The goal of the Customer Voting Portal is to balance new product development in line with customer requests while contributing to the long-term product roadmap. Each module has its own voting portal, directly accessible from the Admin pages in Pulse, and enhancement requests are transparent meaning it allows you to see the suggestions from other Pulse customers. If there is an enhancement you believe would be beneficial to other customers – speak with your network! We encourage you to use the portal as a platform to help communicate your needs as a user group. This will ensure Pulse delivers strategic and customer driven enhancements along with features to help align strategies, people, and organisational performance.
Contents
New Features and Enhancements
1. HCM eRecruitment
1.1 Linkedin IntegrationPulse has introduced a new integration method to the eRecruitment Module.
To learn more about the LinkedIn integration method please contact Pulse Support via our website or call us on 1300 363 325.
Step 1: Once the integration is enabled, then go to Job Listing > View any open job > Job details. Here users will have the ability to publish the Job ad on LinkedIn along with other publishing options.
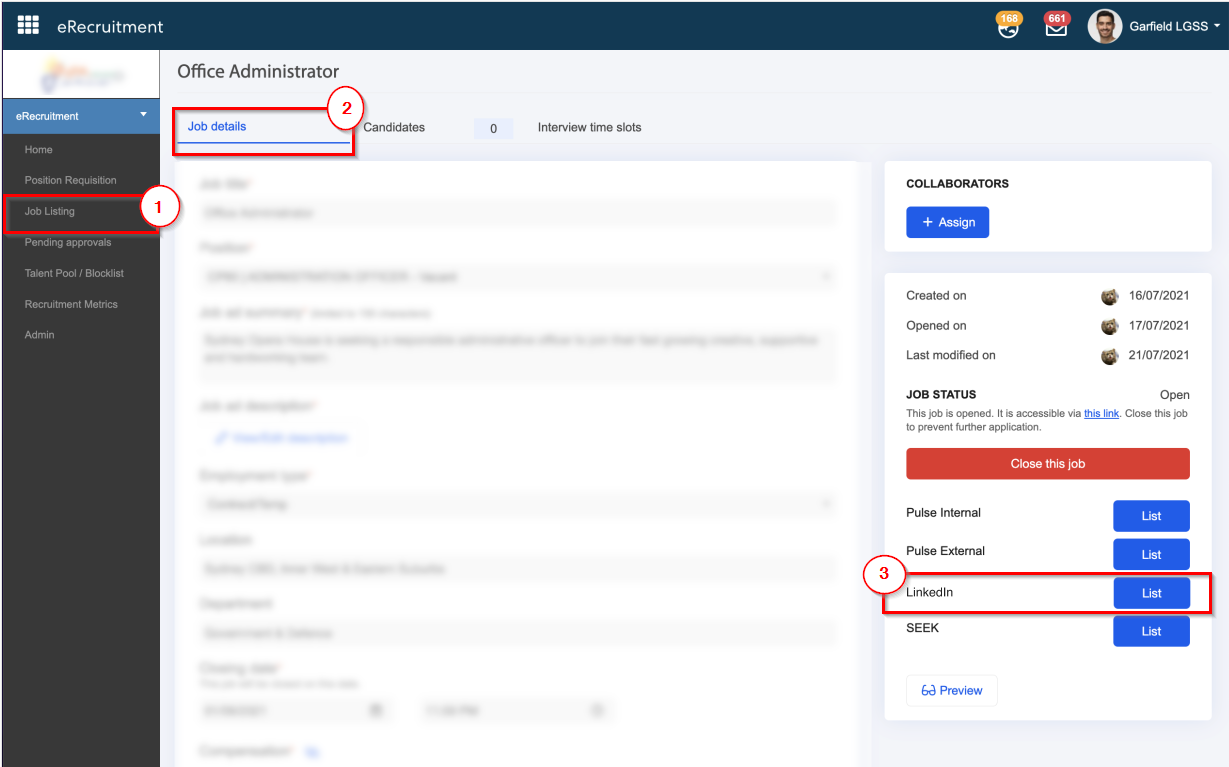
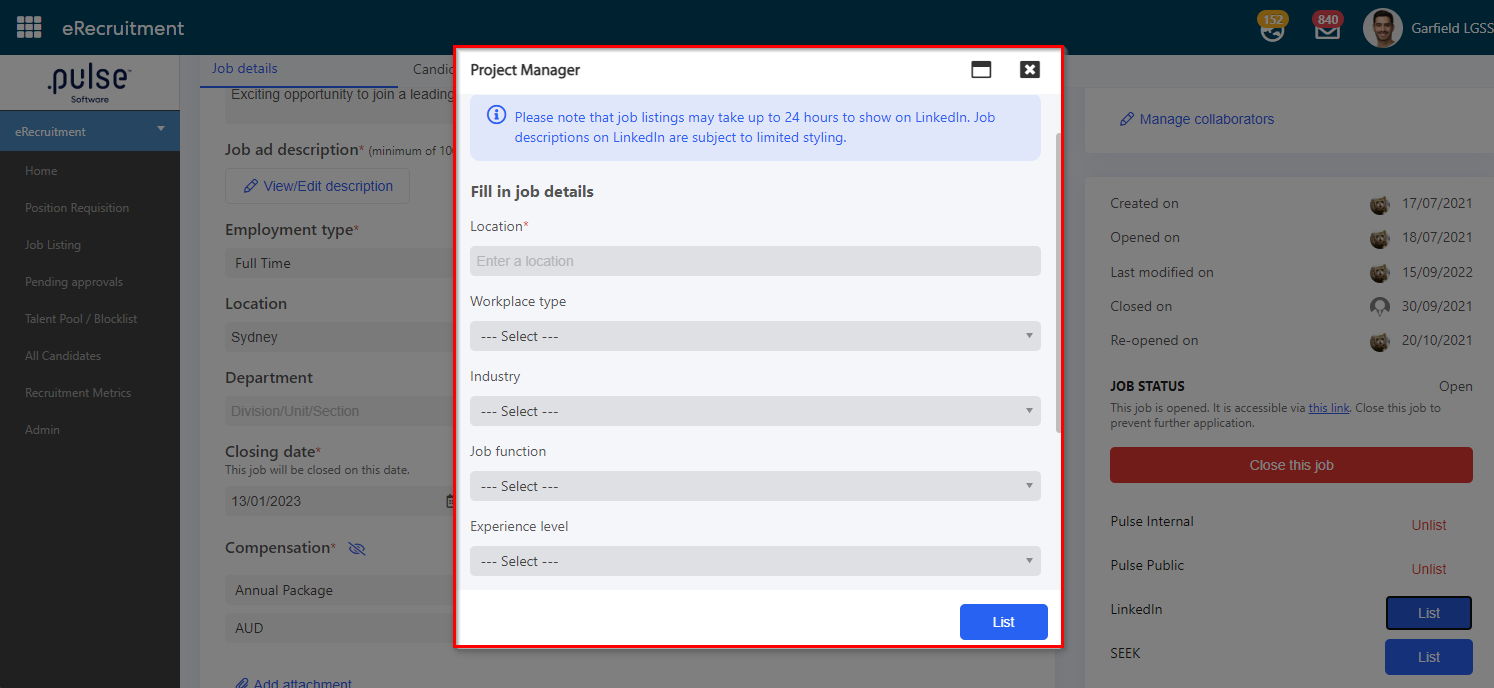
Step 2: Once the user clicks on "List" against the LinkedIn then they will see a pop-up where they will have to fill in the required details before publishing it in LinkedIn.
Step 1: In the eRecruitment Module, go to the Candidate Talent pool. Alternatively, go to the Job Listing > candidate section > View candidate > select Position & Skill.

Step 2: Admins can refine their search for candidates based on "Positions" or "Skills". Admins will now have the ability to either add multiple skills under one position or add multiple skills without selecting any position.
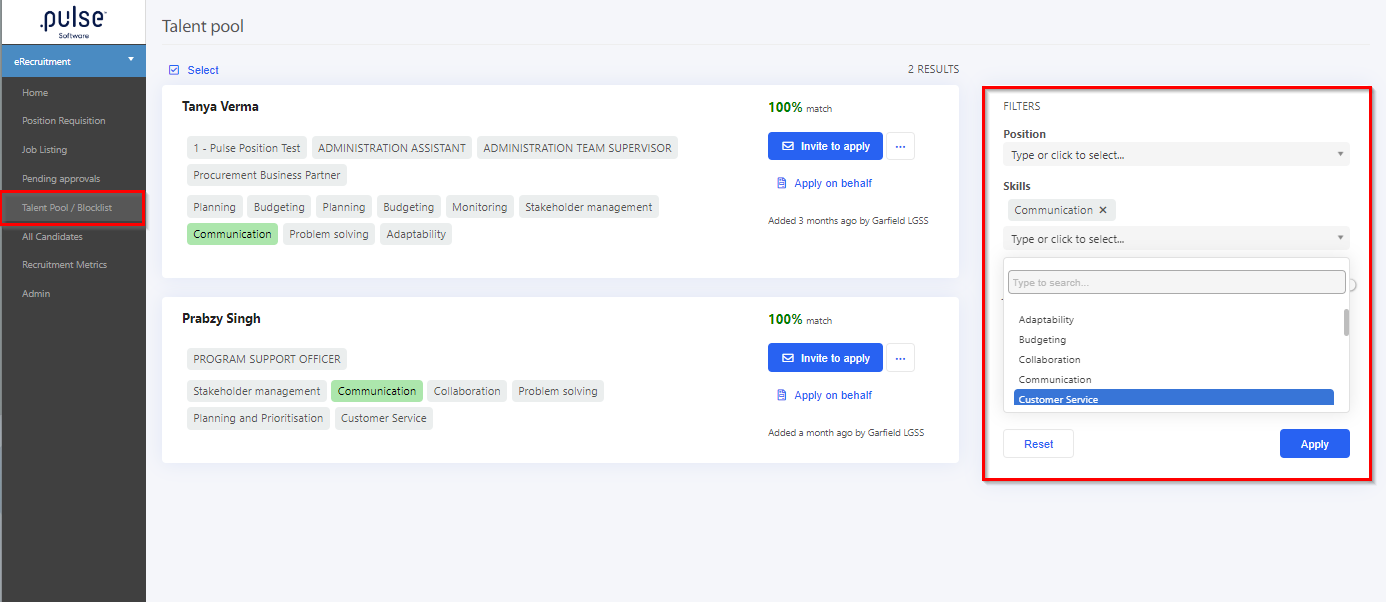
Step 3: After the position or the skills are selected, click on Apply to view the successful candidates.
1.3 Manually add a candidate to a jobThis feature will allow the hiring managers to manually add a candidate for a job listed.
Follow the steps below to view this feature:
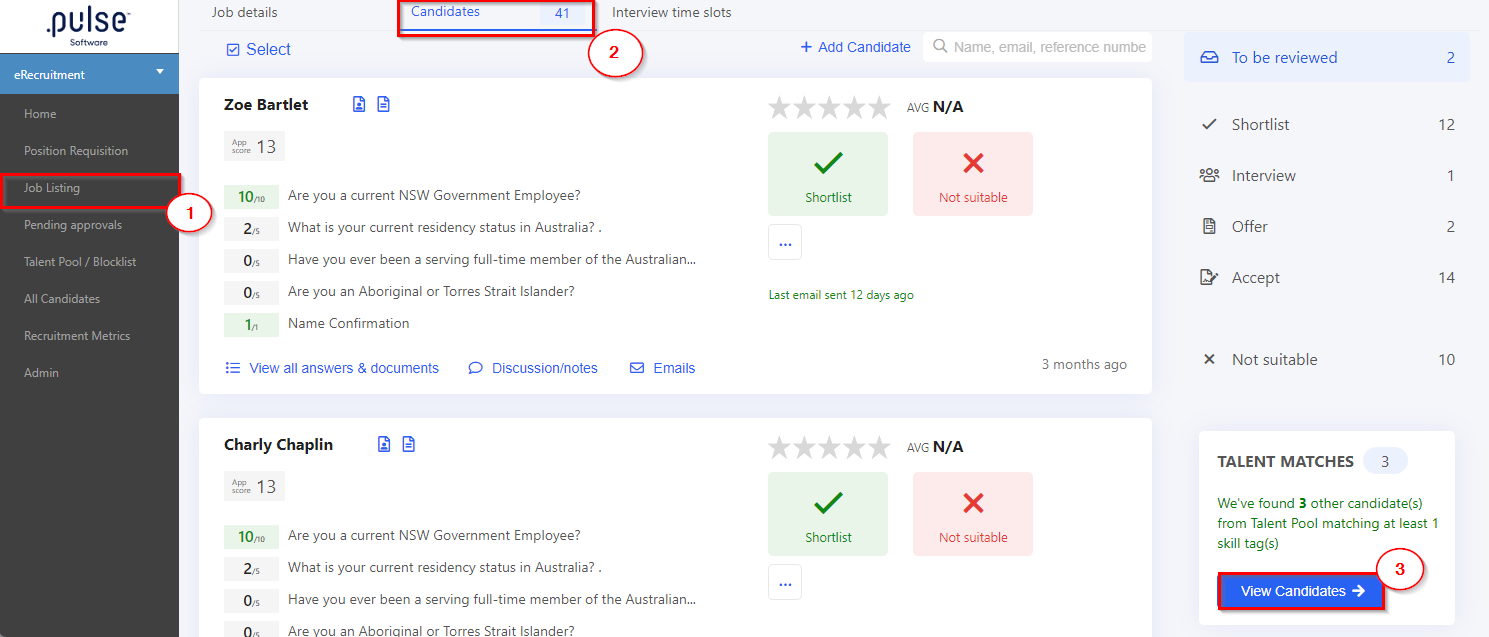
Step 1: In the eRecruitment module, a new "+ Add Candidate" button has been added to the "Candidates" tab on all job listings (Job Listing > View) allowing Hiring Managers and Admins to manually add candidates to a job. This is to support submitting and tracking applicants who may have applied with a physical resume or through some other method, allowing Hiring Managers to evaluate them along with all of the other candidates who have applied through the various online job boards"
Step 2: Once the required details are filled, the hiring managers will see two check boxes to trigger notification.
a) Notify candidate of submission
b) Notify Admins or Collaborators of candidate submission
Step 3: Once all the information has been filled, the hiring managers will have two options to either "Save & close" or ""Submit & Add another".
Save & close button will save the details of the candidate and close the pop-up, whereas, Submit & add another button will save the details of the candidate and a new candidate can be added using the same pop-up.
1.4 Manually apply for a job on behalf of a candidateThis new feature allows admins to manually apply for a job on behalf of a candidate.
To enable this feature please contact Pulse Support via our website or call us on 1300 363 325.
Step 1: In the eRecuitment Module, a new "Apply on behalf" button has been added against every candidate in the talent pool (Job Listing > Open job > Candidate section > click on "View Candidate" button). This button will help the Hiring managers or the admins to manually apply for a job on behalf of a candidate.
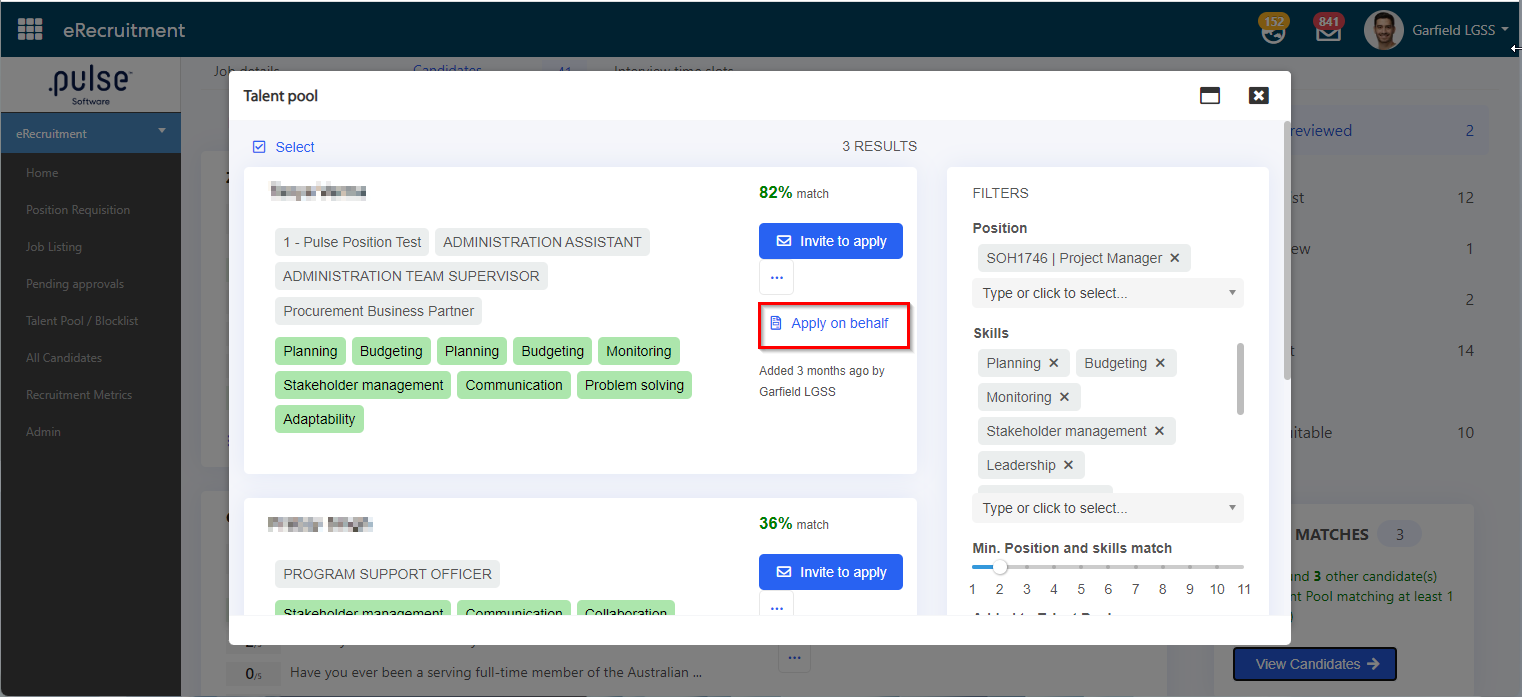
Step 2: When the admins will click on "Apply on Behalf" button, a pop-up will appear where a list of OPEN JOBS will appear.
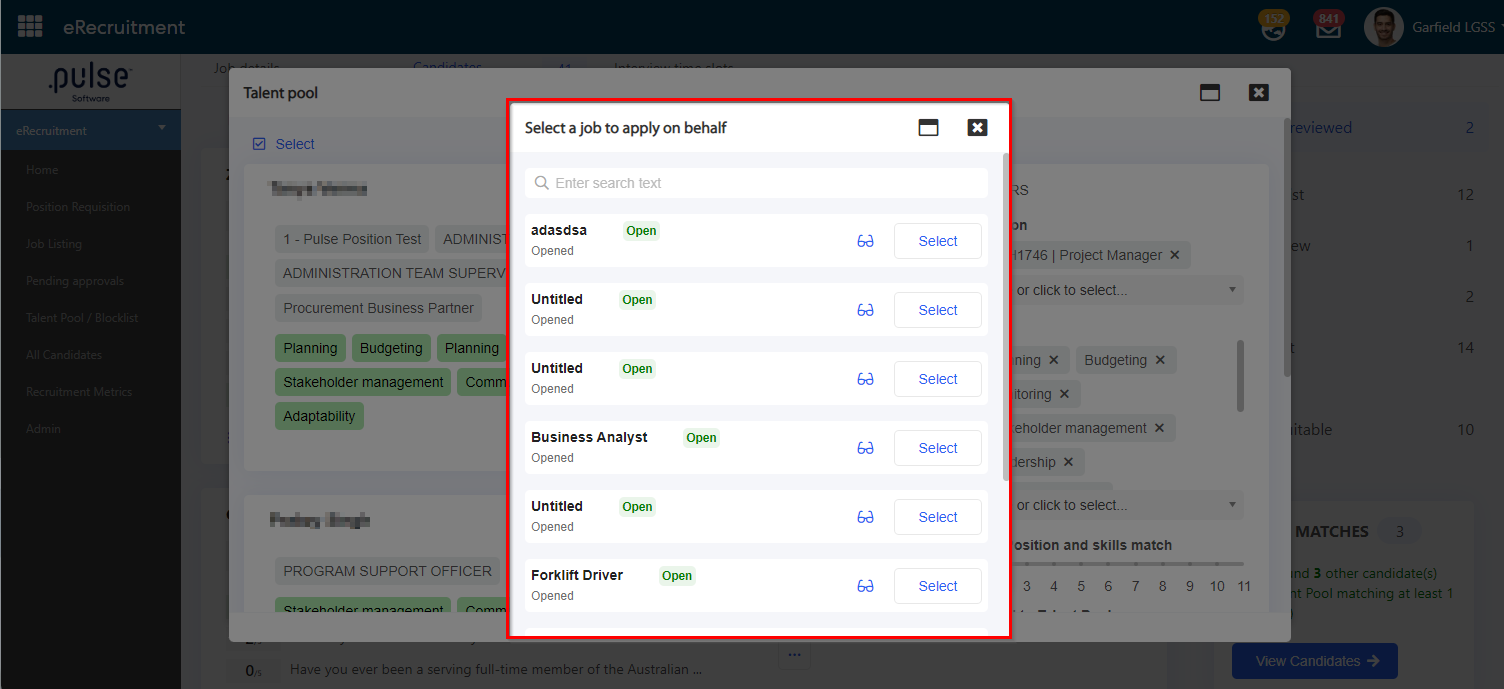
Once the admin selects a job to apply on behalf of the candidate, a new pop-up will generate wherein the admins will have the ability to view the job details as well as they will have to fill in all the required details of the candidate.
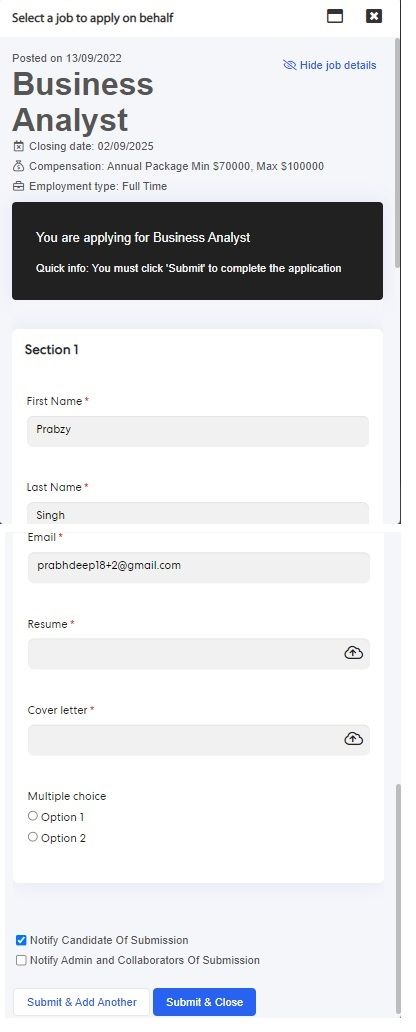
Step 3: Once the required details are filled, the hiring managers will see two check boxes to trigger notification.
a) Notify candidate of submission
b) Notify Admins or Collaborators of Submission
Once all the information has been filled, the hiring managers/admins will have two options to either "Save & close" or "Submit & Add another".
Save & close button will save the details of the candidate and close the pop-up, whereas, Submit & add another button will save the details of the candidate and a new candidate can be added using the same pop-up.
2. Corporate Planning & Reporting
2.1 Ability to link to existing Risks in the systemPulse is introducing a new feature in the CPR module which will allow the admins to link the existing risks in the system with an action.
To view this feature, please follow the steps below:
Step 1: Go to "My Actions" page and search for "Risks" tile. Pulse has renamed the "Add a Risk" button to "Add/Link a Risk".
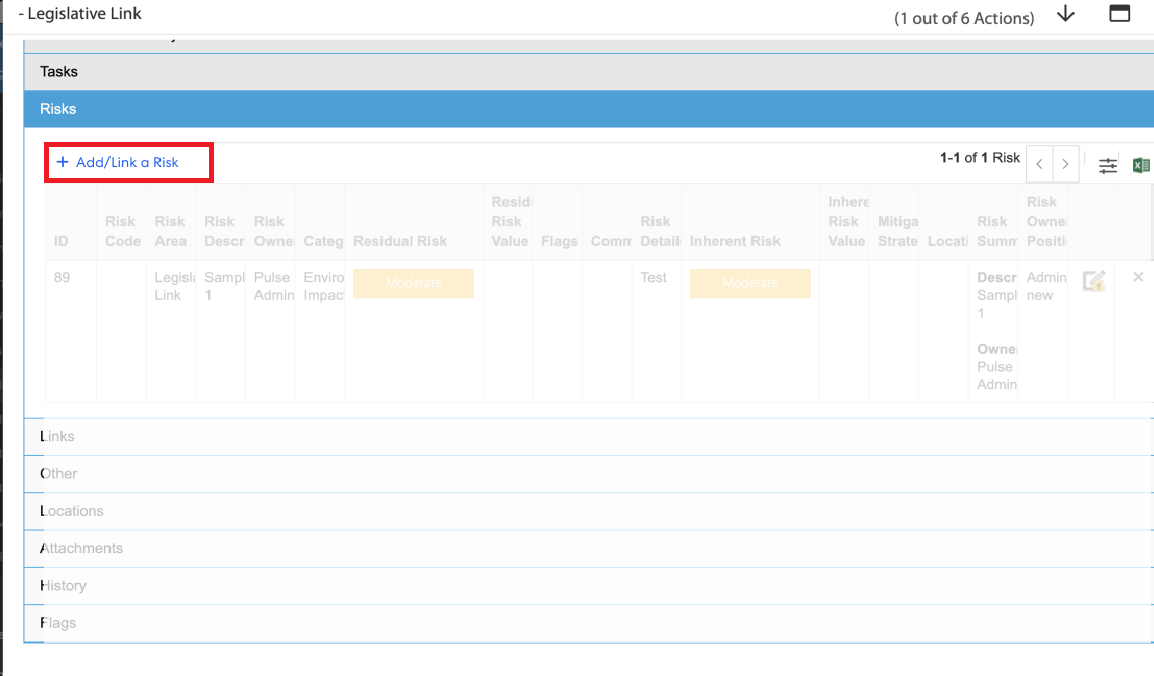
Step 2: Click on "Add/Link a Risk", a pop-up window with a search bar will appear as "Search for an existing Risk", which will allow admins to look up and choose the appropriate risk to be with the action. Moreover, admins also have the ability to add a new risk, simply by clicking "Create a new Risk" just under the search bar.
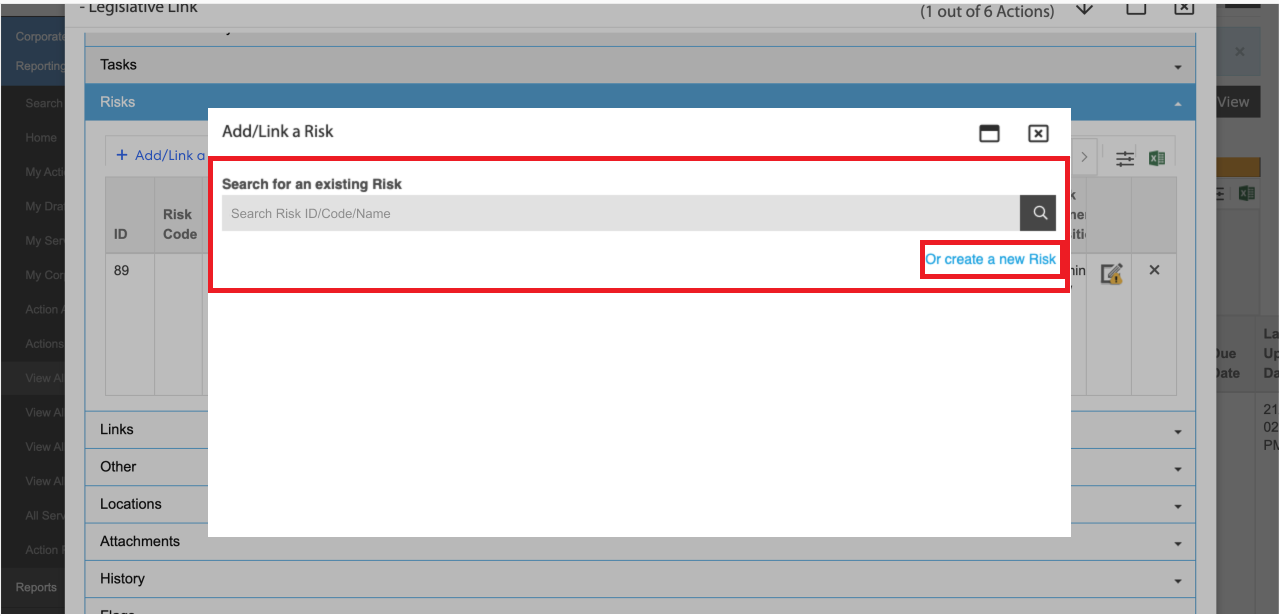
Step 3: "Search for an existing Risk" search function will search for risks that are created from any module
Step 4: Once the risk is selected to be linked, a link icon against each linked risk will be added, this will help the admins or the risk owner to distinguish between the linked risk and the non-linked risks.
The "risk owners" will have the ability to update, edit or delete a risk from the Risk tile.
2.2 Additional filtering options to the "Latest Action Progress" in the Document GeneratorPulse is introducing a new filter in the document generator of the Corporate Planning & Reporting Module. This will allow users to filter by hierarchy, add more options to format the Actions table, and show Tasks for actions in the same document
To view this feature, follow the following steps;
Step 1: Login to Pulse > click on "Corporate Planning & Reporting" module.
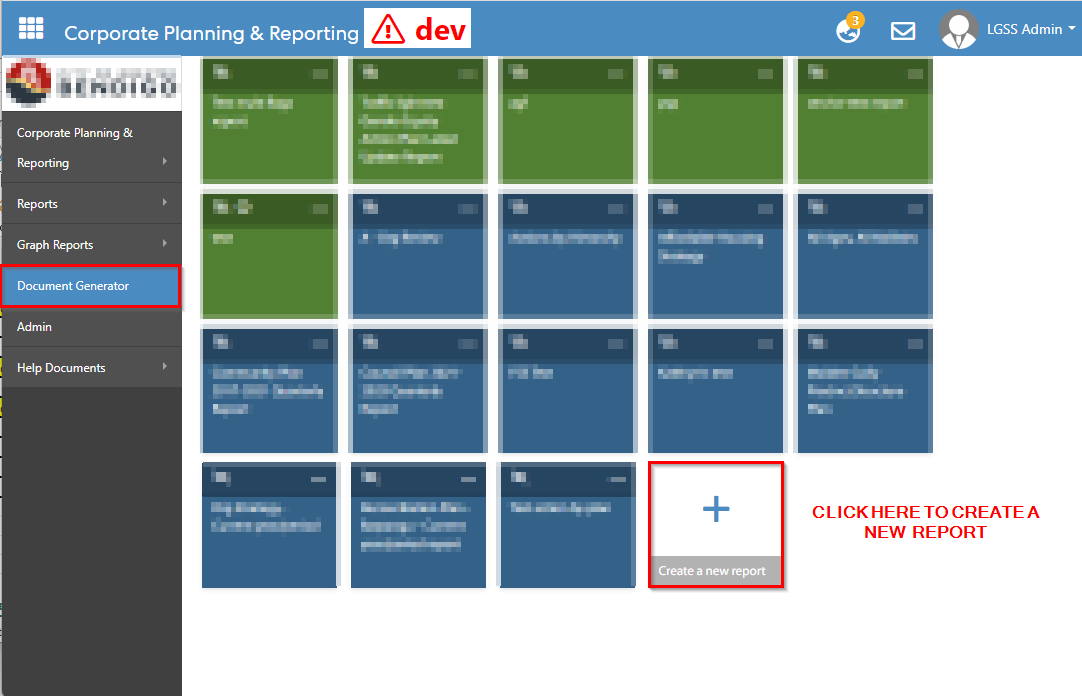
Once logged in, click on the "Document generator" tab to generate a new document.
Step 2: Click on "+ Create a new report" in the document generator page.
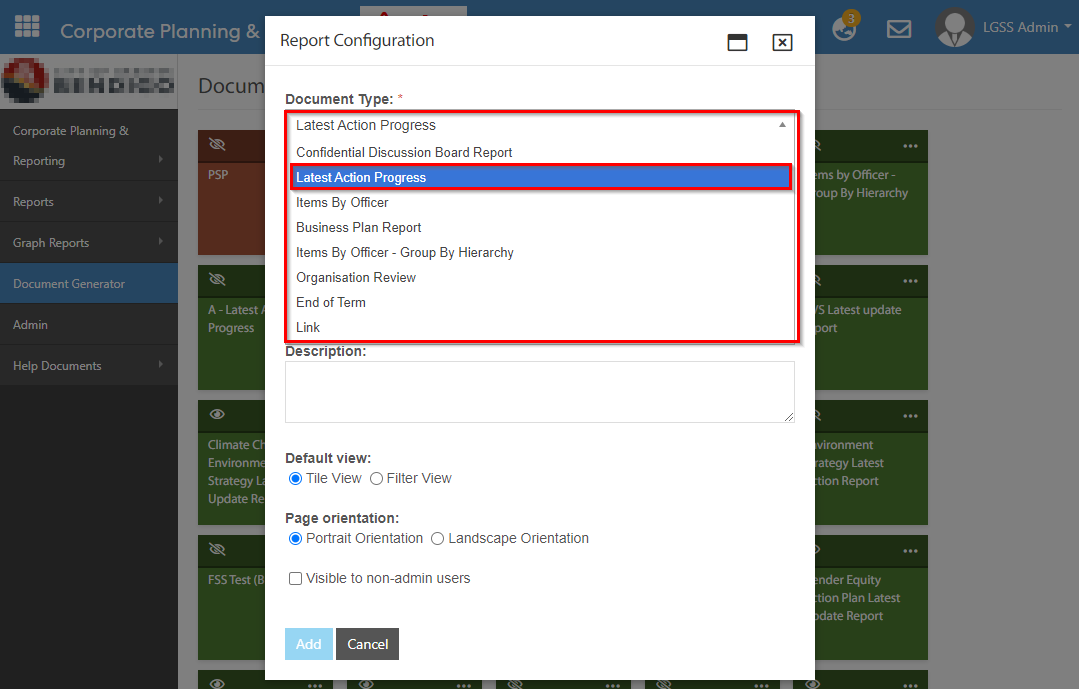
In the "Document Type" field, select "Latest Action Progress" from the dropdown menu. Fill all the required information and click "add".
STEP 3: Expand "Filters" and click on filters dropdown to see new filters such as "Hierarchy" and "Due date exceeded". Users will now have the ability to filter their searches on the basis of these new filters.
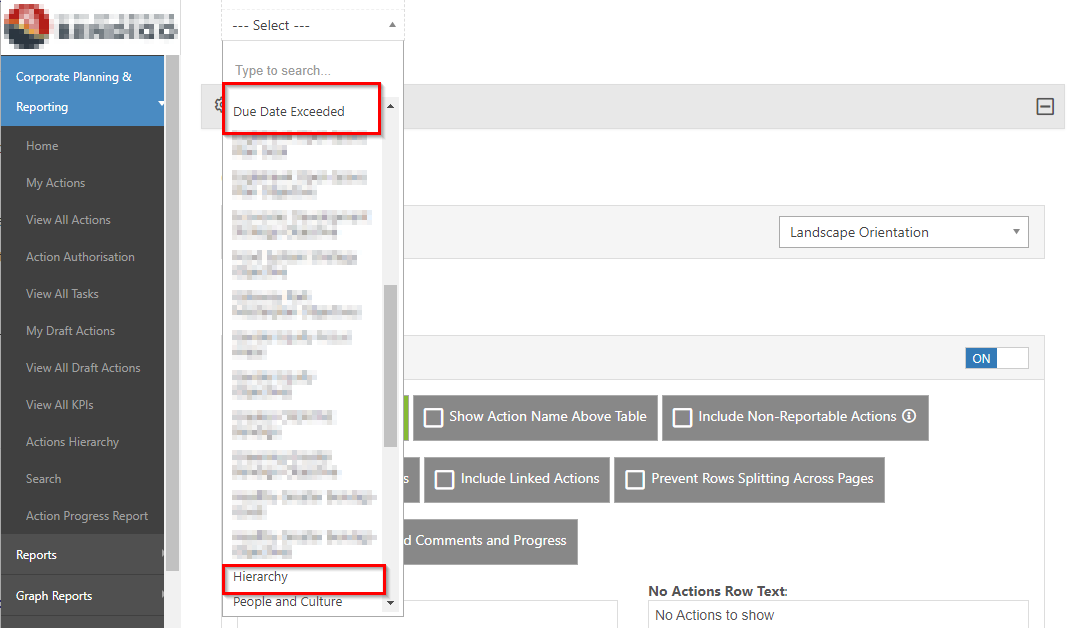
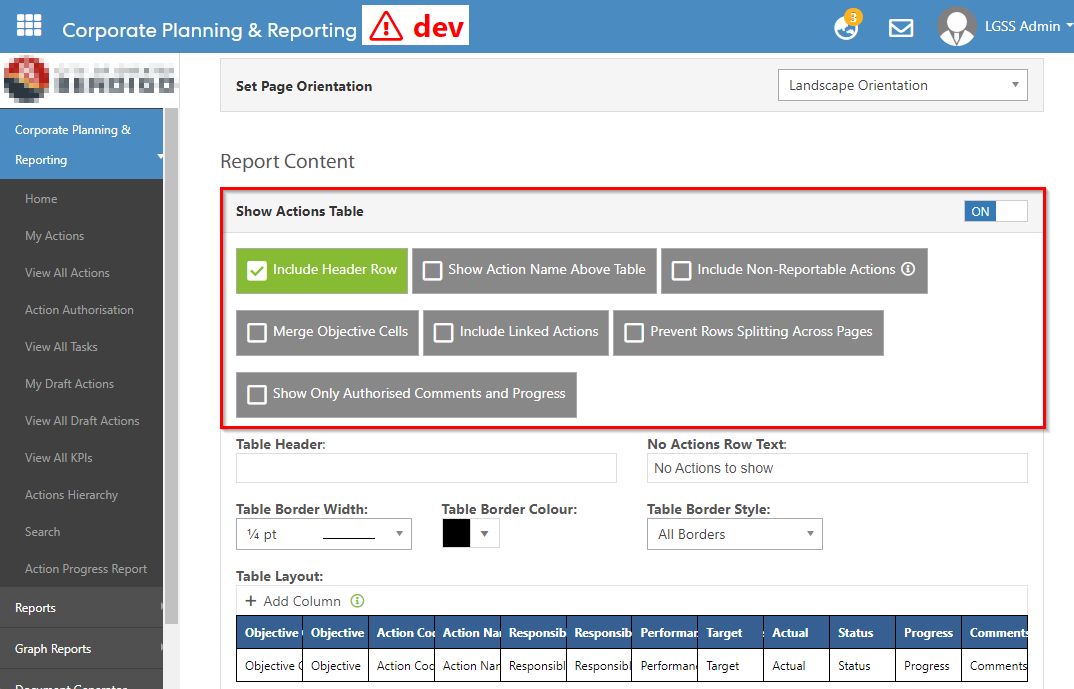
Step 4: Expand the "Configuration" column to view the new formatting options under "Report Content". A list of options are added that will allow users to show Action Task table in the same report. The list includes:
- Include Header Row
- Show Action Name above Table
- Include Non-Reportable Actions Merge DP Action Cells (Merge Objective Cells)
- Include Linked Actions
- Prevent Rows Splitting Across Pages
- Show only Authorised Comments and Progress
Pulse Software has introduced a new "Auto-populate completion date" feature in the CPR module. The system will automatically set the Completed Date against the Action, Task, and Nodes once either the progress is set to 100% or the status is set to completed.
To enable this feature, follow the steps below:
Step 1: Login to Pulse > click on Corporate planning & Reporting module.
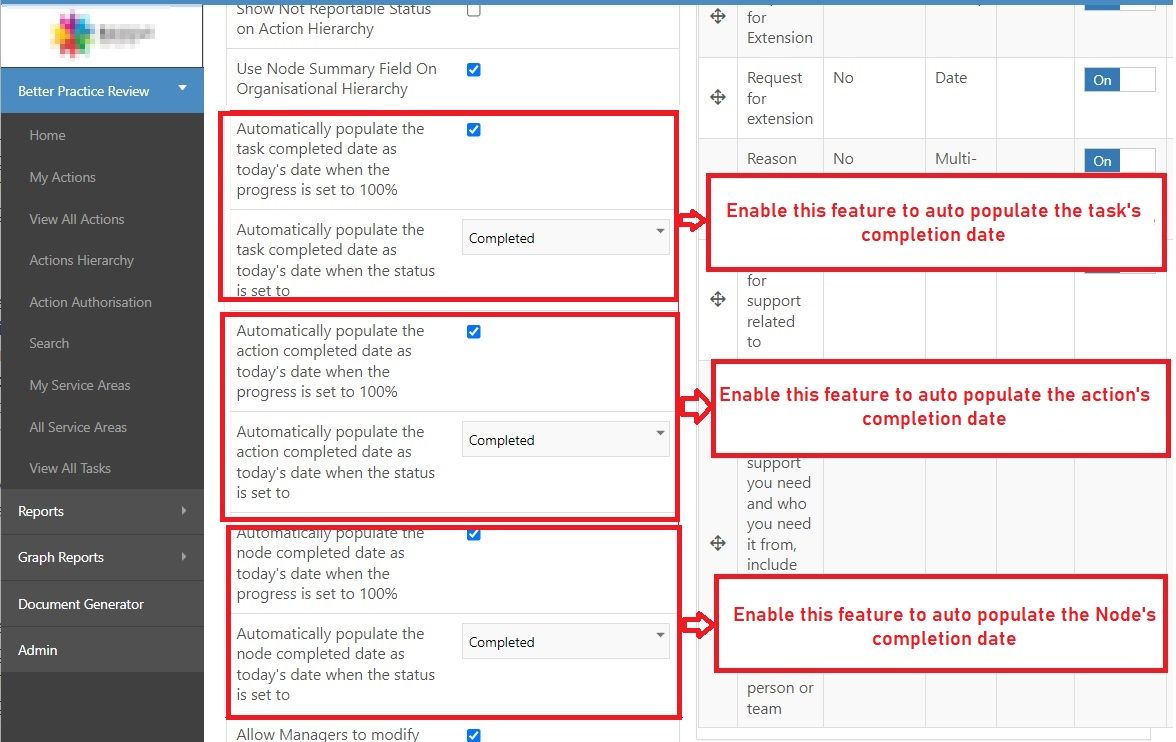
In the CPR module, go to Admin Page > General settings > Hierarchy Specific Settings > enable the following settings and set the status to "Completed"
a) Automatically populate the task completed date as today's date when the progress is set to 100%
b) Automatically populate the action completed date as today's date when the progress is set to 100%
c) Automatically populate the node completed date as today's date when the progress is set to 100%.
STEP 2: Click on "Save configuration".
STEP 3: Once these settings are enabled, go to View all actions > click on the update icon to enter the progress update of an action.
When the action's status is set to completed or when the progress percentage is set to 100%, then the system should automatically populate the completed date.
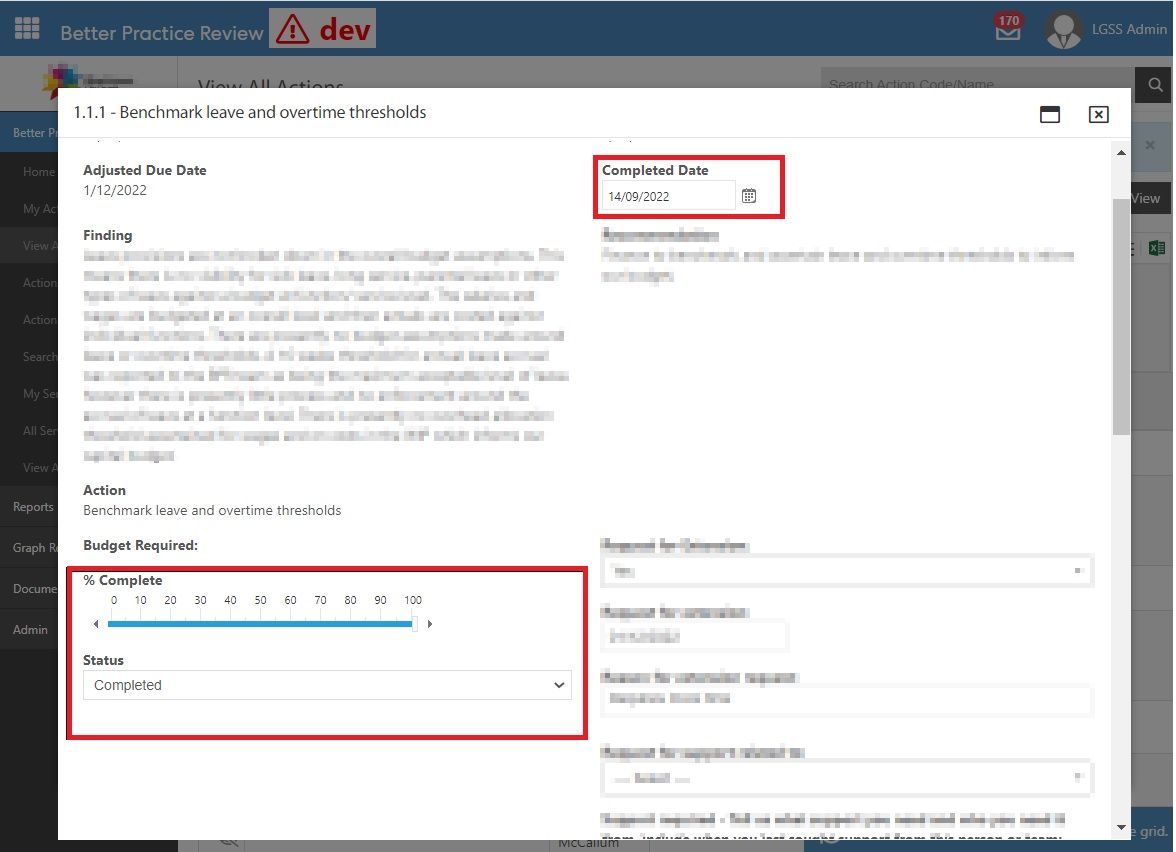
Similar functionality is applied when a task or a node is updated.
3. HCM Performance
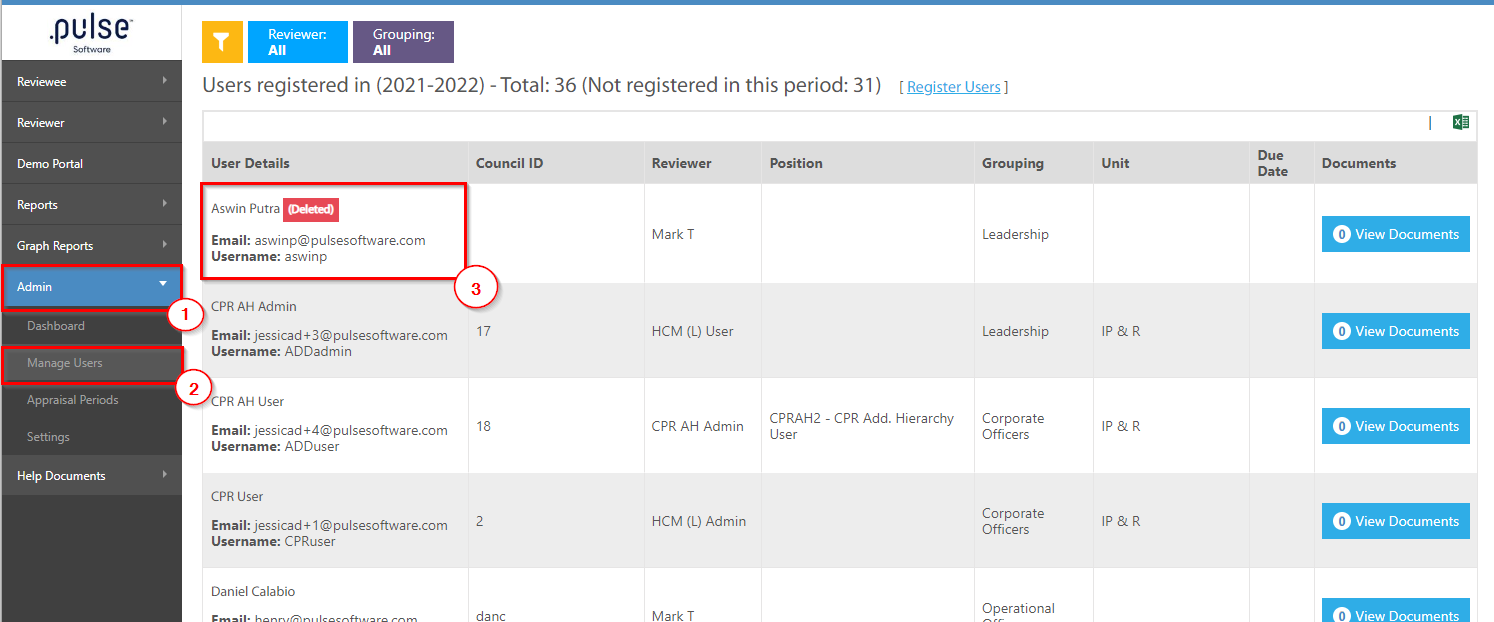
3.1 Sync Users and active status from Pulse Security to PerformancePulse is introducing a new feature in the Performance Module where admins will have the ability to see deleted users or deleted reviewers.
If a user or a reviewer gets deleted from the Pulse security(login to Pulse > Employee Performance Management > Pulse security > Delete a user using the 3 dot icon)
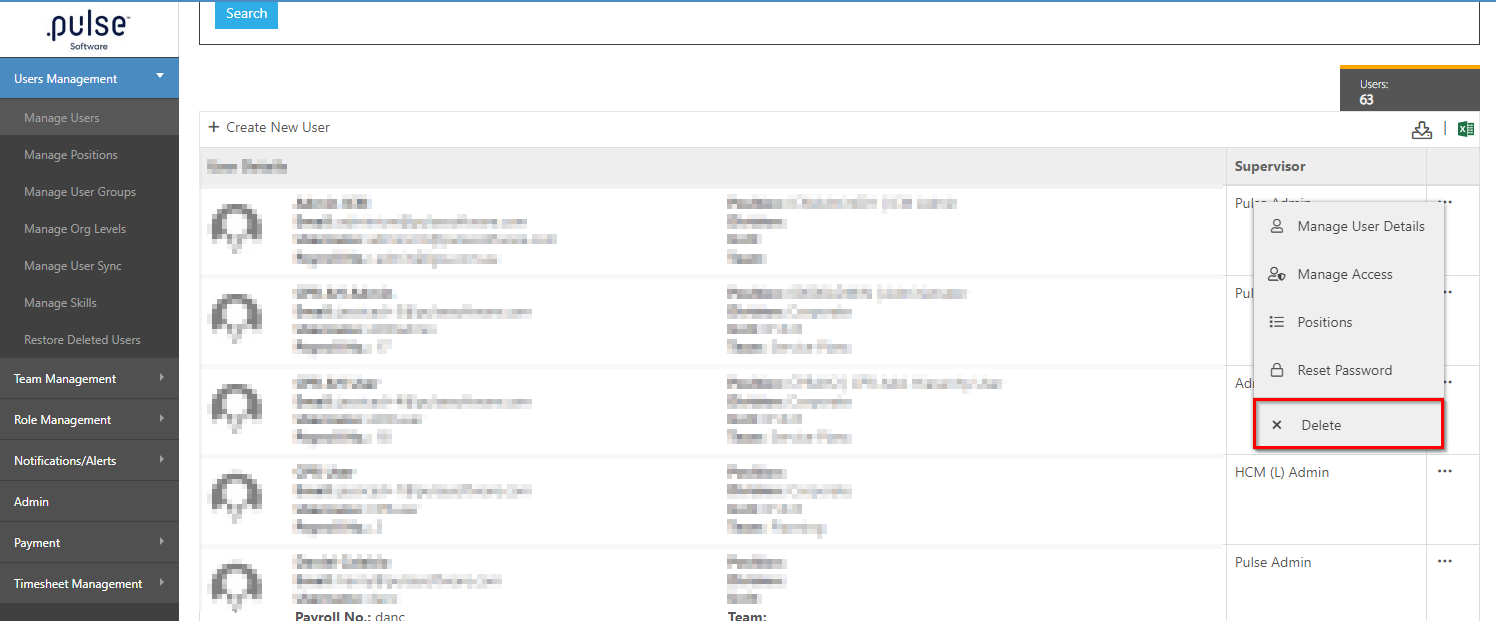
Once a use/reviewer is deleted, the admins are now able to view a tag against their name. To view the "deleted tags" go to Admin > Manager users.
Please note, there are several pages where this feature has been added.
Issues resolved
Exporting a PDF record will now be consistent with the data that exists.
Admins have the ability to assign tags to a session and save it.