Contents
1. HR Core
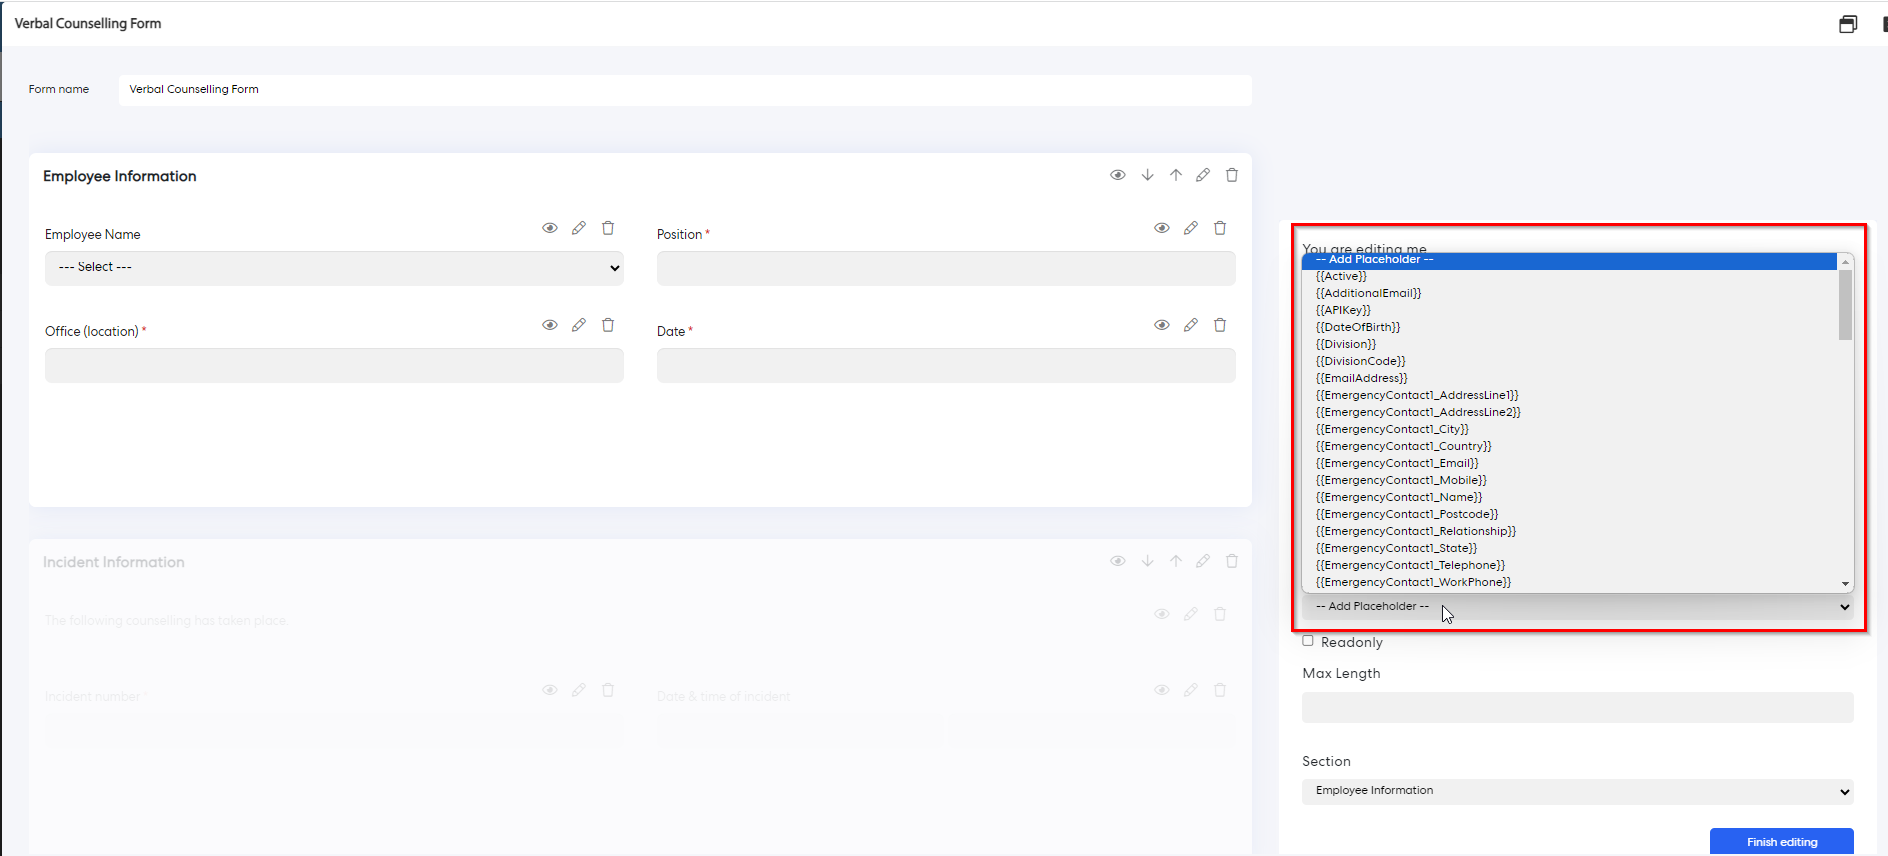
1.1 Added HR Core Field Placeholders to FormsHR core fields are now available as placeholders in Form modules. This can be configured in the "Single line text" response type, as shown below:
2. eLearning Module
New Course Image UploaderThe Cover Photo image uploader has been updated to allow Admins of the Learning Module to more easily resize and position images uploaded for use as Cover Photos. Cover Photos can be added when creating new, or editing existing, course packages.
Step 1: Login to Pulse > eLearning Module
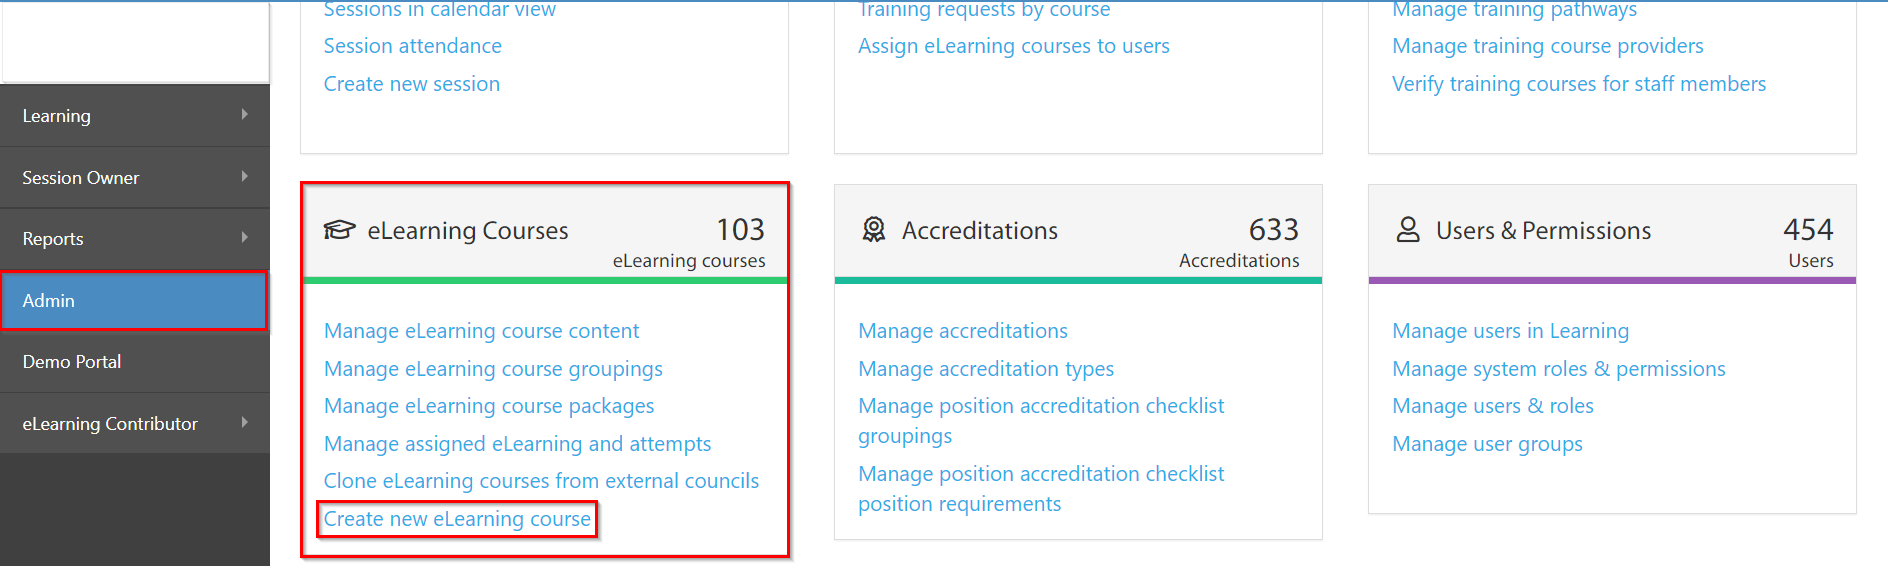
Step 2: Go to Admin page > Create new eLearning course (for creating a new eLearning course)
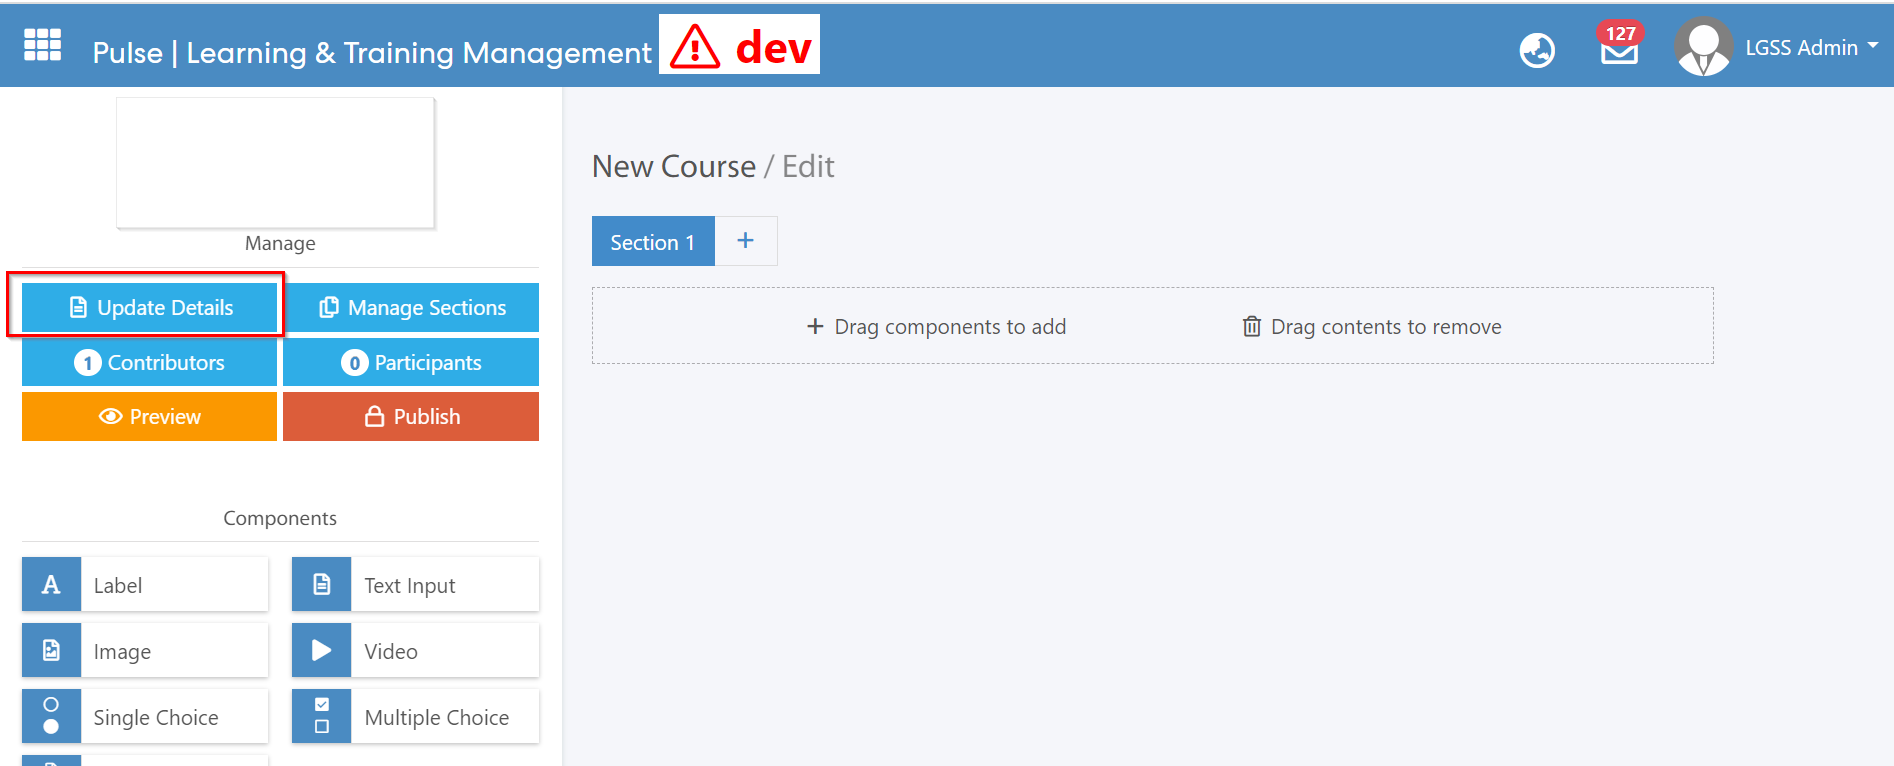
Step 3: Click on Update Details button and wait for the pop-up to open.
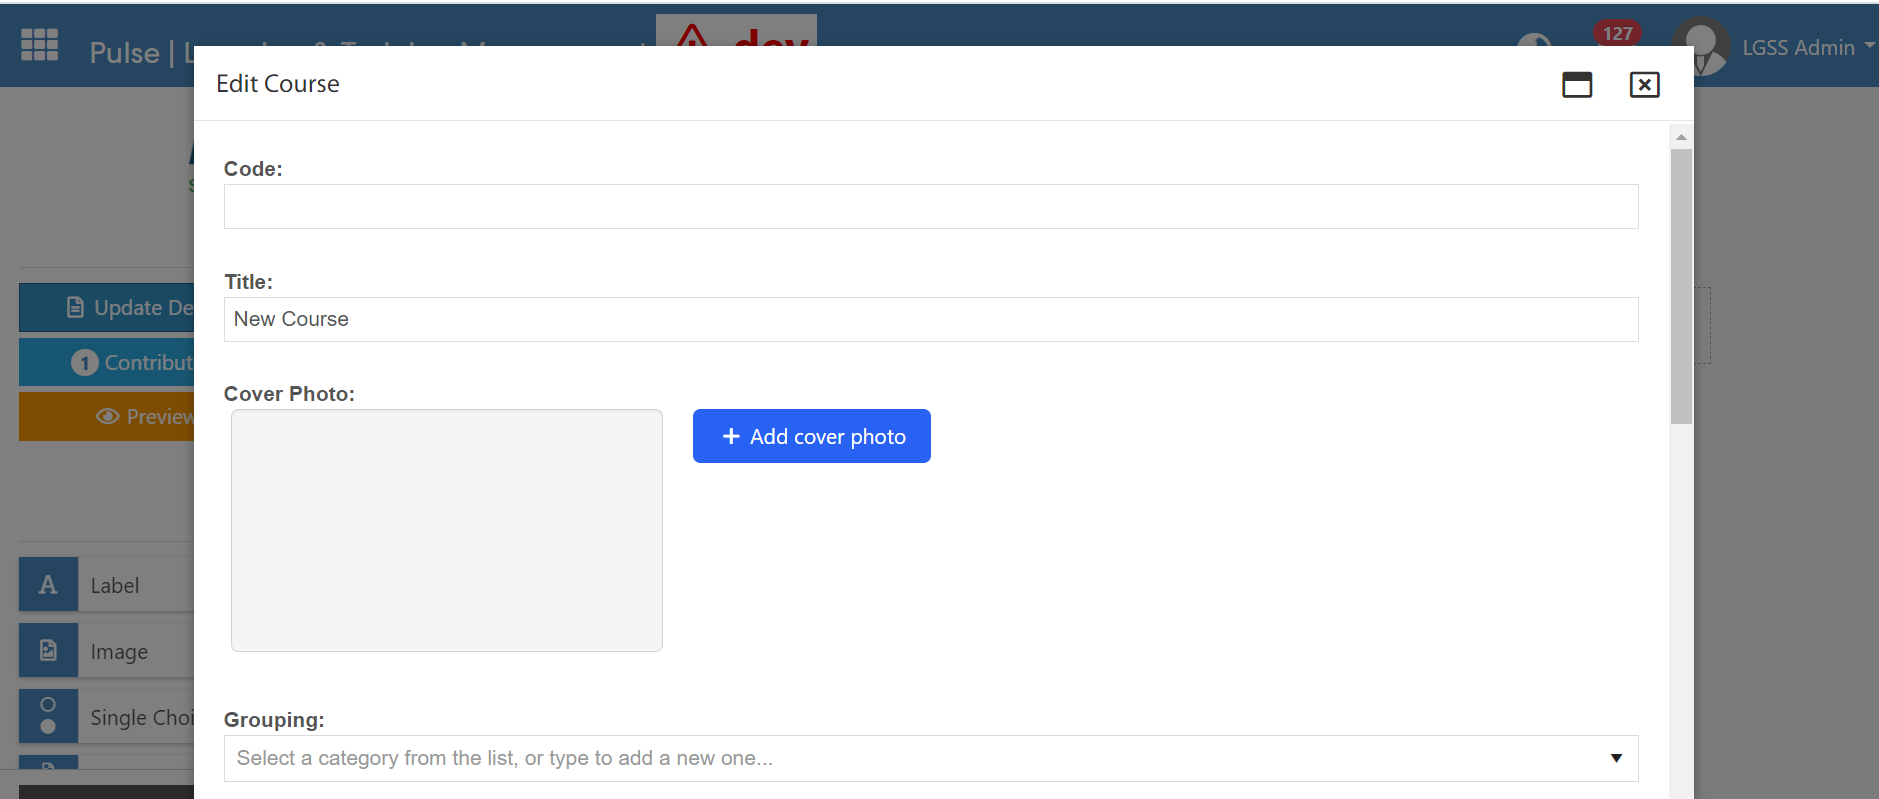
Step 4: Click on the "Add cover photo" button to launch the image uploader
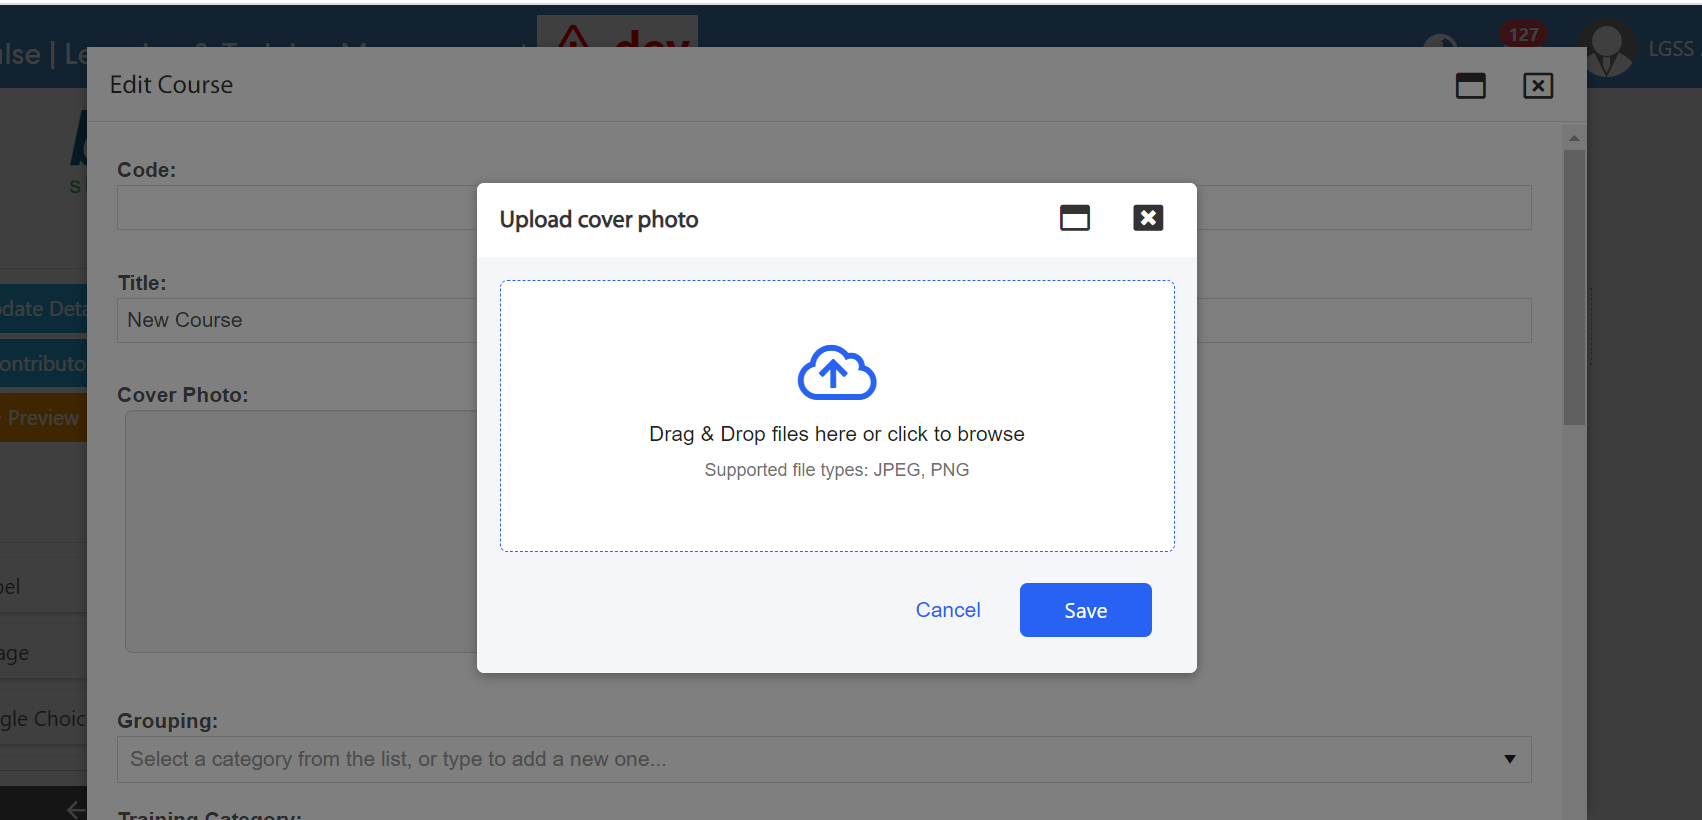
Step 5: Drag and drop an image, or click the file upload area to select an image to upload. Admins will be able to crop or select a portion of the image to use.
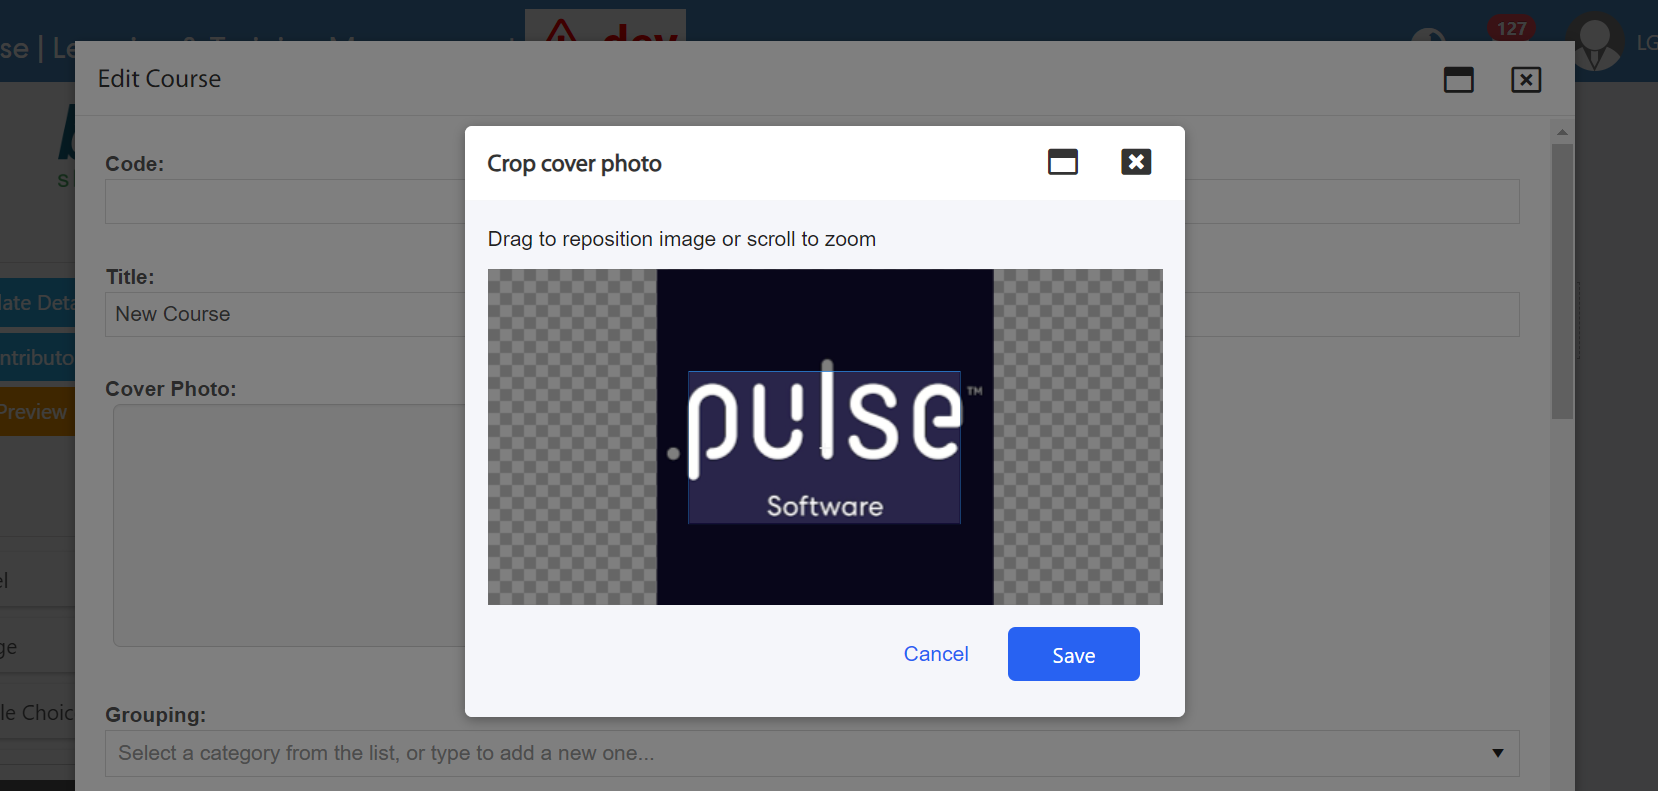
Step 6: After making the desired adjustments, click save to save the changes and view the cropped image in the Cover Photo field.
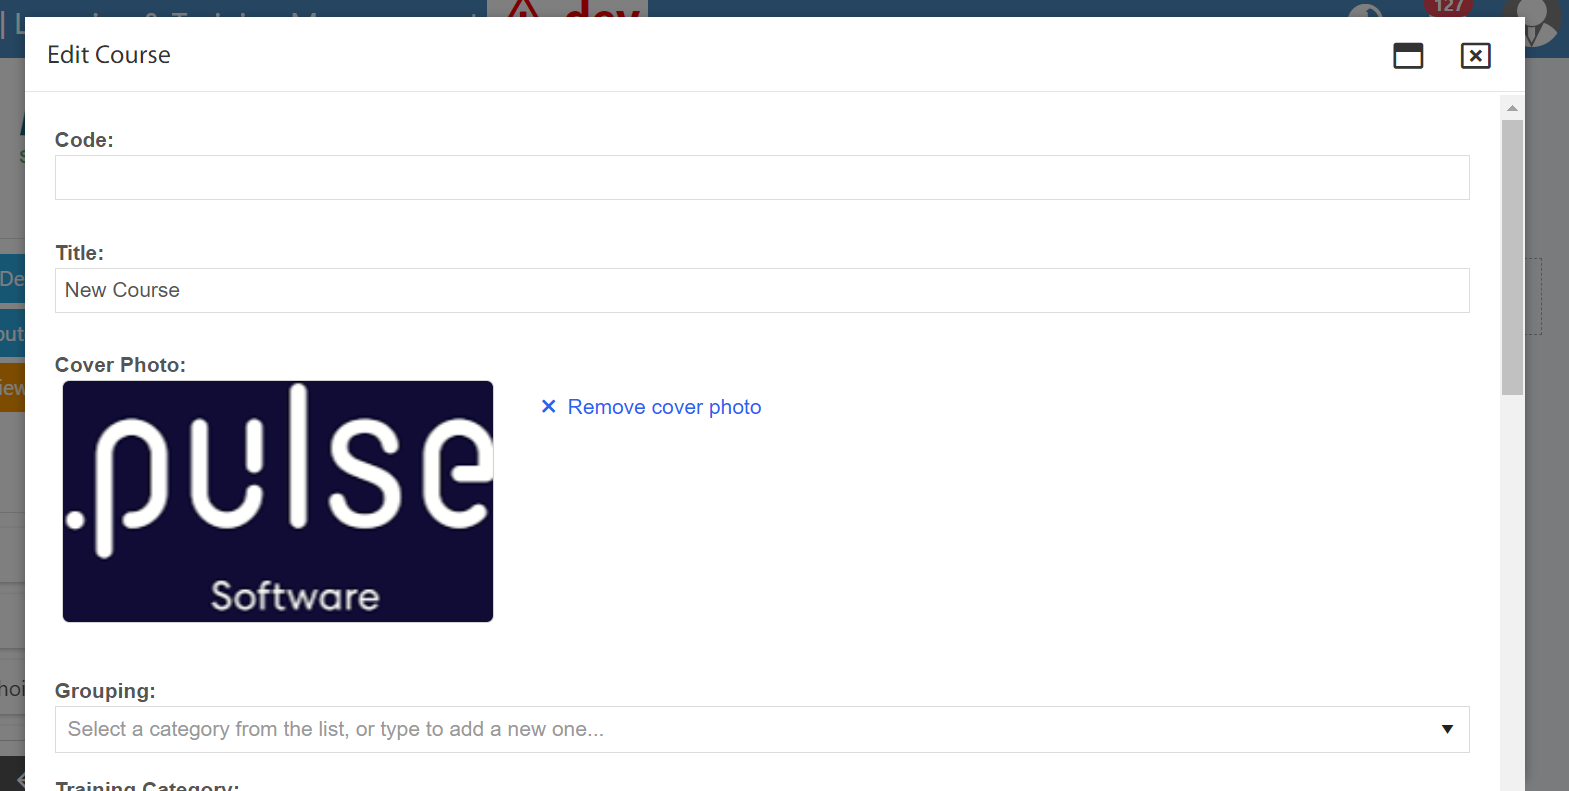
Step 7: To remove the uploaded image, click on the "Remove cover photo" button.
Note: Admins can follow the same steps when they edit a course or a course package.
3. eRecruitment Module
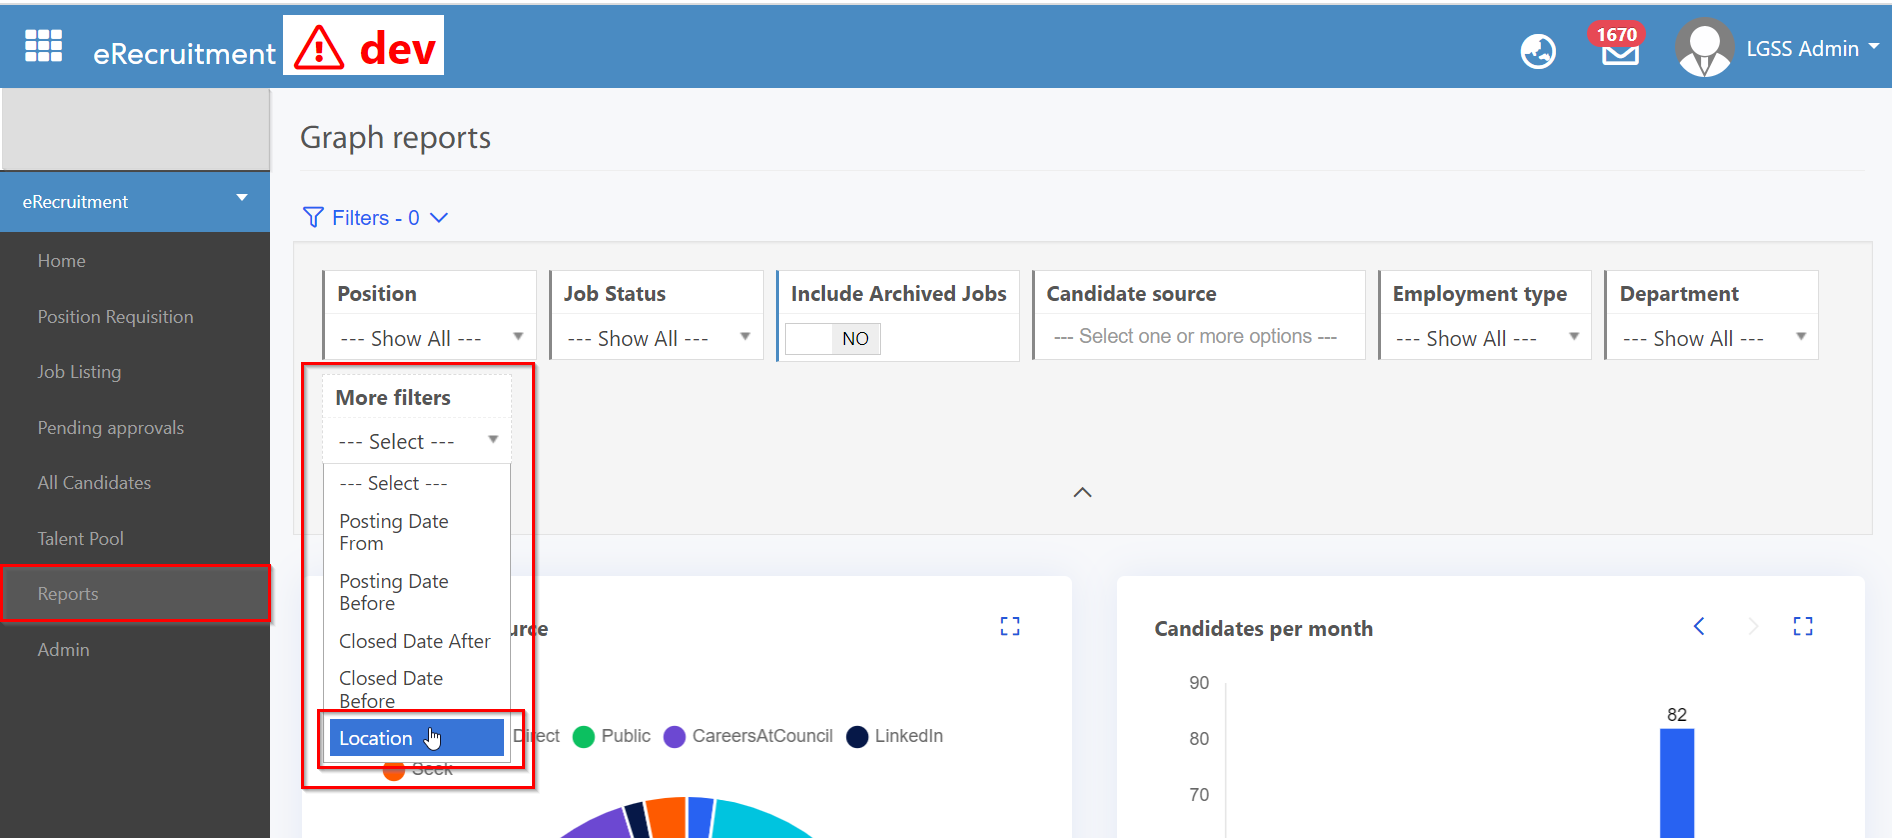
3.1 Added a "Location" filter to the Reports pageAdmins and hiring managers of the eRecruitment module can now filter the charts on the Reports page by location, allowing them to report more granularly.
Step 1: Login to Pulse and go to the eRecruitment Module
Step 2: eRecruitment > Reports > More Filters > Location
Step 3: Click on Apply button to save the Filter.

Step 4: Admins and hiring managers can select one or multiple locations from the dropdown.
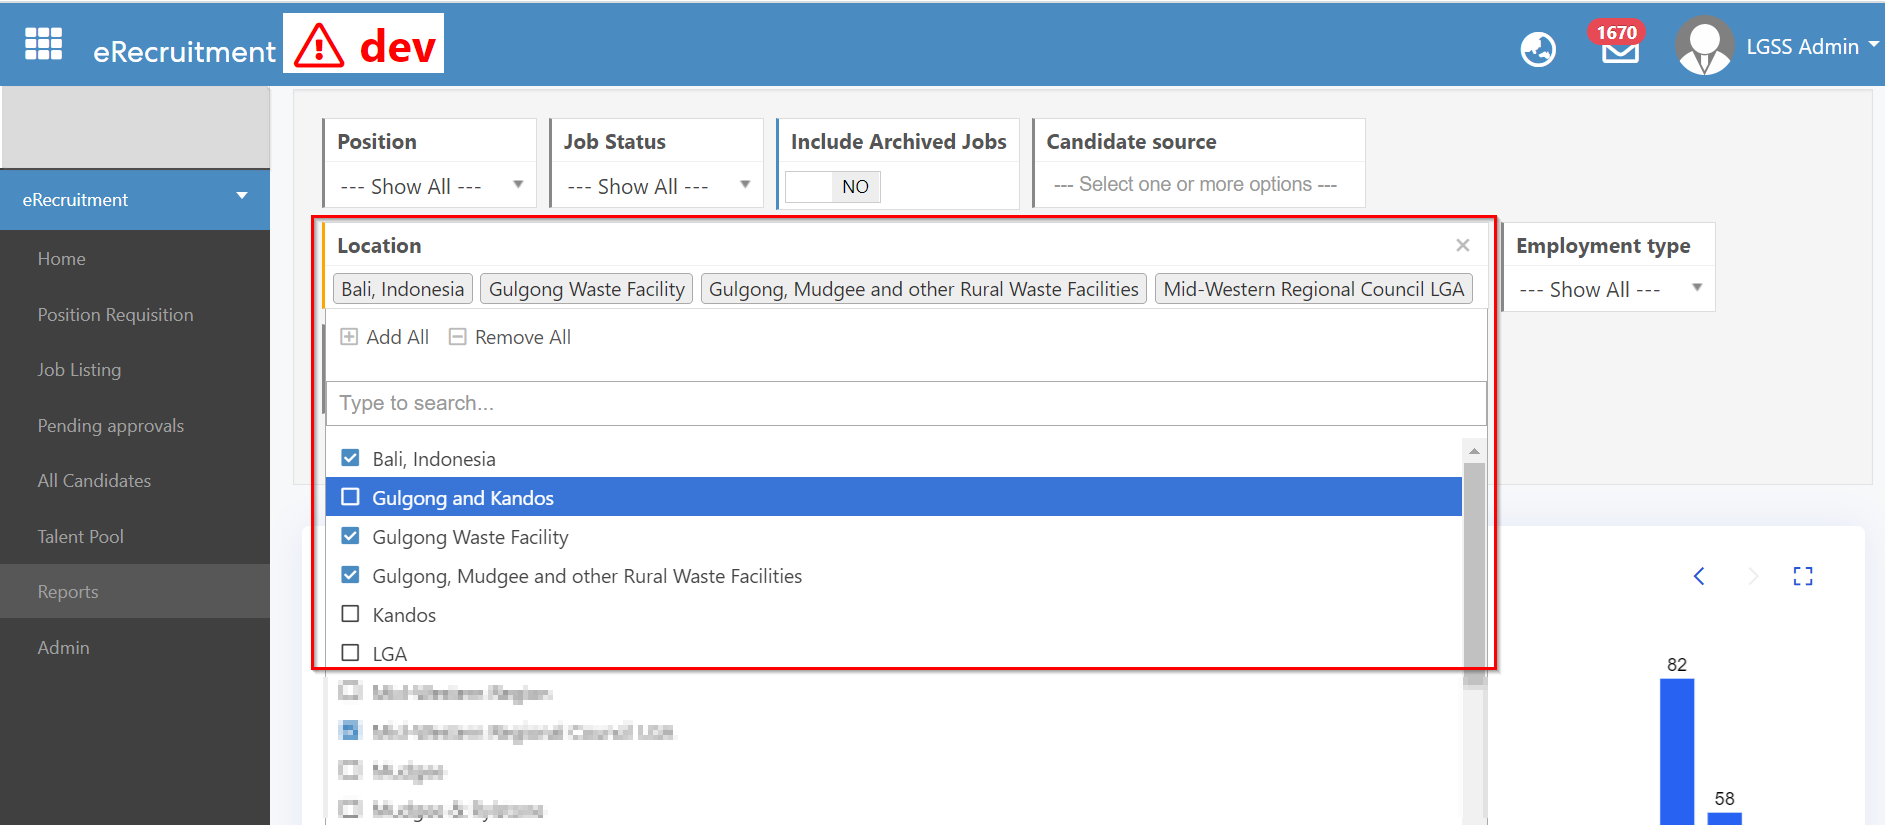
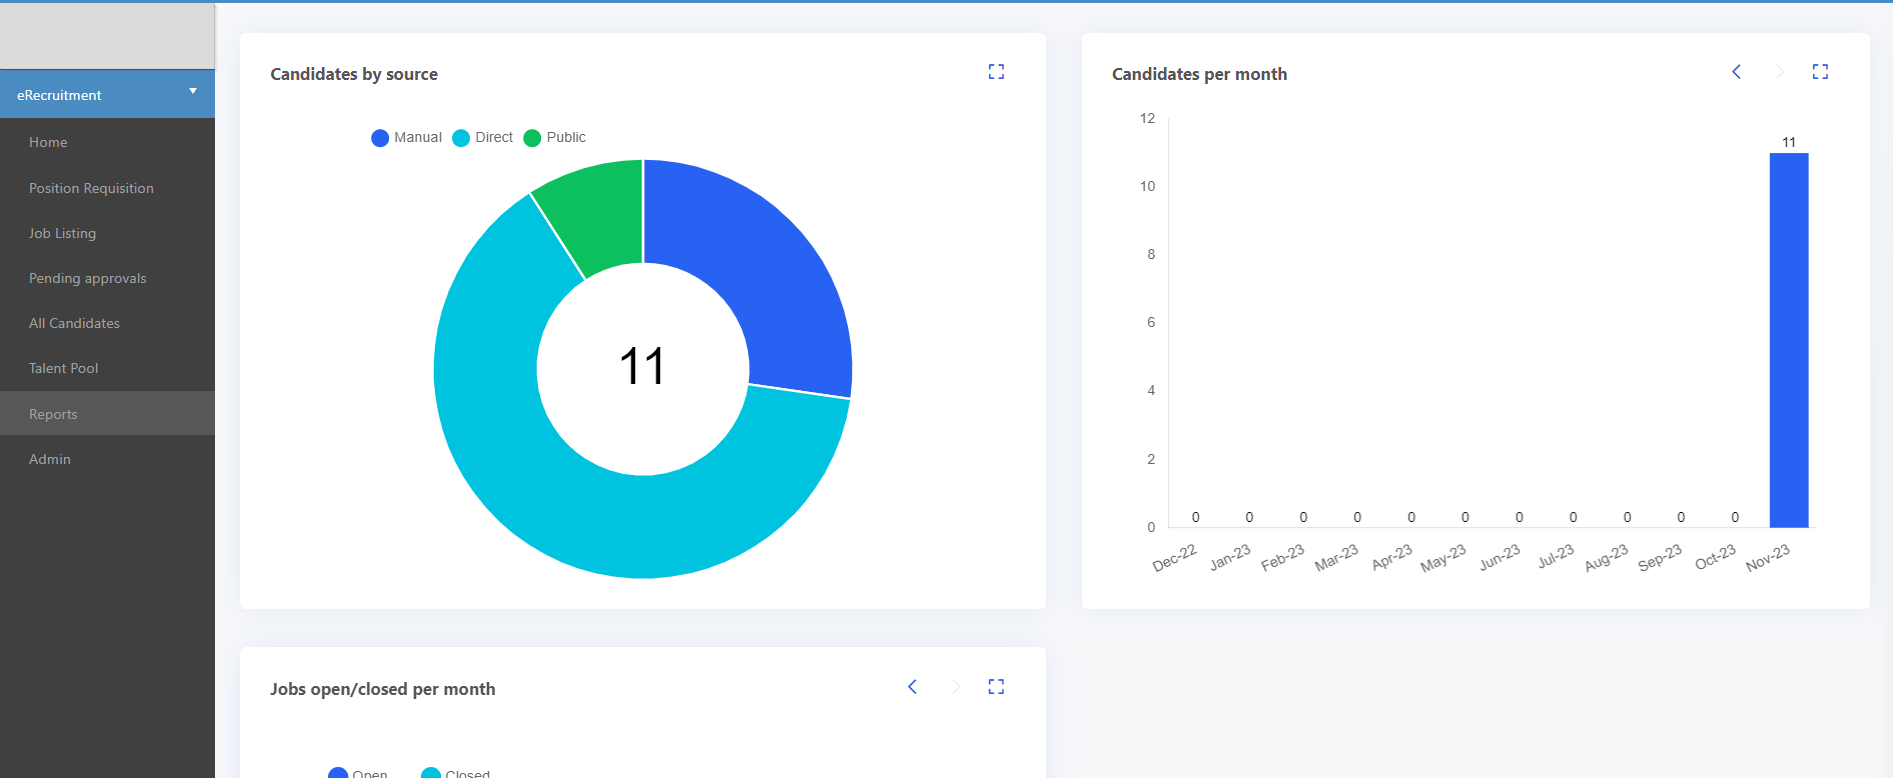
Step 5: Click on the Apply button. The graphs will change based on selection made.
4. Corporate Planning & Reporting Module
4.1 Ability to link projects to TasksAdmins of the Corporate Planning & Reporting Module can now link the Tasks to Projects in the Project Management & Control Module.
This allows admins to push the progress update of the linked tasks to the Corporate Planning & Reporting Module so that the changes are automatically and seamlessly reflected in the CPR tasks page. This process is automated and saves the need for manual updates.
Step 1: Login to Pulse and go to the Corporate Planning & Reporting Module.
Step 2: Go to the Admin Page > General Settings > Turn on the "Allow task progress updates from PMC" Key.
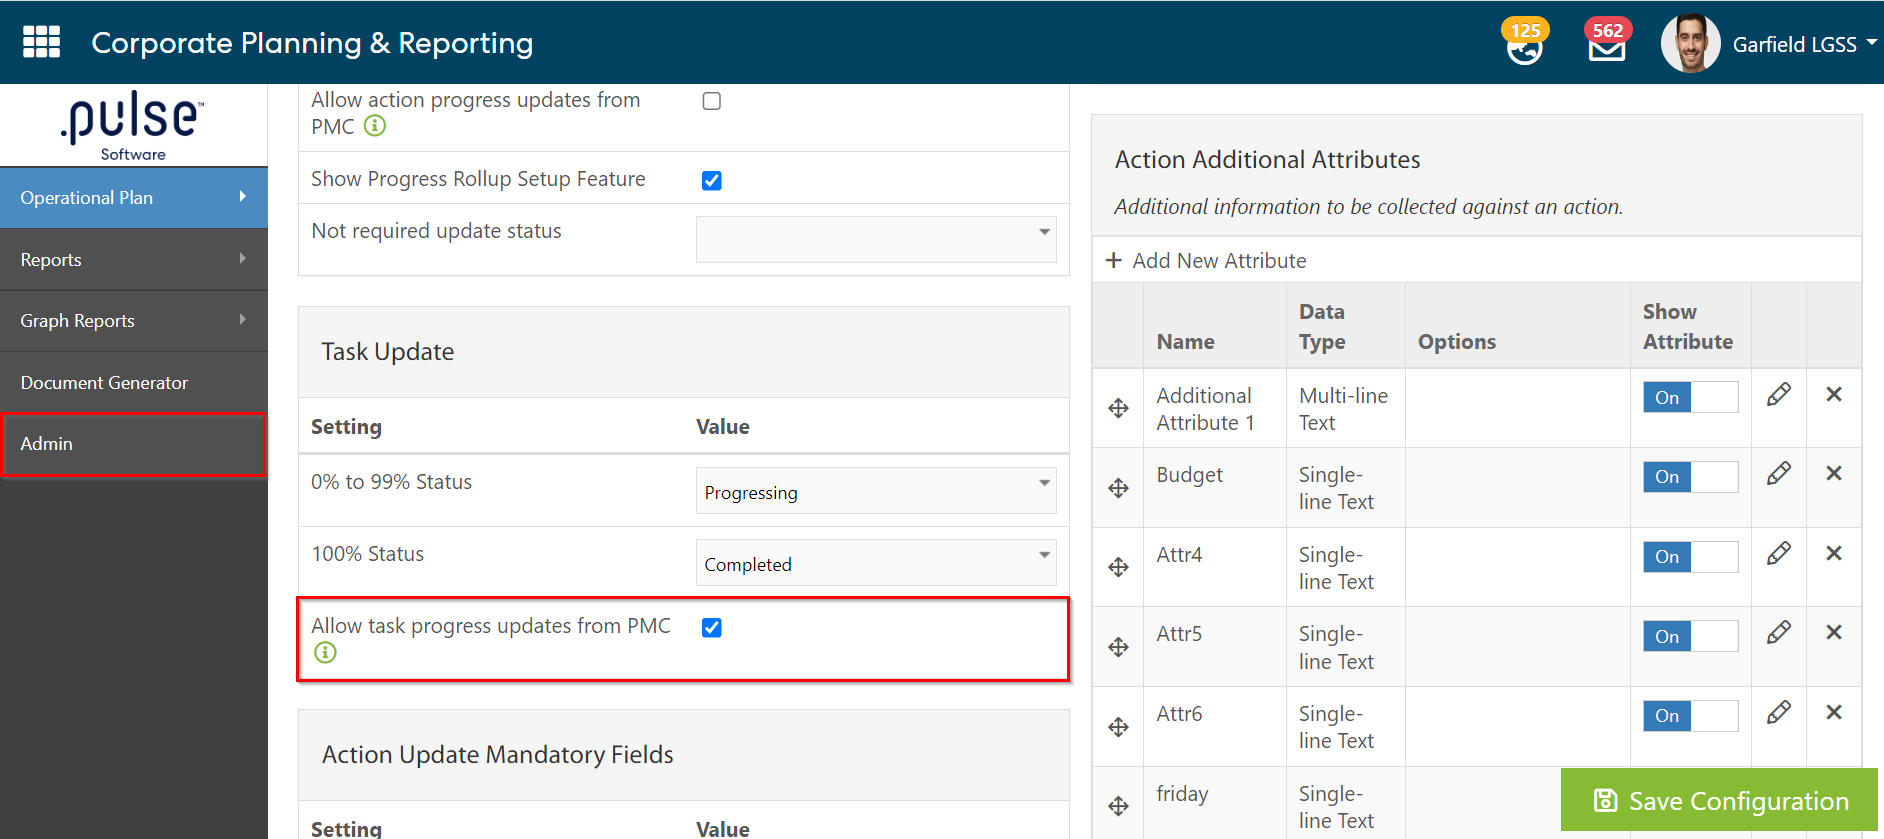
Step 3: Click on "Save Configuration" to save the configurations.
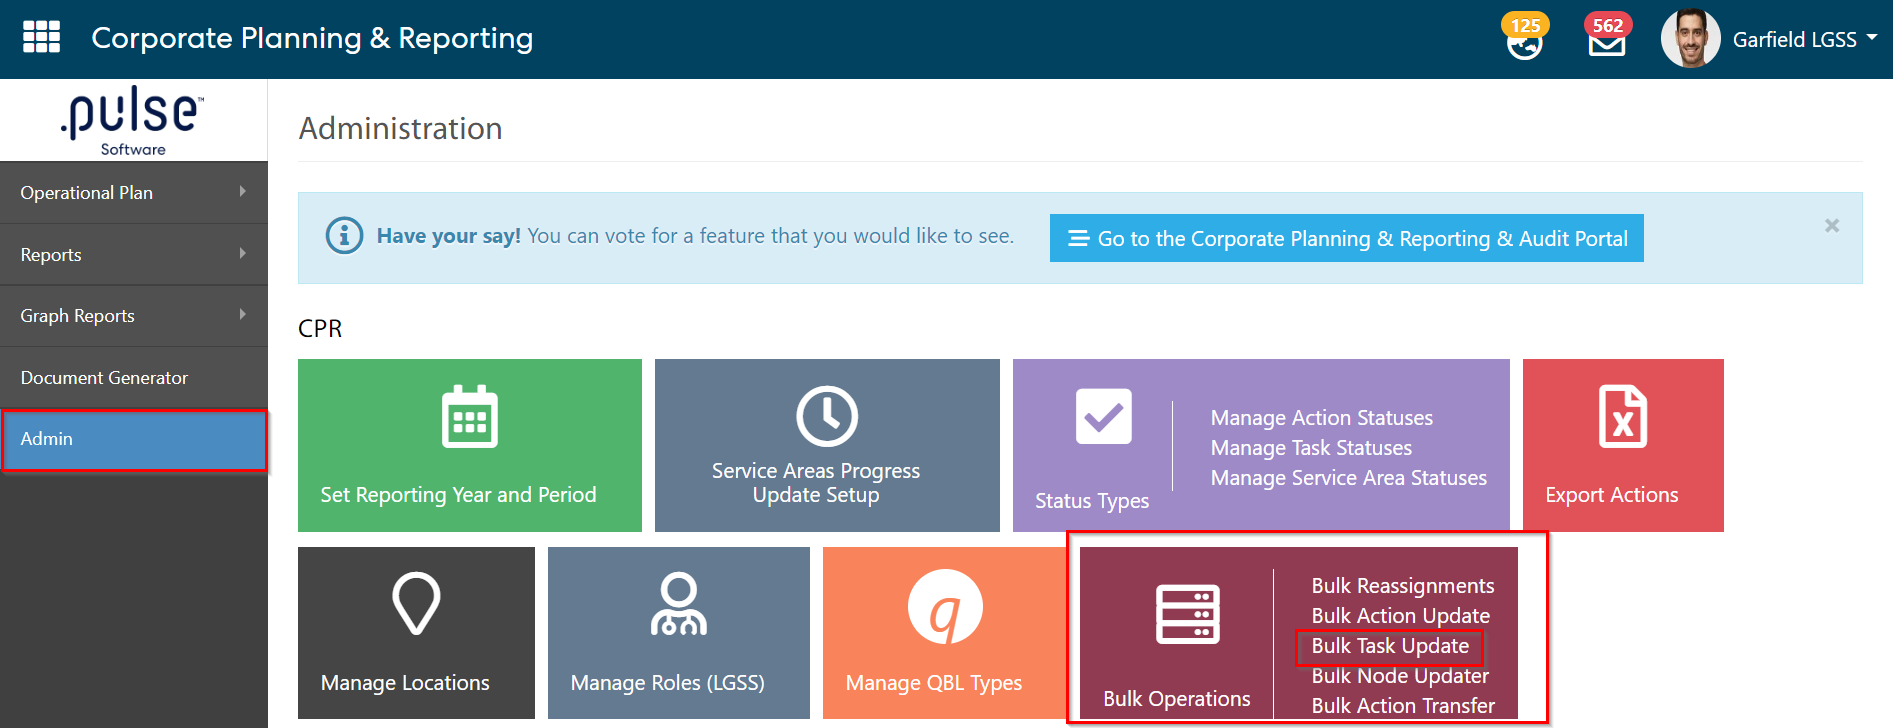
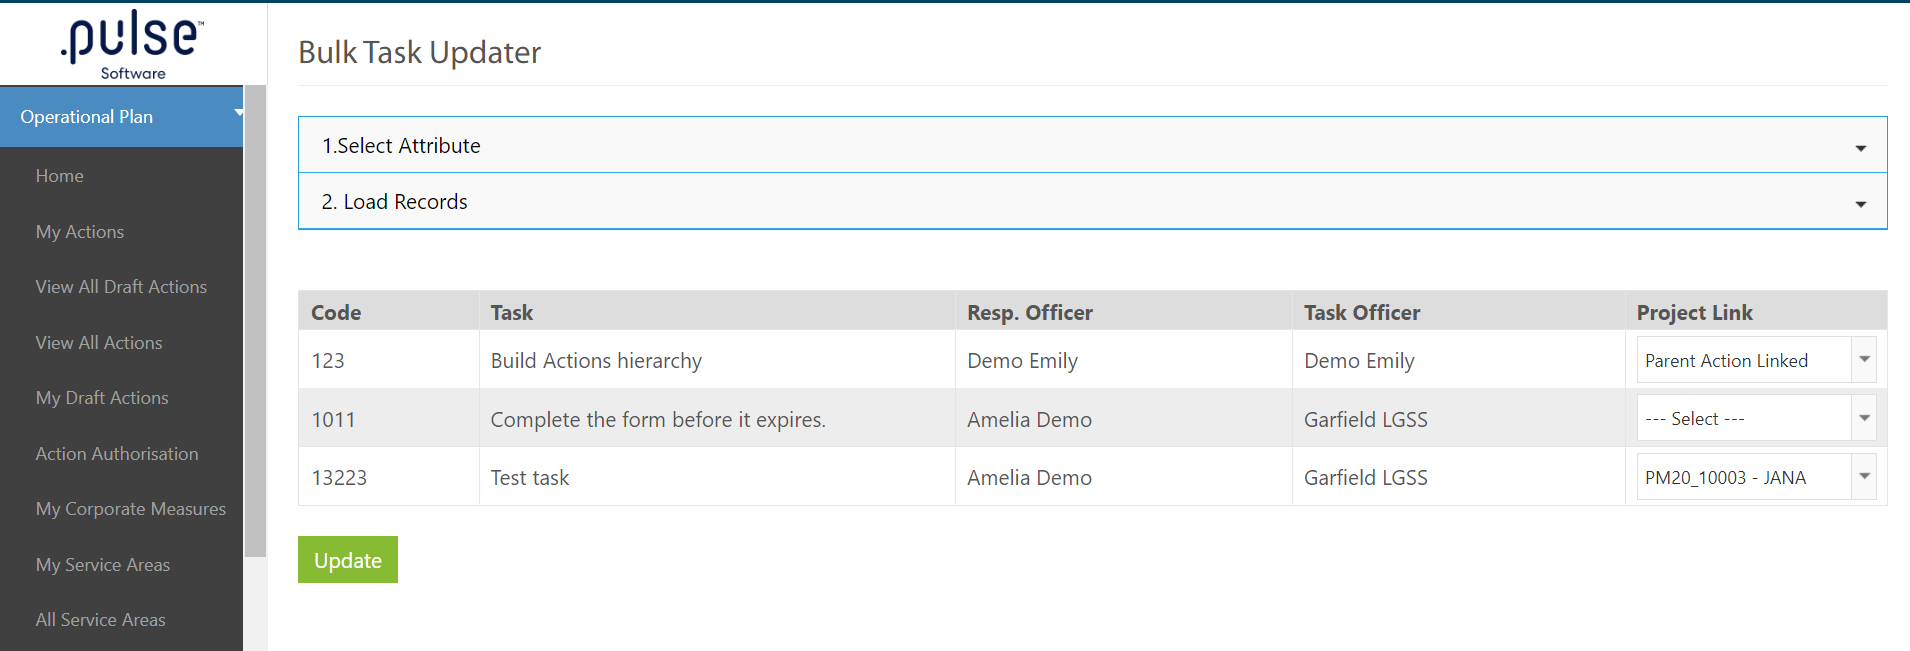
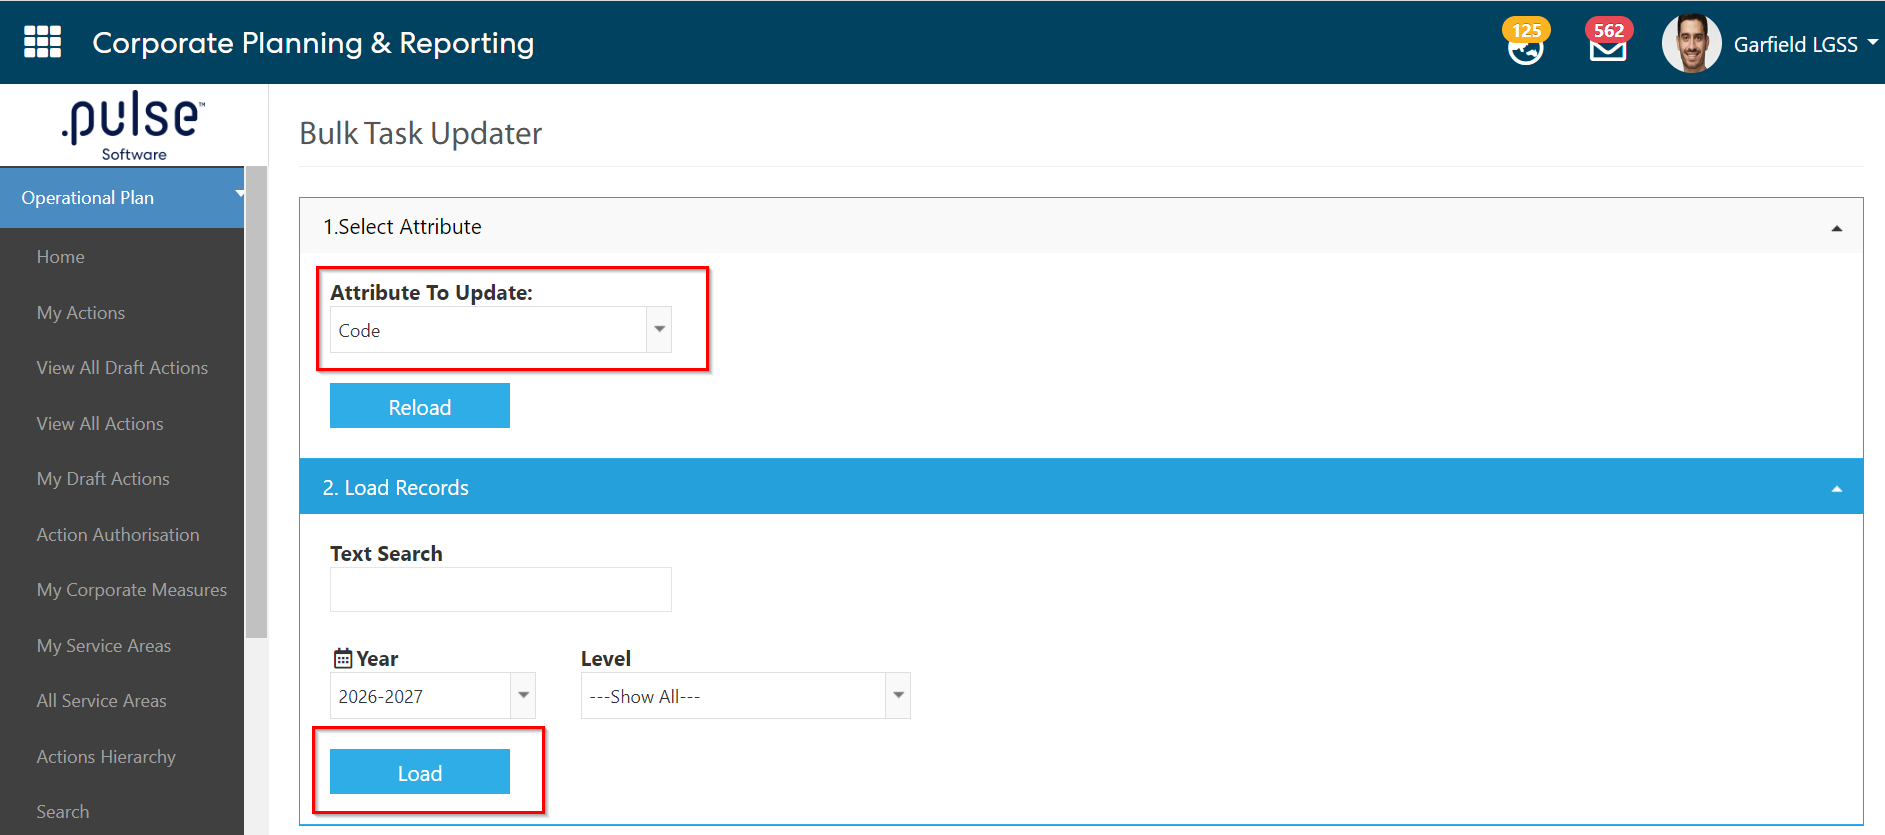
Step 4: Admin page > Bulk Operations > Bulk Task Update
Step 5: Ability to Link the Tasks to Projects
Select the on "Project Link" value from the Attribute to Update dropdown.
Note: The "Project Link" value will only appear if the above config key (Allow task progress updates from PMC) will be enabled.
Step 6: Click on "Load" button to load the results.
When a Project is linked to a task, it cannot be linked to another task.
In this case, we will focus on the "Complete the form before it expires." task and link this task to one of the projects from the Project Link dropdown.
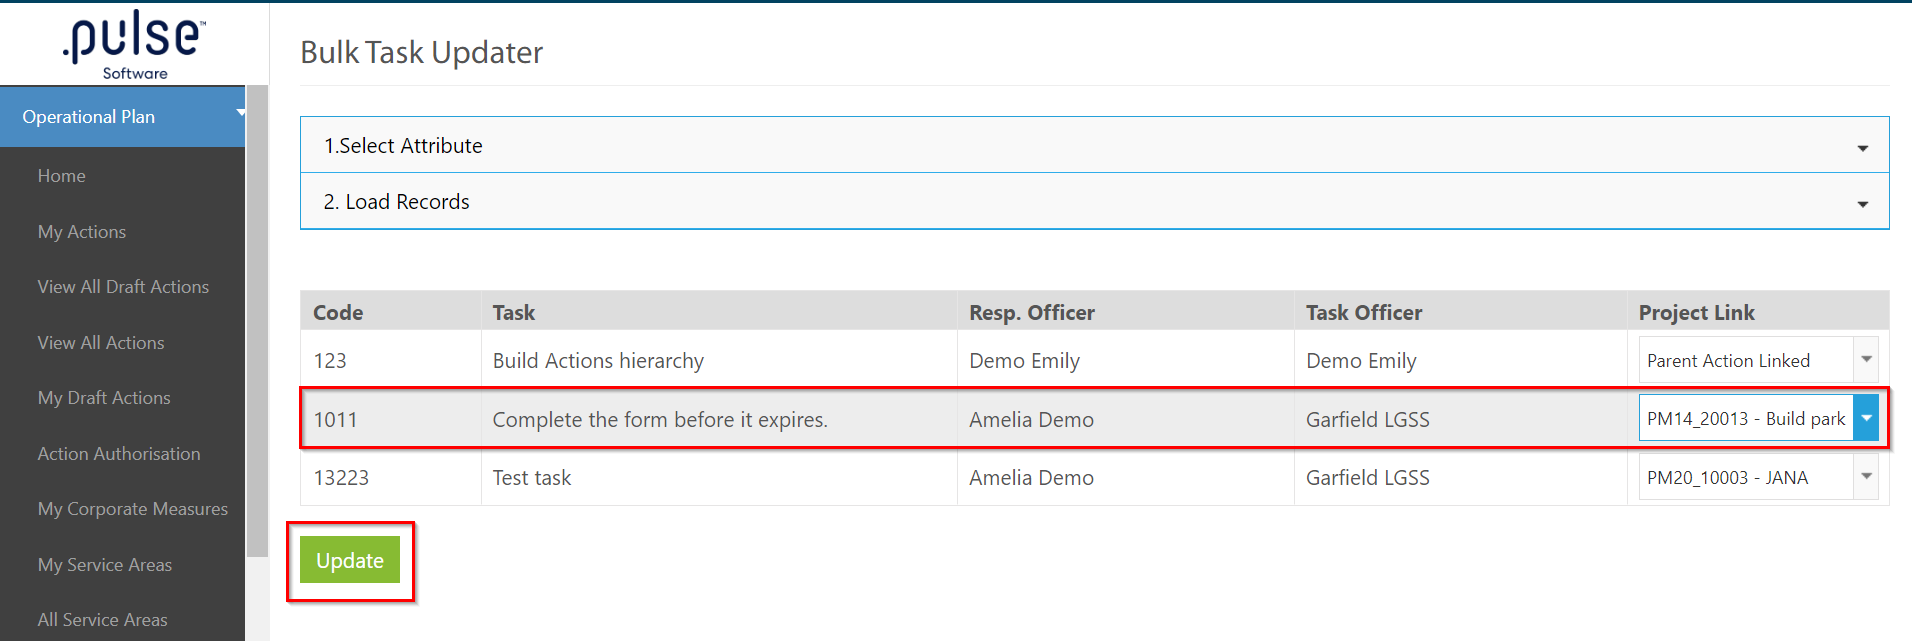
Step 7: Click on the Update button to save the changes.
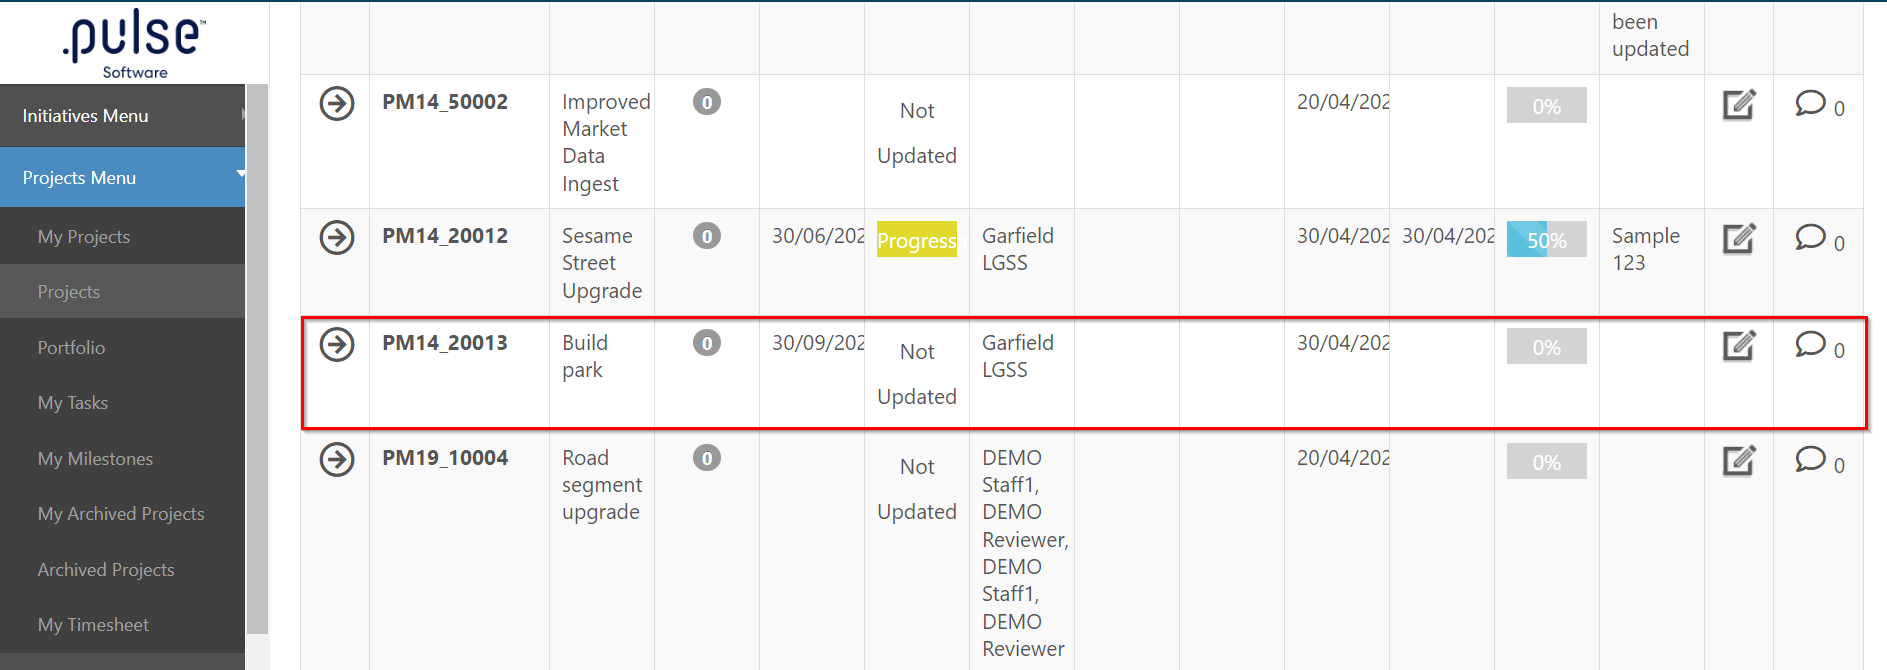
Step 8: Navigate to the PMC module and go to Projects Menu > Projects, and search for the project that has been linked with the task. In this case, the task was linked to "Build Park" project.
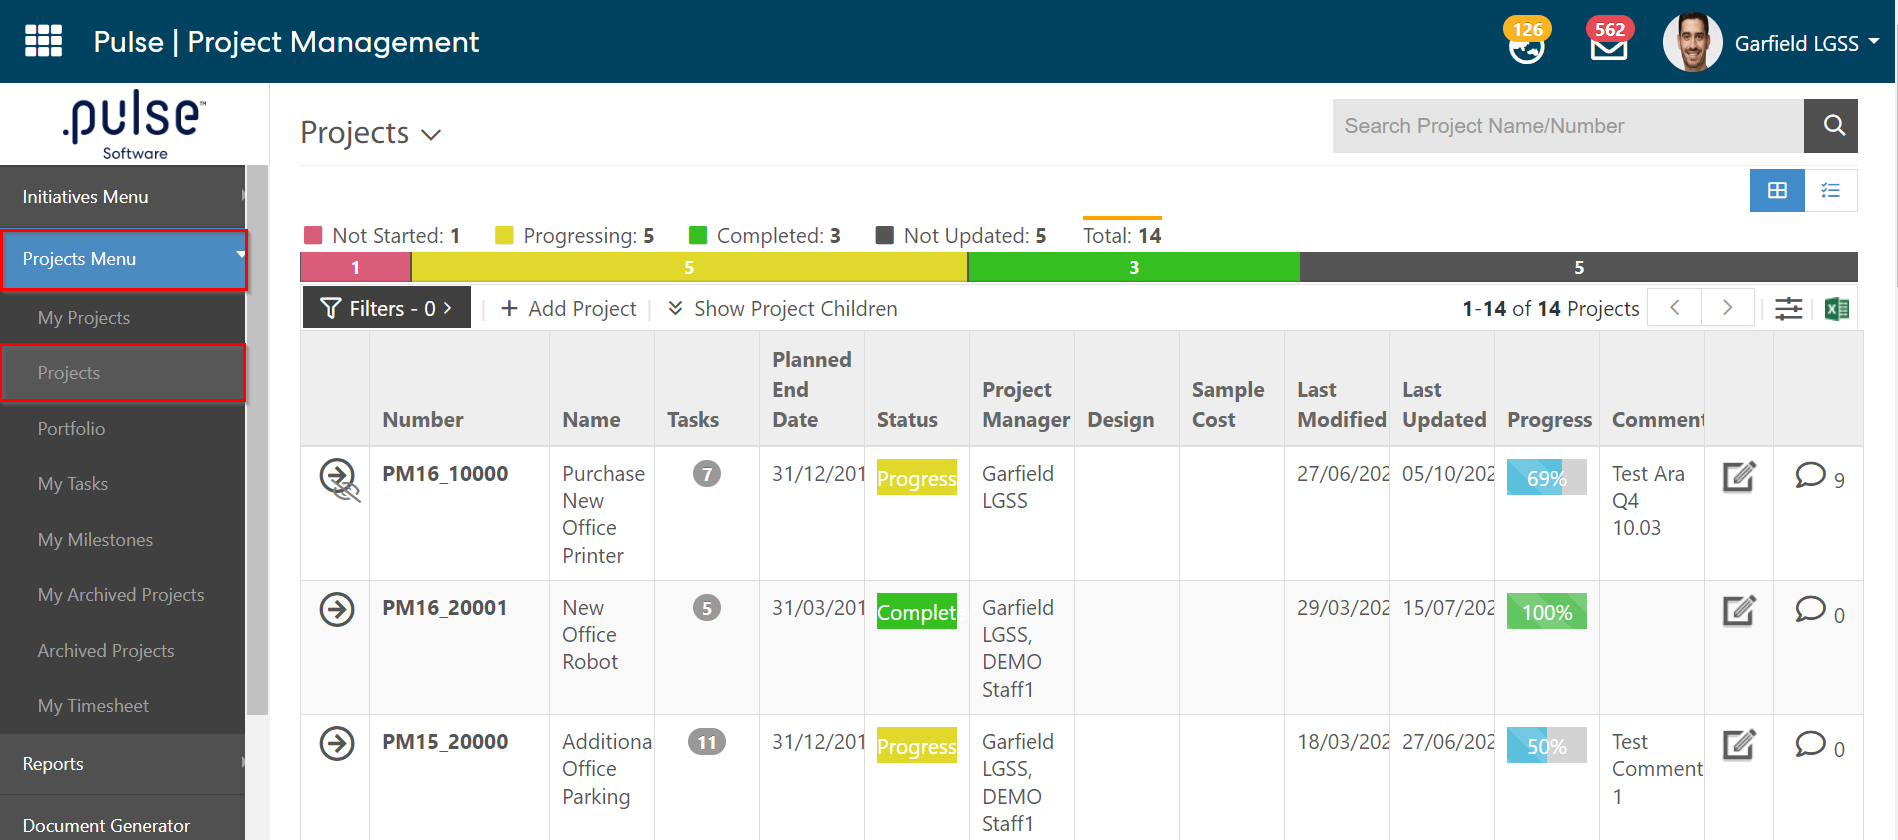
Step 9: Click on the Update button to update the project. A pop-up will open up where admins will be able to see the linked Task.
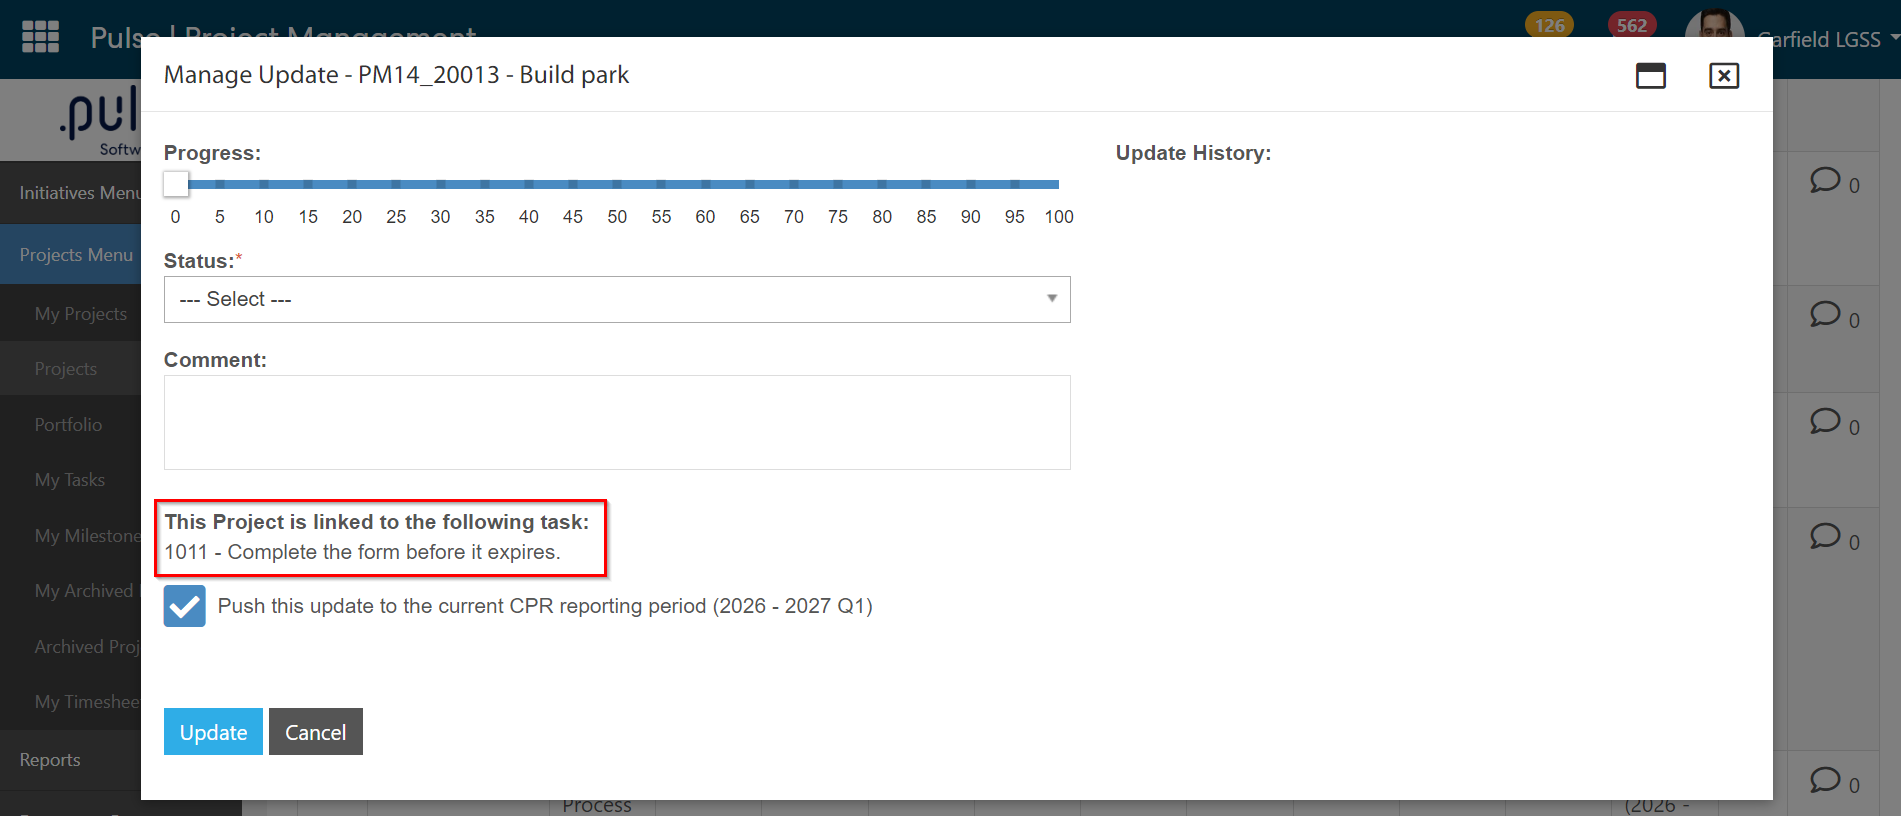
Note: The Linked tasks can only be updated by users who are both part of Project team role in the PMC module as well as responsible office or task officer of the CPR module.
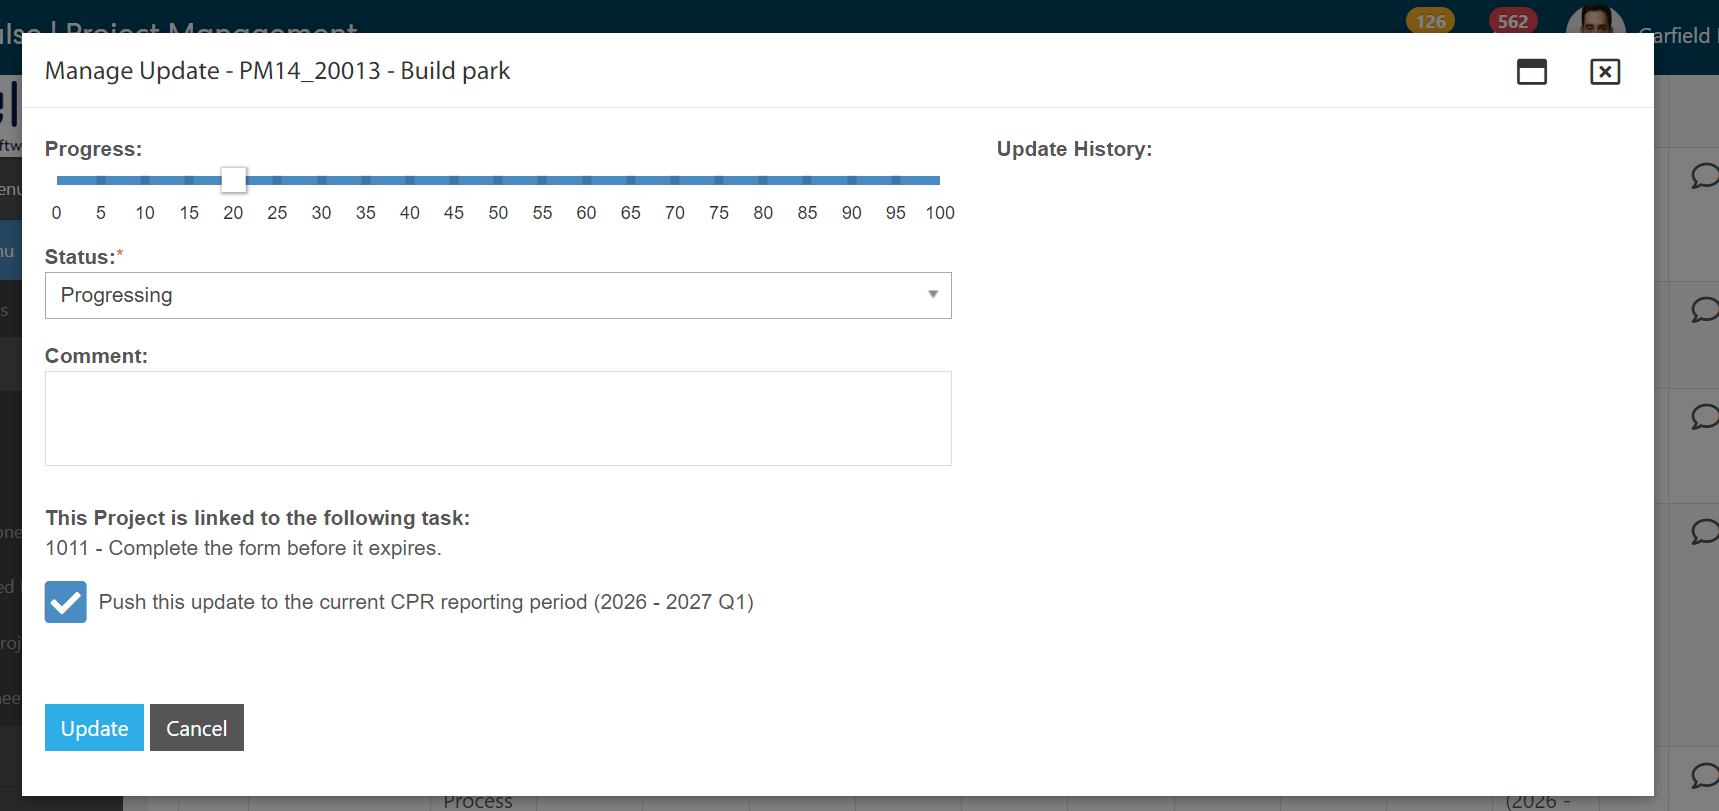
Step 10: Make a progress update to the linked Task and click on the Update button to save the changes and also to reflect the changes in the CPR module.
To see the changes in the CPR Module, go to the CPR module and Operational Plan > View All Task page.
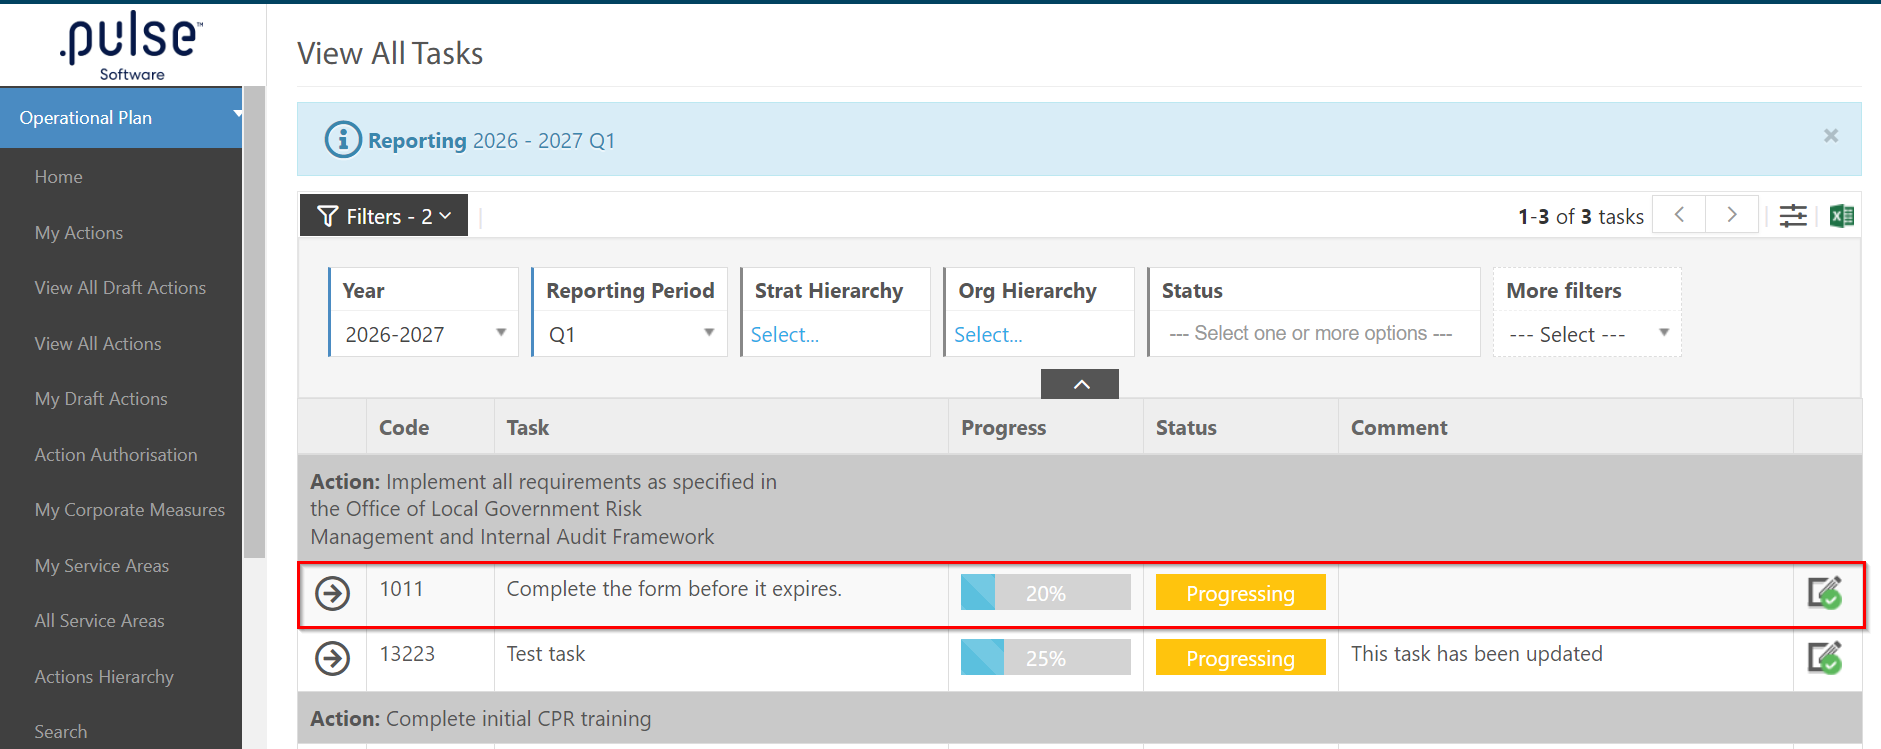
Notice the Progress update of the Task has been changed and also the Update Icon turned to green colour since the Task has already been updated in the PMC module.
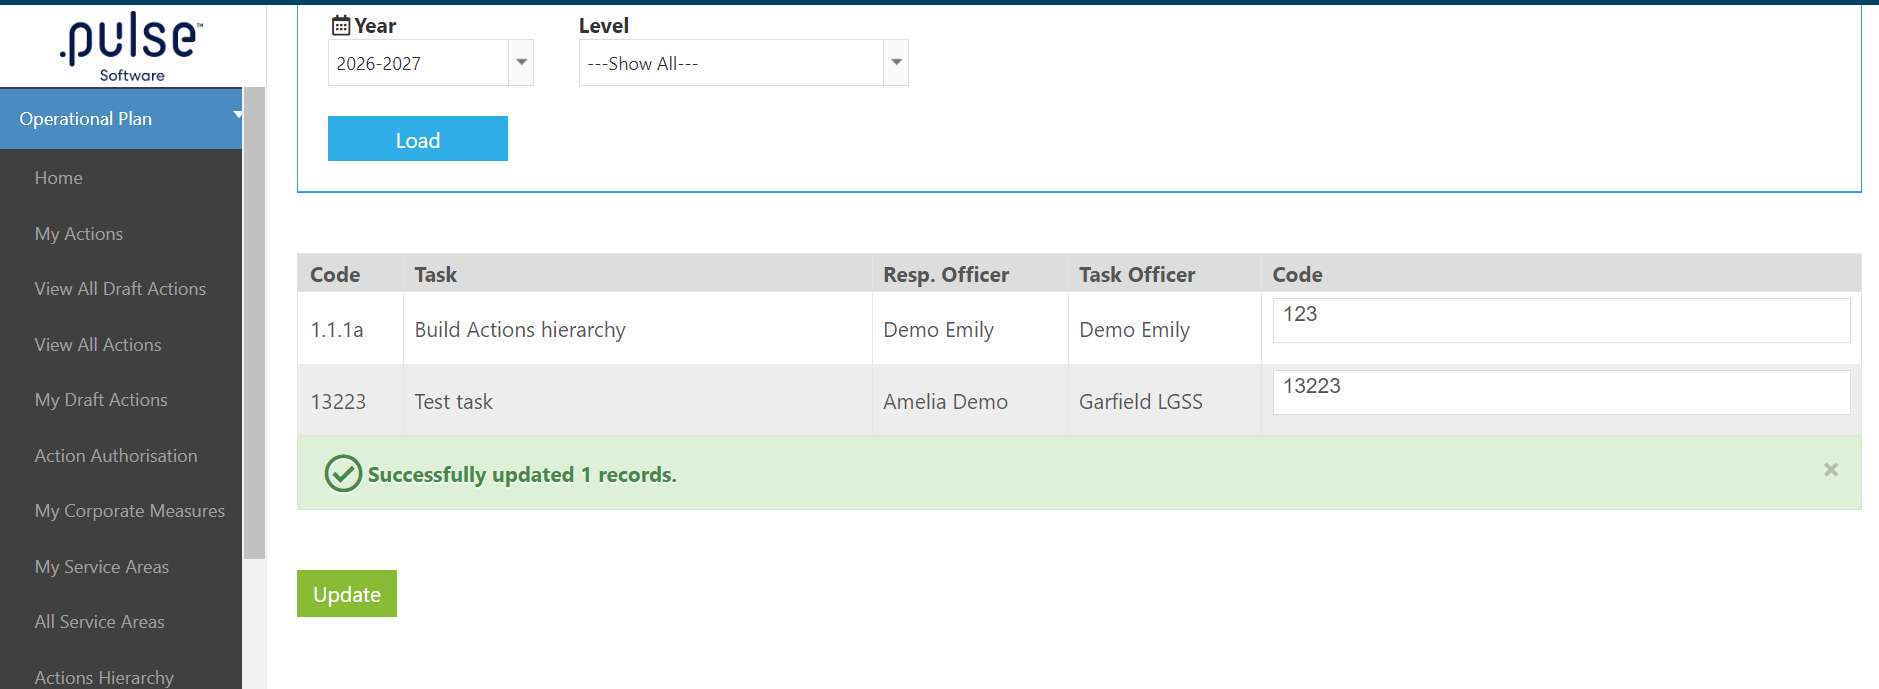
4.2 Bulk Update the Task Code field in the Bulk Task UpdatedA new Attribute To Update has been added to the "Select Attribute" section - Code. Select "Code" from the Attribute To Update dropdown and click on "Load" to load the results.
When the result loads, the admin can change the Code of multiple Tasks from this page.
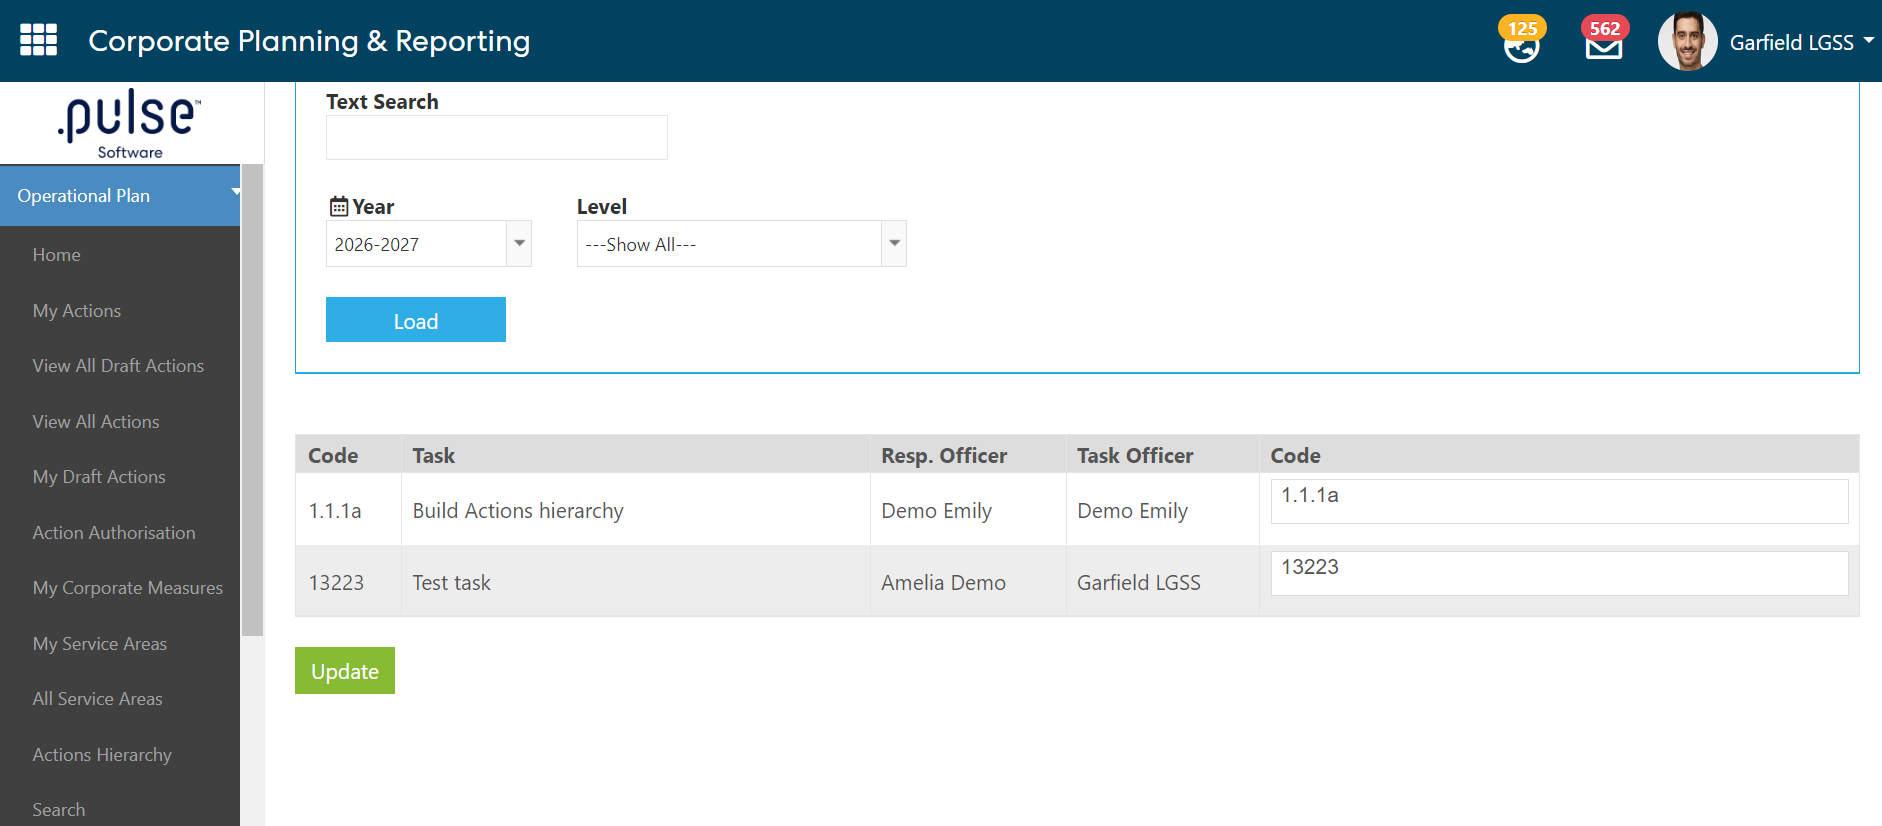
After making the changes, click on the "Update" button to save the changes.
Issues resolved
- Fixed an issue where admins or hiring managers were not able to delete the questionnaire or the application form from the Job Listing
General
- Fixed an issue where HTML code was not rendered and displayed in plain text in notification content.
- Fixed an issue where the Notifications were generated incorrectly in the Onboarding module.
- Fixed an issue where the Notifications were generated incorrectly in the Onboarding module.
- Fixed an issue where the "Notify reviewee of Goals Approval Reminder" notification was not triggering.
- Fixed an issue where some videos in eLearning courses were not loading on iPhone.
Delegations & Policies Register
- Fixed an issue where the users have to select the page size every time they visit the page.