Contents
1. HCM eLearning
1.1 Ability to re-allocate the eLearning to the usersPulse is introducing a new feature in the eLearning Module which will allow admins to re-allocate an eLearning to users. To view how this feature will work, please follow the following steps:
Scenario 1: Define the default recurrence schedule for the assignment for new eLearning courses.
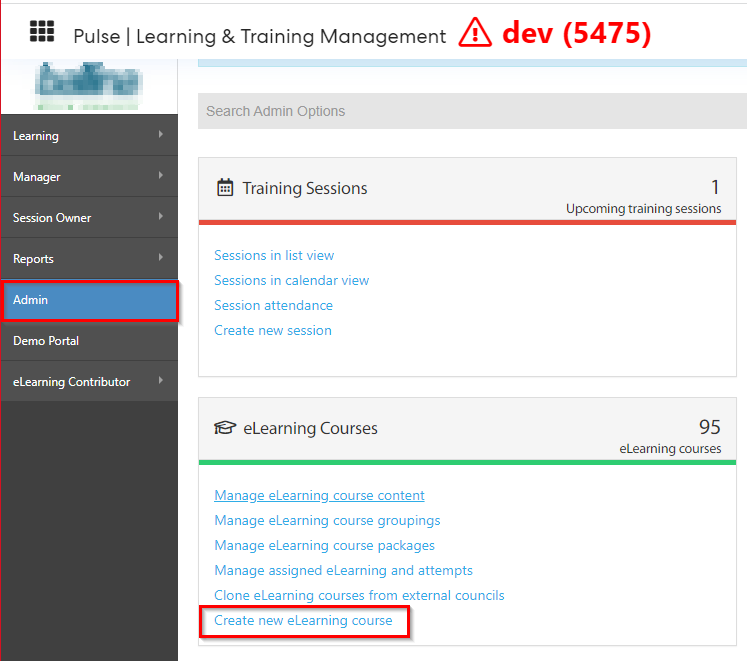
Step 1: Login to Pulse and then go to the eLearning Module.
Step 2: Click on Admin page --> Create new eLearning page.
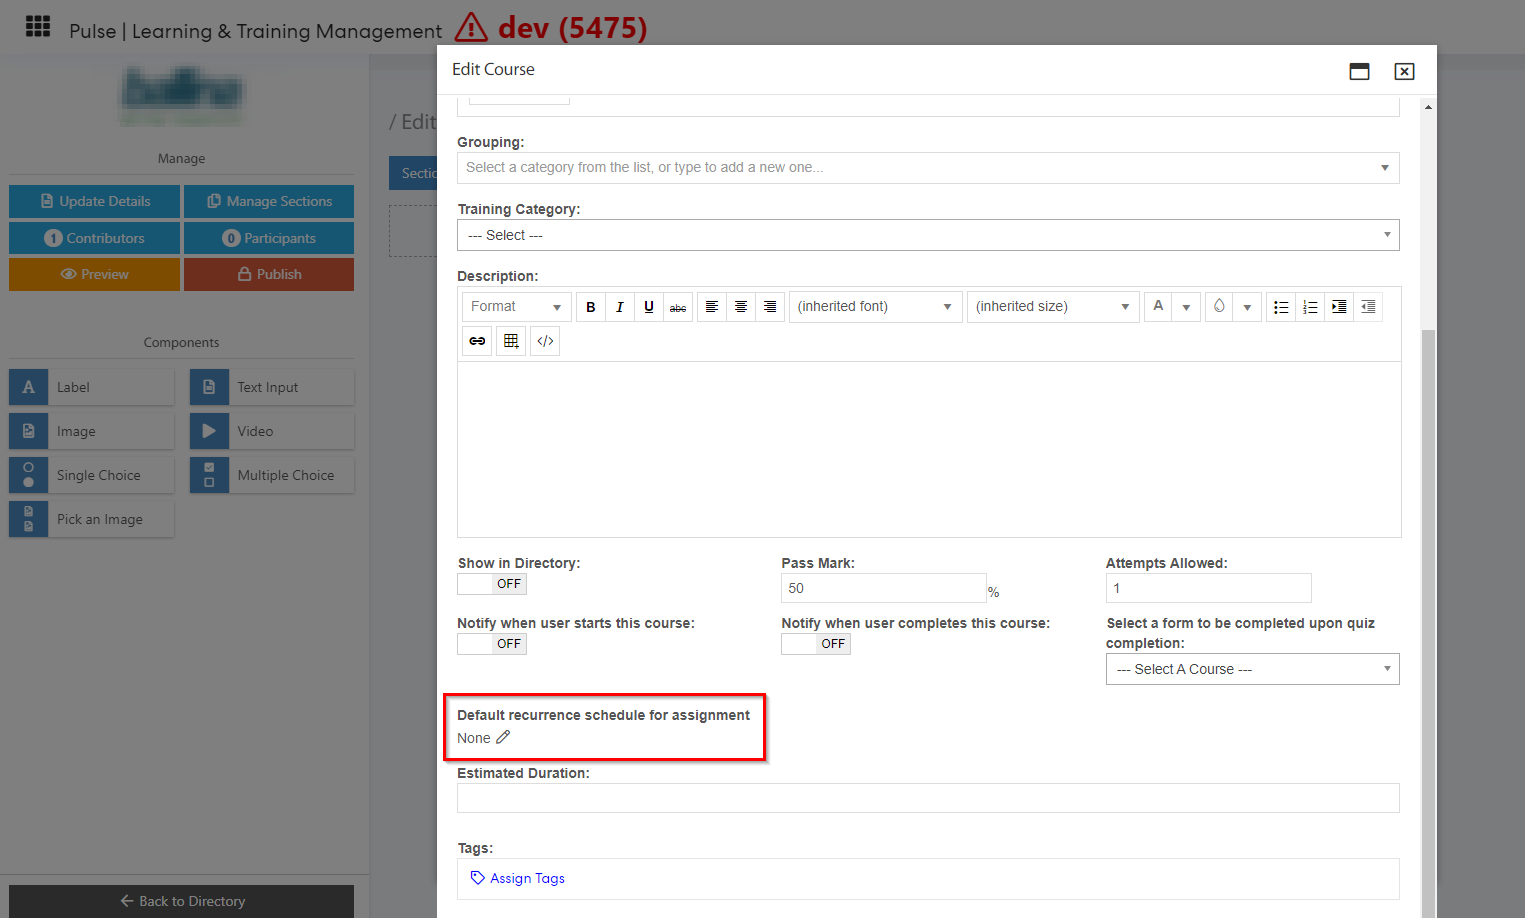
Step 3: Click on the pencil icon to edit the recurrence. Once clicked on the edit button, a pop-up will appear where the admins will have the ability to define the recurrence. The admin will have two options:
1) None: This means that there is no default recurrence set against an eLearning.
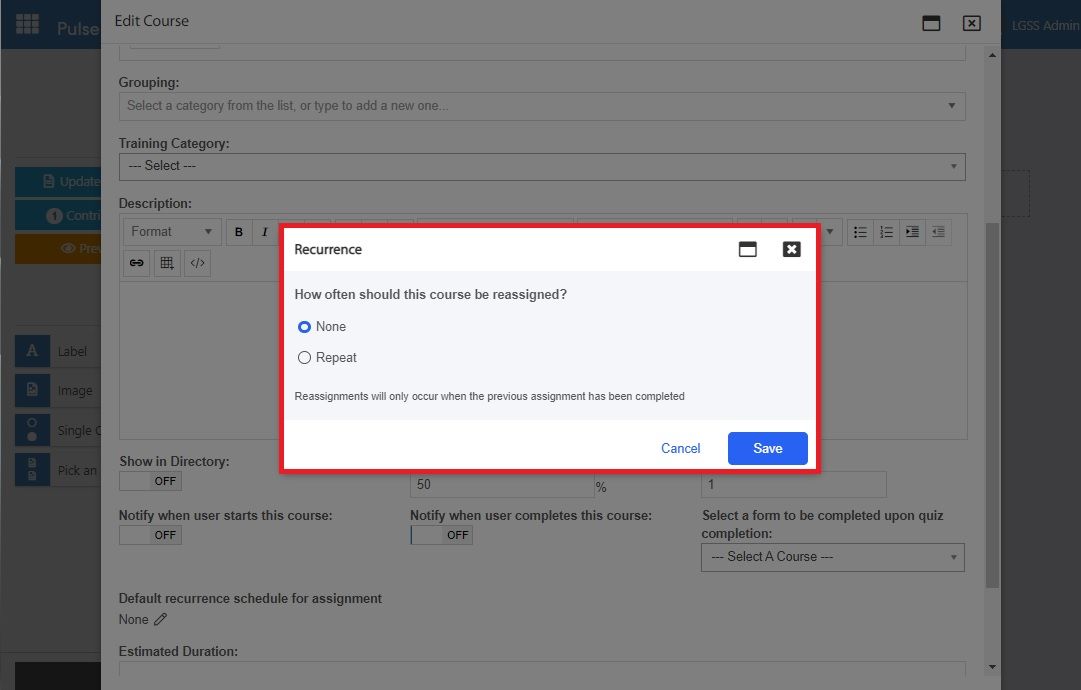
2) Repeat: When the admins click on repeat, they will then have to fill some additional information related to the recurrence schedule.
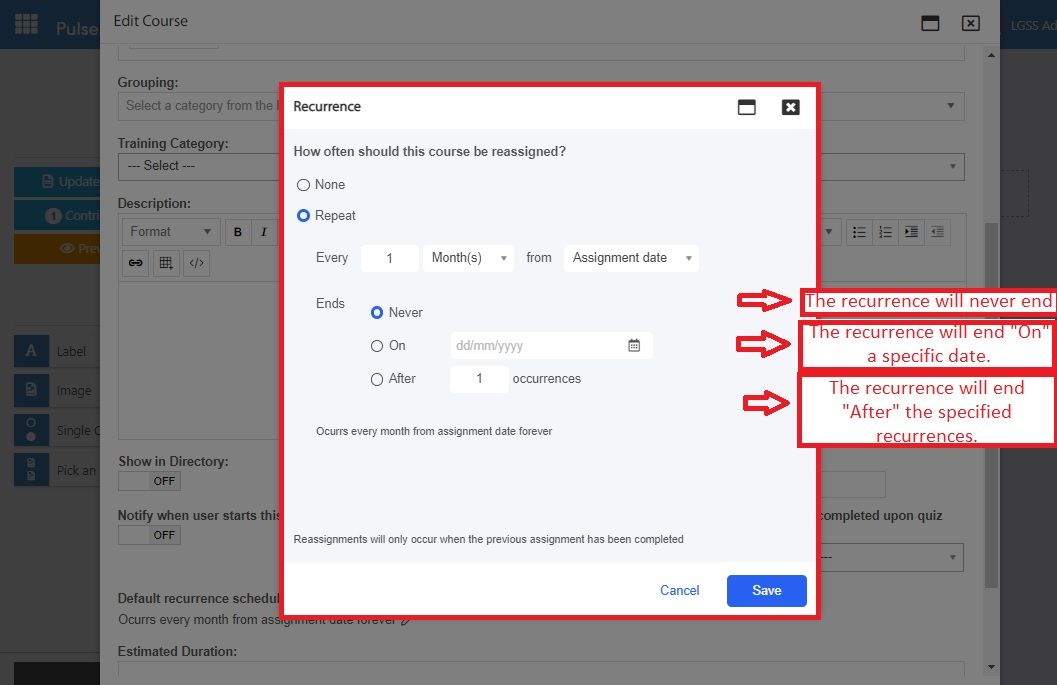
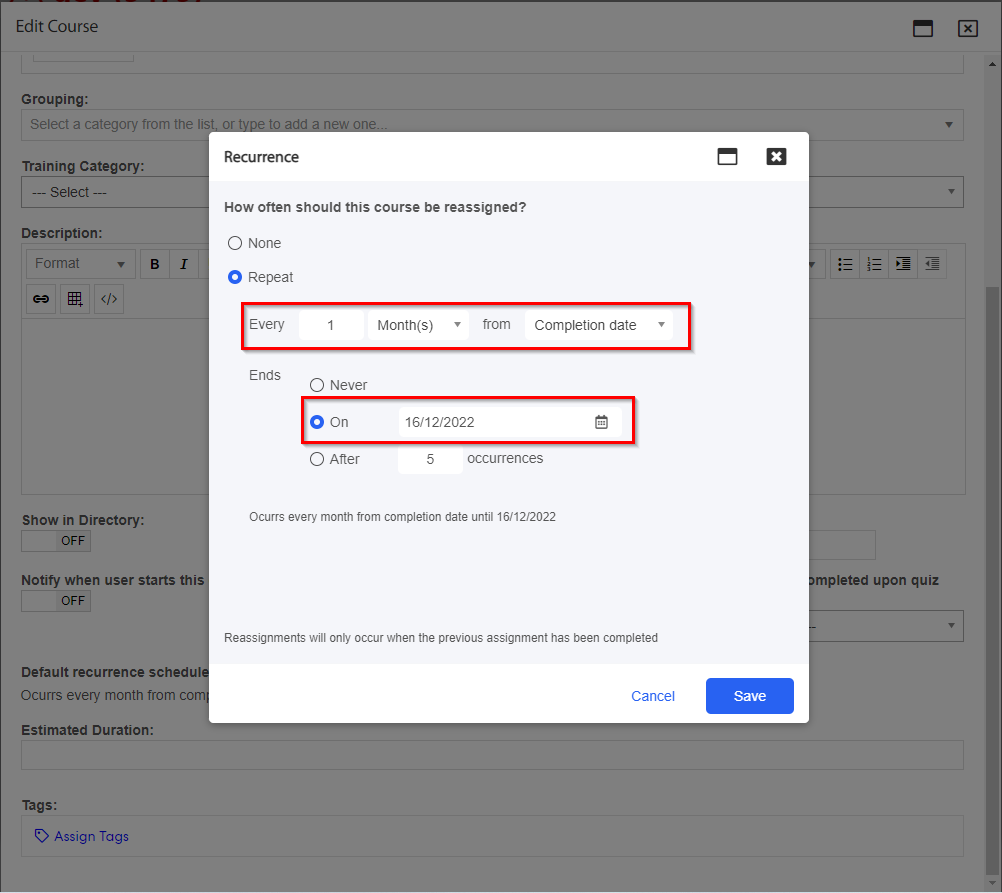
Step 4: Click on Save button once the schedule is defined.
Scenario 2: Define the default recurrence schedule for the assignment for existing eLearning courses.
Step 1: Login to Pulse and then go to the eLearning Module.
Step 2: Click on Admin page --> Manage eLearning content/ Manage eLearning page.
Step 3 & Step 4 of Scenario 1 will be repeated.
Scenario 3: Assign eLearning to users.
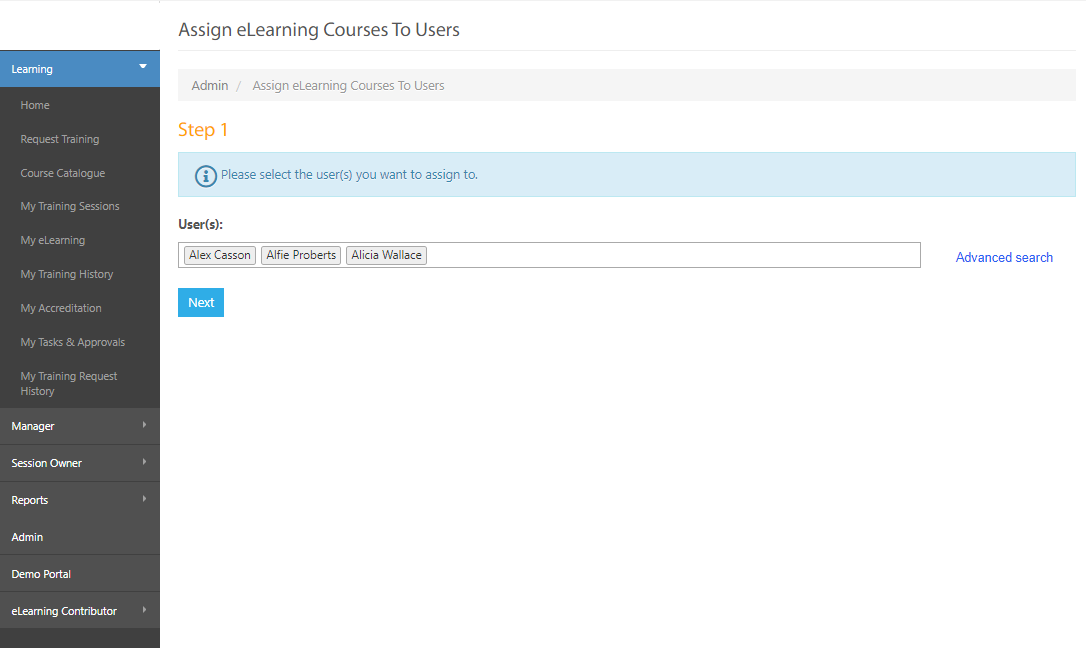
Step 1: Login to Pulse--> eLearning module --> Admin page --> Assign eLearning courses to users.
Step 2: Select the users.
Step 3: Click on Add Courses/ Add Courses From Package.
Once the courses are added the system will assign the default recurrence to all the added courses. Admins will now be able to view the default recurrence in the "Recurrence" column.
The admins will be given the ability to change the default recurrence by clicking on the edit icon.
By clicking on the edit icon, a same pop-up will appear as step 3 of Scenario 1, where the admins can define a new recurrence against the eLearnings.
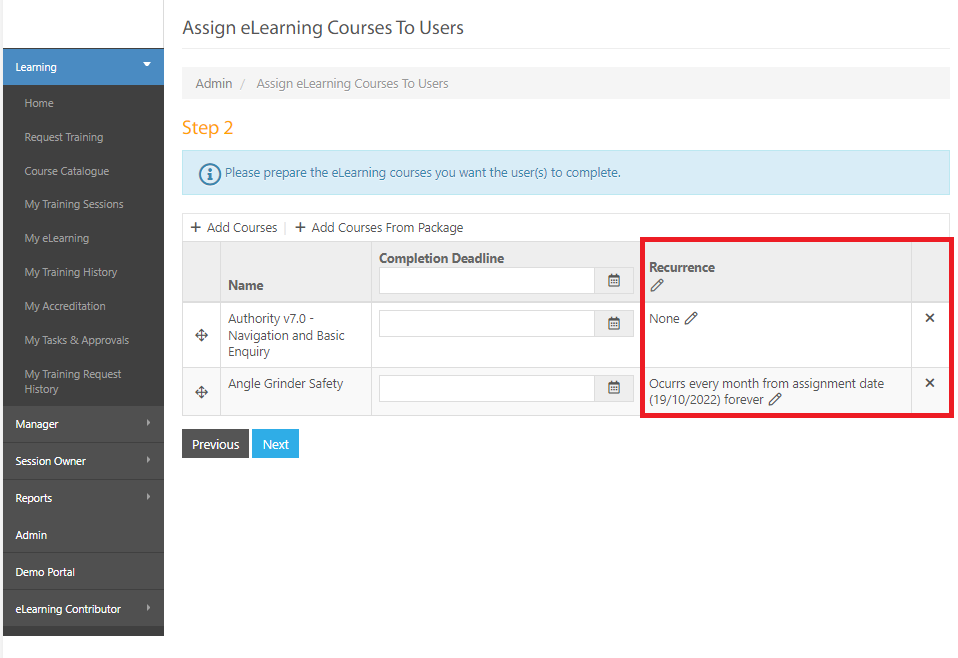
Once the recurrence is set, click on "Next" to go to Step 3.
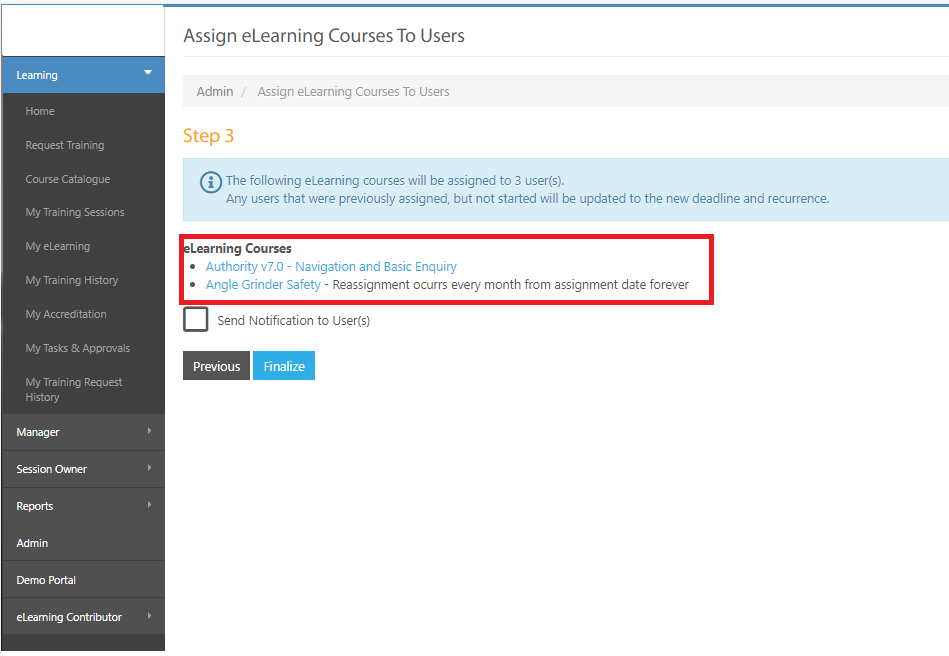
Step 4: Admins can send a notification for each eLearning course along with their recurrence schedule set.
Note: Scenario 1 & 2 are applicable to eLearning course packages as well.
Scenario 3: Ability to view/cancel the recurring assignments.
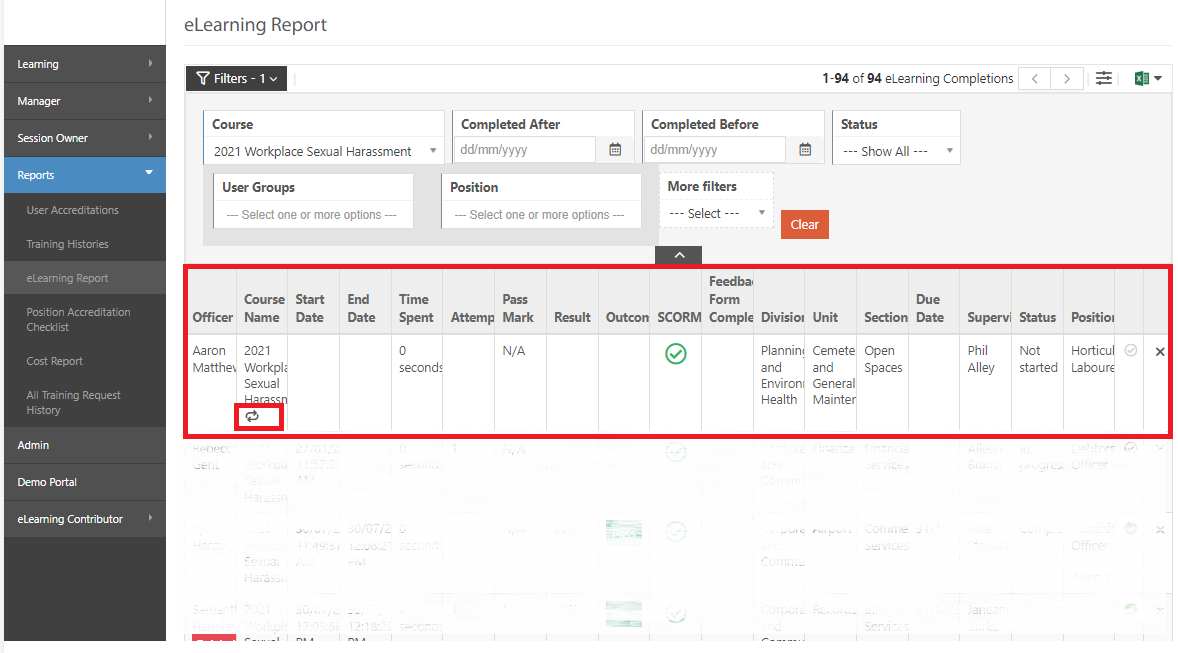
Step 1: Login to pulse --> eLearning Module --> Reports Tab --> eLearning report.
A recurrence icon will be shown against recurring eLearnings which will help the users to differentiate between a recurring eLearning and non-recurring eLearning.
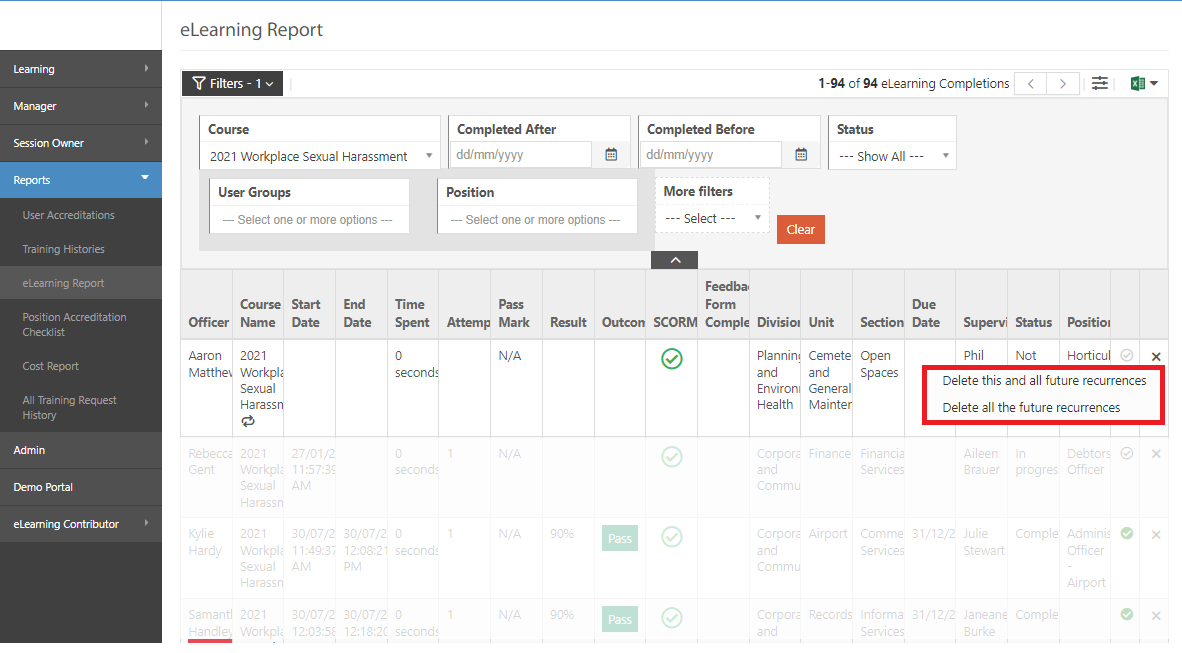
Step 2: The admins have ability to delete the recurrence. To delete the recurrence, the admins will have two options:
1) Delete this and all future recurrences: This will delete the current and all the future recurrences.
2) Delete all future recurrences: This will delete all the future recurrences.
2. HCM eRecruitment
2.1 Ability to Add Email Template Interview InvitationPulse is introducing the ability to have Email templates for Interview Invitation in eRecruitment Module. When a candidate is at the Interview stage then the admins have the ability to send an Email to the candidates from the available email templates.
To view this feature, follow the steps below:
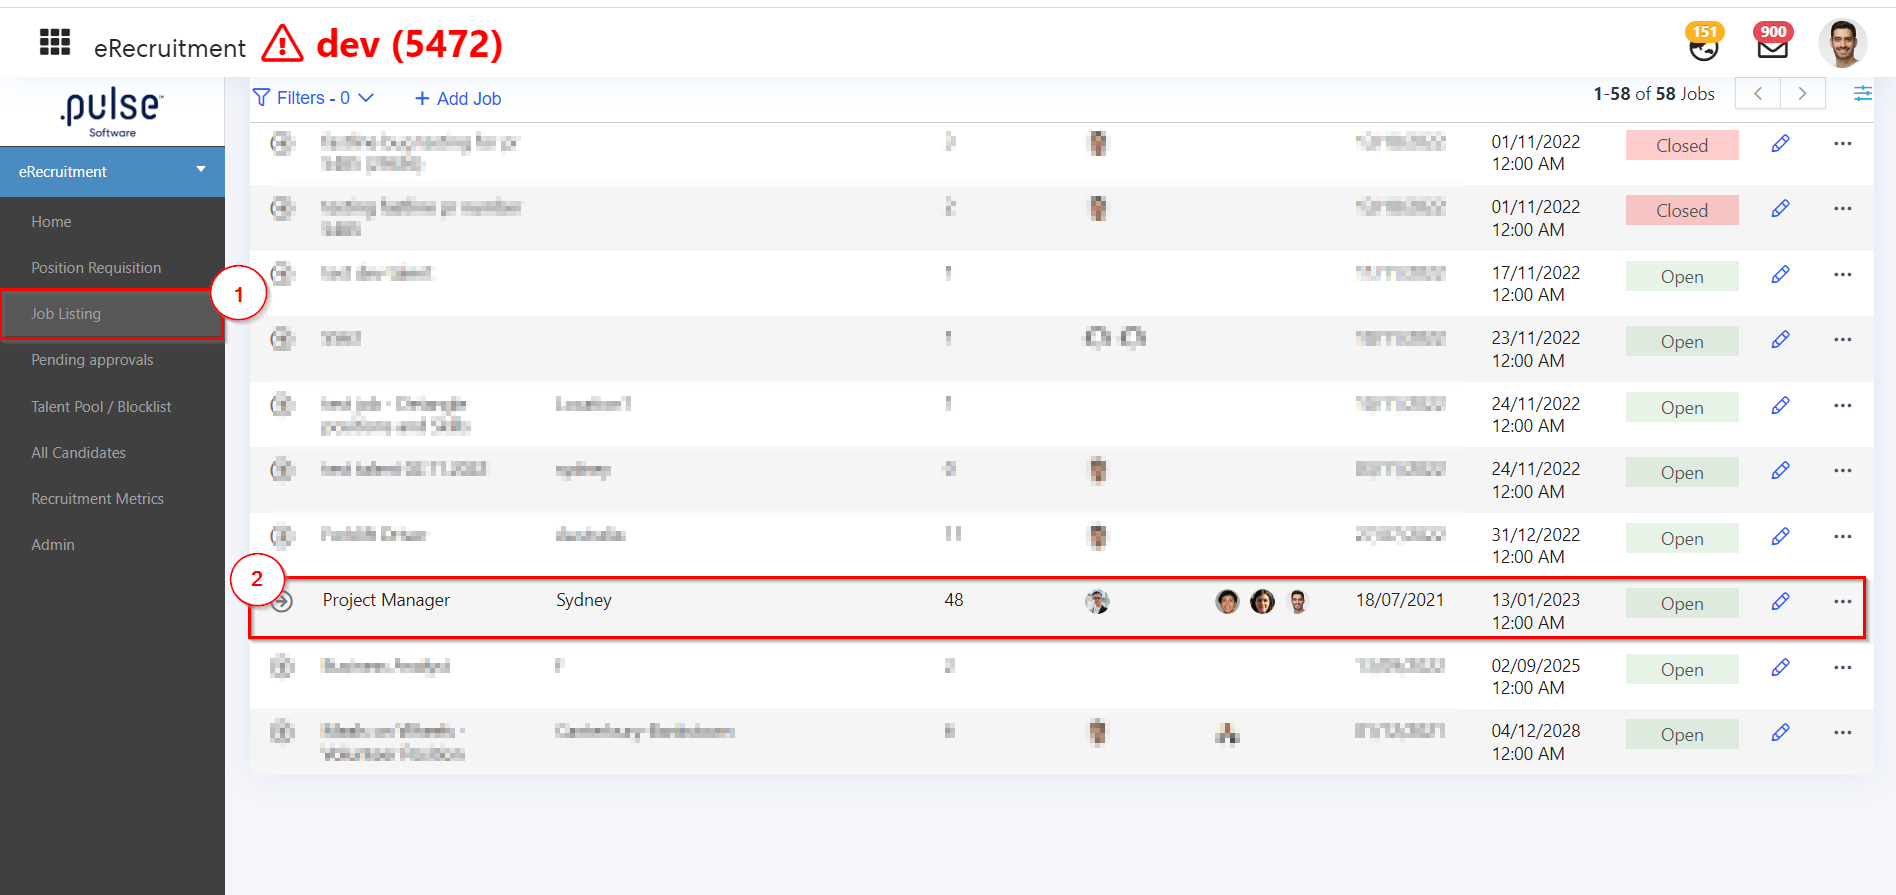
Step 1: Login to Pulse --> Click on the eRecruitment Module --> Job Listing page.
Step 2: In the Job listing page, select an open Job with some candidates in it.
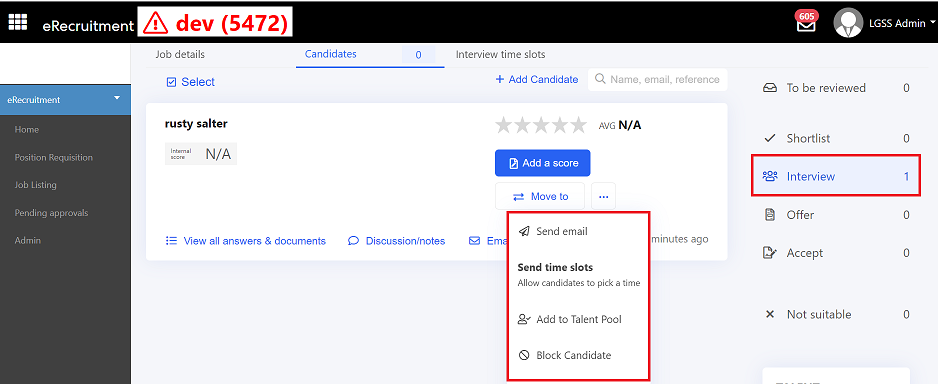
Step 3: Click on the Job to view it --> Under the candidate's Tab --> View the right hand menu where the candidates will go through the recruitment process.
While in the Interview phase, admins have the ability to send emails from the available templates.
Step 4: Click on the 3-dots to Send time slots to the candidates.
Step 5: By click on the Send time slots, admins or the hiring managers will have to fill out the time slots and an Invite pop-up will appear, where the admins or the hiring managers will be able to view an email template dropdown as well as Save as Template button.
Admins or Hiring Managers can either use an existing email template to send an invite or they can write an email and then can save it as an template for future purpose.
2.2 Ability to handle pre-employment checksPulse has introduced a new feature in the eRecruitment module where the admins or the hiring managers will have the ability to add Check to capture information about the candidate.
To view this feature, follow the steps below:
Step 1: Login to Pulse --> Click on the eRecruitment Module --> Job Listing page.
Step 2: View any job --> go to the Job Details Tab --> Job ad description
Admins or the Hiring Managers have the ability to Add a check for a candidate.
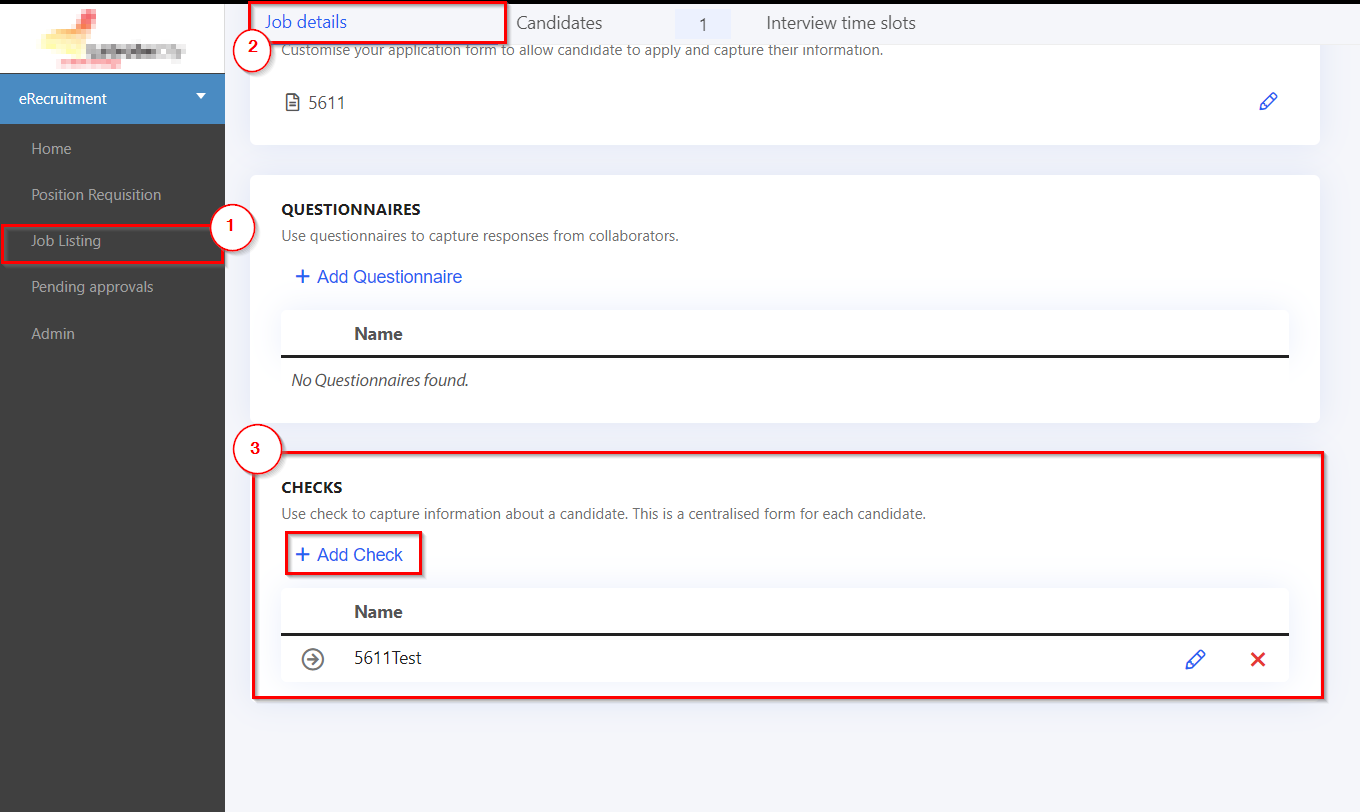
Step 3: Click on Add Check to add a check in the Job description. Hiring Managers or the Admins can either create a new check or use an available check to add in the field.
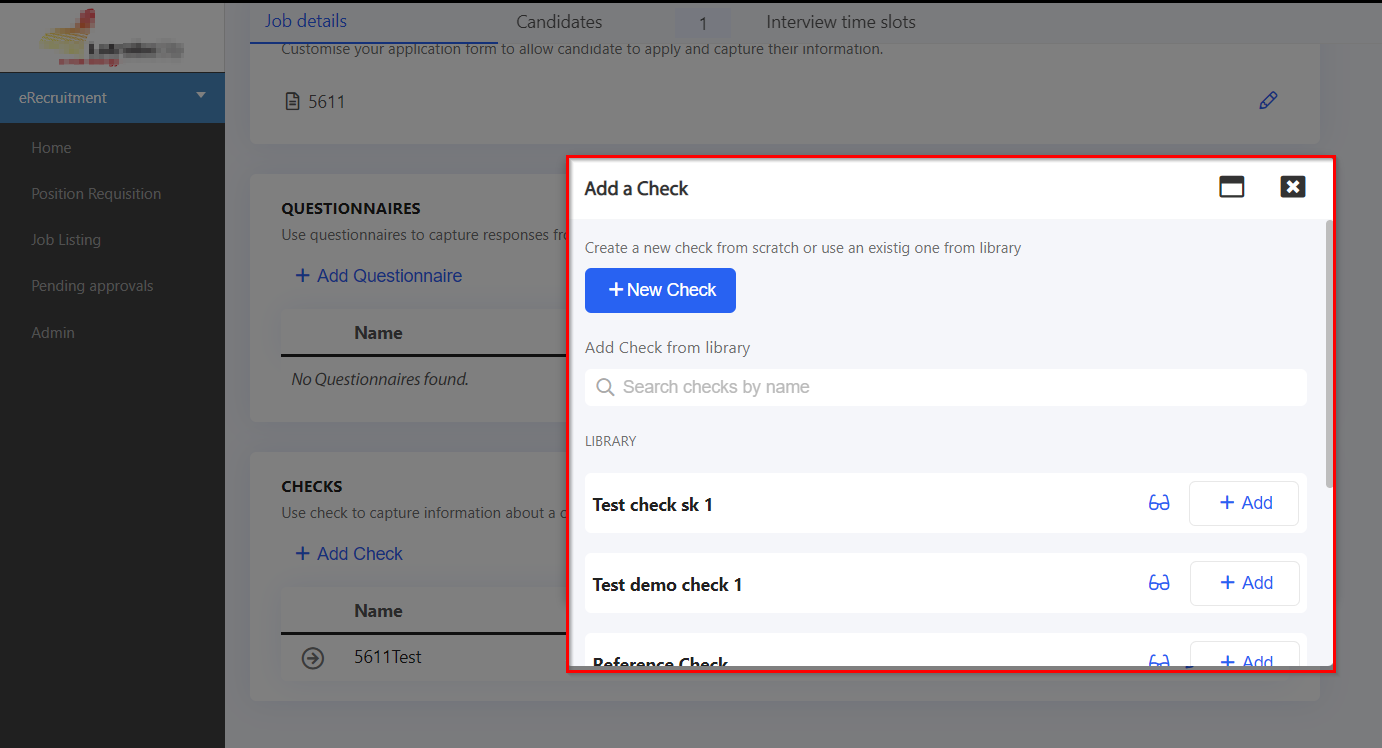
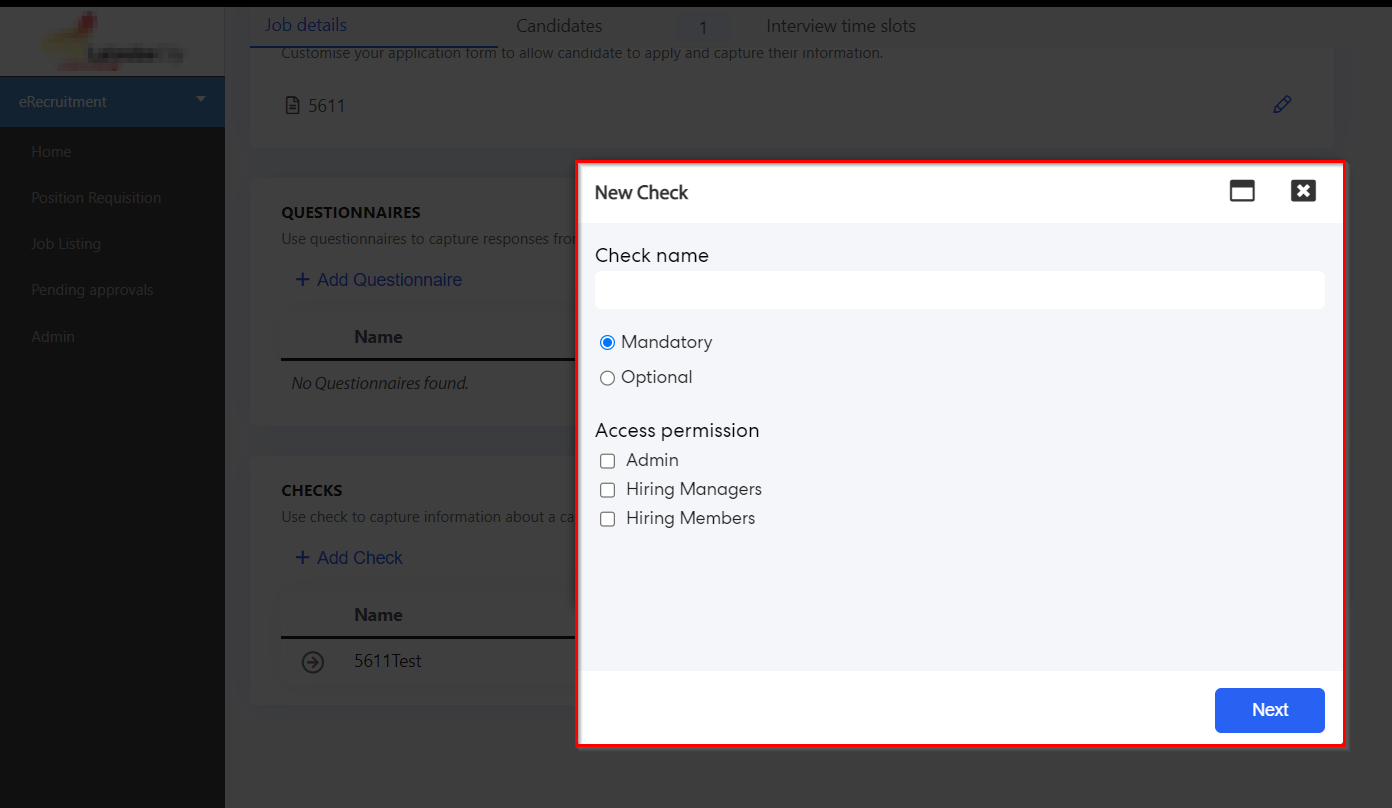
Click on Next to proceed further.
2.3 Ability to add Skills & Position Filters independently while adding a candidate to the Talent PoolPulse has introduced a new feature in the HCM recruitment module, where the admins and the hiring managers will have the ability to add multiple skills against any positions & vice-versa.
To look how this feature looks, follow the steps below:
Step 1: Login to Pulse --> Click on the eRecruitment Module.
Step 2: Go to eRecruitment Module --> Job Listing --> View any job --> Candidates Tab (Any stage) --> 3 dots --> Add to Talent Pool

Step 3: Click on the Talent Pool--> Talent Pool pop-up will appear.
Admins or the Hiring Managers can refine their search for candidates based on "Positions" or "Skills". Admins have the ability to either add multiple skills under one position or add multiple skills without selecting any position.
Alternatively, Admins or the hiring managers can also select multiple positions against different skills.
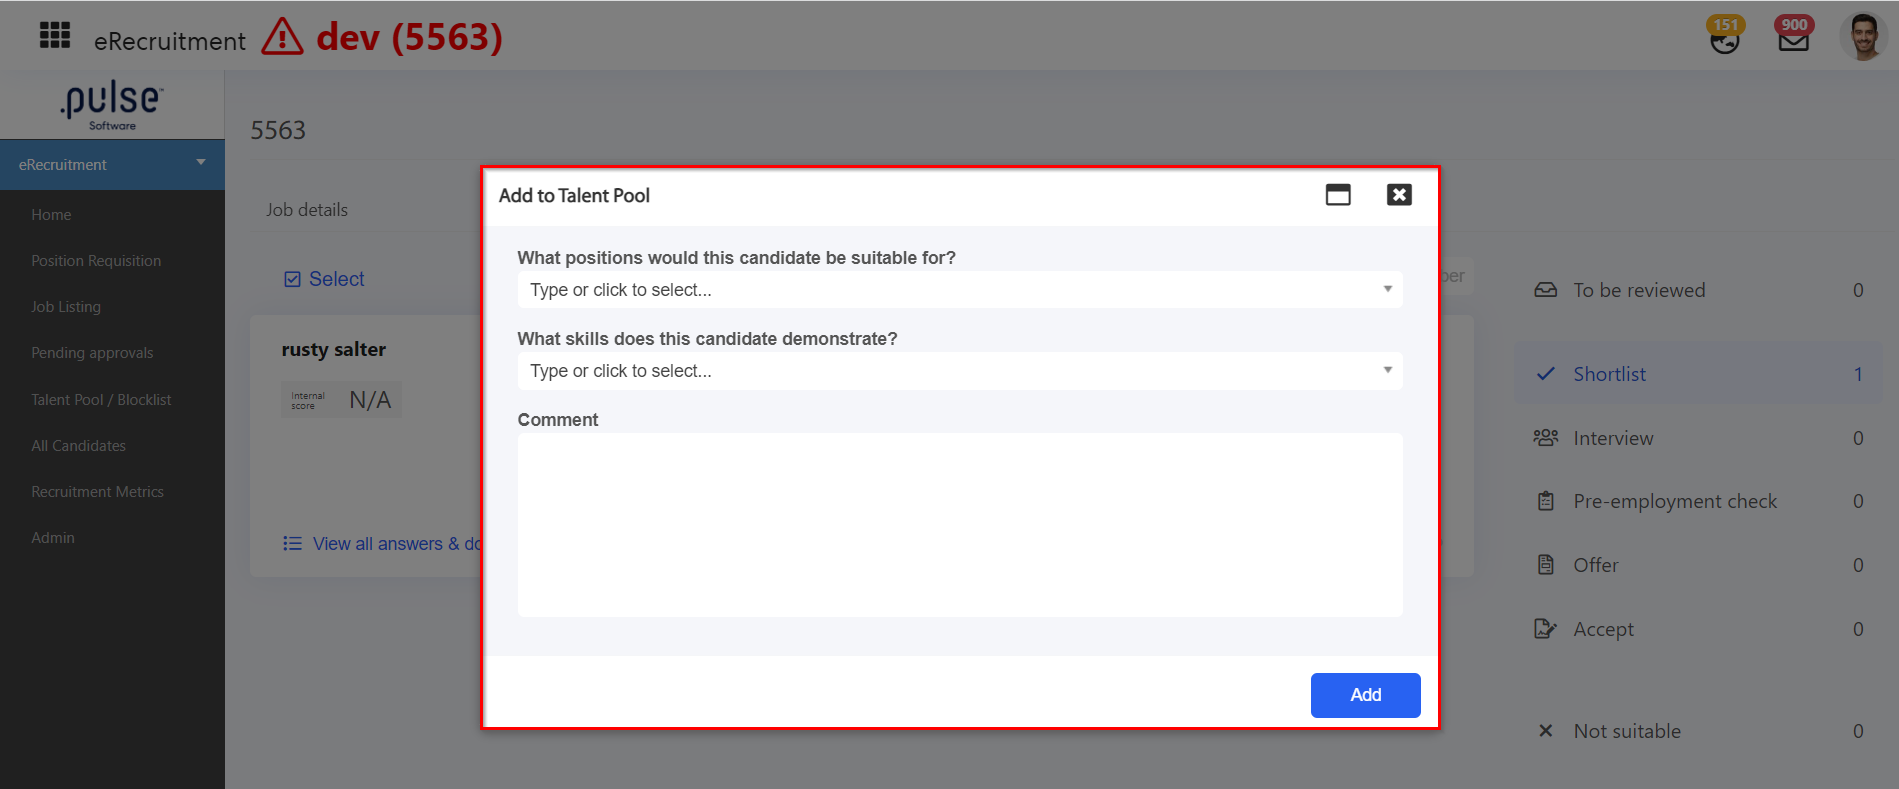
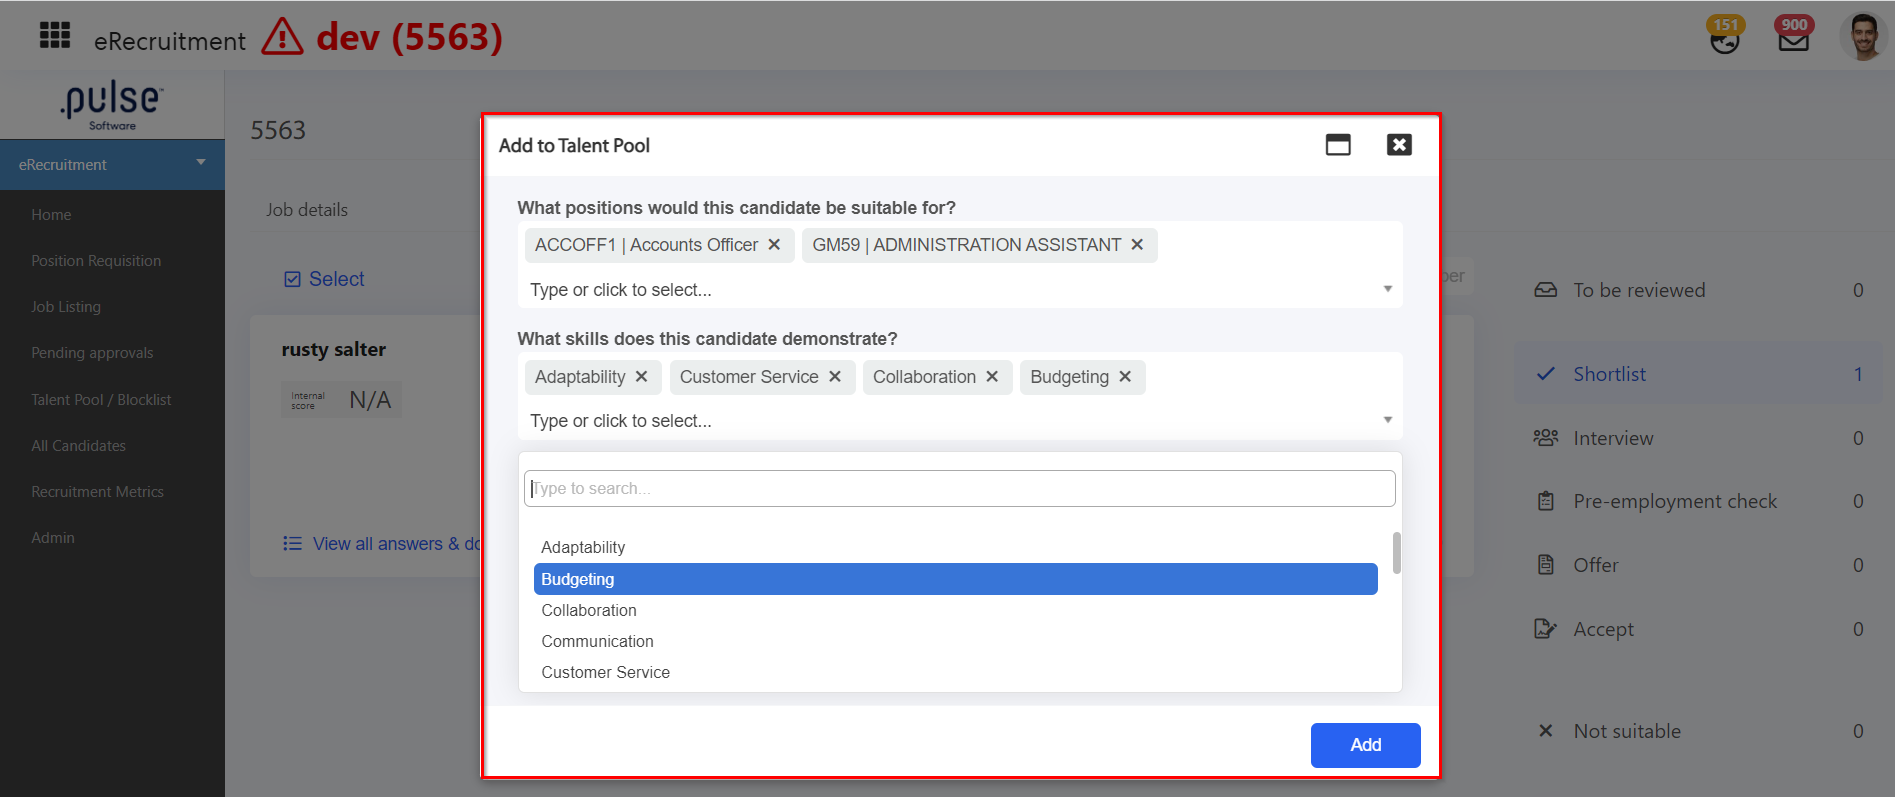
Step 3: Click on Add to Add this candidate to the Talent Pool.
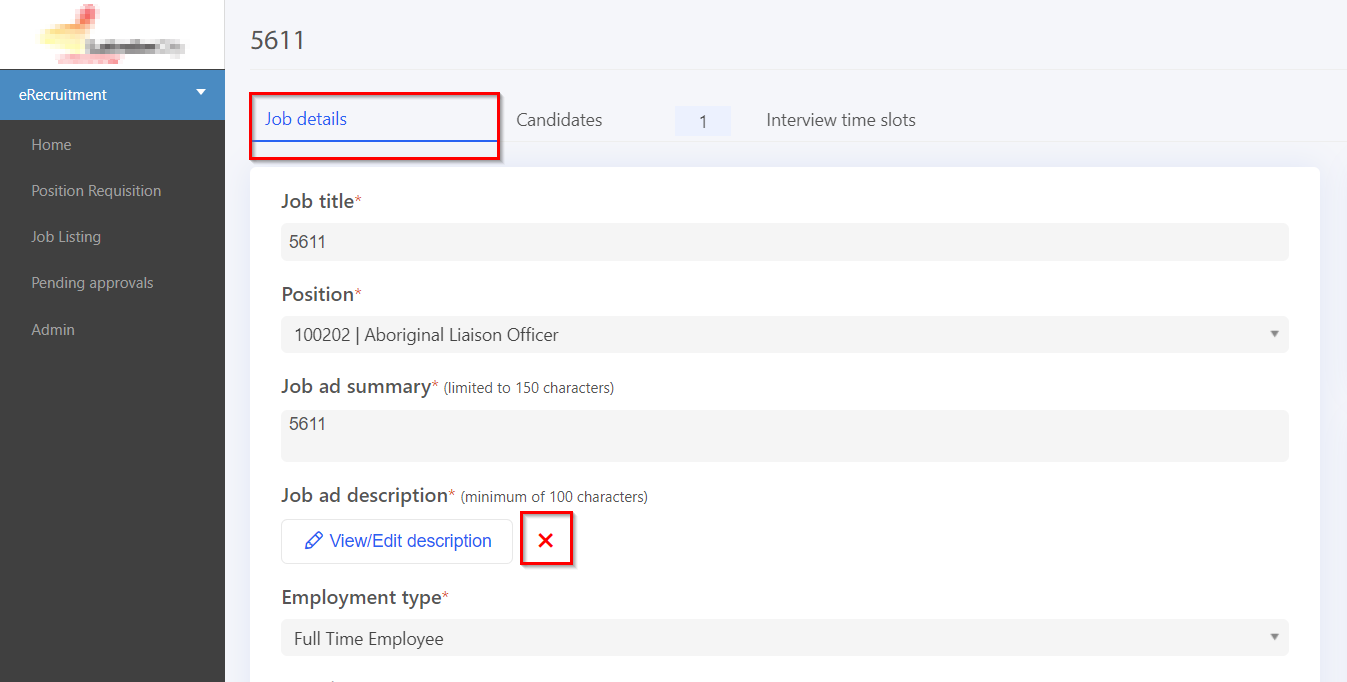
2.4 Ability to clear Job advertisement text on a JobTo view this feature, Follow the steps below:
Step 1: Login to Pulse --> Click on the eRecruitment Module --> Job Listing page
Step 2: Go to the Job details Tab --> Under Job ad description, pulse has added this new feature of deleting the job ad directly by click on the red cross icon, shown below in the screenshot.
By clicking on the Cross sign, a confirmation pop-up will appear to delete the job ad.
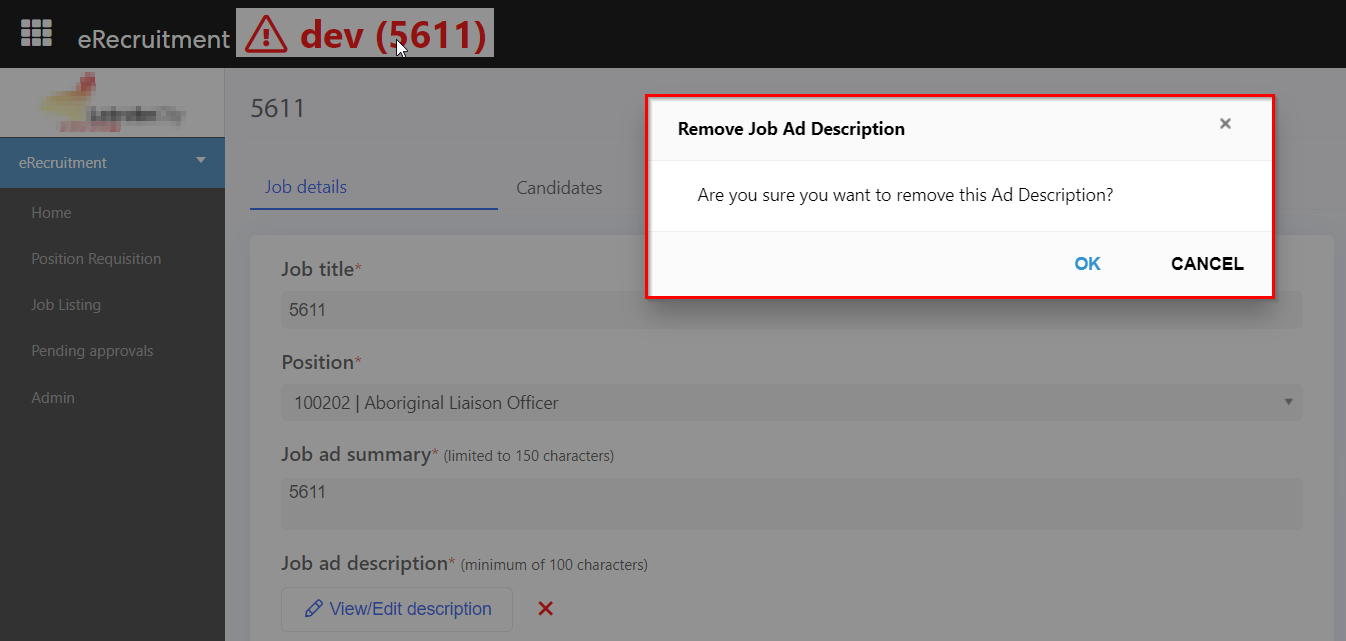
Step 3: Click on Ok to delete the Job ad.
3.New Incident & Claim Management
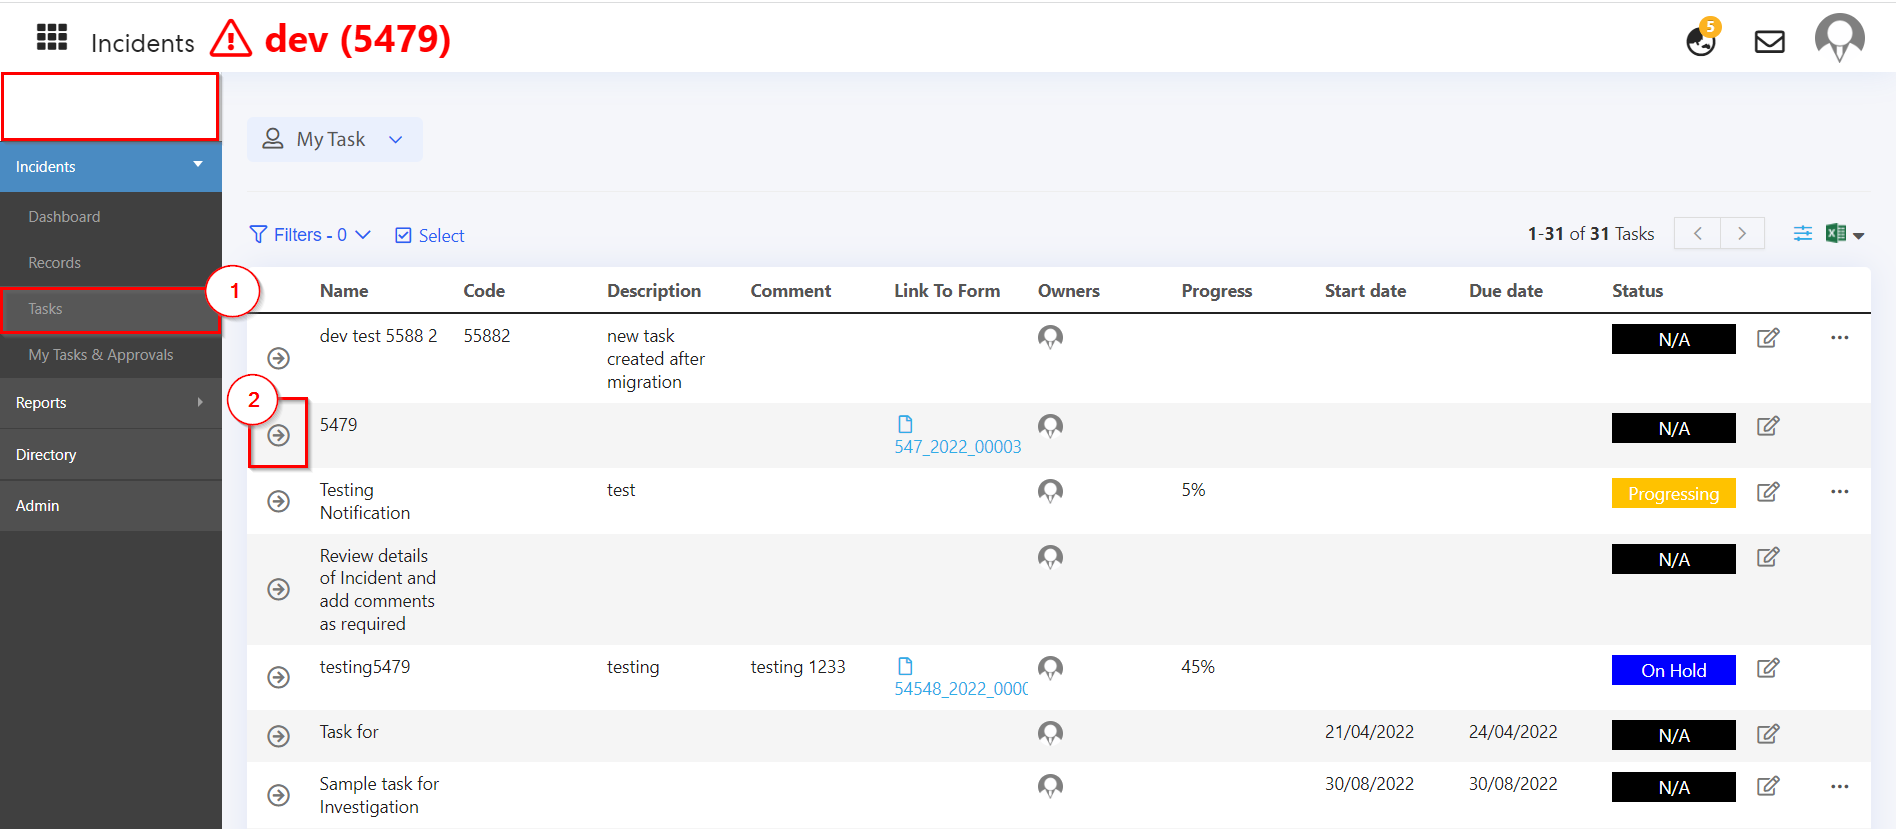
3.1 Ability to Update Task Progress from notification or emailsPulse has introduced a feature in the ICM module where the users have the ability to update their task progress while updating the tasks. An "Update Progress" button has been given to the users now which will enable them to update their progress from the same page.
Step 1: Login to Pulse --> Click on the Incident & Claim Management Module.
Step 2: Under the Incidents Tab --> Click on the Task Tab. A list of tasks allocated to the user will open up.
Click on View Button to view or update the task.
Step 3: A pop-up will appear with all the details of the task. The user can update the details and the progress of the task.
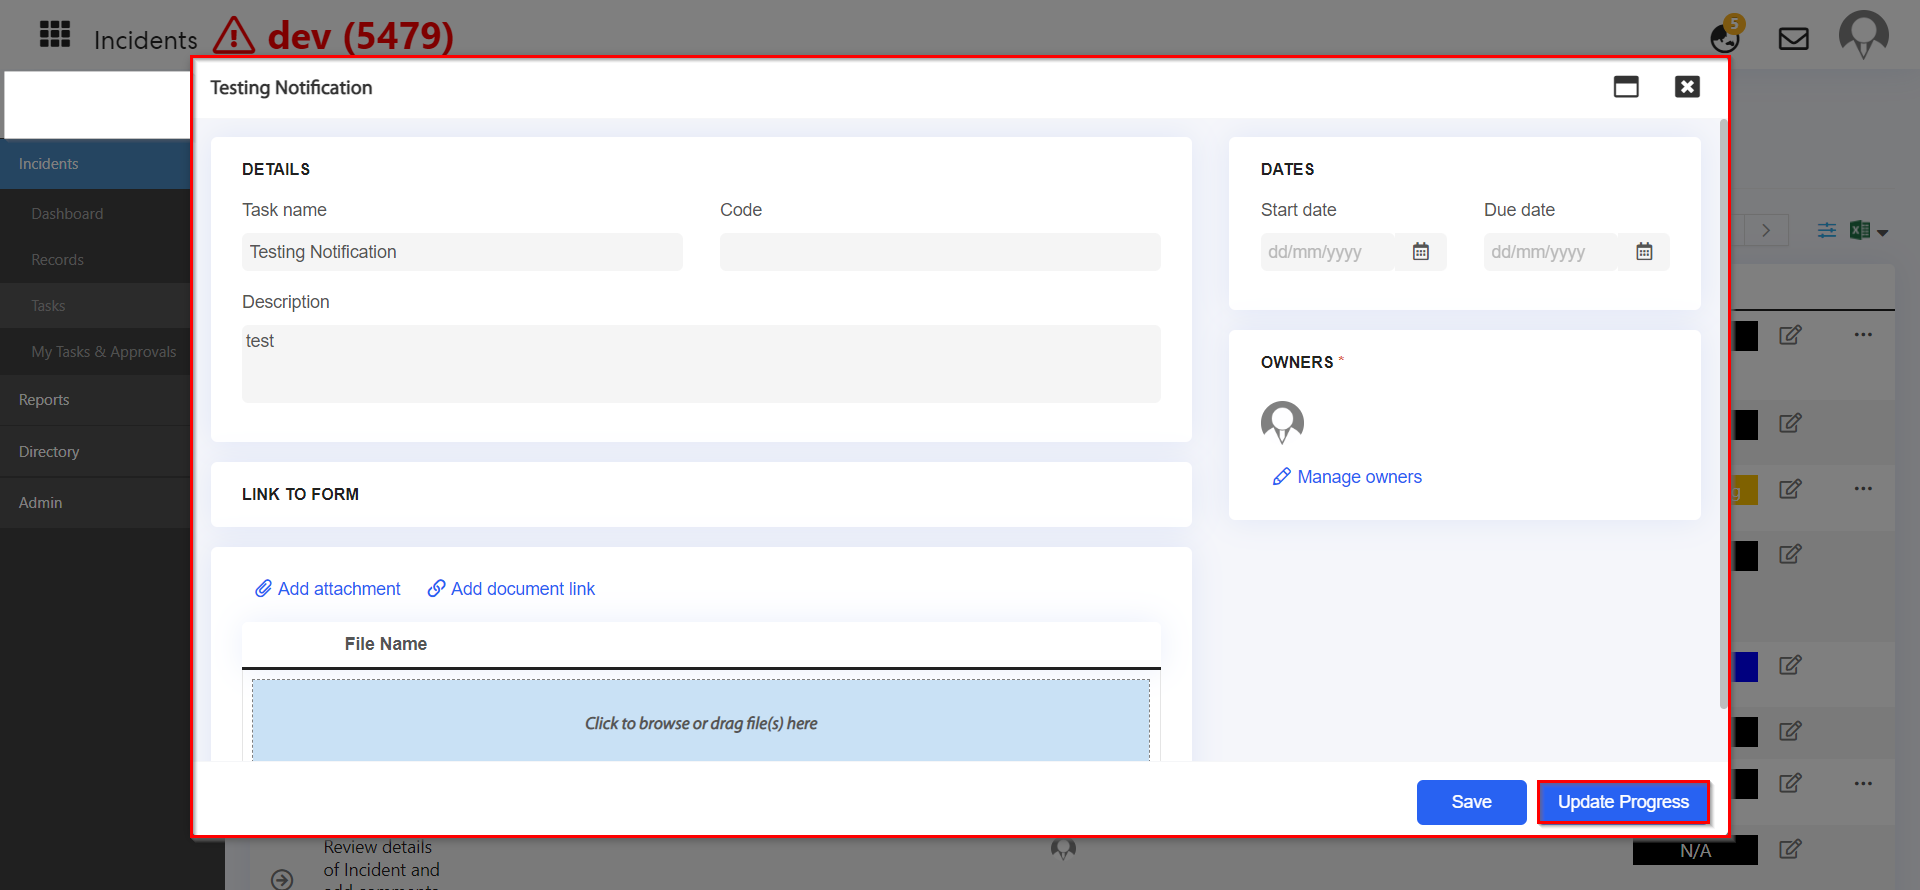
Step 4: Click on the Update Progress button to update the progress of the task. A new screen will appear where the users can update the status & progress, add attachments or links related to that Task.
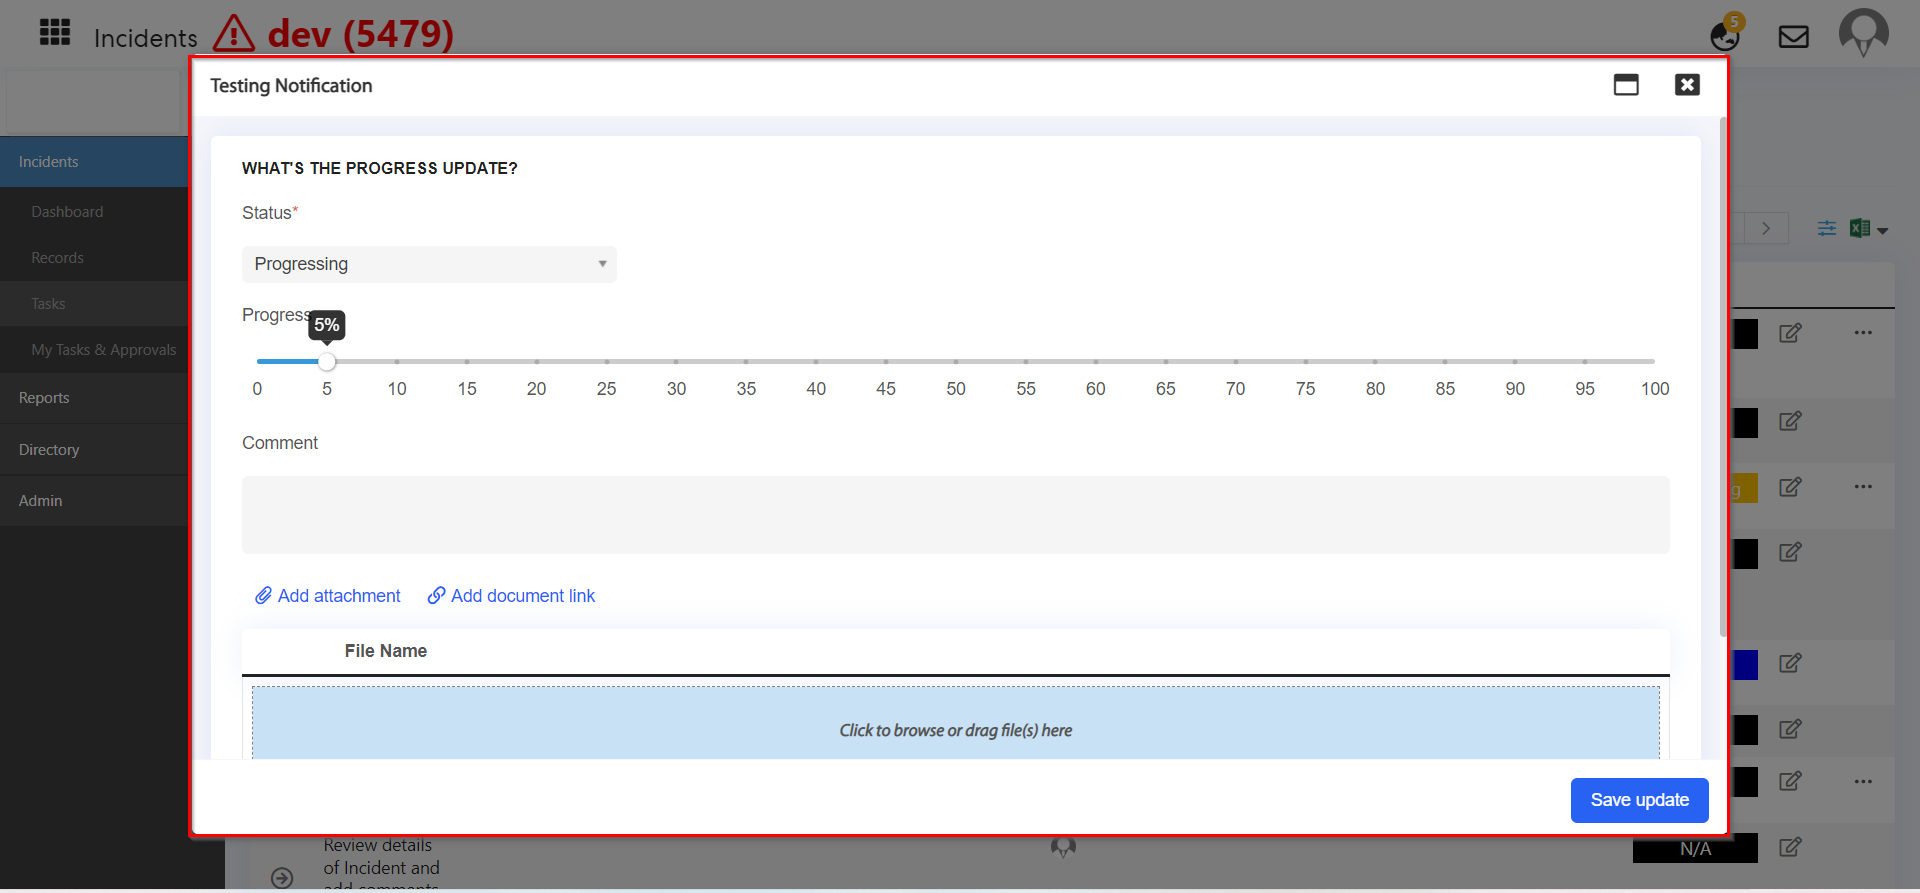
Step 5: Click on Save Update to save the changes.
4. HCM eLearning
4.1 Ability to manage bulk un-enrollments of eLearningsTo view how this feature works, follow the steps below:
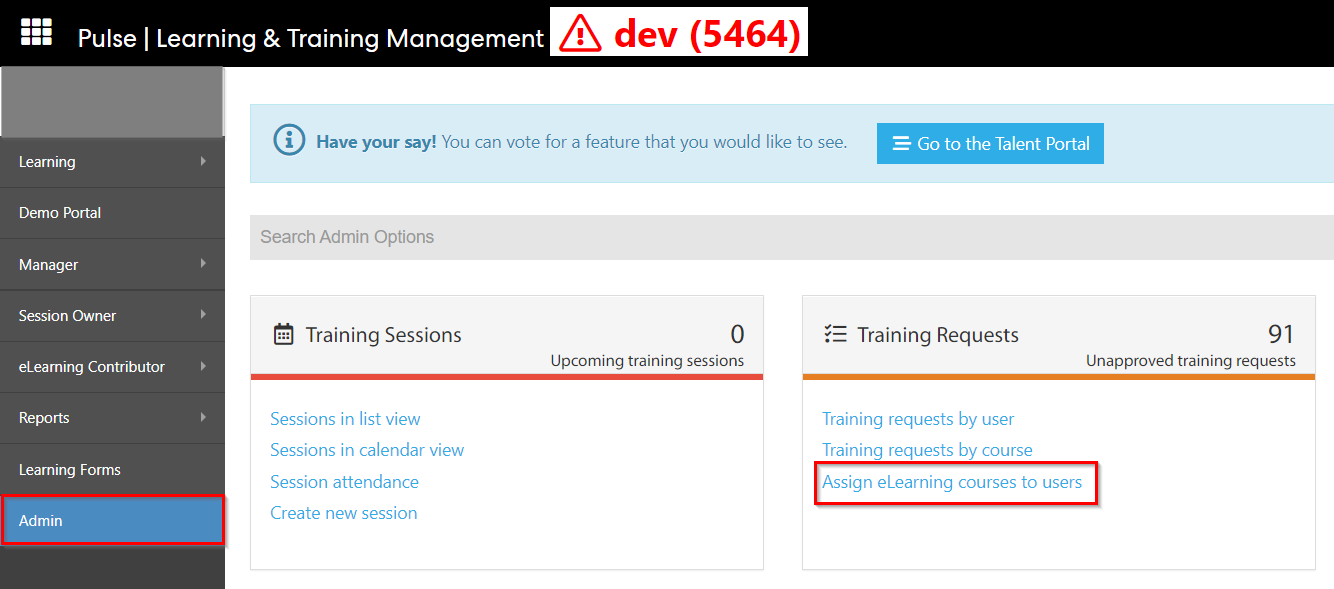
Step 1: Login to Pulse --> click on the eLearning Module --> go to the Admin tab --> Assign eLearning Courses to Users.
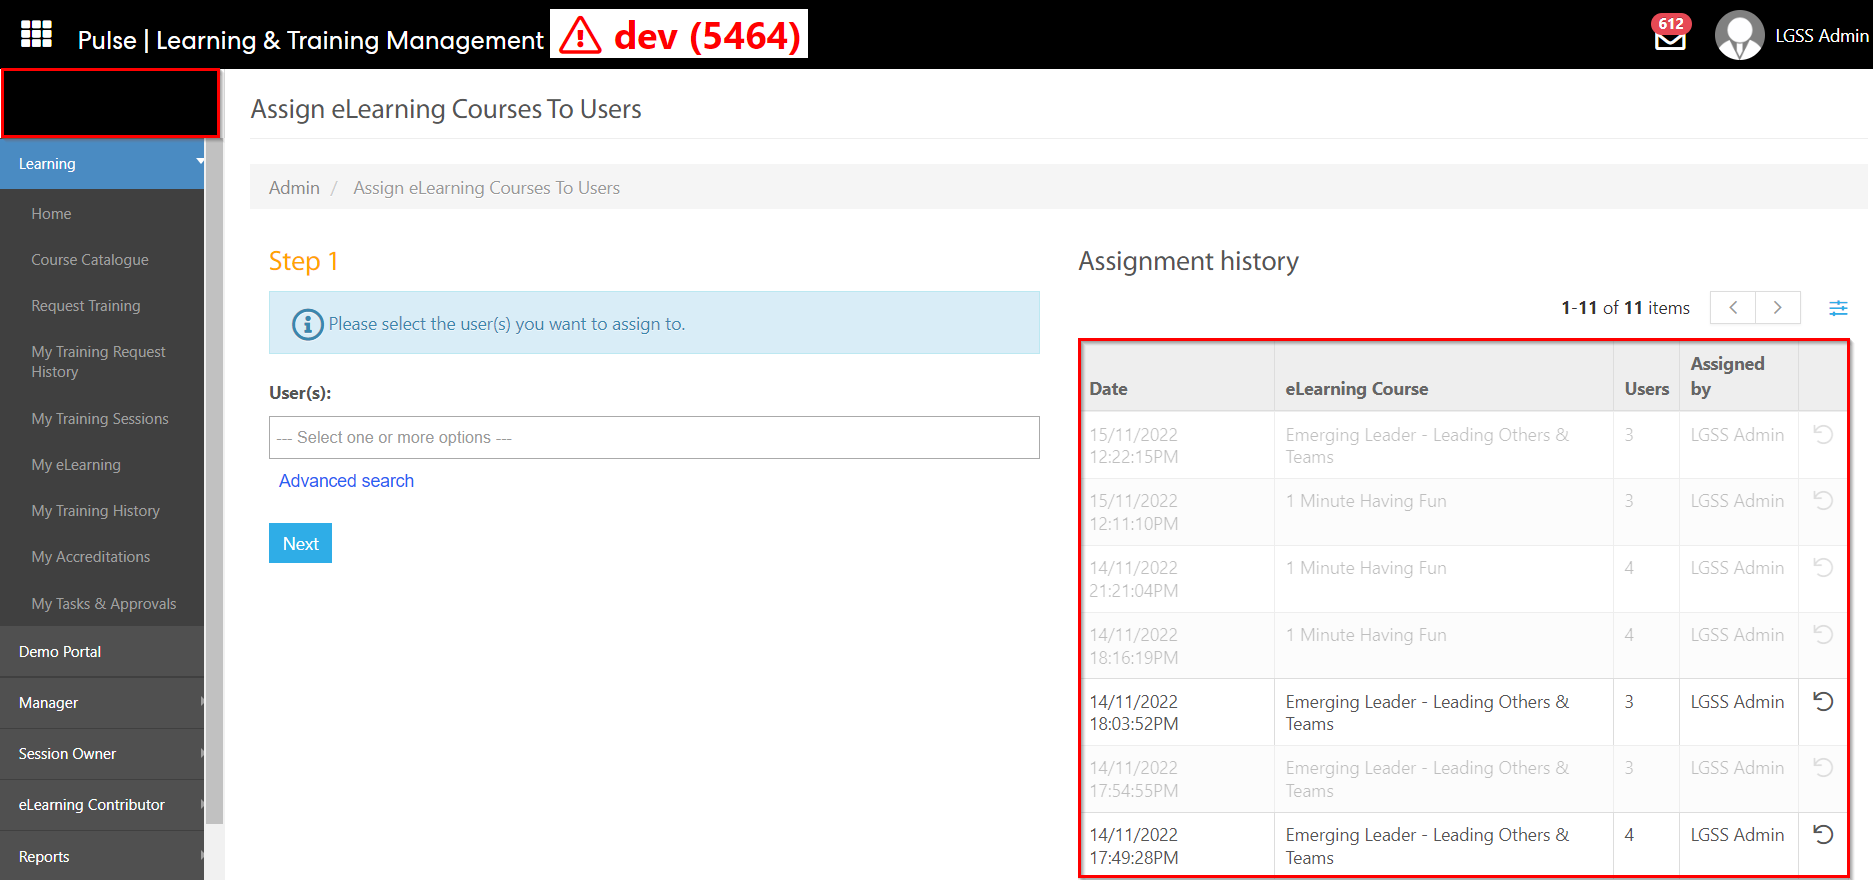
Step 2: In Step 1 of assigning eLearning courses to users, admins have the ability to view assignment history consisting of date, eLearning courses, users, assigned by and an Undo button.
Admins can undo the eLearning by clicking on the undo button from the assignment history.
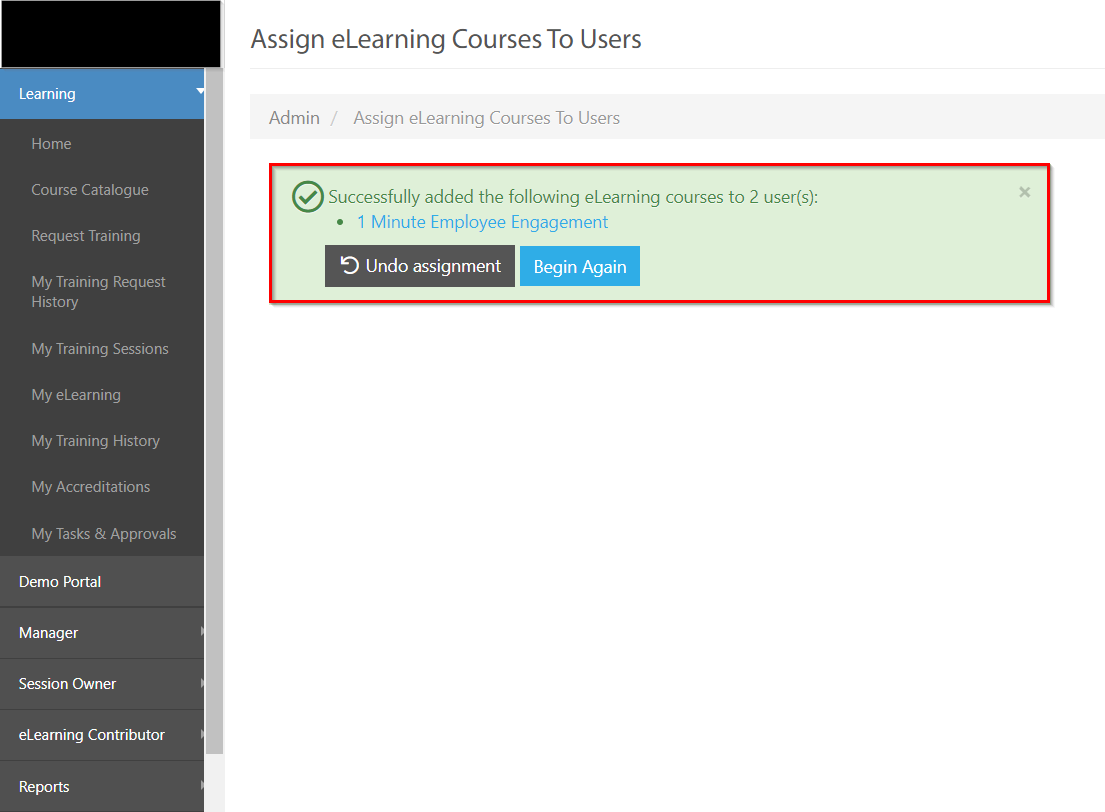
Step 3: The unenrollment can also be done after completing Step 2 and Step 3 of Assigning eLearning courses to users. Once a course is selected to be allocated and then a final email is sent to the user, admins will get a confirmation banner text.
An "Undo Assignment" button is given at this confirmation banner where the admins will have the ability to undo this enrollment for the user.
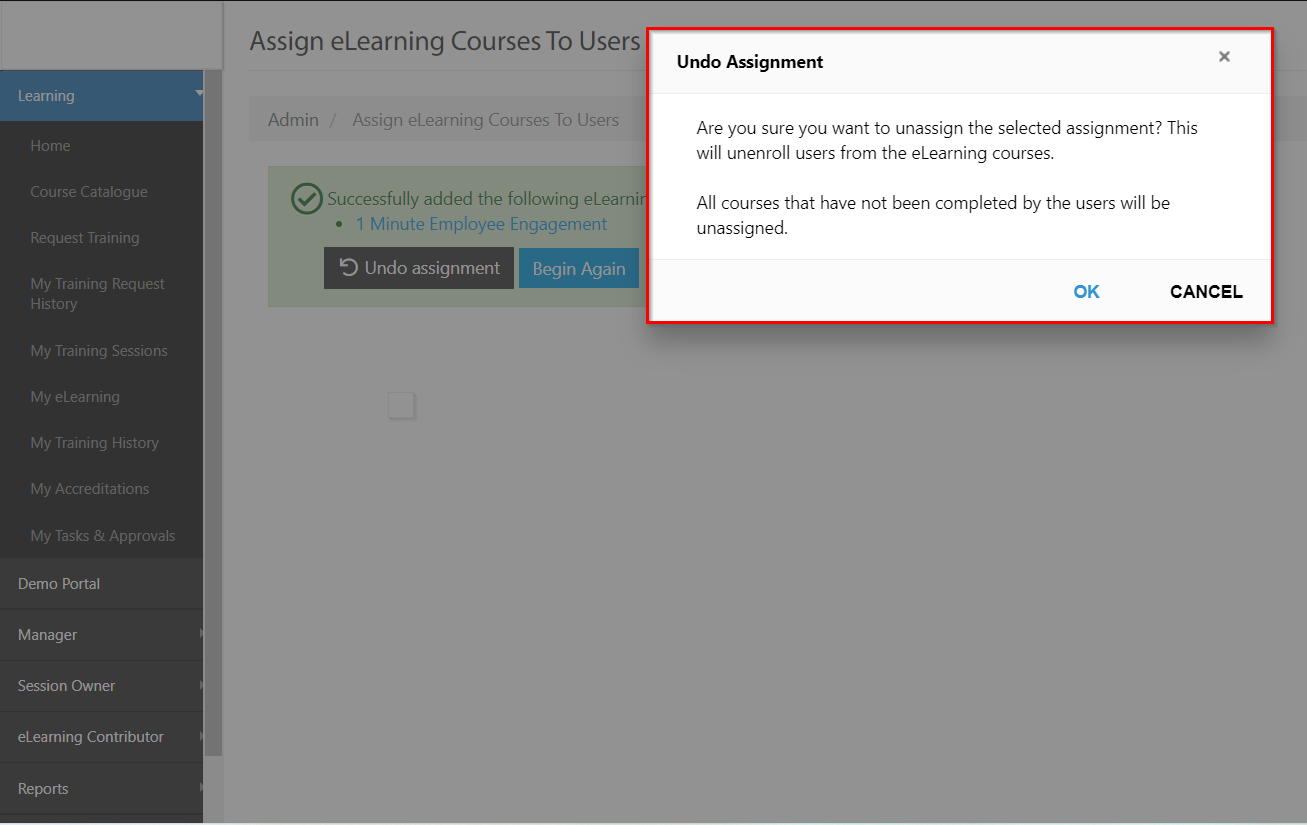
Click on Ok to save the changes or click on Cancel to discard the Undo Assignment.
Issues resolved
- Users can now edit the Location and Key Selling Points once a job has been posted to SEEK.
- Fixed an issue preventing the list of candidates from loading on the Candidate page.
Corporate Planning & Reporting
- Fixed an issue where the Completed date column was not populating with the Task's completed date when the task's progress is set to 100% and the "Automatically populate the task completed date as today's date when the progress is set to 100%" config key is enabled.
- Fixed an issue preventing the Google Map Plugin from working as expected.