Contents
1.Corporate Planning & Reporting Module
1.1 Ability to add Performance Measures against actions in the Action ImporterIn the CPR, CPR(AH), Compliance, and Audit, Admins can now import Performance Measures and Targets against actions, using the "New Action Importer". This will reduce the amount of manual work required after importing actions for a given year.
Step 1: Log in to Pulse and go to the CPR and CPR(AH), Compliance and Audit modules
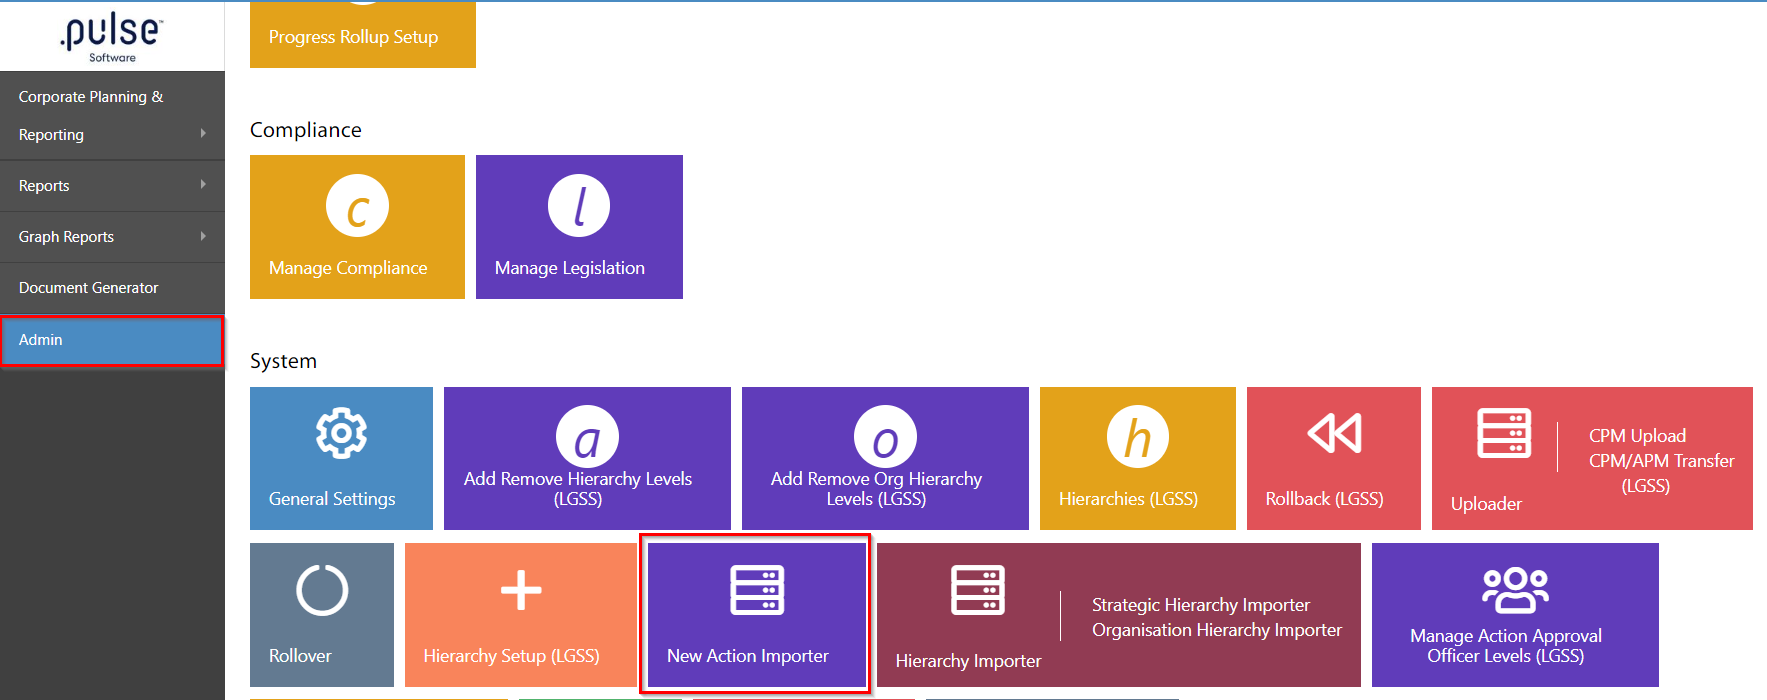
Step 2: Go to "Admins" section > "New Action Importer"

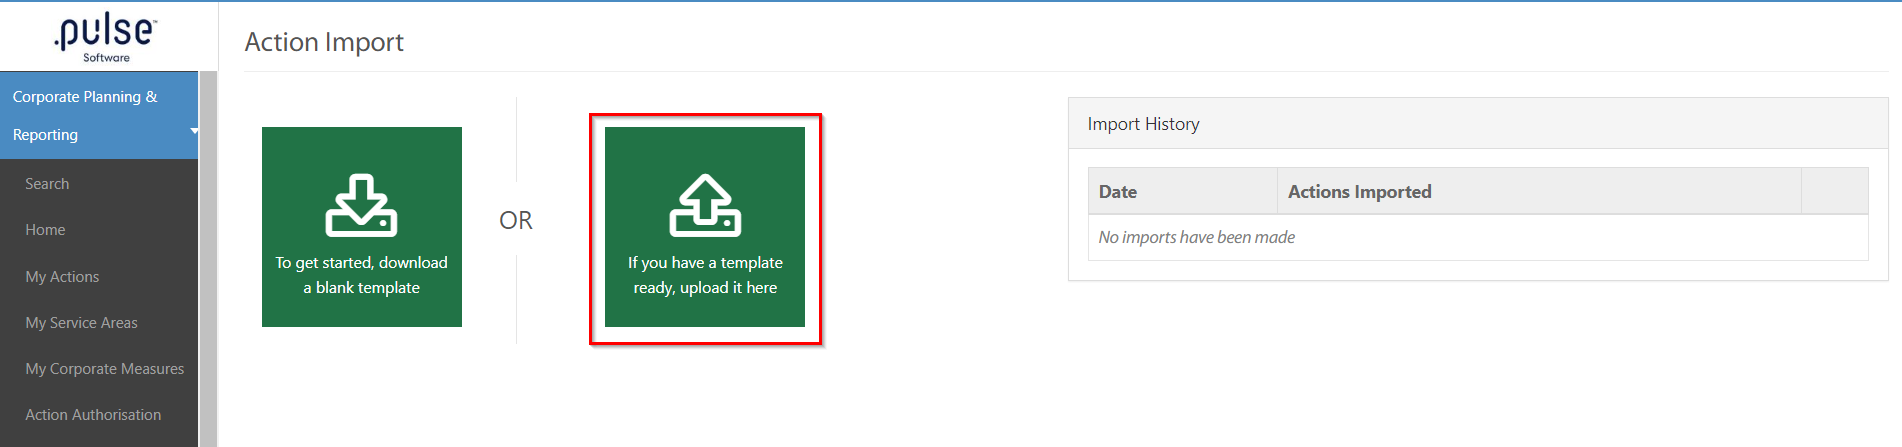
Download the blank Excel template by selecting the option labelled "To get started, download a blank template."

Step 3: An Excel file will be downloaded. Open the file and see a new sheet as "Performance Measures".

Note that required fields are indicated in red, while non-required fields are marked in blue.
Fill in the required fields with the information. For example,

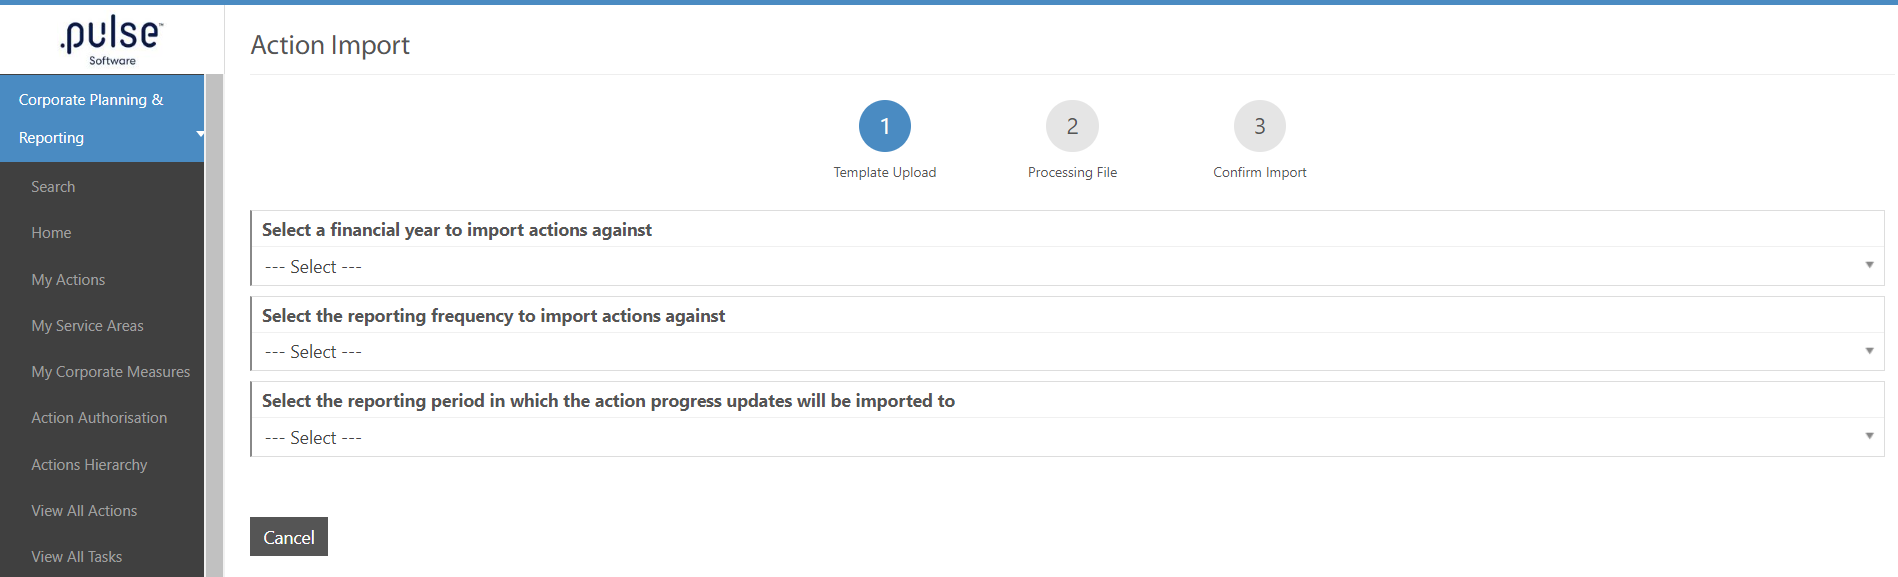
Step 4: Return to the "New Action Importer" section in CPR module to import the completed Excel sheet. Use the provided option to upload the template.

Fill in the required information and attach the attachment.
Once the Excel sheet is uploaded back into the system, the system will do a error check to check whether all the information is complete and matches with the actions.
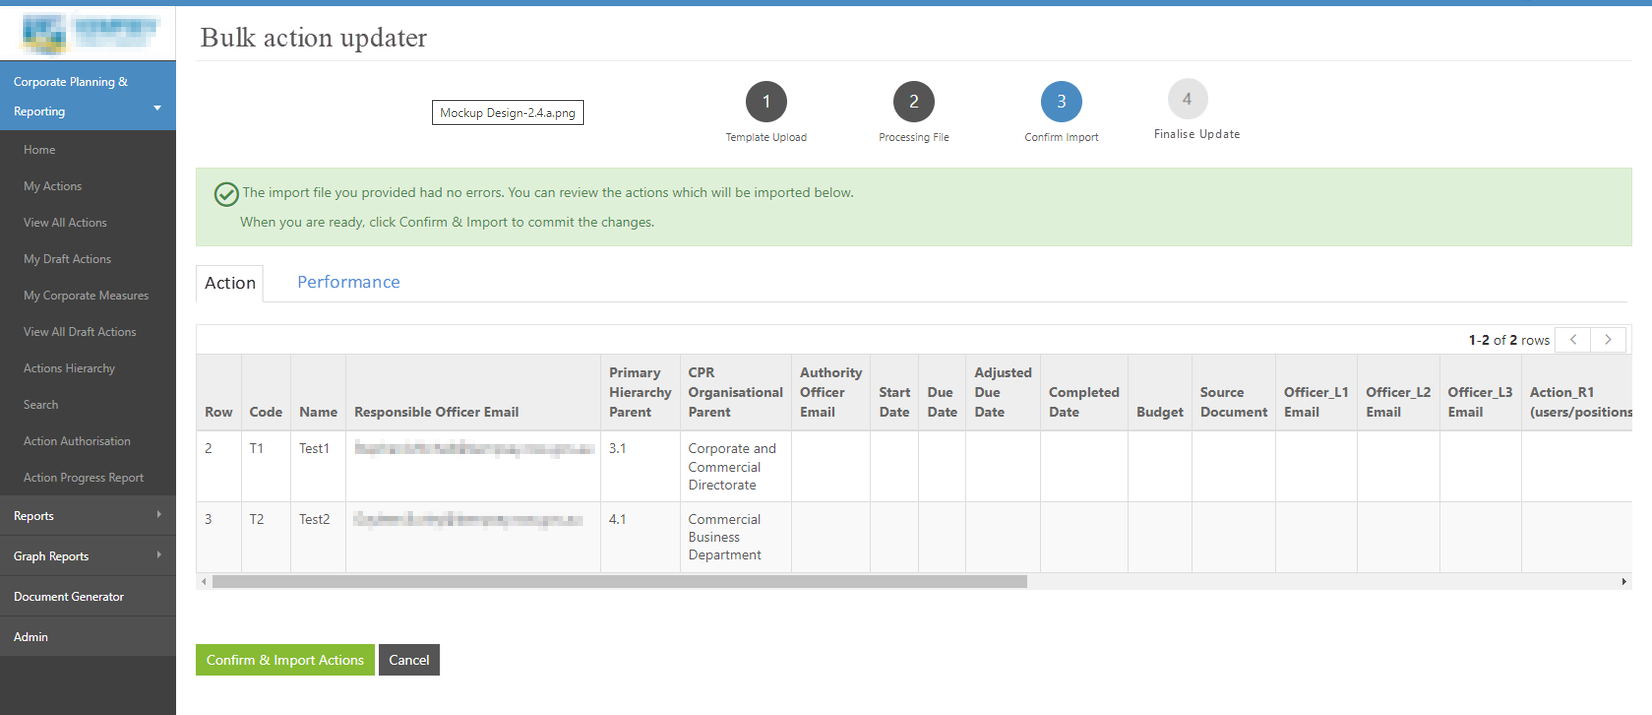
Step 5: The system will conduct an error check to verify the information If no errors are detected, the system will indicate "no errors."
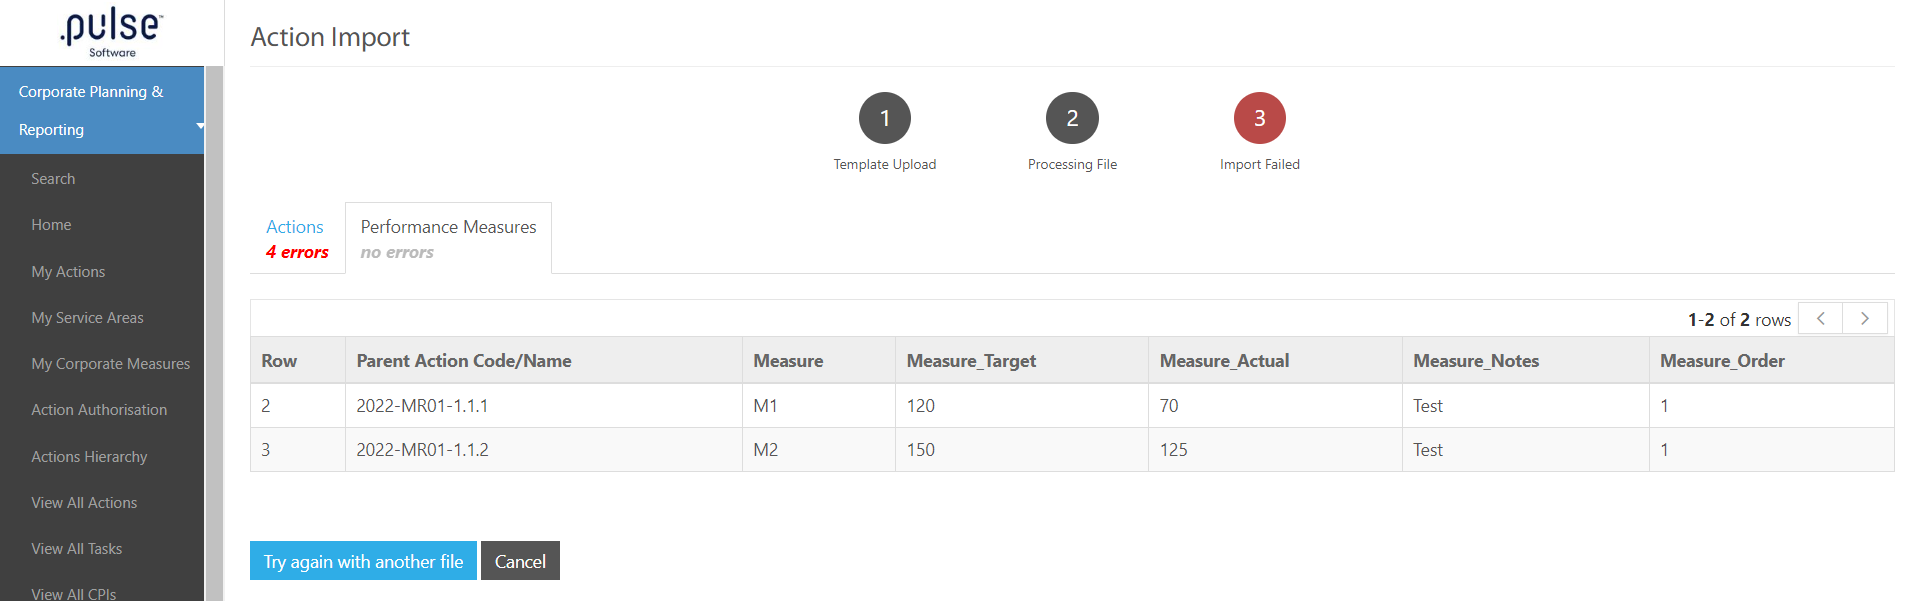
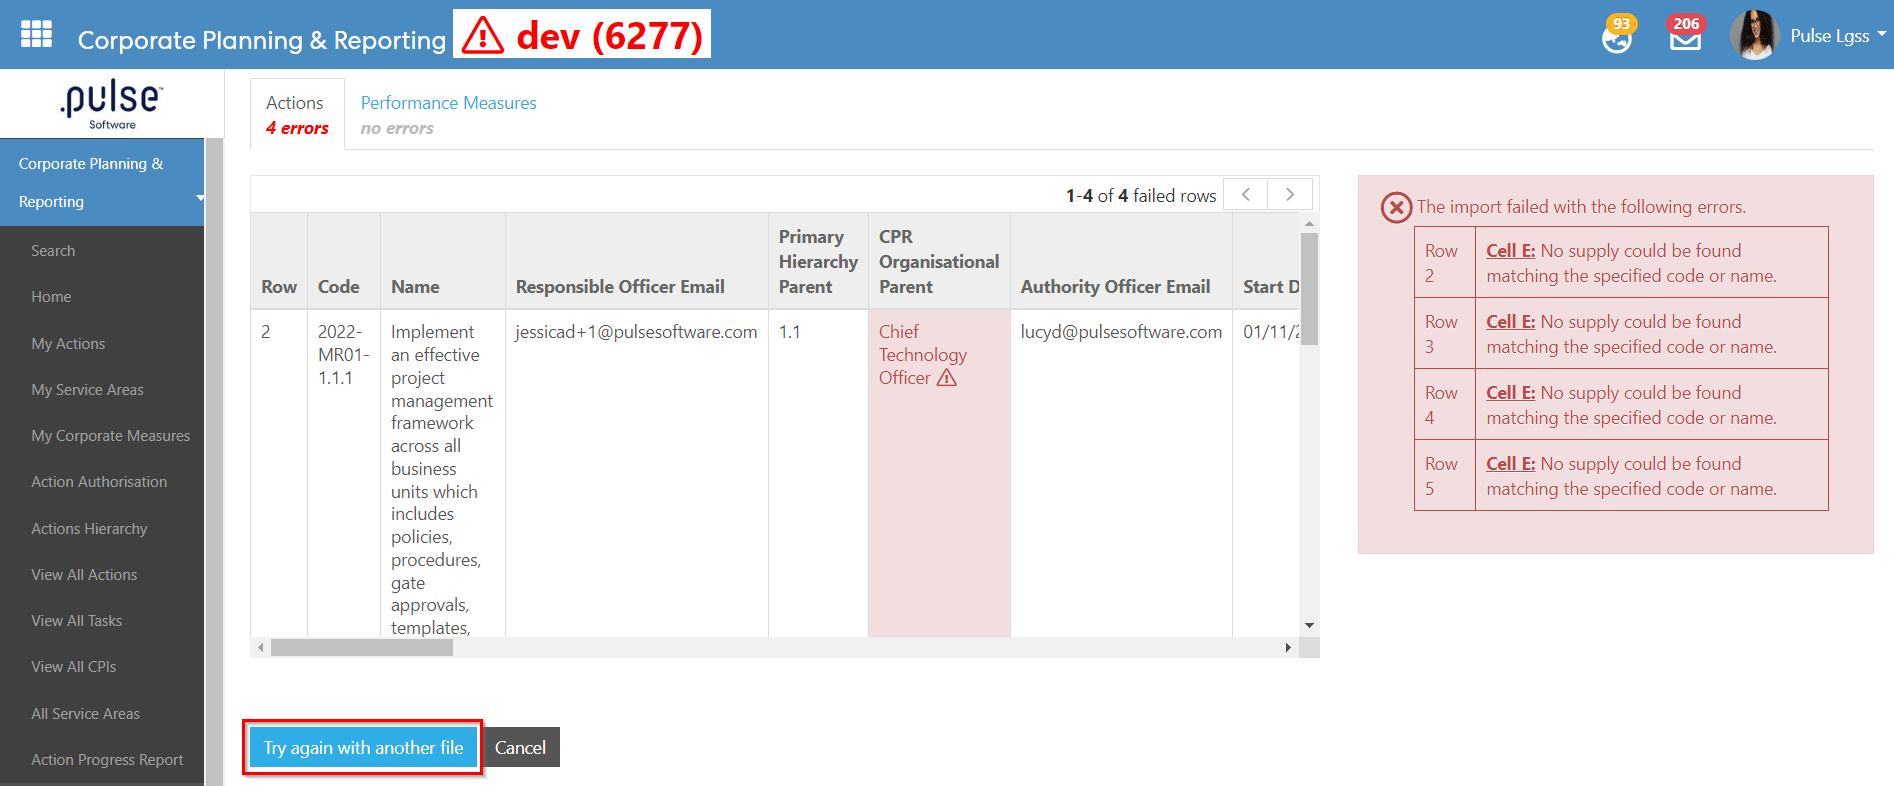
In the event of errors, the system will report the number of errors identified and provide references to the corresponding locations within the Excel sheet.
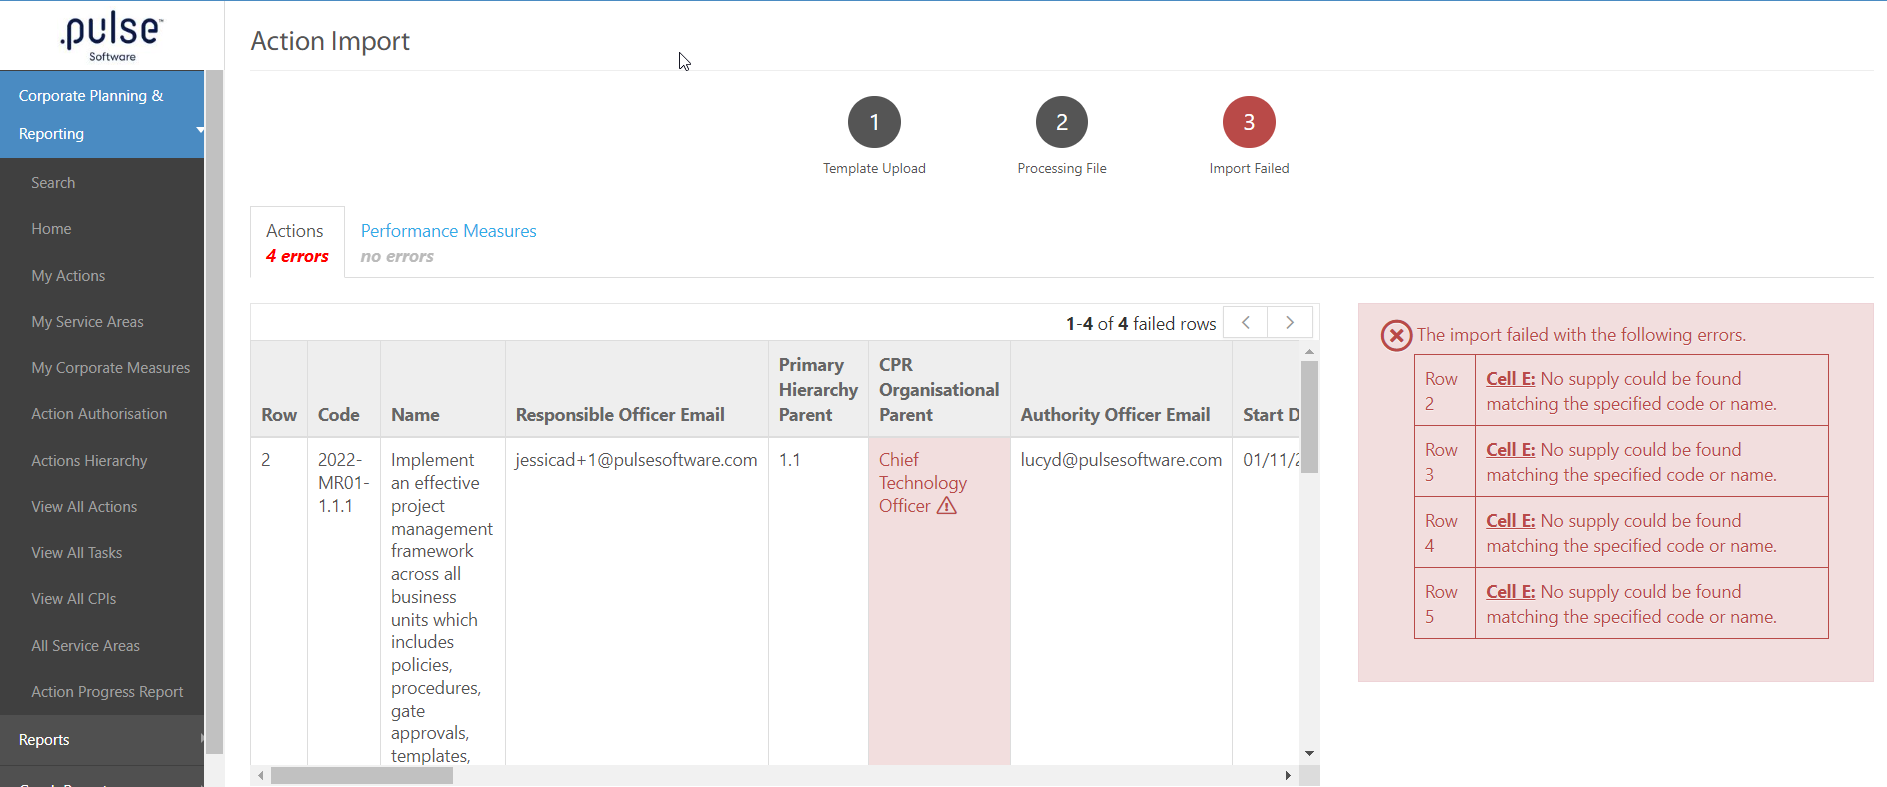
Admins can try re-uploading the file by clicking on "Try again with another file".
If no errors are found, the system will display a confirmation message. To proceed with the import, click the "Confirm & Import Actions" butto.
In the CPR, CPR(AH), Compliance, and Audit modules, when admins use the "New Action Importer", Admins can now import Action Approval Officer using the Action Importer
Step 1: Go to "Admins" section > "New Action Importer"
Step 2: Download the blank Excel template by selecting the option labelled "To get started, download a blank template."

Step 3: An Excel file will be downloaded with new columns in the Action sheet where admins will be able to add Action Roles against the actions.
The new columns are specified below:
- OfficerL_L1(email)
- OfficerL_L2(email)
- OfficerL_L3(email)
Step 4: Admins can fill the action approval officer column by adding the email ID for the user. Once admins fills the action approval officer in the excel sheet, they can then upload the file back into the system.
Step 5: The system will run the validation check to check whether all the information is correct.
Note: System will show the same "Error Message" as in Step 5 of 1.1.
1.3 Ability to add Action Roles against actions in the Action ImporterIn the CPR, CPR(AH), Compliance, and Audit modules, when admins use the "New Action Importer", Admins can now import Action Roles using the Action Importer
Step 1: Go to "Admins" section > "New Action Importer"
Step 2: Click on the "To get started, download a blank template" to download a blank excel sheet template.
Step 3: An Excel file will be downloaded with new columns in the Action sheet where admins will be able to add Action Roles against the actions.
The new columns are specified below:

Step 4: Admins can fill the action roles column by adding the email ID or the position of the user. Once admins fills the Action roles in the excel sheet, they can then upload the file back into the system (Admin > New Action Importer > "If you have a template ready, upload it here.")
Step 5: The system will run the validation check to check whether all the information is correct.
Note: System will show the same "Error Message" as in Step 5 of 1.1.
2. Onboarding Module
2.1 Capture Accreditations through Onboarding TasksPulse has added the ability to capture Accreditations in the Onboarding module through Staff Tasks, which are integrated with the Learning and Accreditation module. Introducing the assignment of accreditation tasks to an onboarding staff streamlines the onboarding process by effectively managing and tracking essential accreditations in the eLearning Module.
A) Admins now have the ability to capture Accreditations as a Task within the Onboarding Module.
Step 1: Login to Pulse and go to the Onboarding Module.
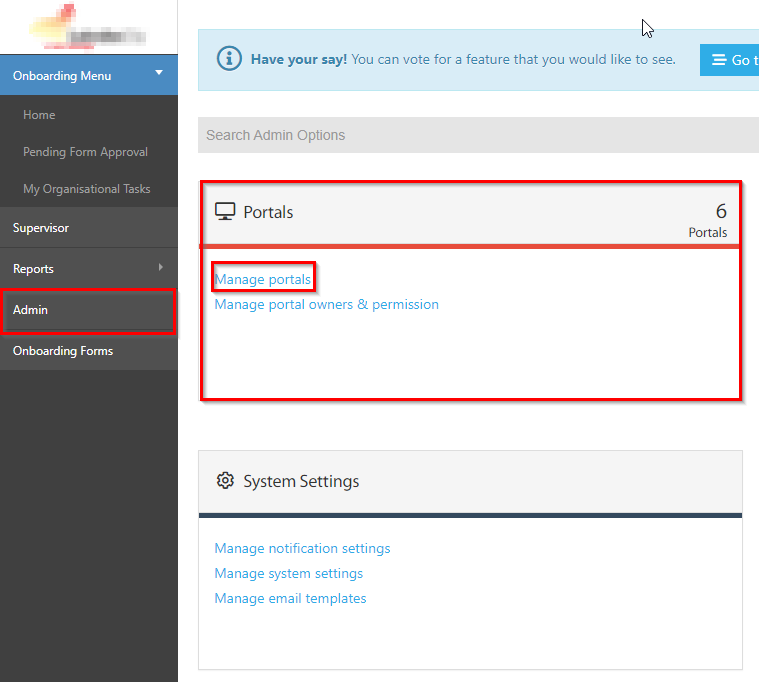
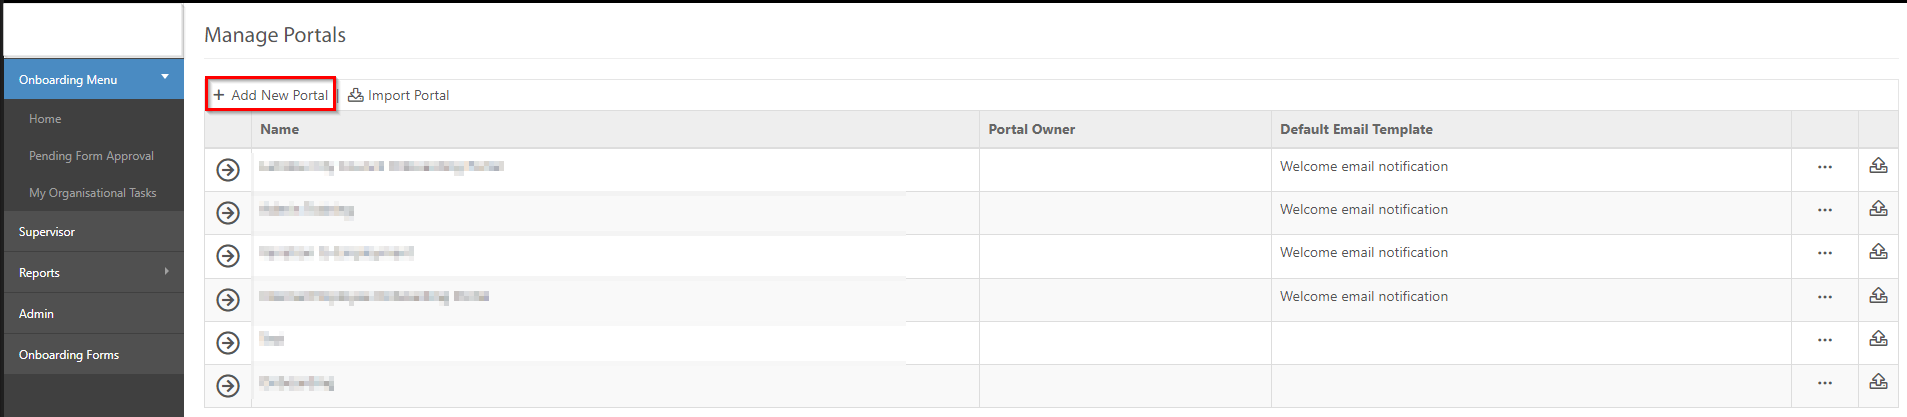
Step 2: Proceed to the Admin Page and select "Portals" > "Manage Portals."
Step 3: Within the Manage Portals section, admins can choose to either add a new portal or modify an existing one to enable the feature.
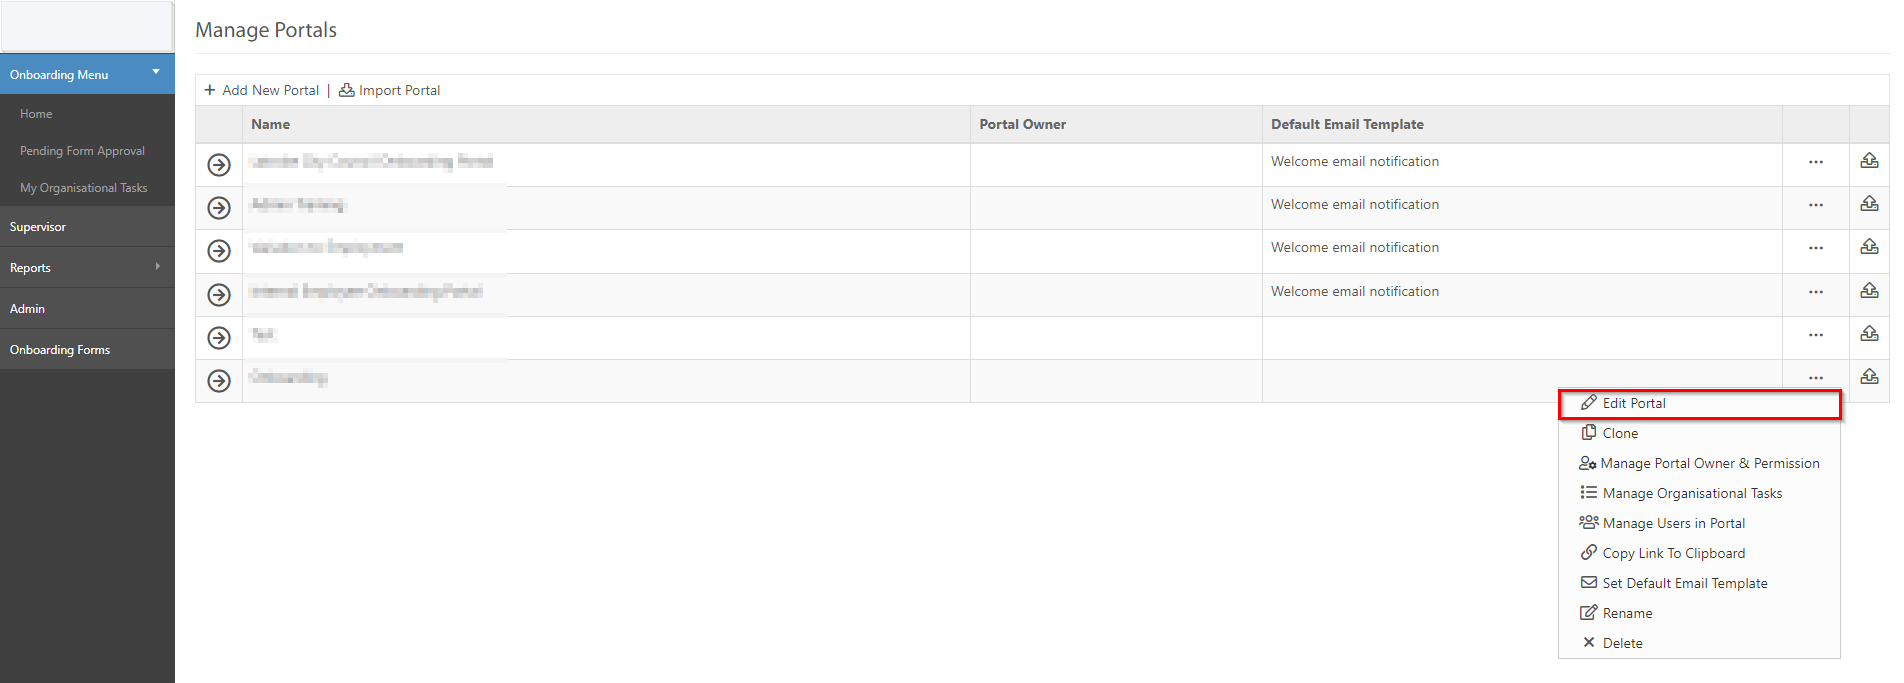
a. To modify an existing portal, click on "Edit Portal" and select "My Tasks" to add a new Task.
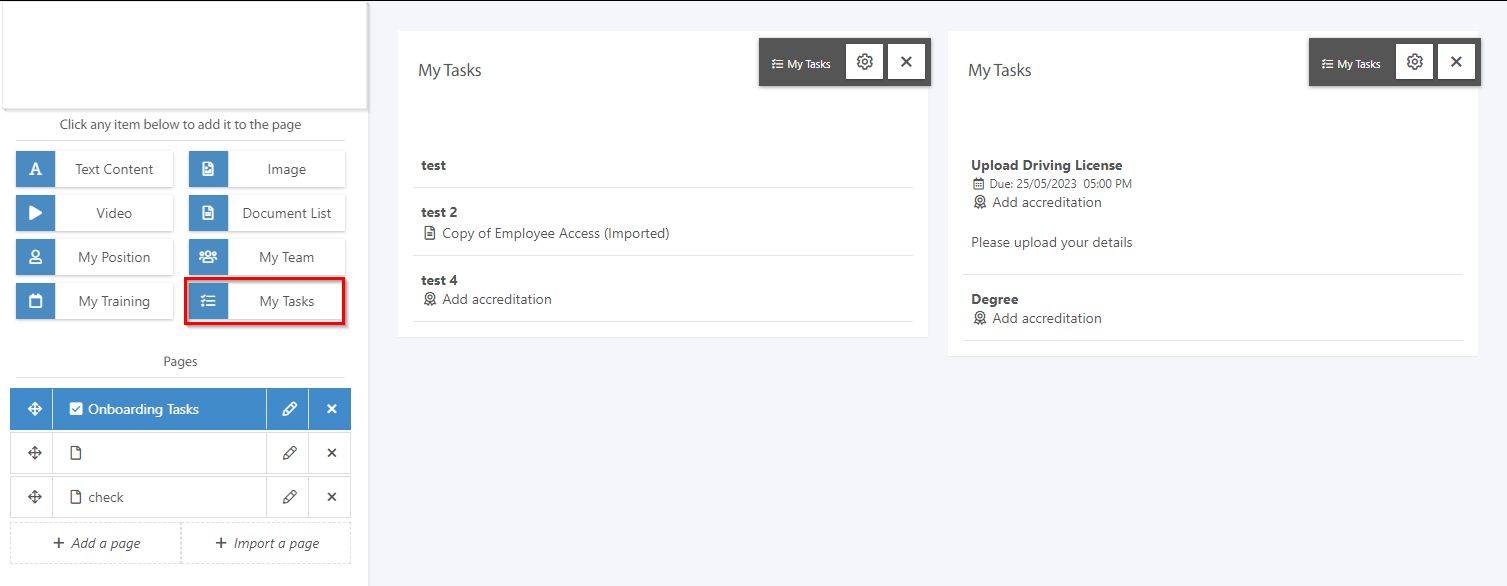
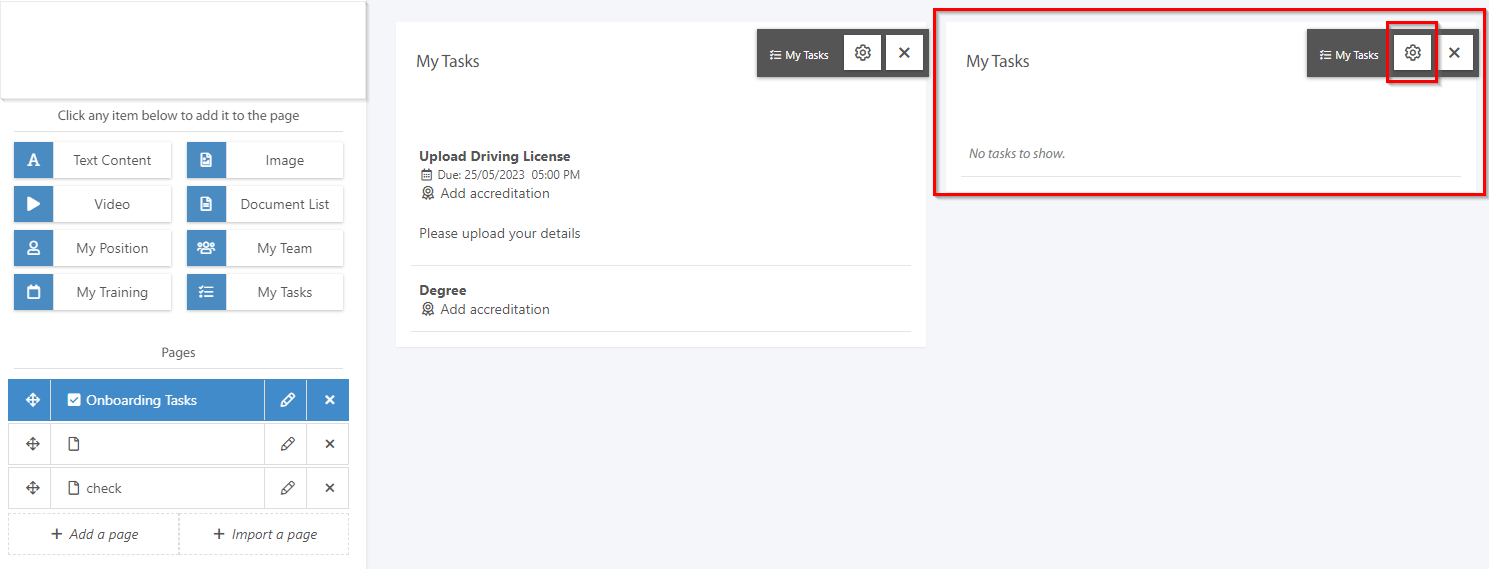
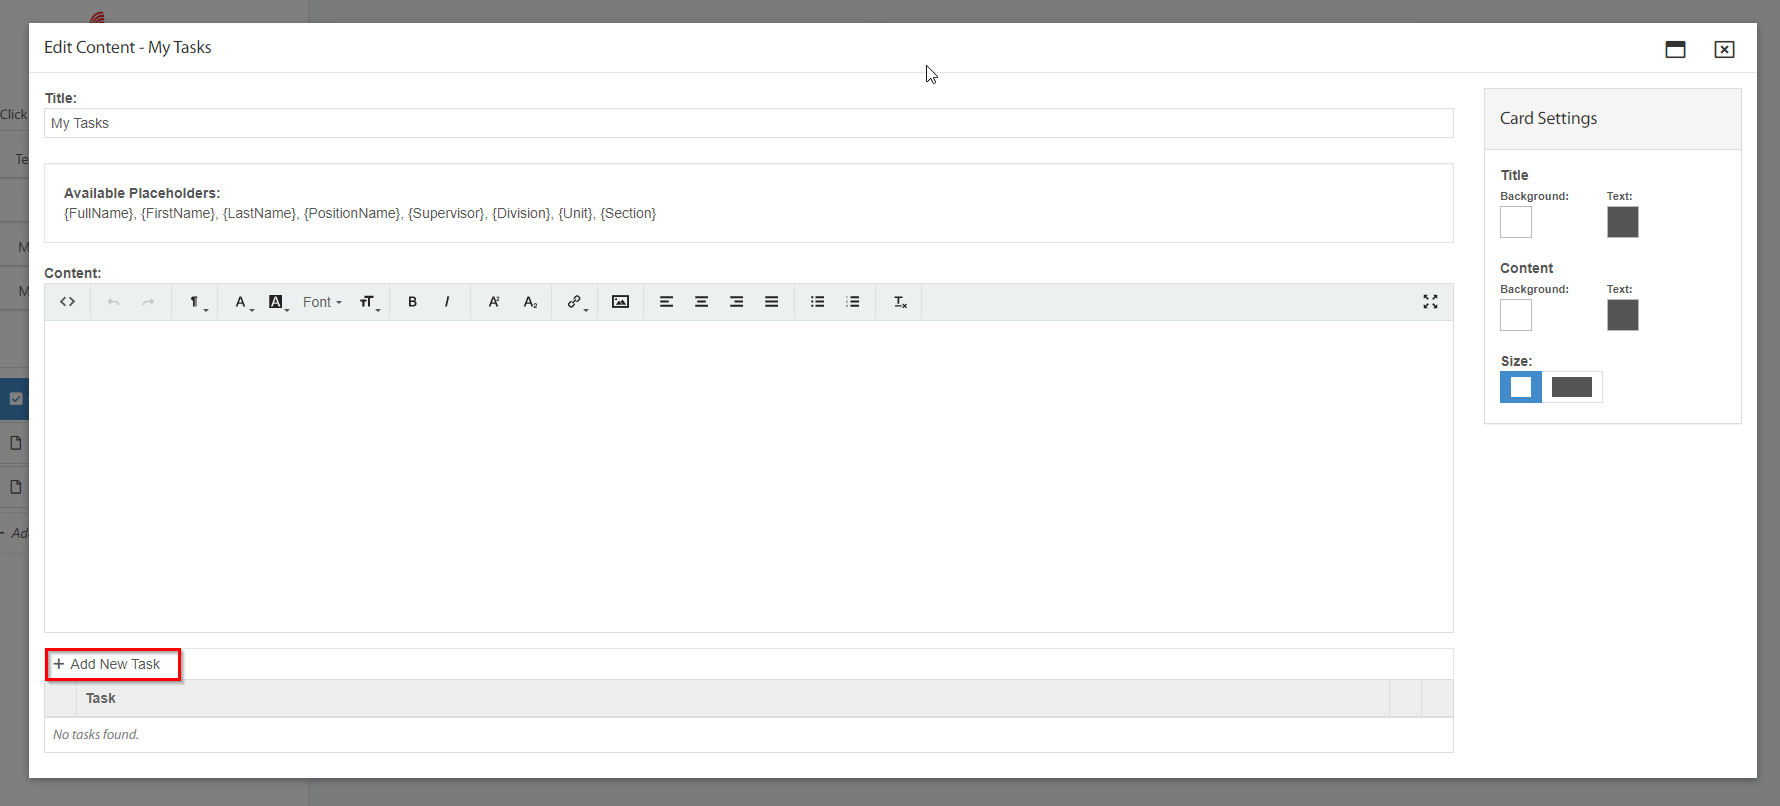
b. Locate the "Settings" icon in the My Task drawer and click on it to access the necessary configuration options.
Step 4: A pop-up window will appear, enabling admins to create a new task. Select "Add New Task" to proceed.
Step 5: Admins can see a new radio button to add Accreditation as a new Task and they can also select the type of Accreditation wanted from the user.
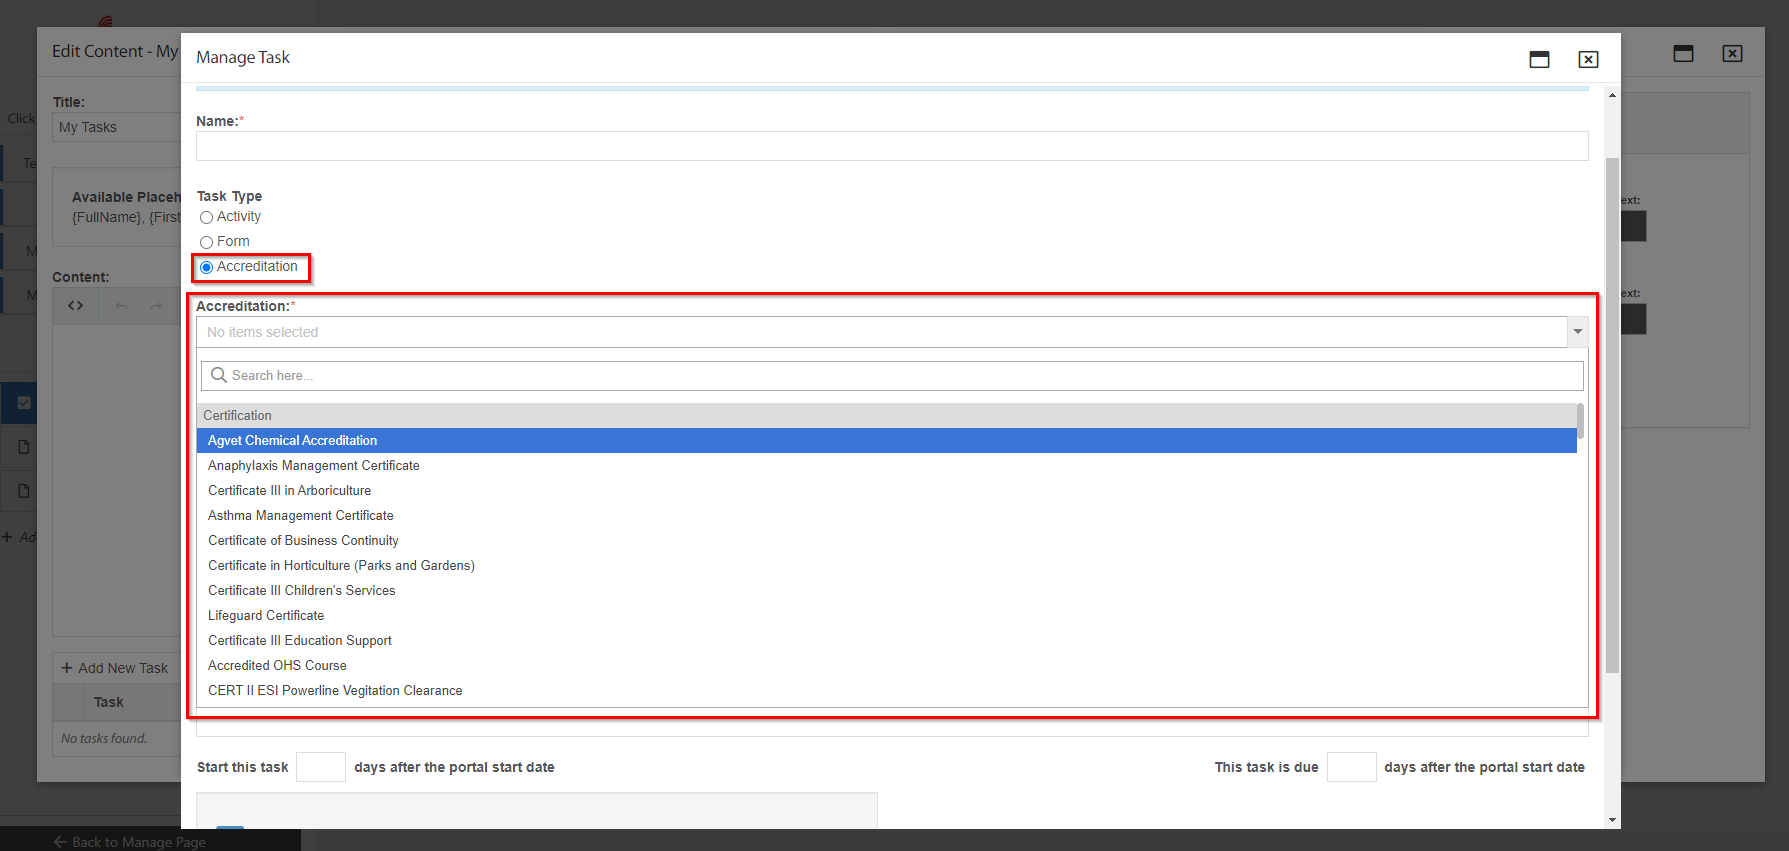
Once admins adds the Accreditation, they can be viewed under the My Task drawer.
When the user log in to Pulse, and go to the Onboarding Module, they can see all the tasks that they have to complete.
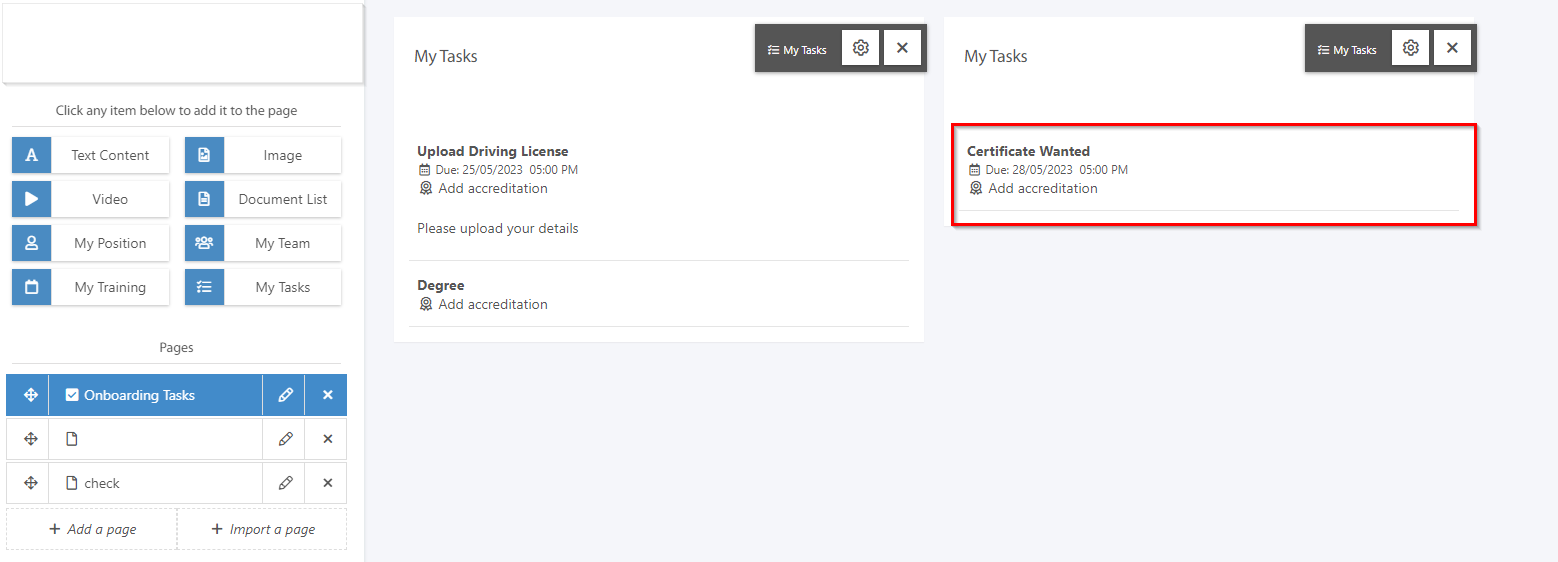
Users will be able to see the Accreditation Task that they have to complete as a part of the Onboarding Process.
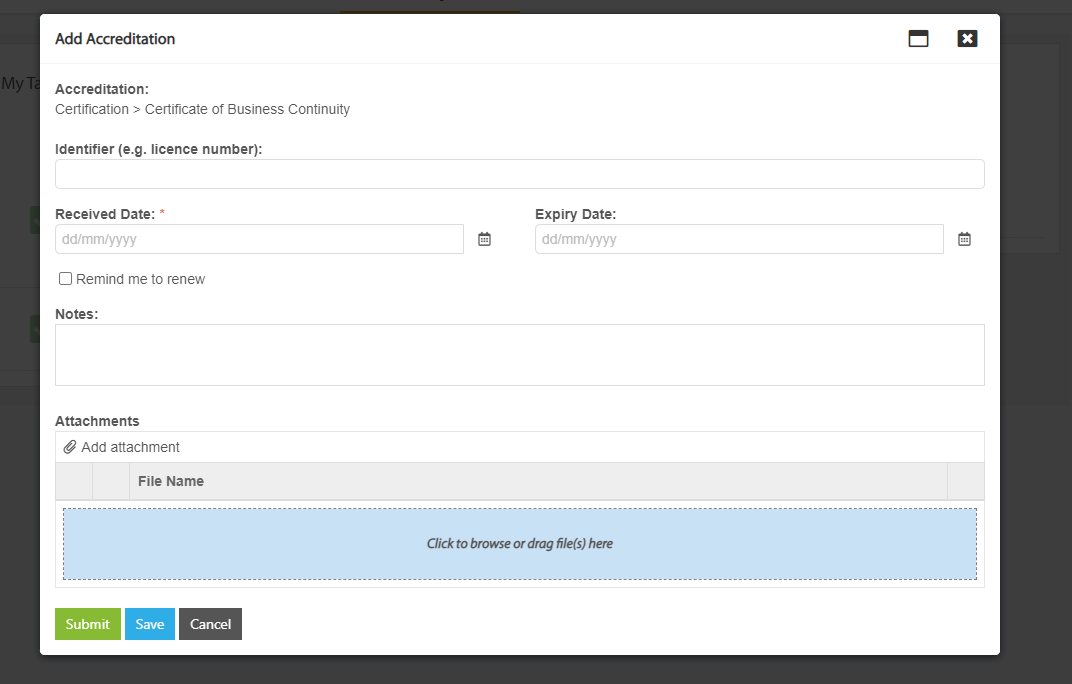
a. Users can attach the required accreditation by selecting the "Add accreditation" button.
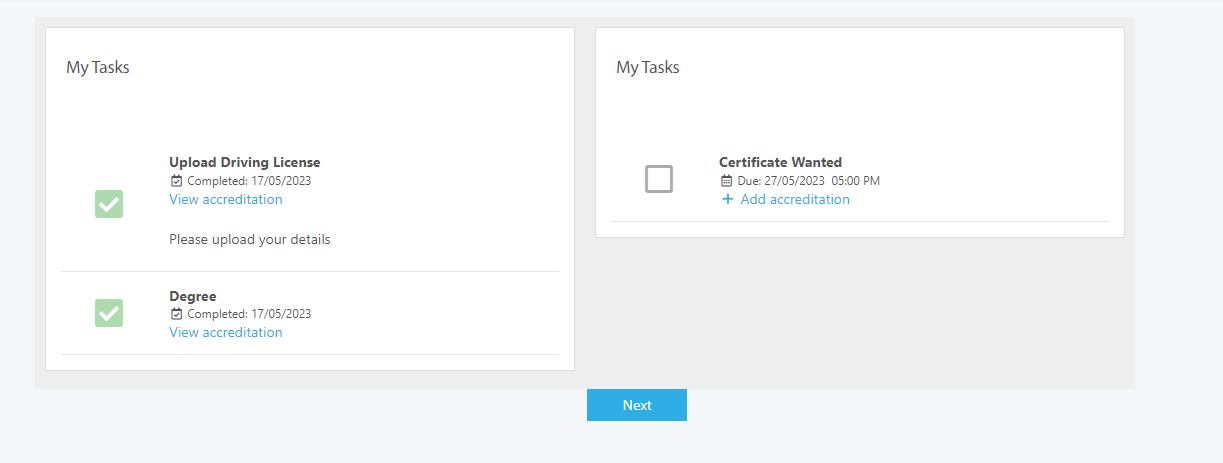
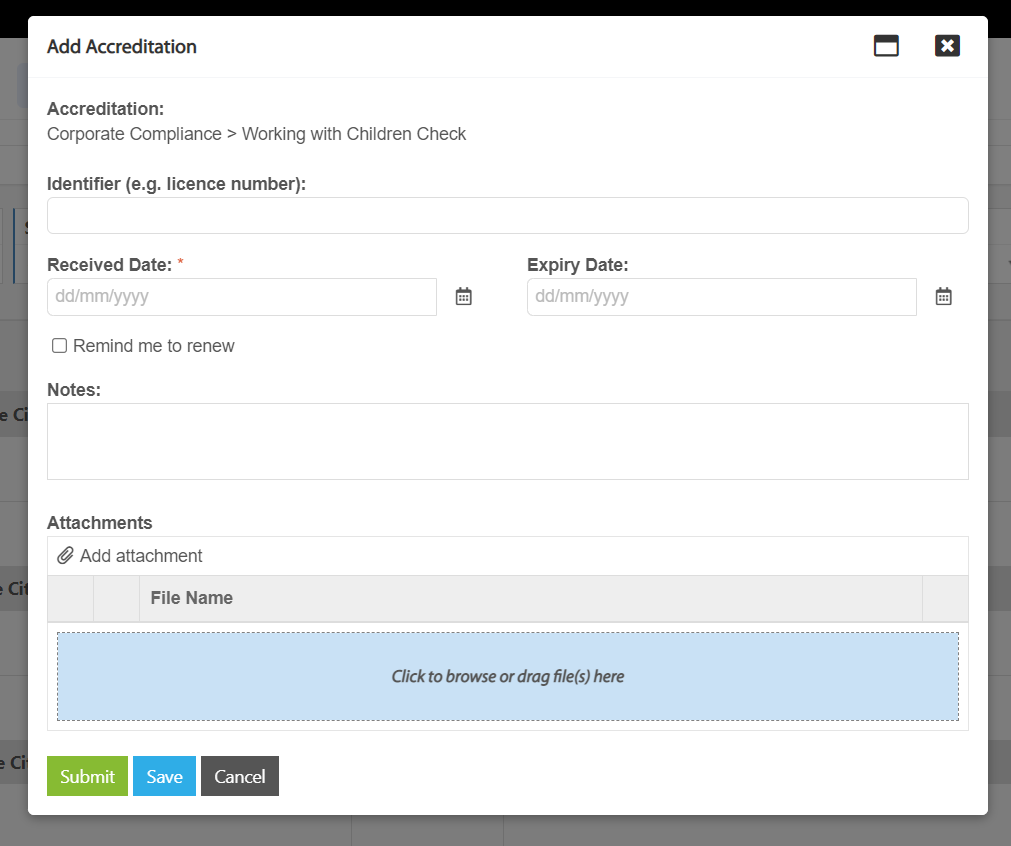
A pop-up window will prompt users to provide all relevant details related to the accreditation.
Additionally, users can upload necessary attachments using the "Add attachment" button. After providing the required information and attachments, users can submit the task by clicking the "Submit" button.
a. Upon submission, both admins and supervisors will receive notifications indicating the completion of the onboarding tasks.
Once submitted, admins and supervisors gets notified that the user has completed the tasks for the Onboarding.
(B) In addition, administrators and supervisors have the ability to complete an accreditation task on behalf of users. To use this feature, please follow the steps outlined below:
Go to the Onboarding Module, Reports > Staff Task Report >Filter the Task type by Accreditation
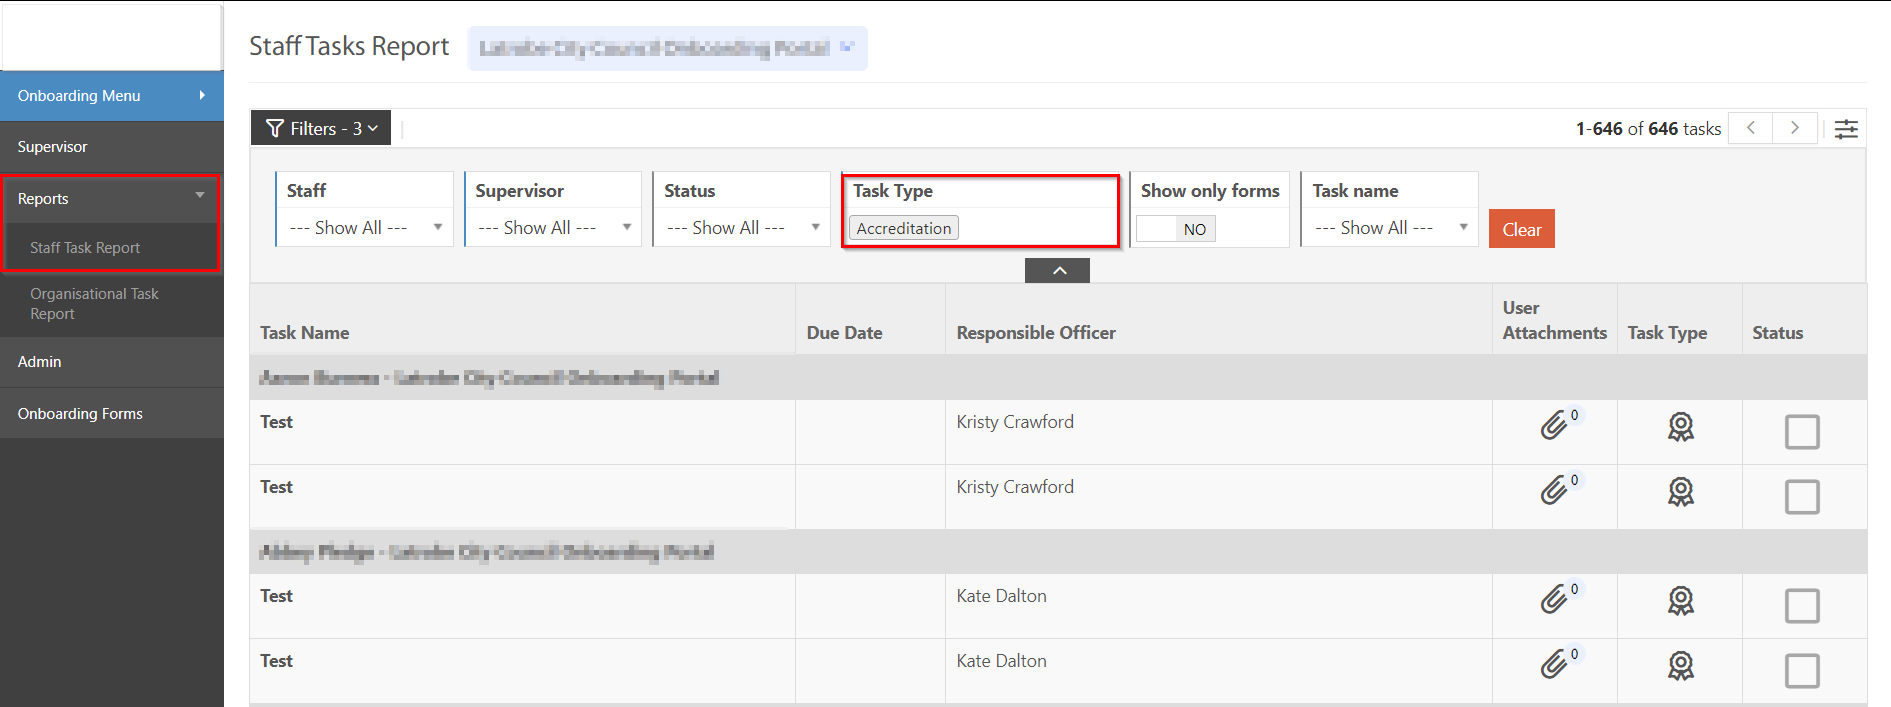
In the Task type column, click on the badge icon. A pop-up will appear where admins and supervisor can complete the task on behalf of the users.
Click on the Save button to save the changes, otherwise click on the Submit button to submit the task for approval.
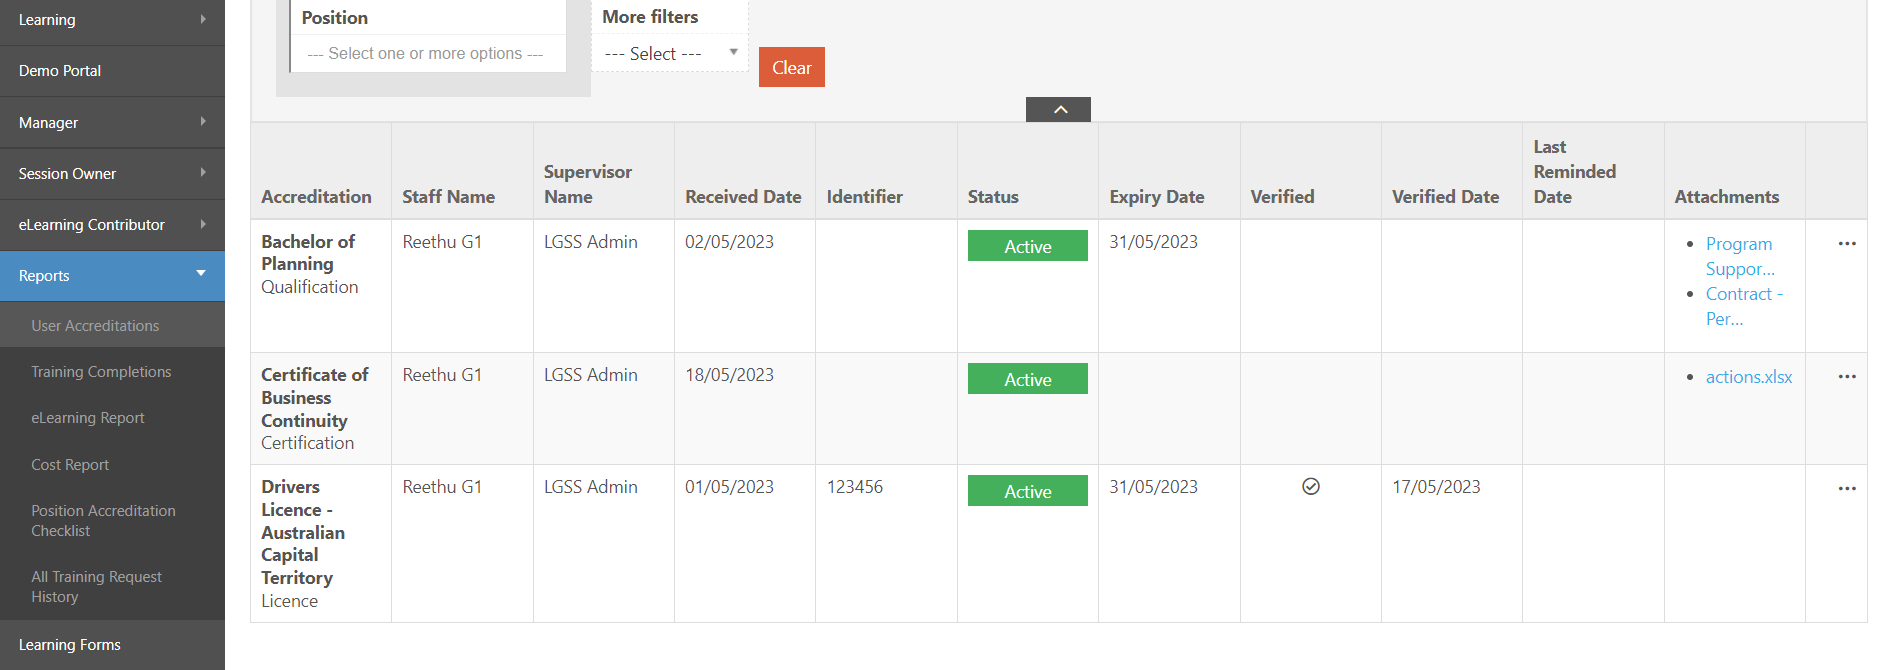
Go to the eLearning Module > Reports > User Accreditation. Filter the accreditation based on the Users and see all the details along with the status of the accreditation on this page.
Issues resolved
Corporate Planning & Reporting Module
- Fixed an issue where the status count of the actions was not showing the correct count in the "View all Actions" page.
Project Management & Control Module
- Fixed an issue where the system was showing an error message while searching for a Project Execution.
Enterprise Risk Management Module
- Fixed an issue where the users were not able to download the excel export for Associated Tasks.
- Fixed an issue where the status count of the actions was not showing the correct count in the "All Risks" page.
- Fixed an issue, enabling users to be able to view the task details in the organisation/staff tasks pop-up window.