Contents
1. Corporate Planning & Reporting Module
1.1 Bulk Action Updater – Support for Configurable Additional AttributesThe Bulk Action Updater has been enhanced to support configurable Additional Attributes (AAs) defined within the Action Add/Edit/View screen. This enables administrators to update these attributes in bulk, eliminating the need for individual record updates and improving overall efficiency.
What’s Changed:
1. The following AA data types are now supported, with attributes displayed under an “Additional Attributes” section in alphabetical order:
- Currency
- Date
- HTML Text
- Lookup
- Multi-Lookup
- Multi-line Text
- Numeric
- Single-line Text
- Traffic Light
2. A top controller is available above the grid for all enabled AAs (across all data types), allowing users to apply a single value to the current page or across all pages.
3. Mandatory AAs are clearly marked and validated before the update.
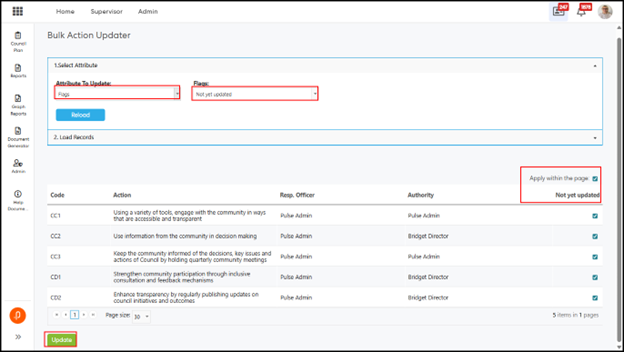
Entry Steps—All AA Data Types (Except Multi-Lookup)
Step 1: Log in as an Admin user and navigate to:
Admin > Bulk Operations > Bulk Action Update
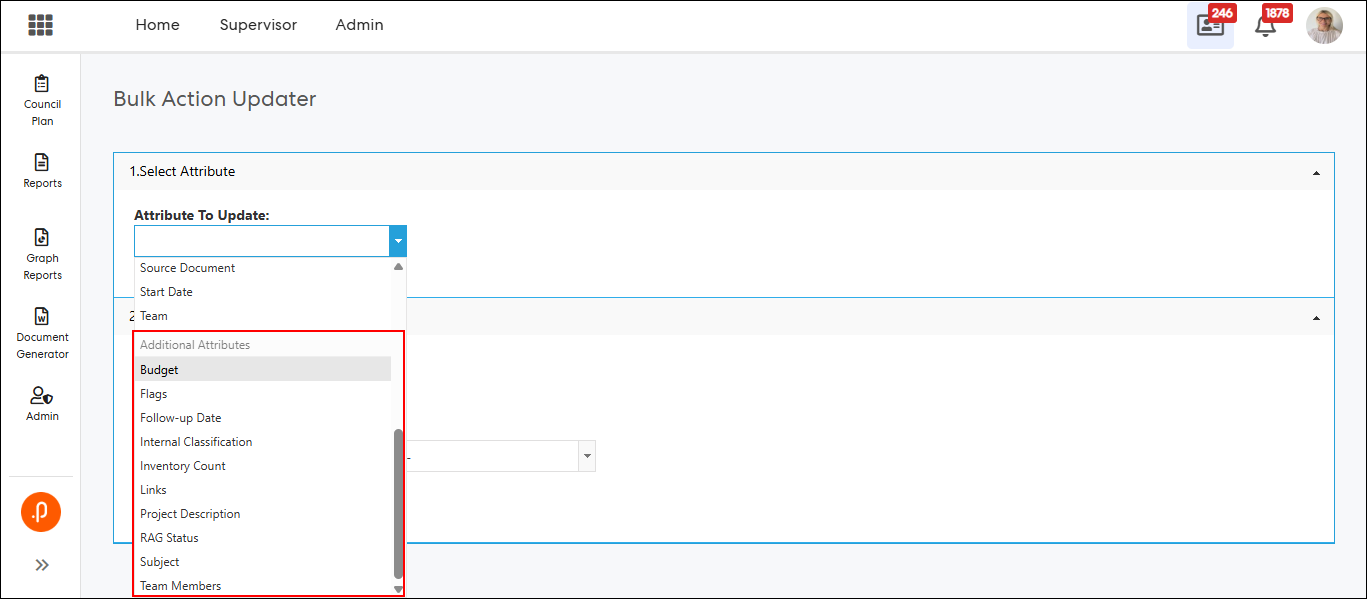
Step 2: From the Attribute To Update dropdown, select the required AA.
The list displays all configured AAs with ‘Show Attribute’ enabled in the General Settings of the Admin section, presented in alphabetical order.
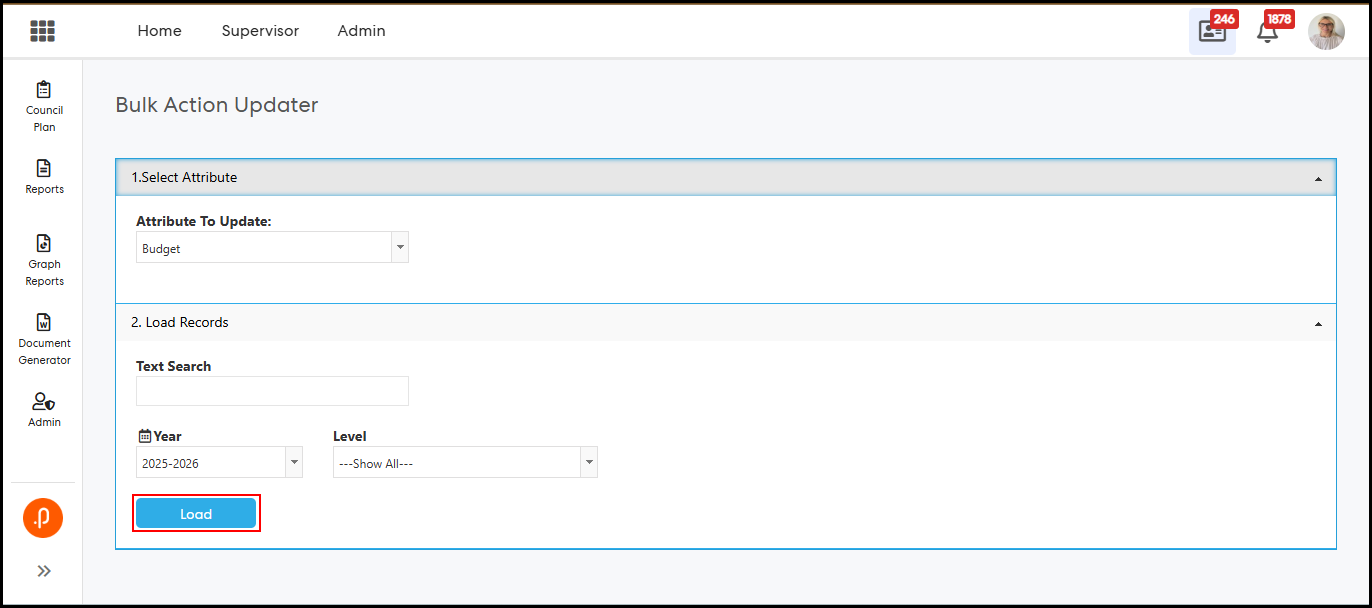
Step 3: Select the relevant Reporting Year and apply optional Hierarchy Level and Hierarchy Node filters if required.
Step 4: Click Load to display applicable actions in the grid.
A new column appears corresponding to the selected attribute.
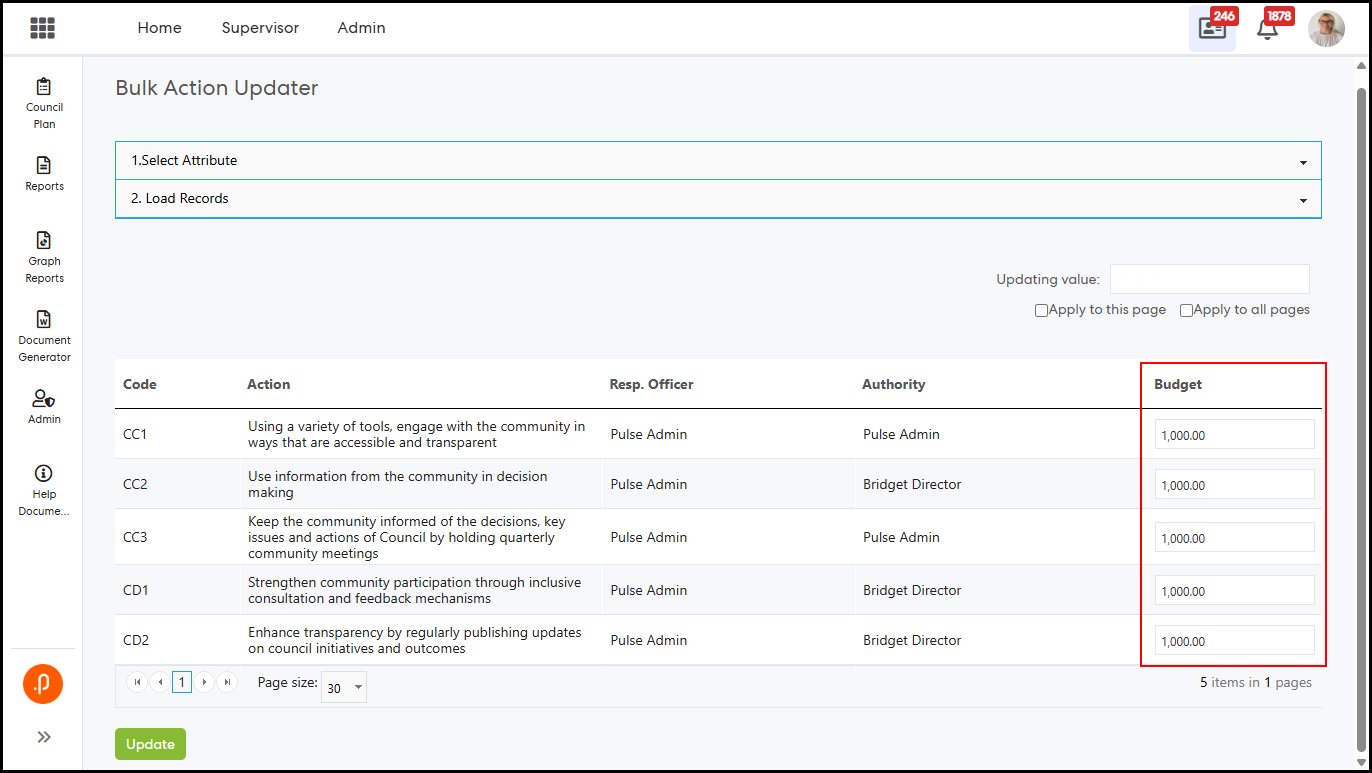
Step 5: Enter, update, or select values for each row using the available input controls (e.g., text fields, drop-downs, or date pickers), with existing values pre-populated.
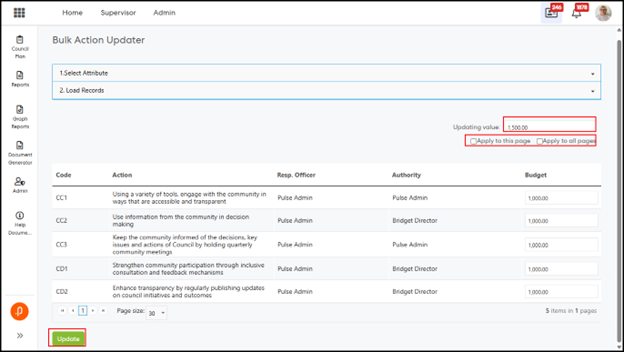
Step 6: Use the top controller input to apply content in bulk to:
- This page
- All pages
Note: The existing Flags option is now managed alongside Additional Attributes and continues to use a secondary dropdown for selection, along with the ‘Apply within the page’ top controller (check/uncheck).
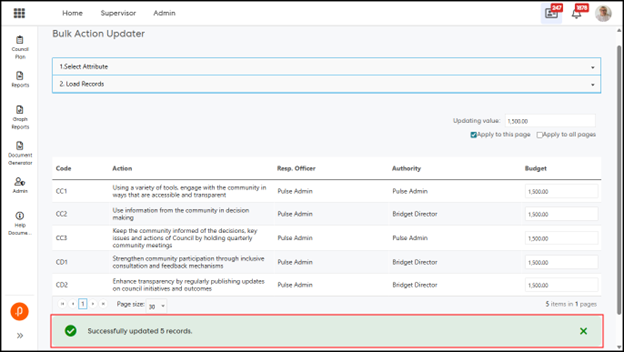
Step 7: Click Update to save changes.
A confirmation message is displayed showing the number of successfully updated actions.
Entry Steps—Multi-Lookup AA Data Type
Step 8: Use the dropdown control in each row to select one or more values. Existing values are preloaded automatically.
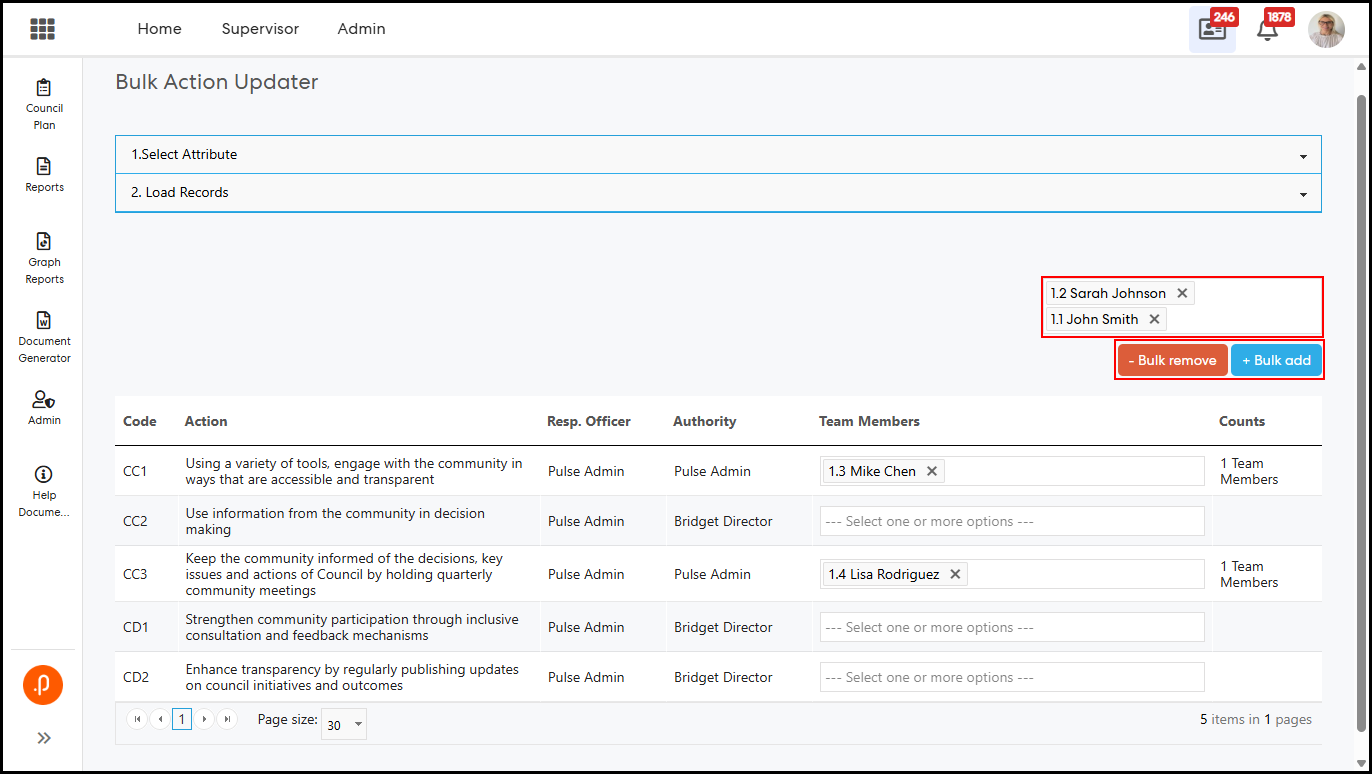
Step 9: Use the top controller input to select one or more values and perform:
- - Bulk remove: Removes selected value(s) from all records on the current page and saves automatically.
- + Bulk add: Appends selected value(s) to all records on the current page and saves automatically.
Note:
- Null or “--Select--" values are not supported for updates or removal.
- Individual action updates support auto-saving.
- Updated counts are reflected immediately in the adjacent “Counts” column.
The Document Generator has been enhanced to support a new Target Status Traffic Light column, along with configurable Report Characters (symbols) for CPI/KPI Target Statuses. This feature is available in CPR and PRF Document Generator reports where the “Show CPI Table” option is enabled. It allows administrators to represent Target Status using a consistent visual indicator (colour + symbol), improving readability and enabling users to quickly interpret performance without relying on text-based values.
What’s Changed:
1. Added a new Report Character (symbol) option to the CPI/KPI Target Status configuration.
2. Introduced a new “Target Status Traffic Light” column under CPI Table configuration in the following Document Generator reports:
- PRF—CPI Configurable Report by Hierarchy
- PRF—CPI Configurable Report
- CPR—Items by Officer
- CPR—Business Plan Report
- CPR—Items by Officer—Group by Hierarchy
- CPR—Organization Review
Access and Navigation:
Step 1: Log in as an Admin user and navigate to:
PRF > Admin > General > Manage Statuses
Step 2: The CPI/KPI Target Status configuration table now includes a new Report Character column.
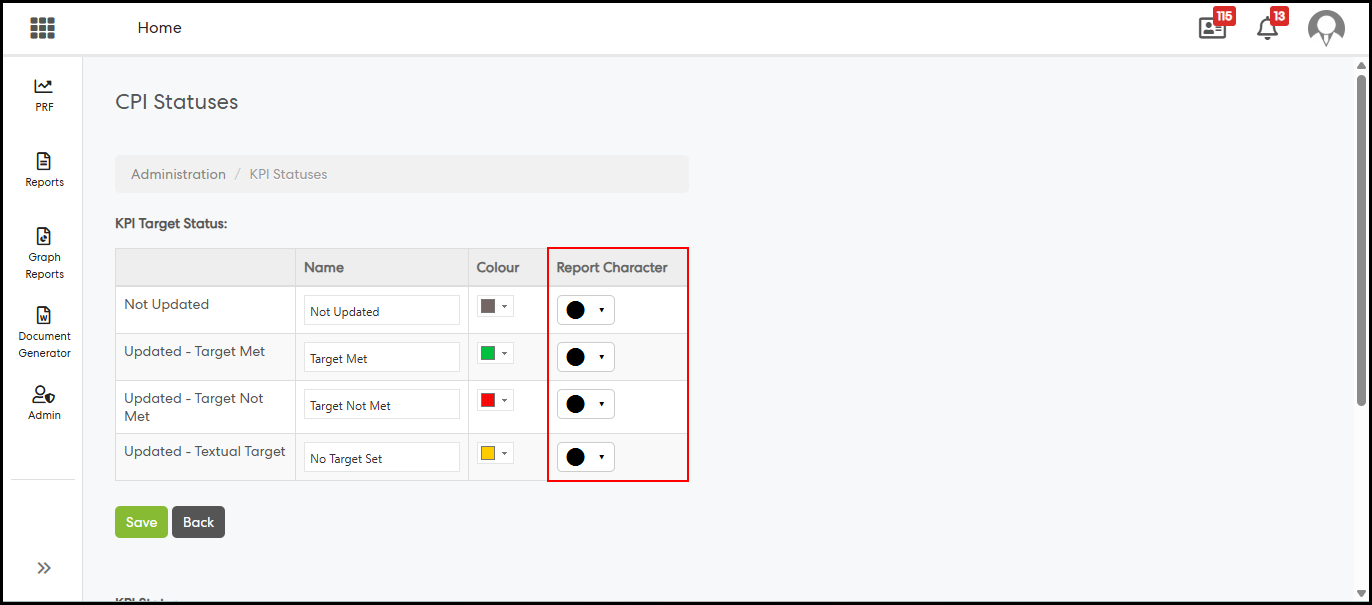
Step 3: Select a symbol from the Report Character dropdown for the required Target Status, then click Save.

Step 4: Navigate to any of the above Document Generator reports and go to:
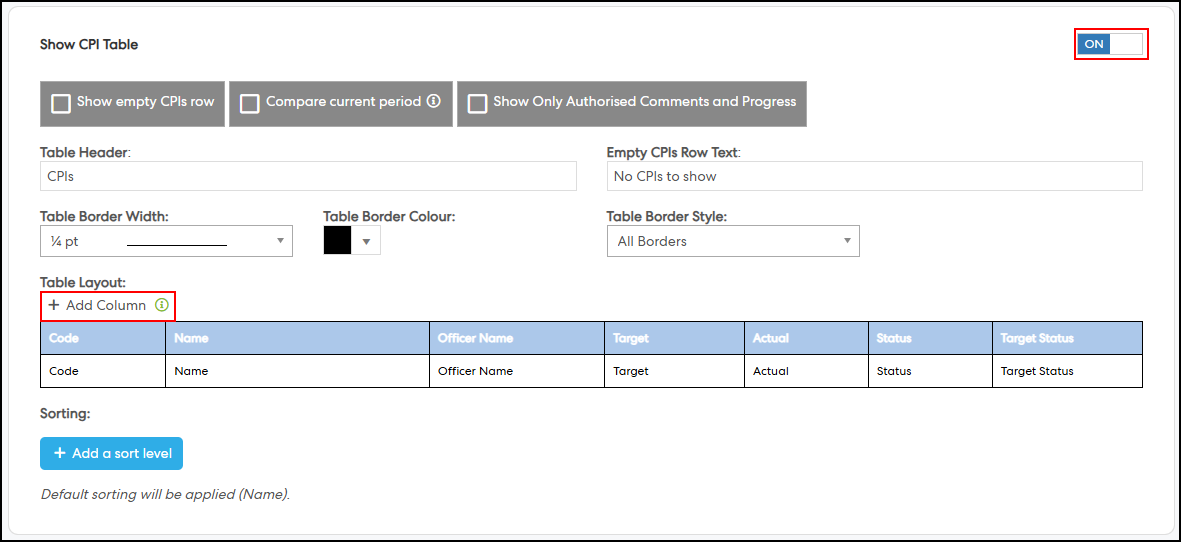
Configuration > Report Content. Enable the Show CPI Table option (if it is not already enabled), then under Table Layout, click Add Column.
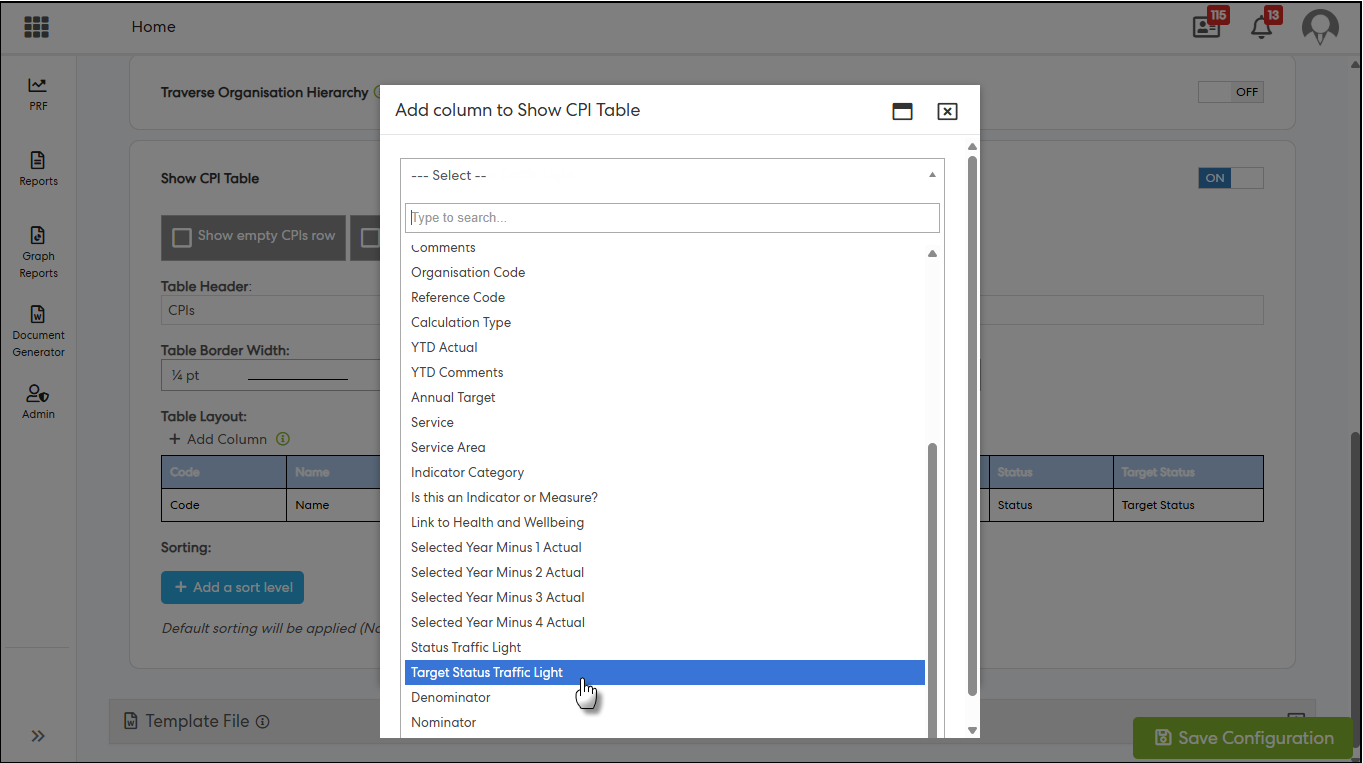
Step 5: From the Add Column dropdown, select Target Status Traffic Light and add it along with any other required columns.

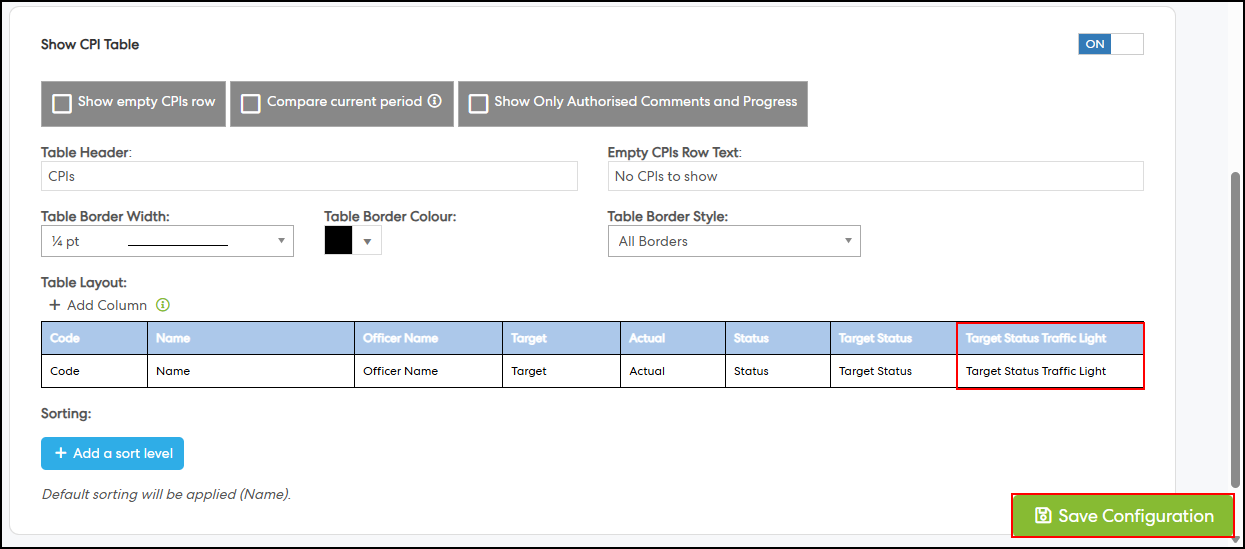
Step 6 (Optional): Use the available formatting options to reorder columns, adjust column width, and update the column label, header, and content formatting. Then click Save Configuration.
Step 7: Generate the report and review the output. The Target Status Traffic Light column will display the configured Report Character with the corresponding colour for each Target Status.
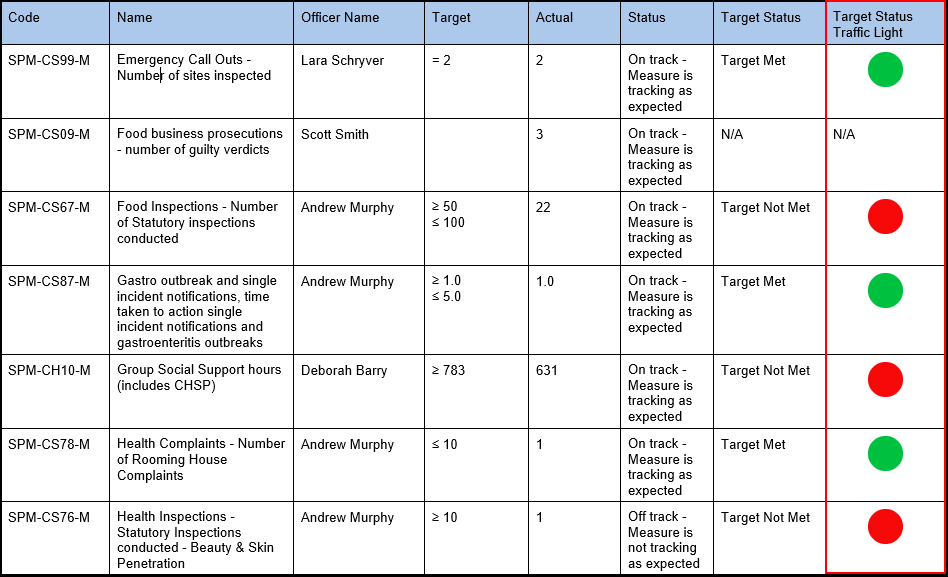
Note: The column will display “N/A” when no progress update exists, when no periodic target is set, or when the target type is Textual or Select List.
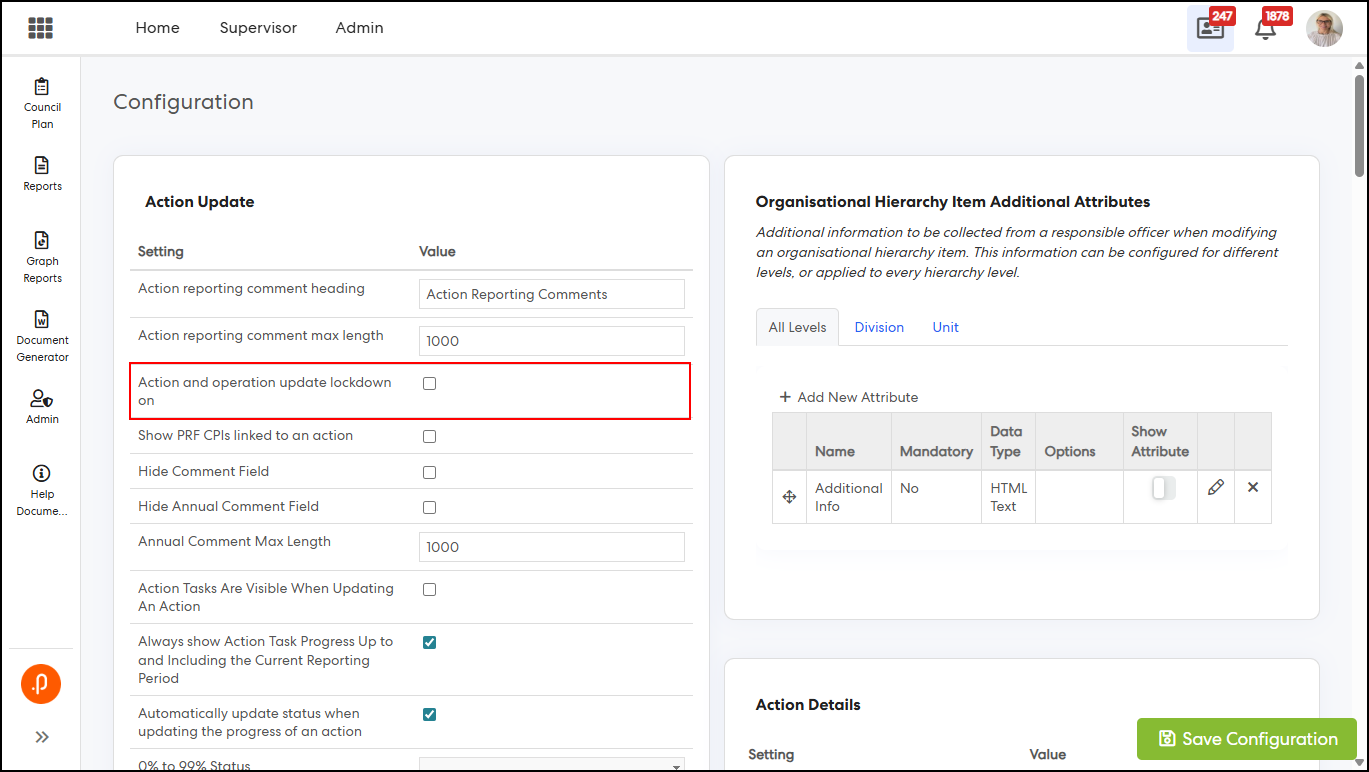
1.3 Action Update Lockdown Banner with Period VisibilityThe My Actions and All Actions pages have been enhanced to display a banner indicating the specific reporting period(s) where action updates are locked. This behaviour applies when the “Action and Operation Update Lockdown On” configuration key is disabled and one or more reporting periods are locked via ‘Reporting Year & Period’ settings.
The periodic action lockdown (except for Module Admin users) continues as per existing behaviour. When the configuration key is enabled, the existing system-wide action update lockdown and banner remain unchanged, irrespective of periodic lockdowns. This enhancement improves clarity by helping users easily identify locked periods and avoid attempting updates for restricted actions.
What’s Changed:
1. Added a lockdown banner with reporting period details in My Actions and All Actions pages across CPR, CPR-AH, Audit, and Compliance modules when system-wide lockdown is not enabled.
Access and Navigation
Step 1: Log in as an Admin user and navigate to:
Admin > General Settings > Action Update and ensure “Action and Operation Update Lockdown On” is not enabled
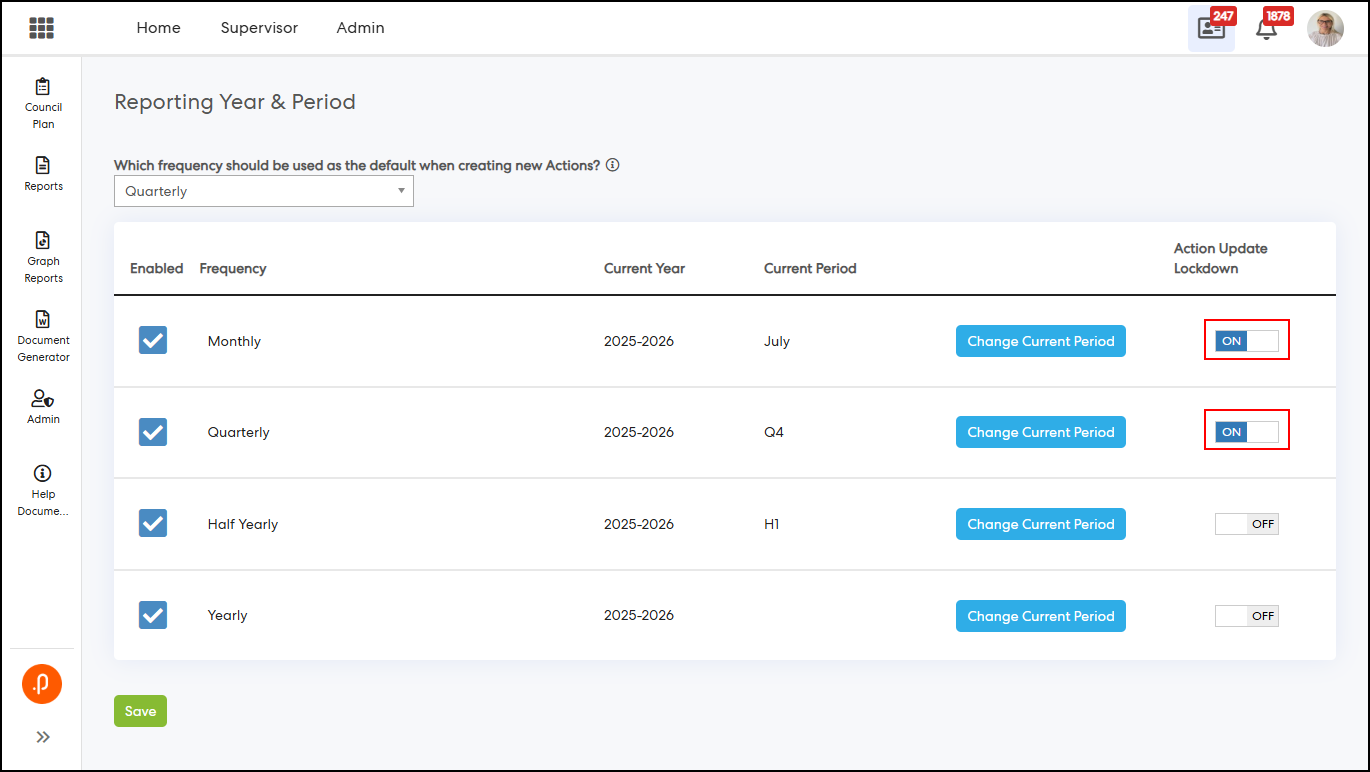
Step 2: Navigate to:
Admin > Set Reporting Year and Period, and enable Action Update Lockdown for one or more reporting periods.
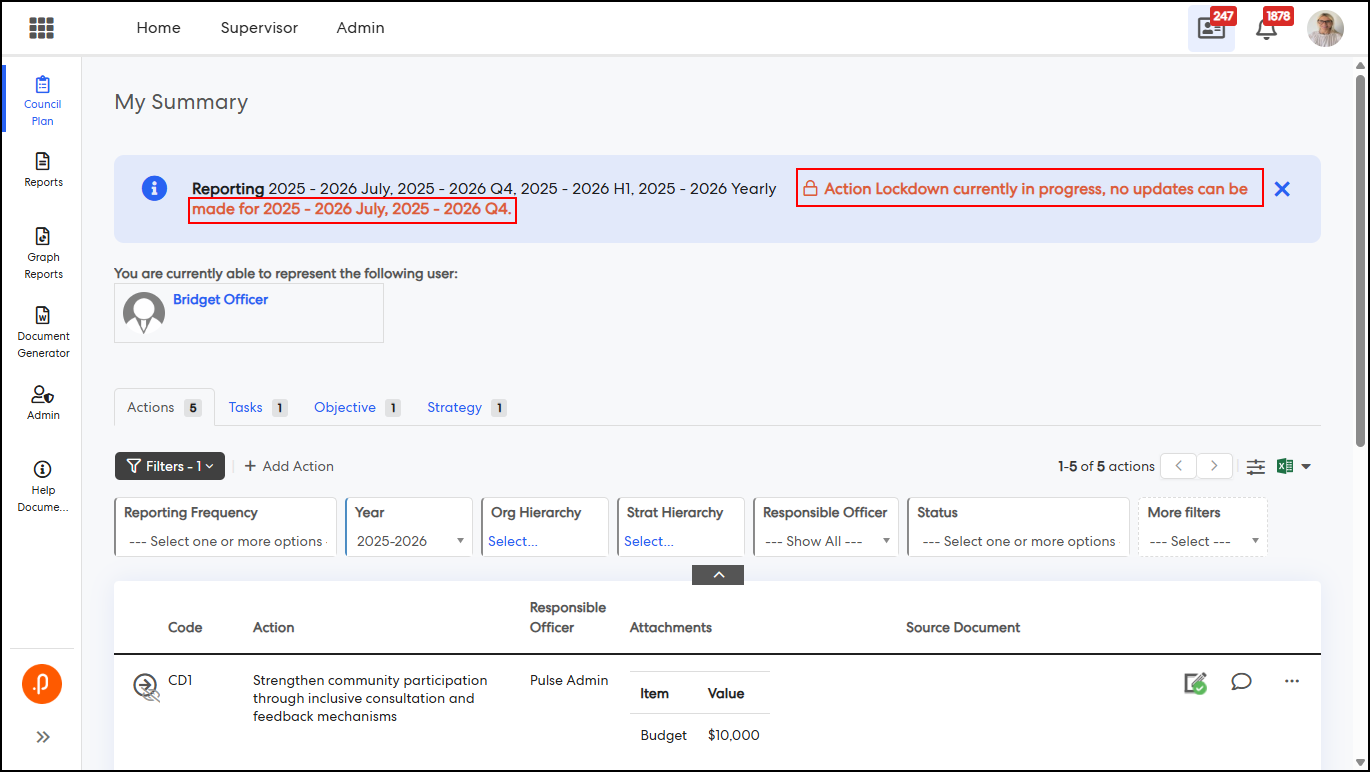
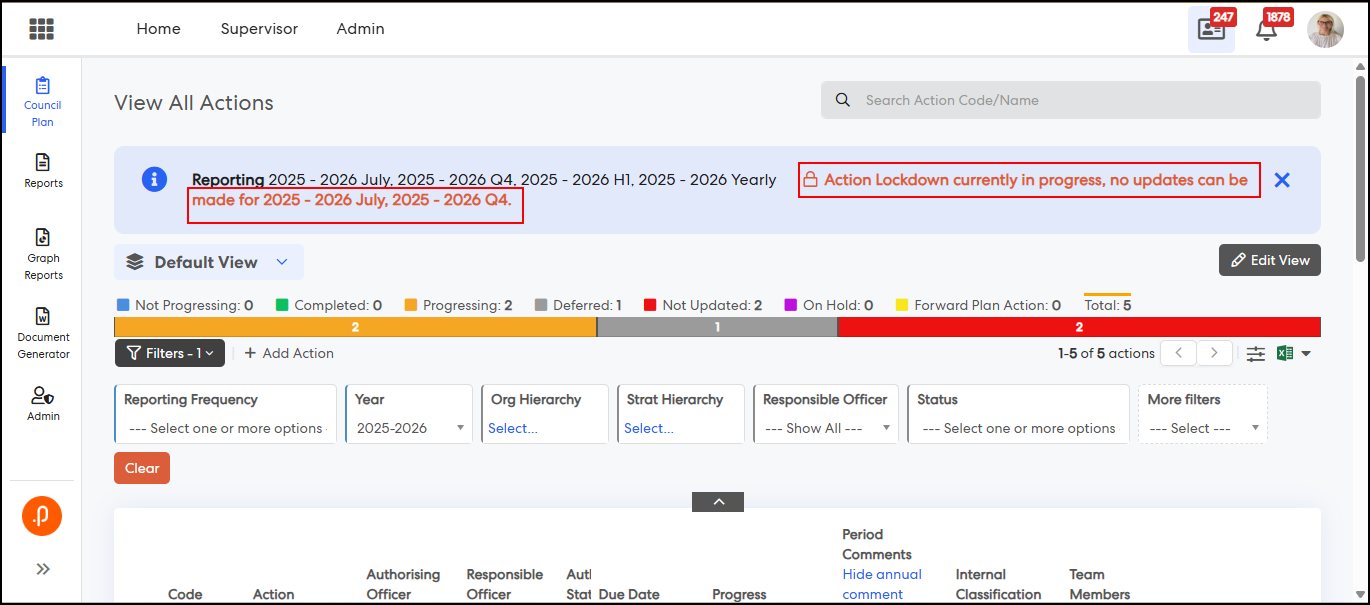
Step 3: Navigate to the My Actions or All Actions pages and verify that the lockdown banner displays the relevant restricted period(s).
2. Performance Reporting Framework Module
2.1 Self-Described Gender Category in LGPRF FTE InformationThe LGPRF Organisational FTE Information page has been enhanced to support a new “Self-described” gender category across all employment types. This enables more inclusive reporting by allowing organisations to capture and report workforce data beyond the existing Male and Female classifications, while maintaining consistency with current calculations and report outputs.
What’s Changed:
1. Added a new “Self-described” gender category in LGPRF Organisational FTE Information:
- Permanent Full-Time—Self-described
- Permanent Part-Time—Self-described
- Casual—Self-described
2. Updated Document Extracts (Excel & CSV) to include the new Self-described rows in the FTE Information section.
Access and Navigation
Step 1: Log in as an Admin user and navigate to:
PRF > Admin > LGPRF Settings > LGPRF > FTE Information
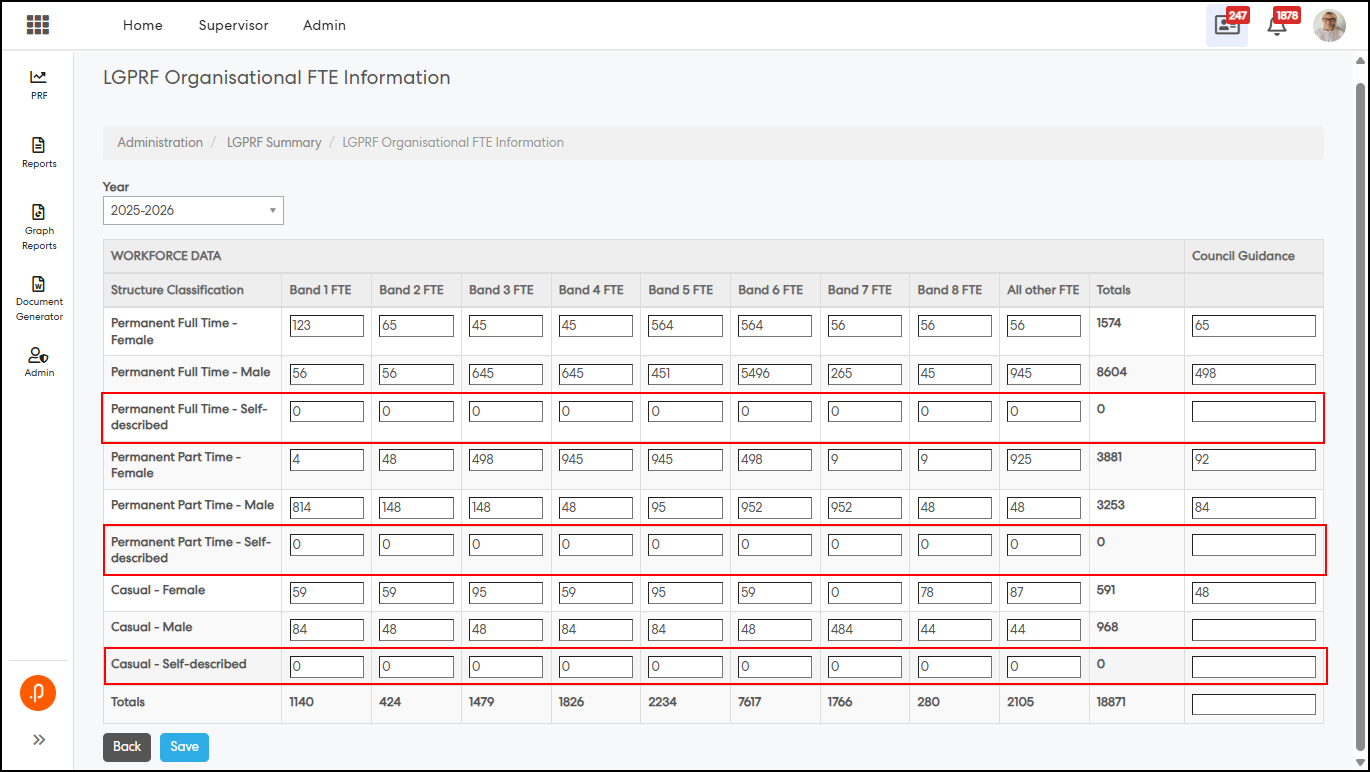
FTE Information page—Self-described rows.
Step 2: Enter values for the new Self-described categories under relevant employment types.
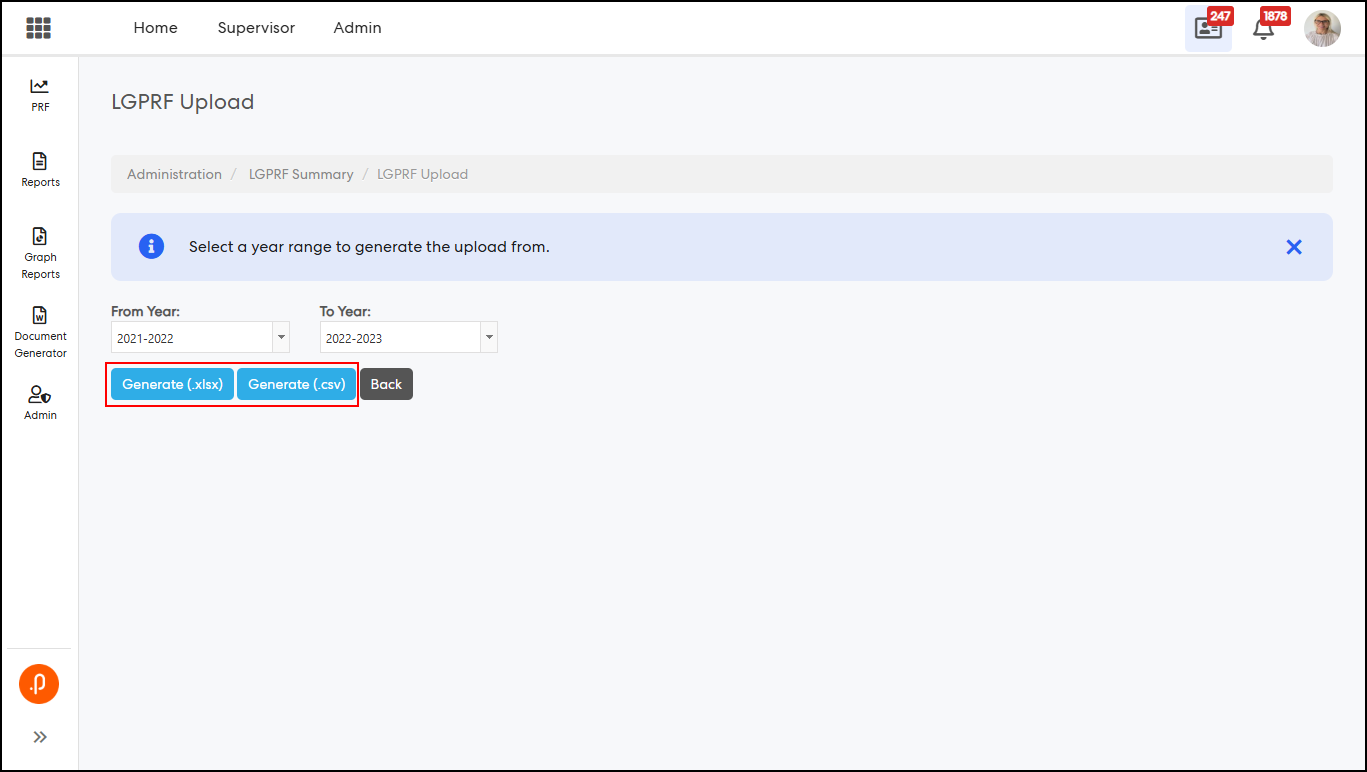
Step 3: Navigate to LGPRF Upload and download the extract (Excel/CSV).
Step 4: Verify that the Self-described rows are included in the FTE Information tab/file
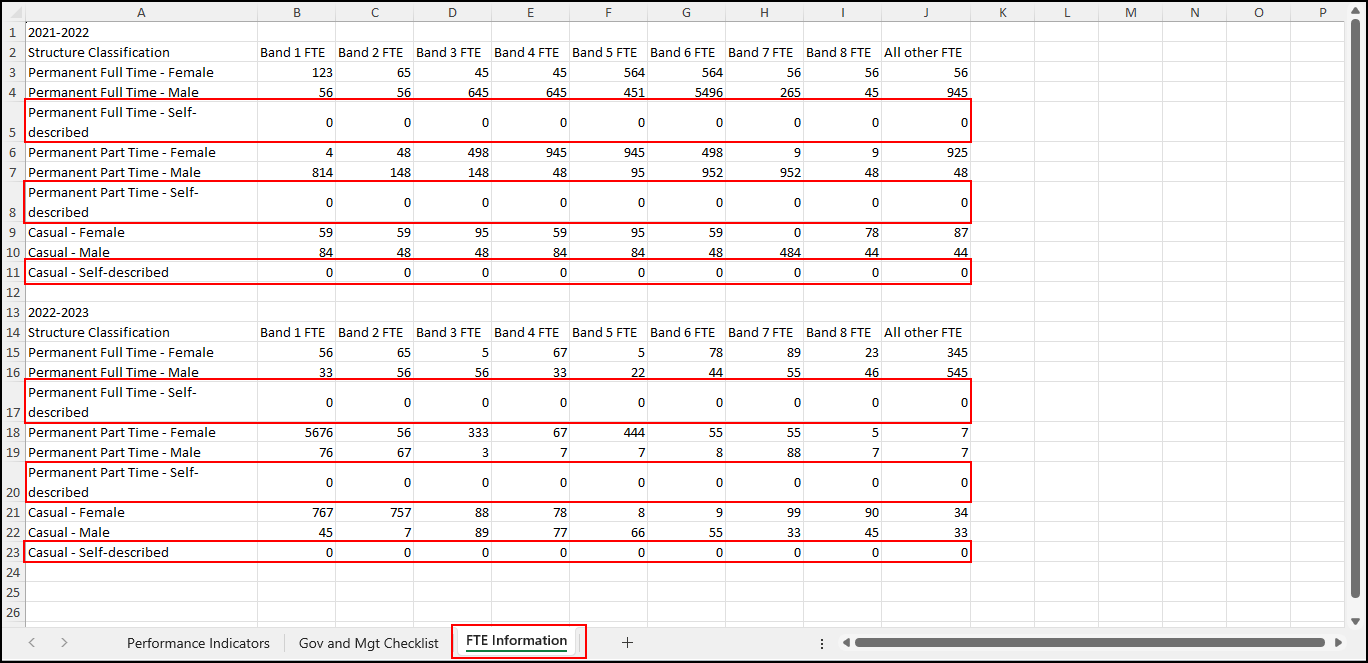
Excel extract—Self-described rows
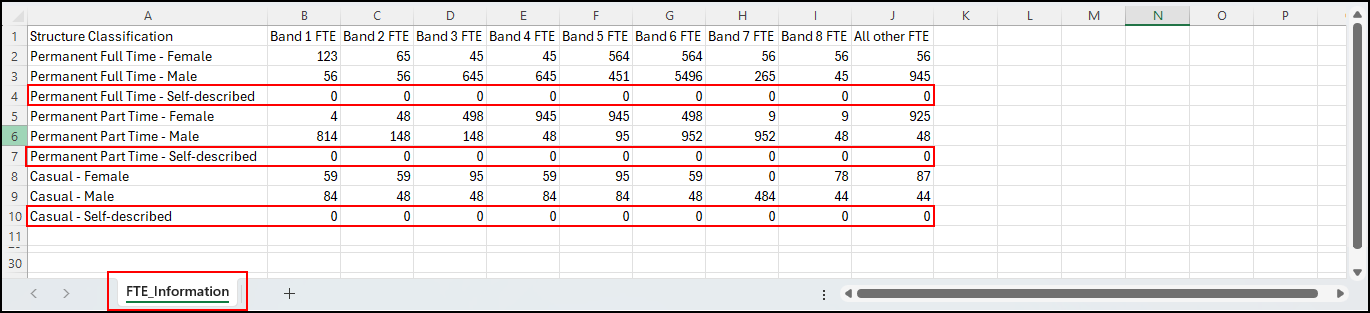
CSV extract—Self-described rows
3. Project Management & Control Module
3.1 Task Import Cost Validation EnhancementThe Project Task Importer has been enhanced to validate that each parent task cost matches the sum of its child task costs during import. This ensures data consistency and prevents incorrect cost aggregation by stopping the import process when discrepancies are detected.
What’s Changed
1. Added validation to ensure parent task cost equals the sum of its child task costs during task import.
2. Introduced an error notification banner when mismatches are detected, preventing the import from proceeding.
Access and Navigation
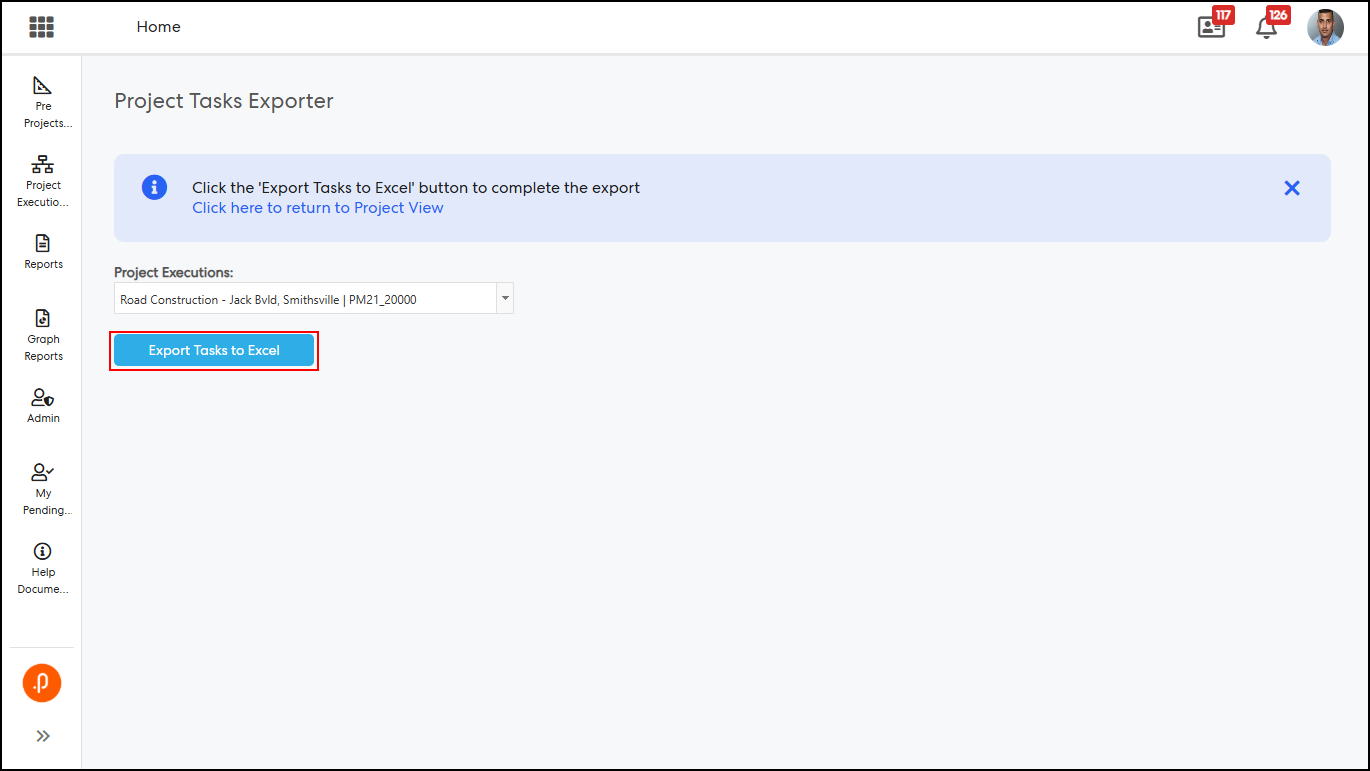
Step 1: Navigate to Project Executions > View Project > Tasks tab, then click Download Import Template > Export Tasks to Excel to download the Task Import Template.
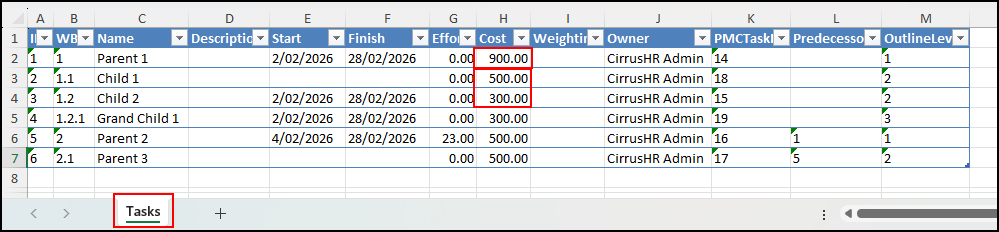
Step 2: In the template, modify a parent task cost so it does not match the sum of its child task costs, then save the file.
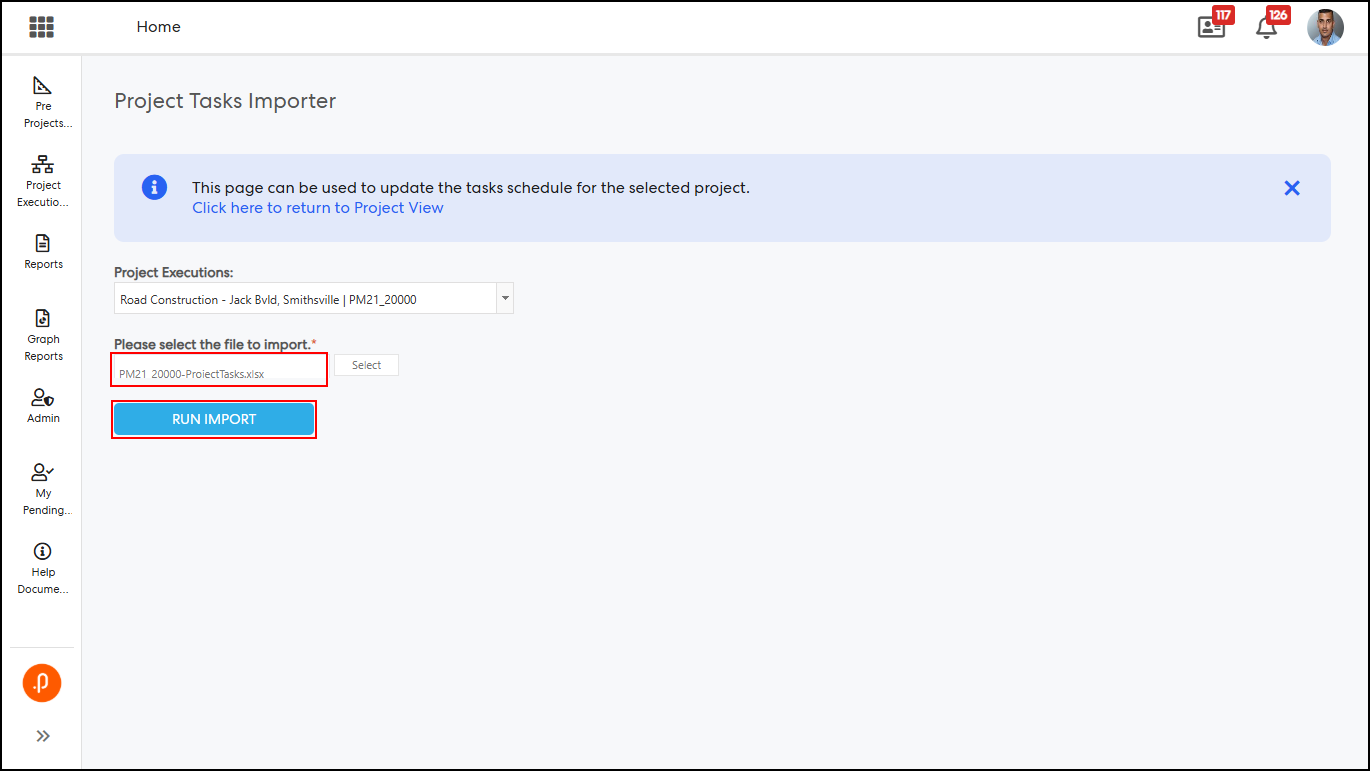
Step 3: Return to the Tasks section, click Import Tasks, select the updated template, and click Run Import.
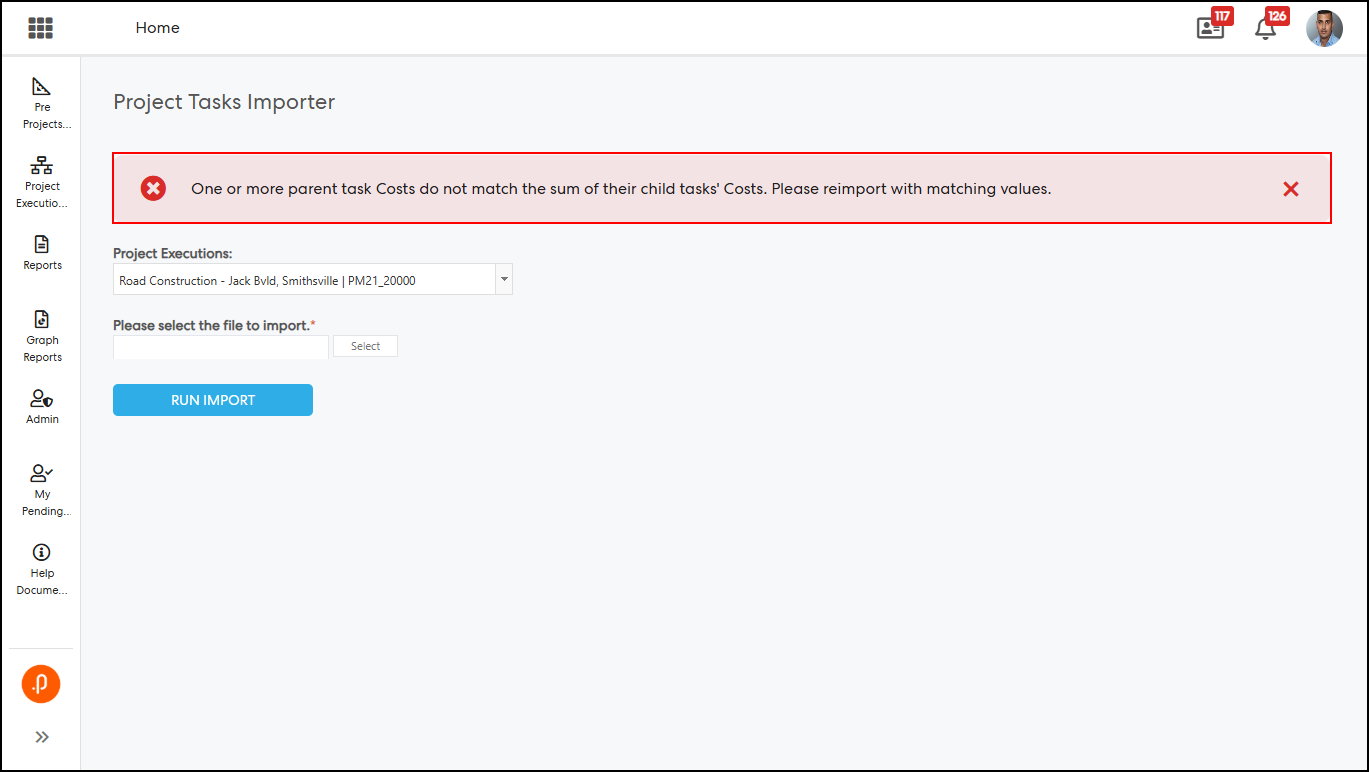
Step 4: Verify that the import fails and a notification banner is displayed:
“One or more parent task Costs do not match the sum of their child tasks' Costs. Please reimport with matching values.”
Note:
- This validation applies when the Cost feature is enabled for project tasks.
- The import will proceed successfully only when all parent and child task costs are consistent.
4. HR Core
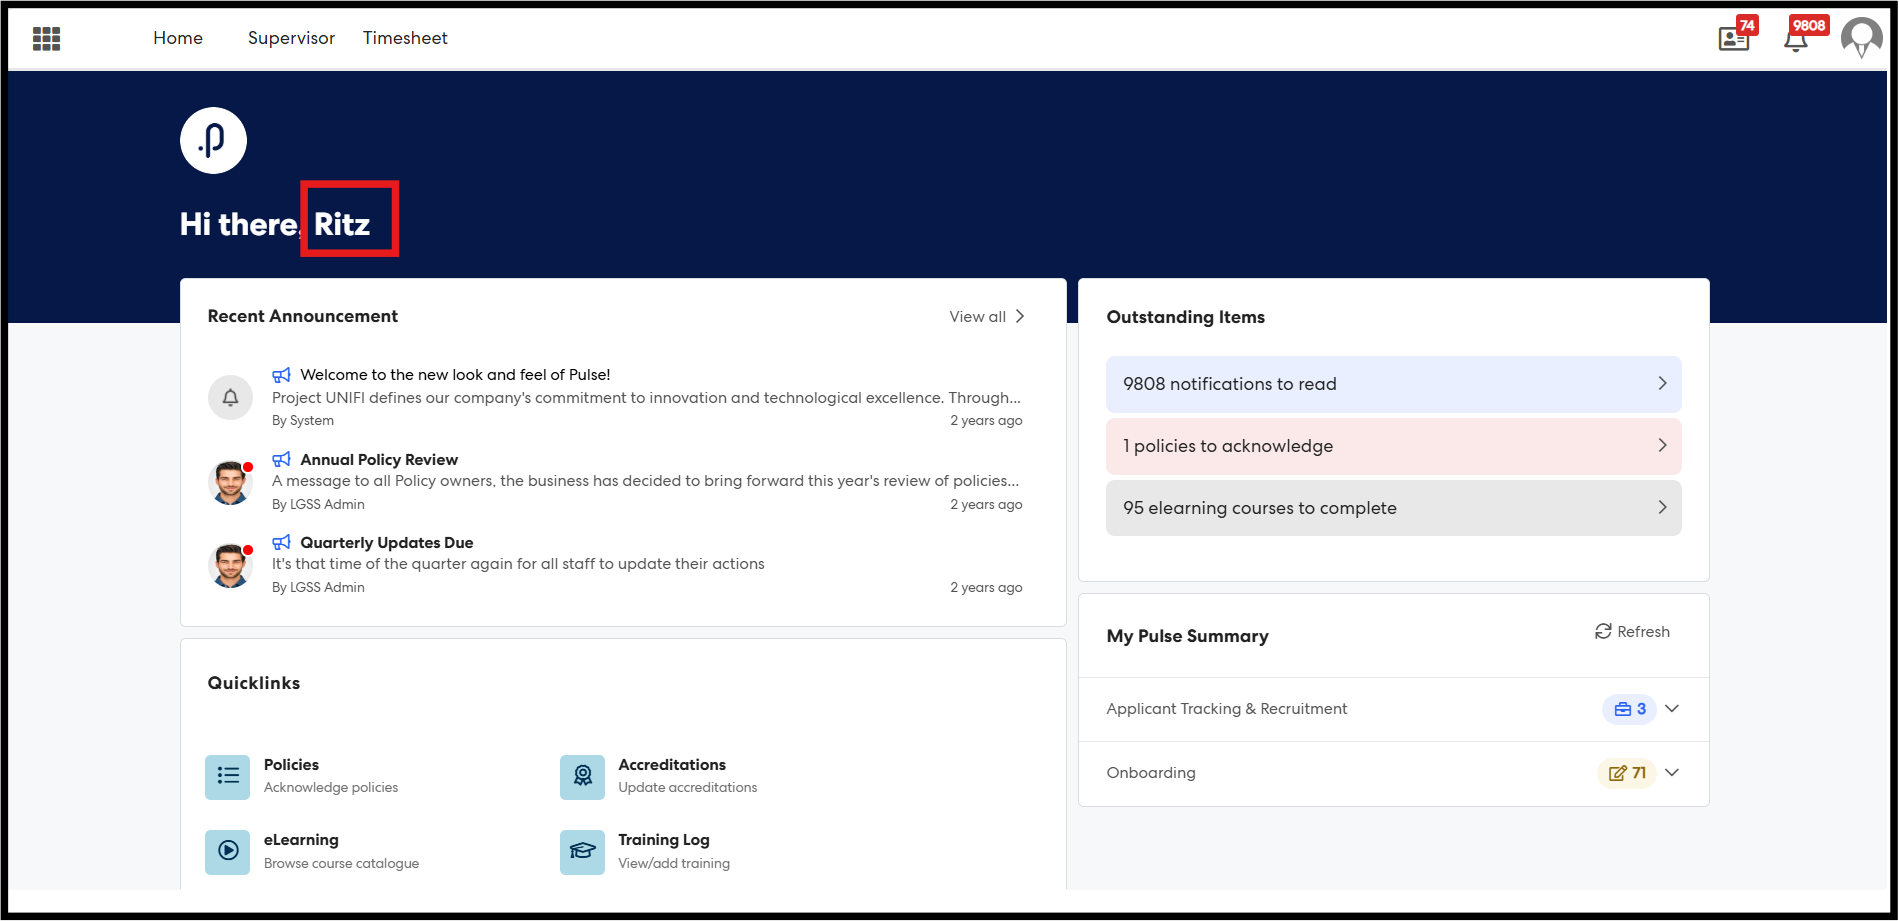
4.1 Introducing Configurable Preferred Name Display Across Home Page and Org ChartThis release introduces the ability to display Preferred Names across the system, giving organisations greater flexibility in how user names are presented.
Landing Page Administrators and HR Core Administrators can now control this behaviour through two independent configuration settings for the Home Page and Org Chart, allowing each area to be configured separately based on organisational needs.
When enabled, the system will display a user’s Preferred Name (where available), while automatically falling back to their First Name and Last Name if no Preferred Name is defined.
This enhancement improves personalisation and user experience without impacting existing data, as it is purely a display-level change.
1. Home Page – Steps to Enable Preferred Name Display in Home page
Navigation: Log in as a Landing Page Admin → Navigate to the Home Page → Click on the profile icon → Select “View Profile” → Click “Edit Home Page Menu” → Select “Edit Branding Banner” → Open Banner Settings.
Steps:
Step 1: Navigate to the Home Page and click on View Profile.
Step 2: Select Edit Home Page Menu.
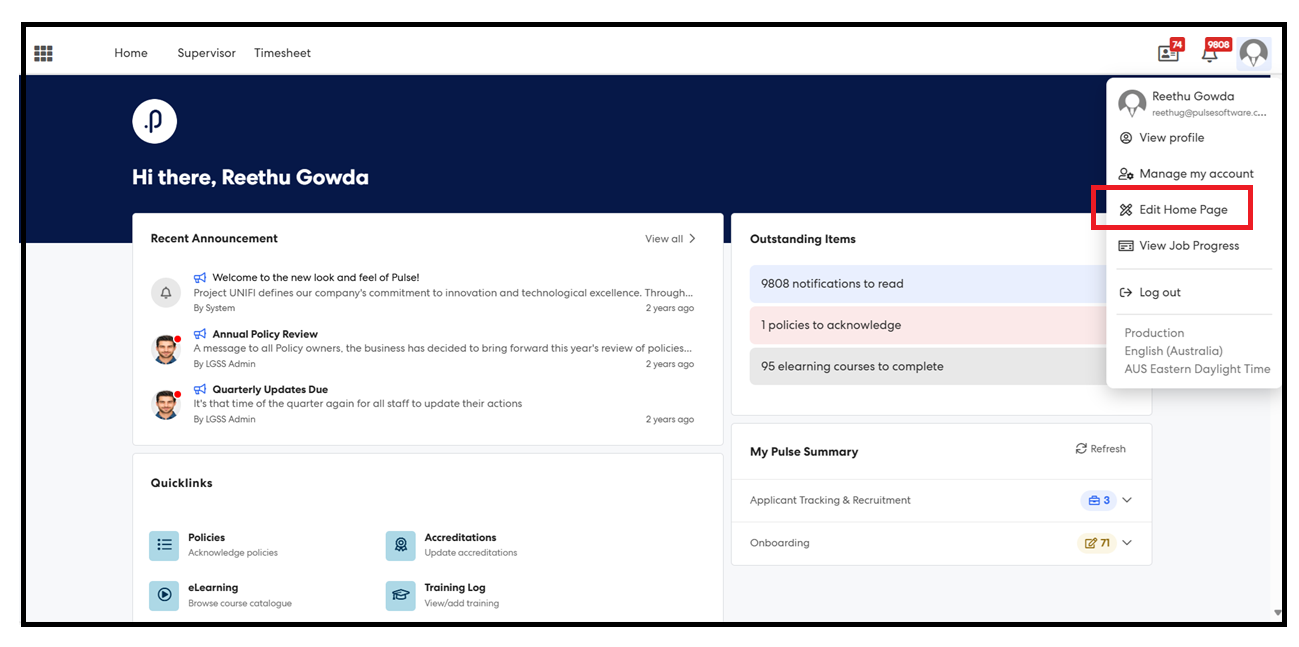
Step 3: Click on the Edit Branding Banner button.
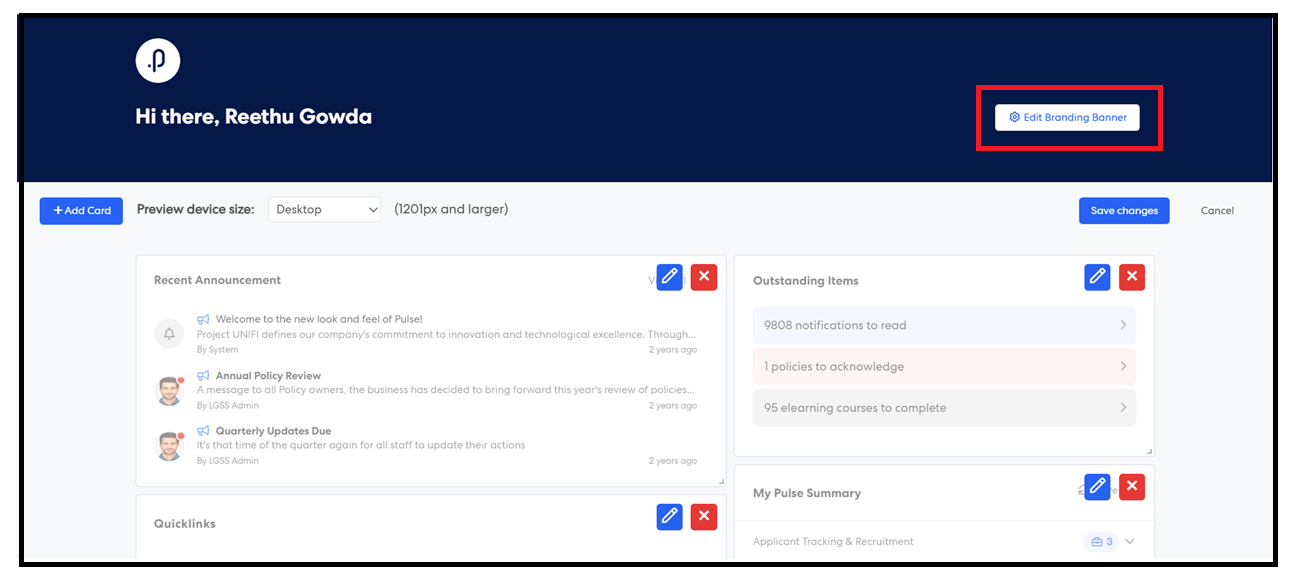
Step 4: In the Banner Settings popup, locate the new checkbox: “Display Preferred Name on Home Page” (disabled by default).
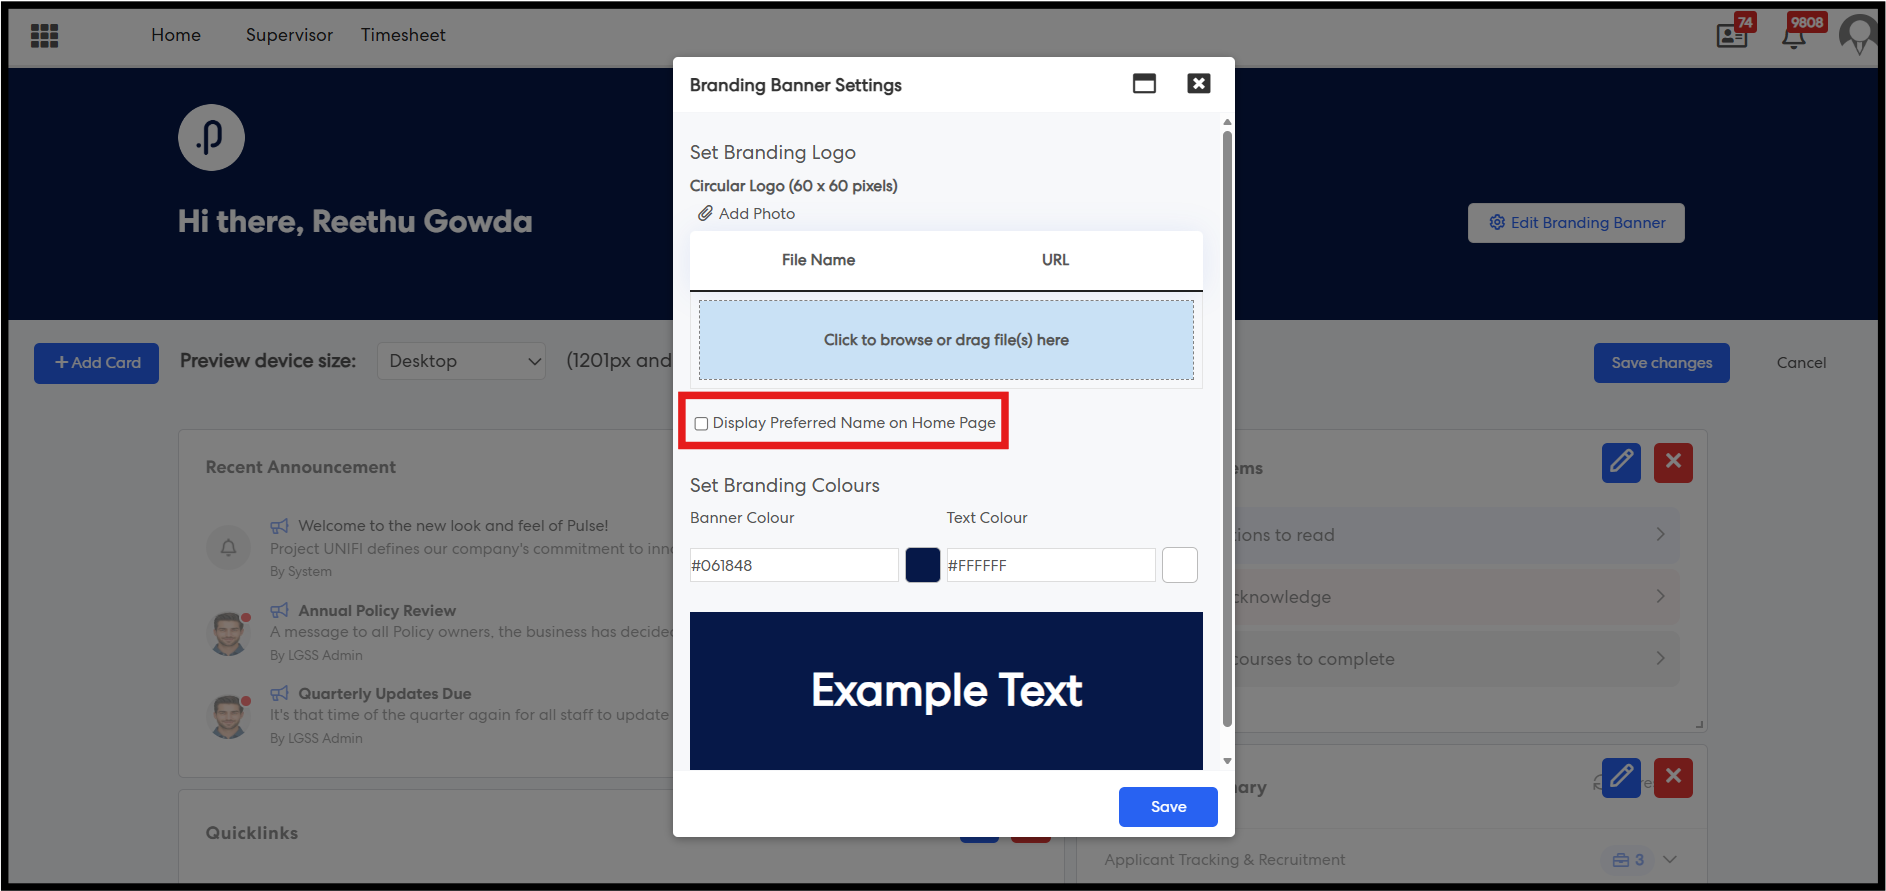
Step 5: Enable the checkbox to display the user’s Preferred Name on the Home Page.
Step 6: Click Save and Apply to apply changes.
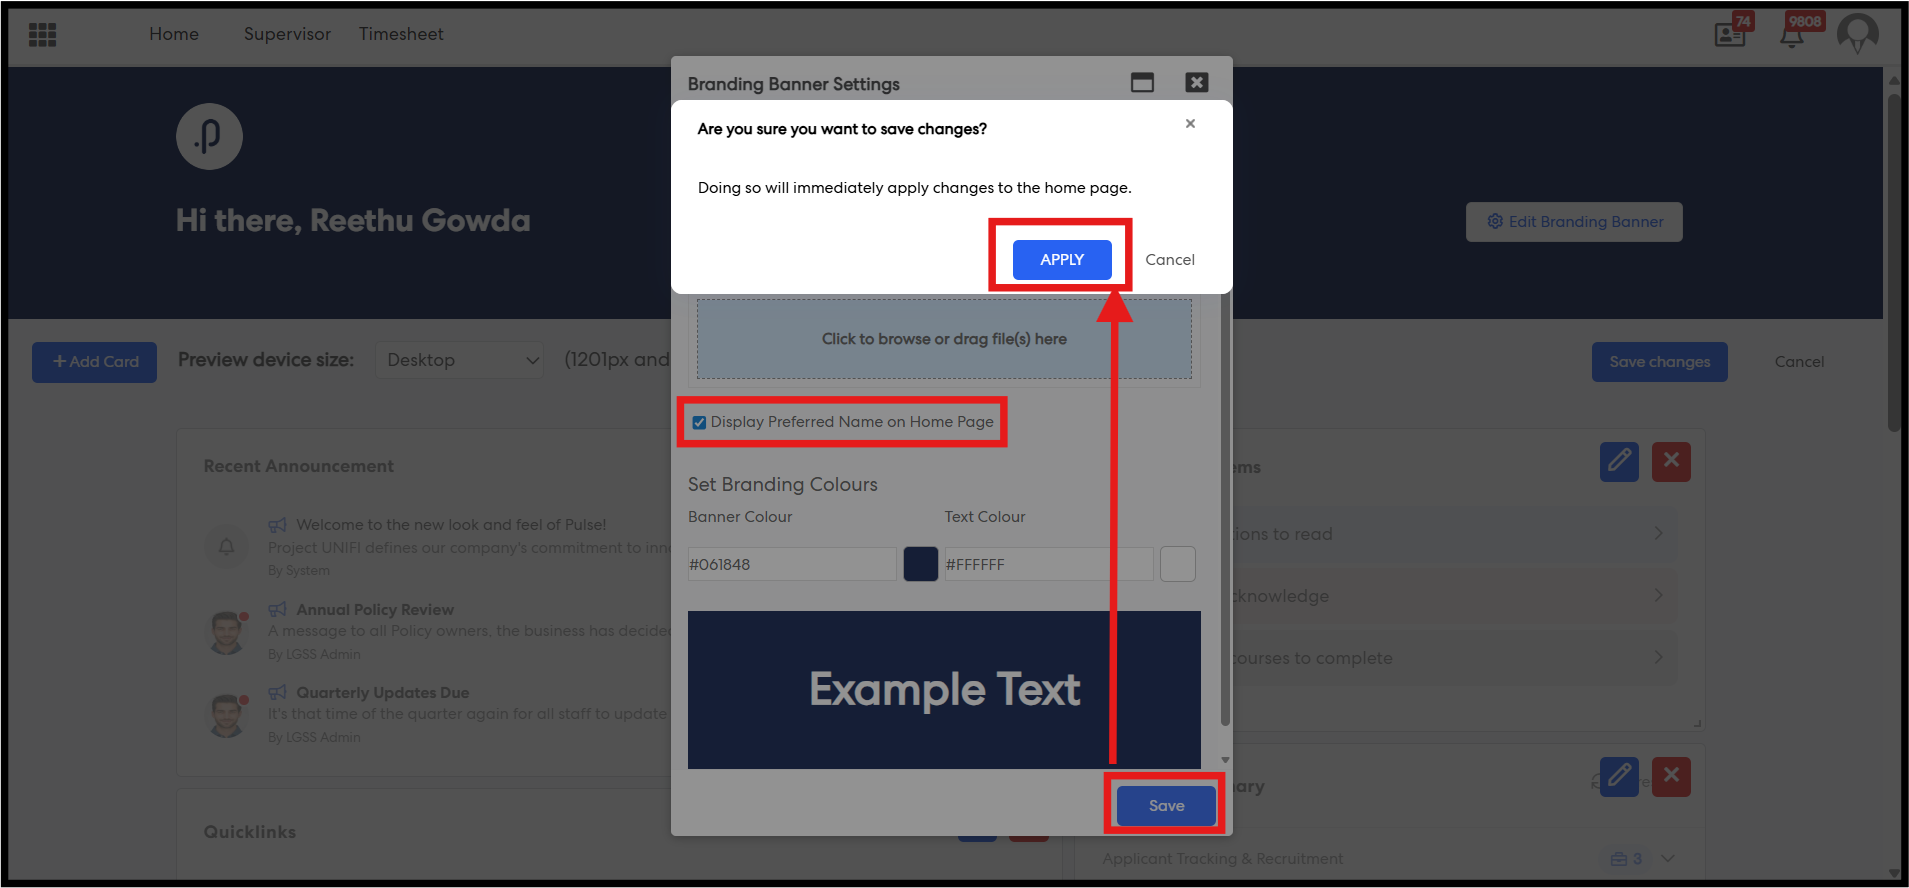
Steps 7: Once the configuration is saved successfully, all users navigating to the Home Page will see their Preferred Name instead of their First Name and Last Name (where available).
2. Organisation and Position Charts – Steps to Enable Preferred Name Display in Organisation & Position Charts
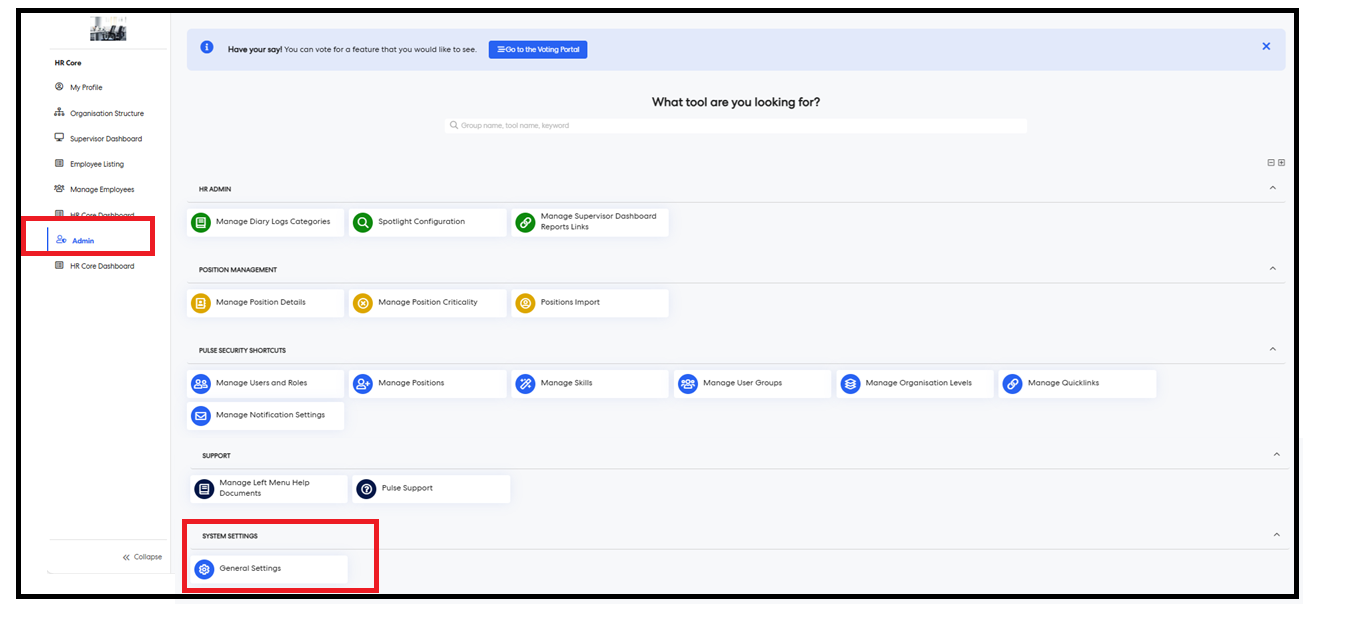
Navigation: Log in as an HR Core Admin → Navigate to HR Core → Admin Menu → General Settings → Configuration Page
Steps:
Step 1: Navigate to the Configuration Page.
Step 2: Locate the Settings tile and the configuration key “Display Preferred Name in Org Chart”.
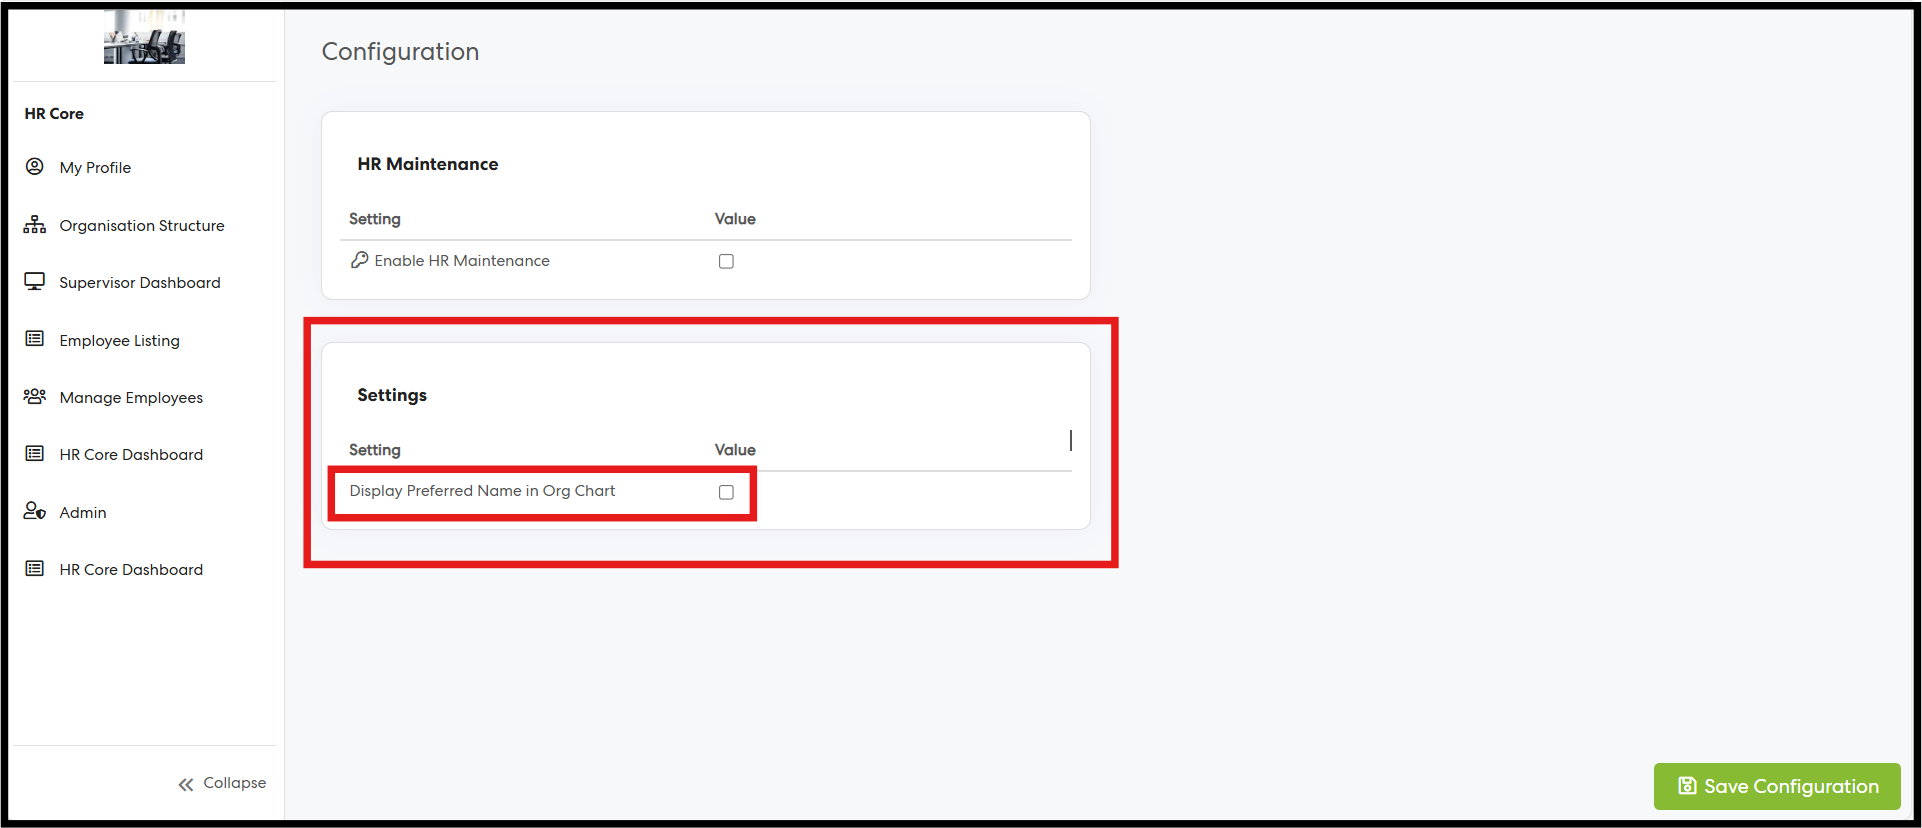
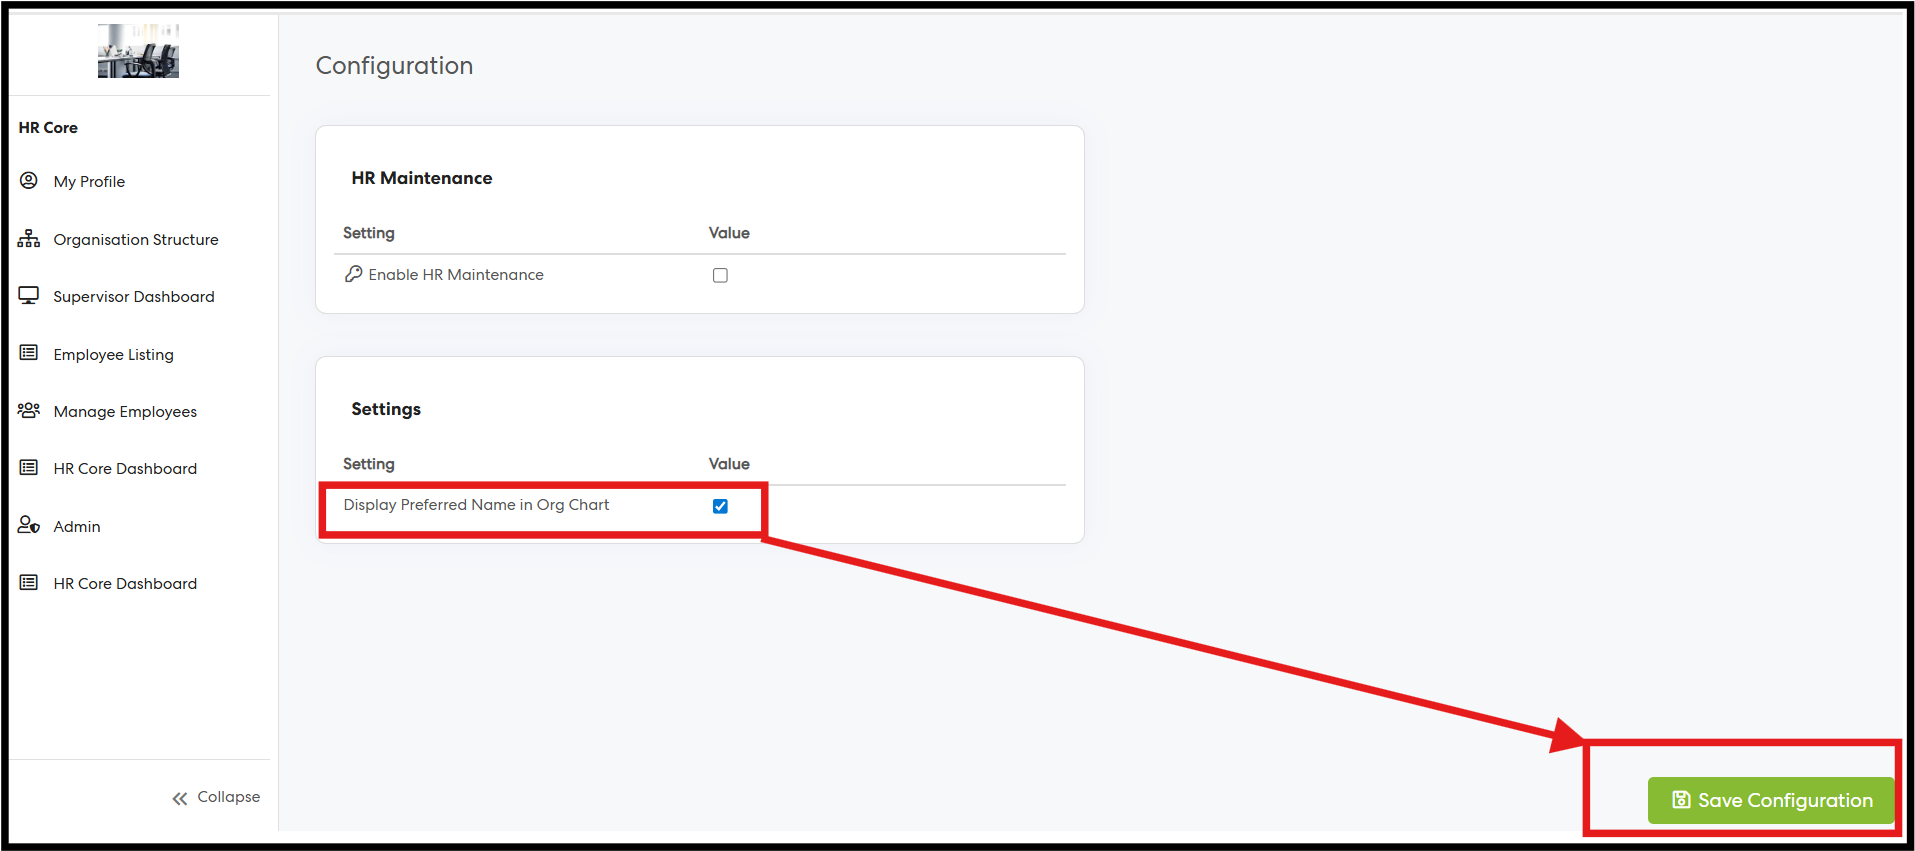
Step 3: Enable the configuration key.
Step 4: Click Save Configuration to apply the changes.
Step 5: Once the configuration is successfully enabled, navigate to the organisation chart view.
Step 6: In the Organisation Chart, the dropdown displays user names in the format First Name +(Preferred Name)+ Last Name. Select the required employee and click Load to view the chart.
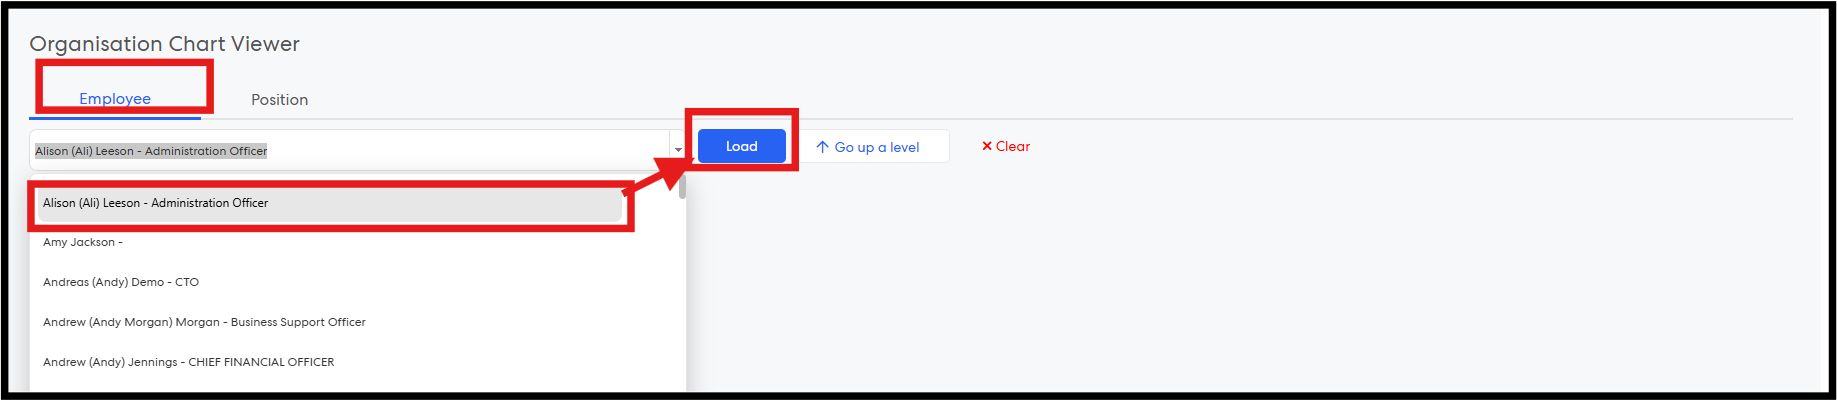
Step 7: The employee card is displayed, showing the user’s name as Preferred Name + Last Name.

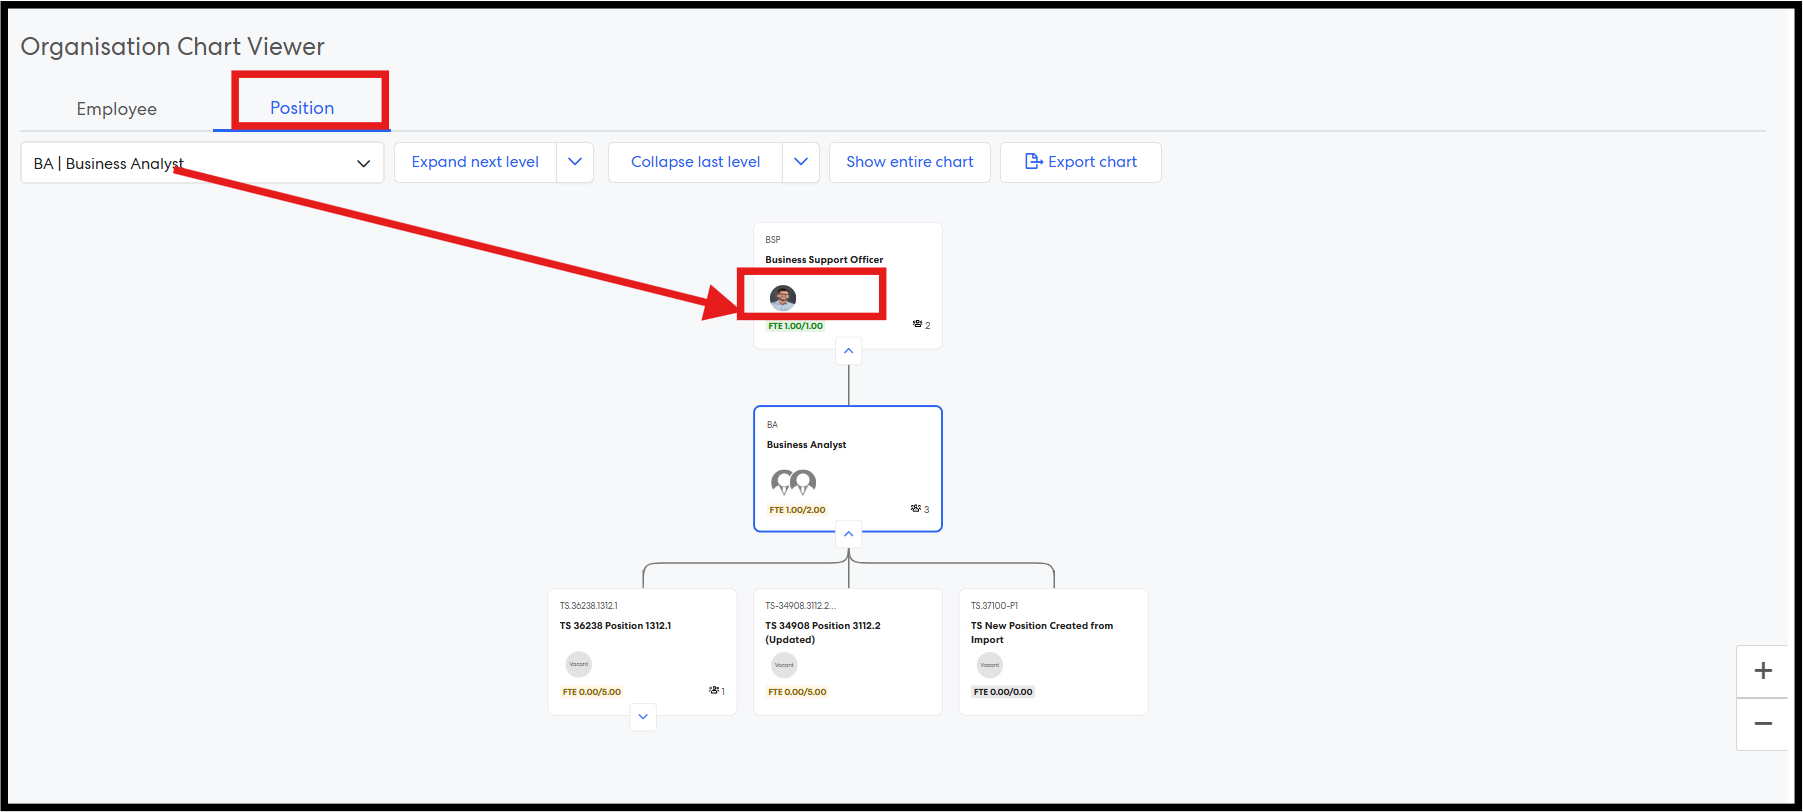
Step 8: Navigate to the Position Chart. By default, the logged-in user’s position org chart is displayed. Alternatively, select another position from the dropdown to load the corresponding position chart.
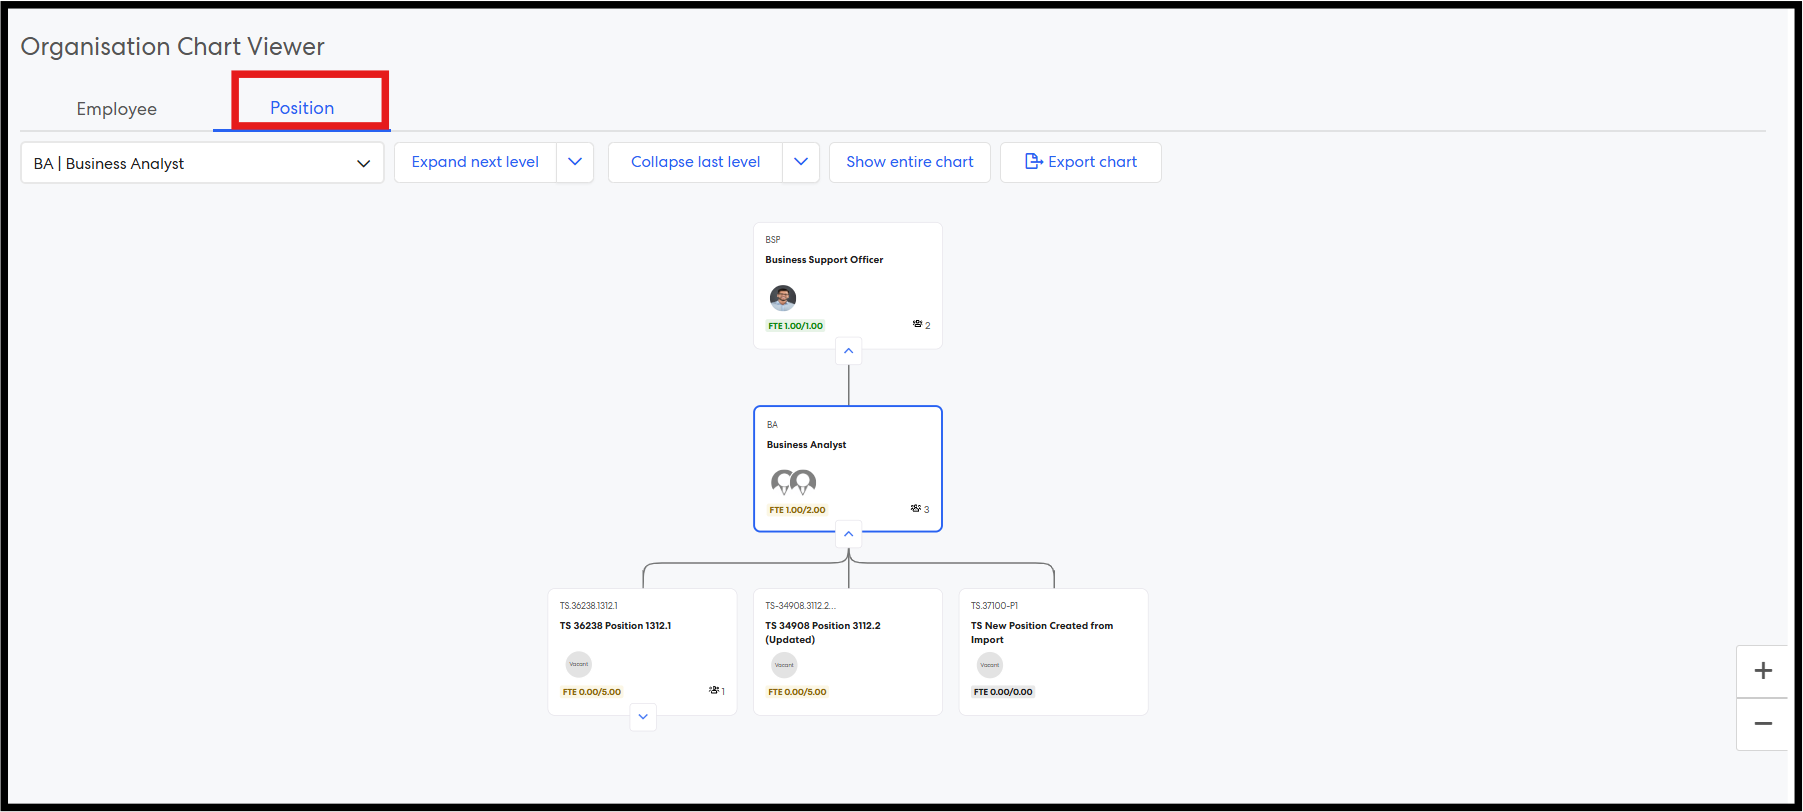
Step 9: Navigate to the position card and click on Incumbents.
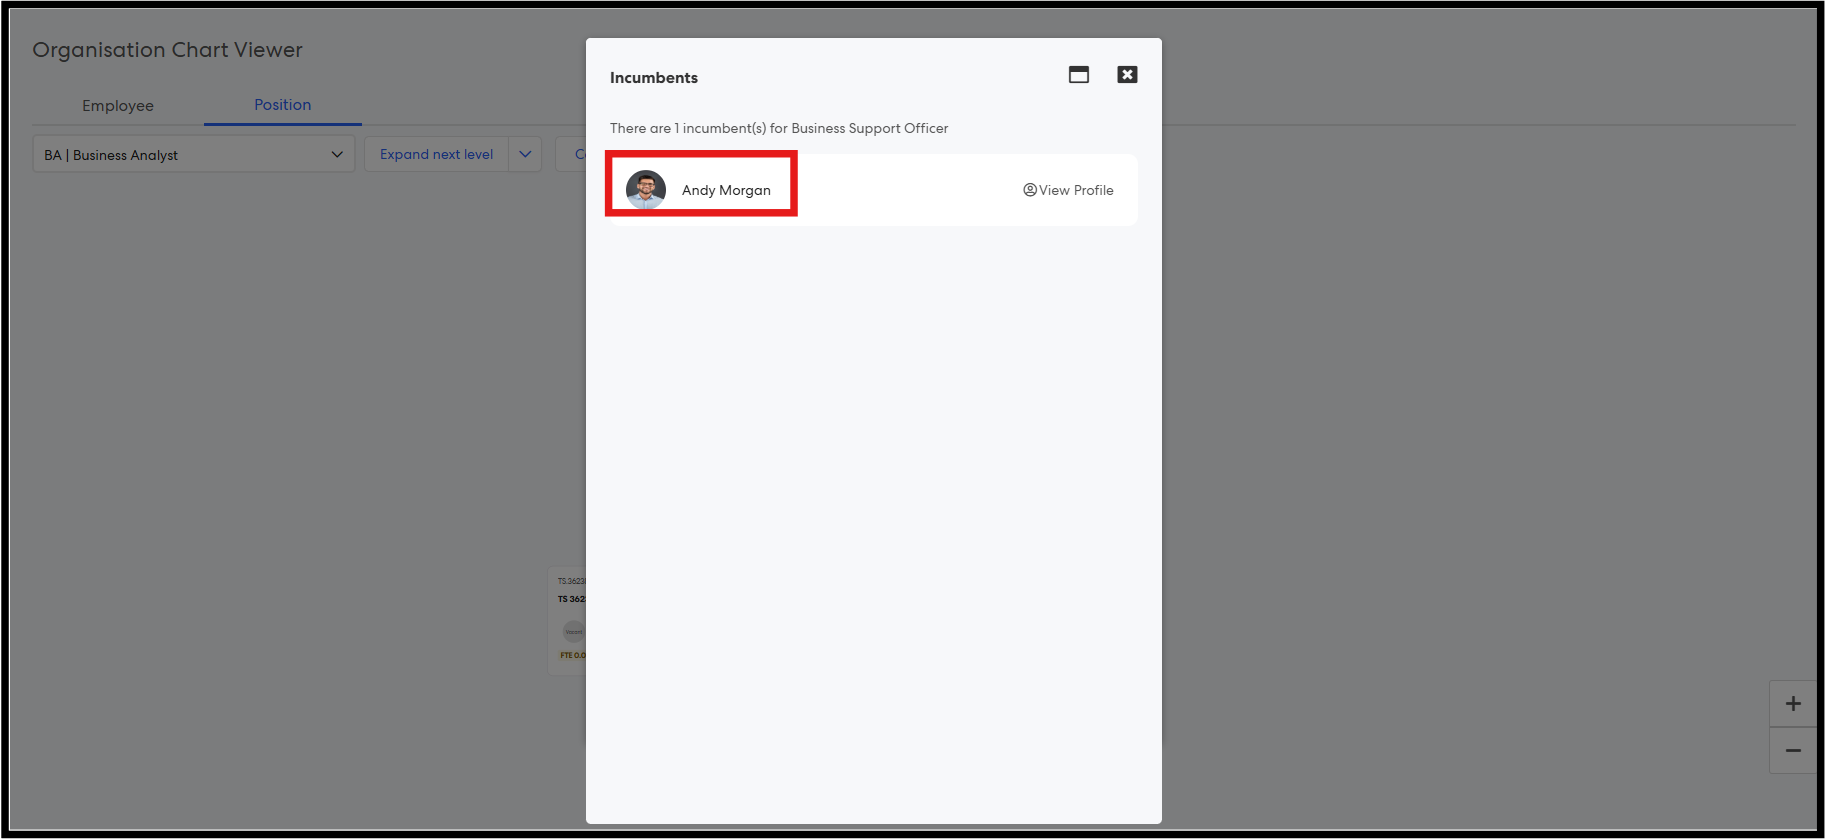
Step 10: The Incumbents popup will display a list of users holding that position, with names shown as Preferred Name + Last Name.
Users can now navigate directly to an employee’s profile by clicking on key name fields such as Supervisor and Representative across the system, including the Manage Employees report page. This functionality is available wherever these fields are displayed, including within employee profiles accessed by supervisors (for direct reports), administrators, and employees, improving navigation while maintaining existing access controls.
This enhancement improves navigation efficiency while ensuring all existing profile permissions and tab visibility rules are fully respected.
1. Employees Viewing Their Profile
Step 1: Log in as a Pulse user.
Step 2: Navigate to the top navigation bar.
Step 3: Click on the profile icon and select View Profile.
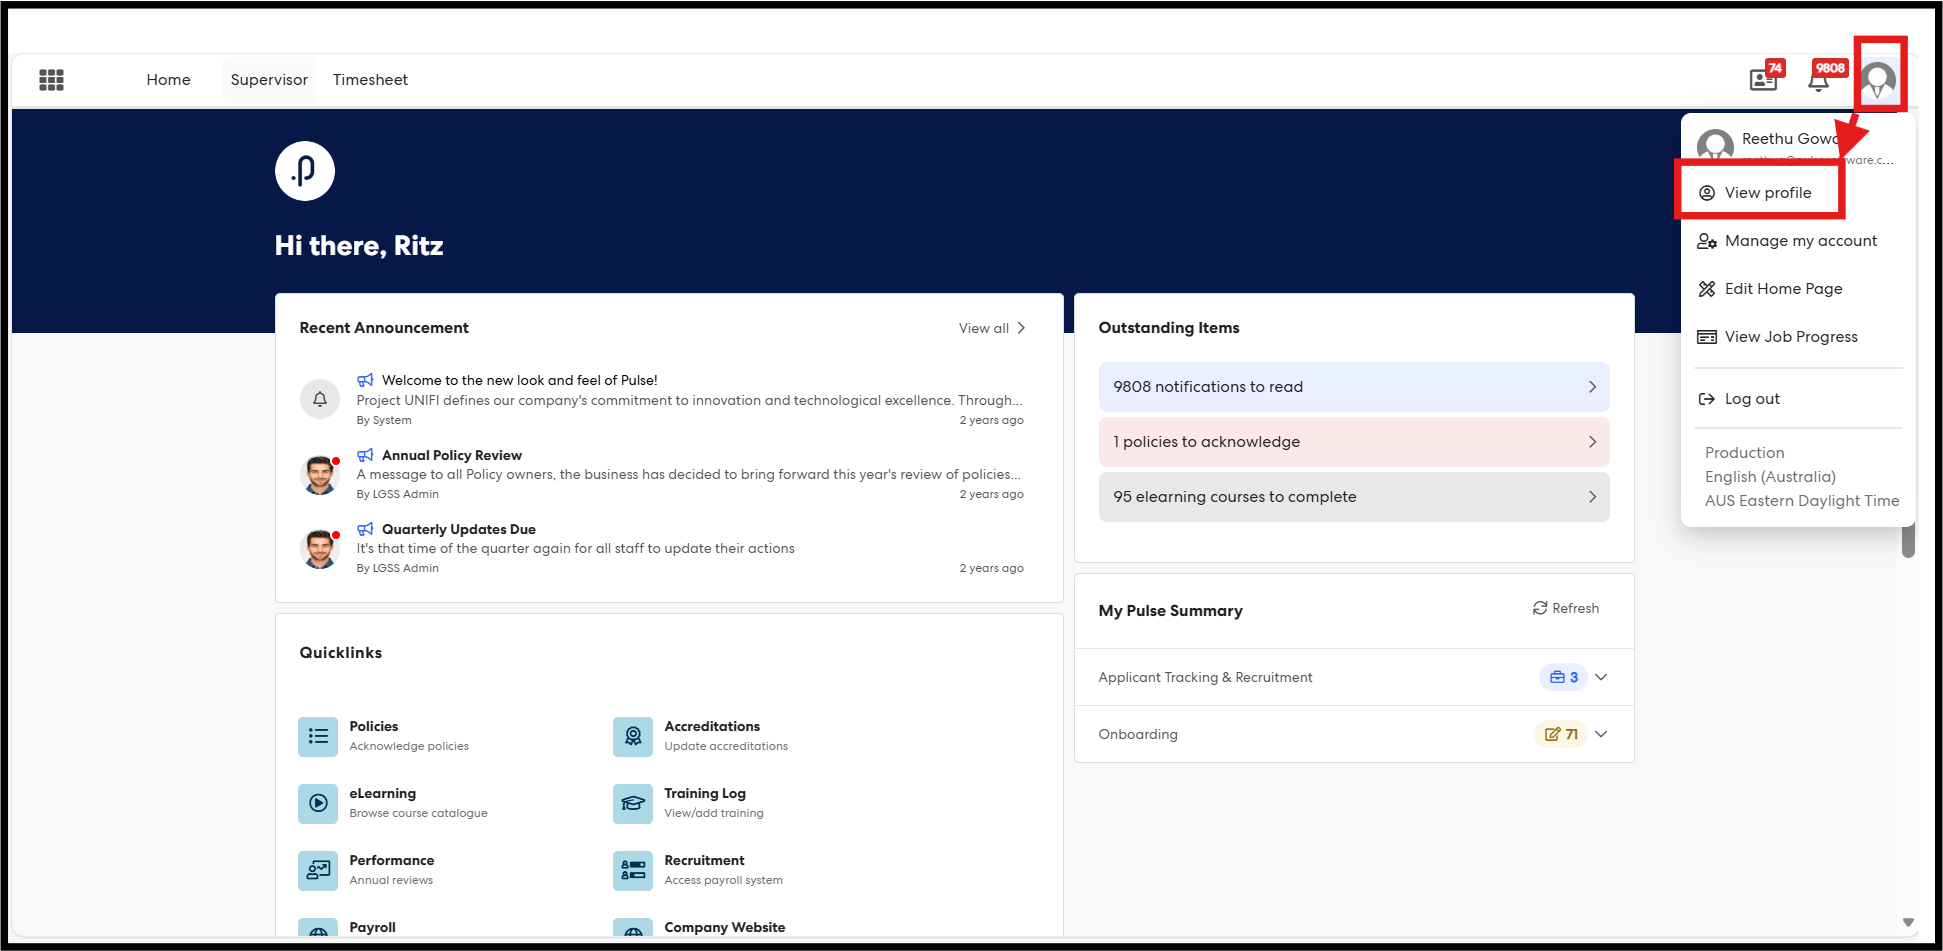
Step 4: The Employee Profile page will load, displaying sections such as Personal and Work Details.
Step 5: Navigate to the Work Details tab. Hover over the Supervisor or Representative name to view the clickable state.
Click on the name to open the respective employee’s profile popup.
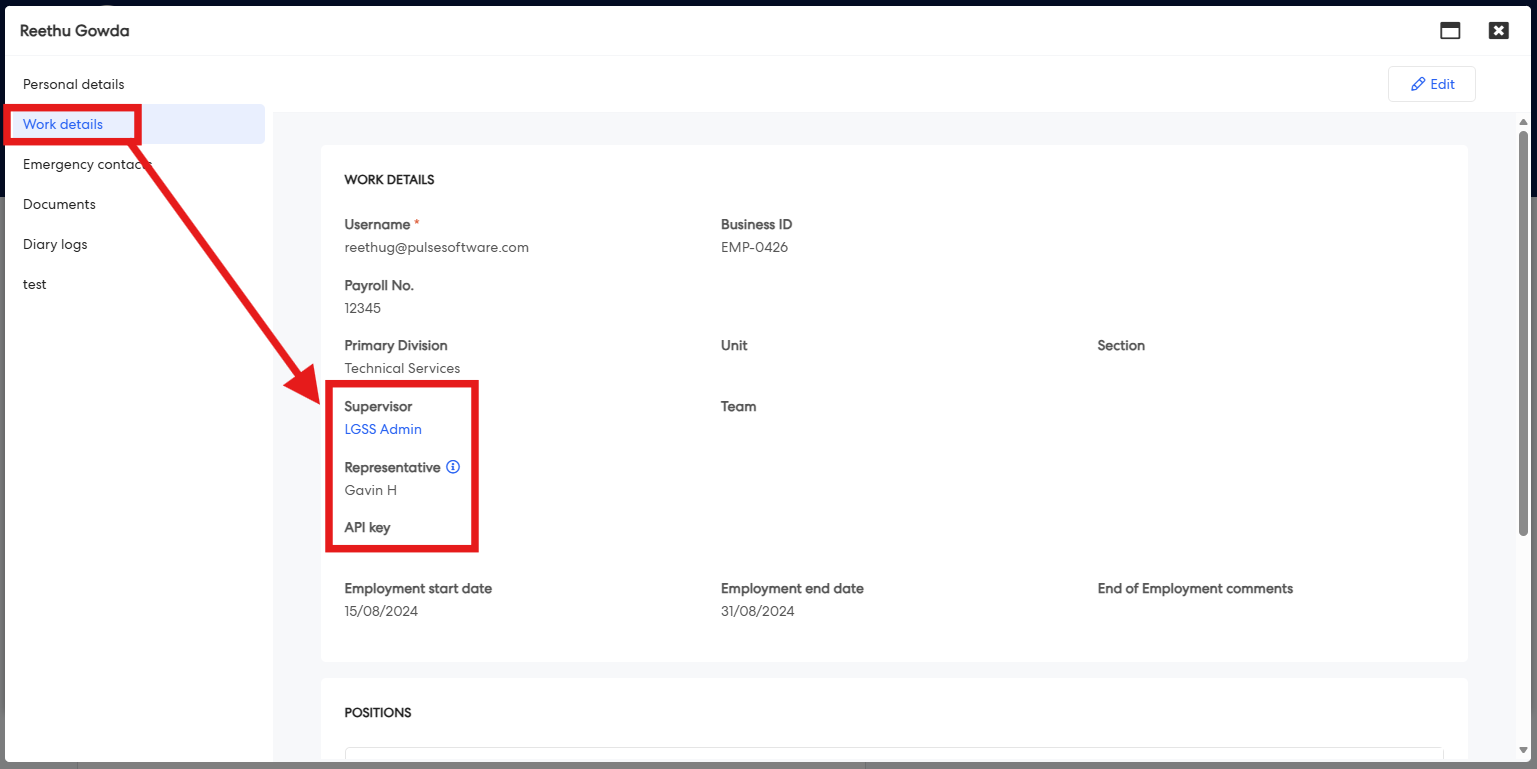
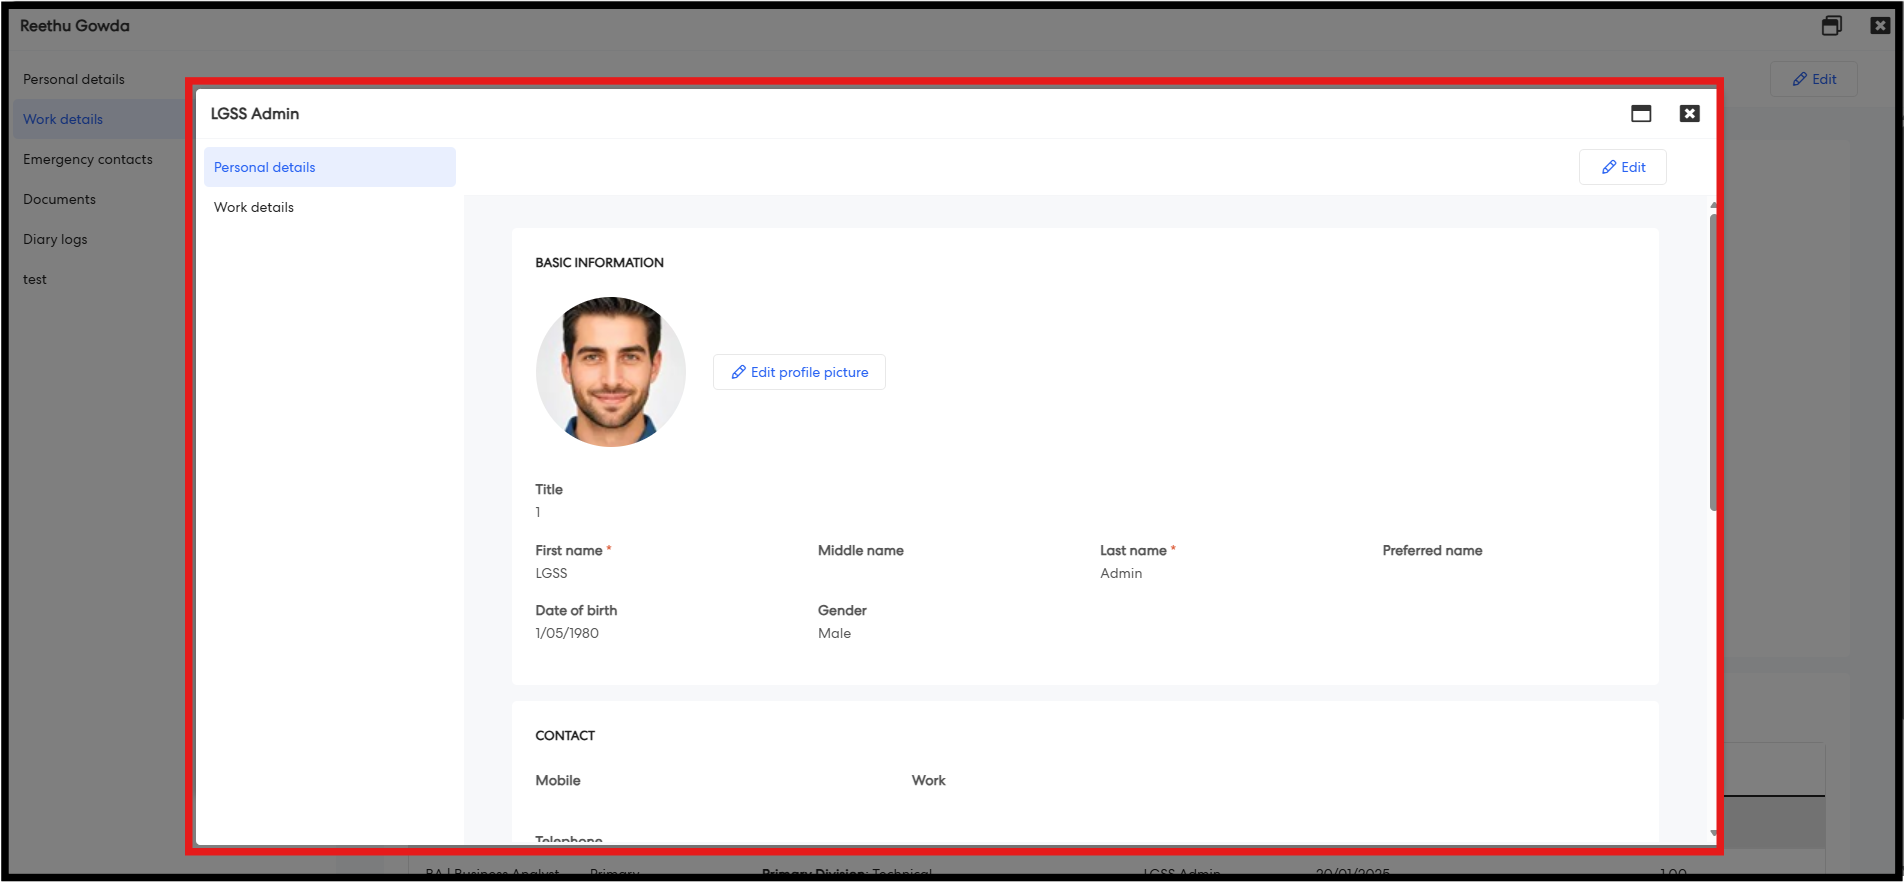
Similarly, when a supervisor navigates to the profile of a direct report, or when an administrator accesses any employee’s profile and navigates to the Work Details tab, the Supervisor and Representative fields will be clickable.
2. Clickable Supervisor and Representative Names in Manage Employees Report
Step 1: Log in as an HR Core administrator and navigate to the Manage Employees report page.
Step 2: The page will load a table displaying all employee details.
Step 3: Navigate to the Supervisor or Representative column.
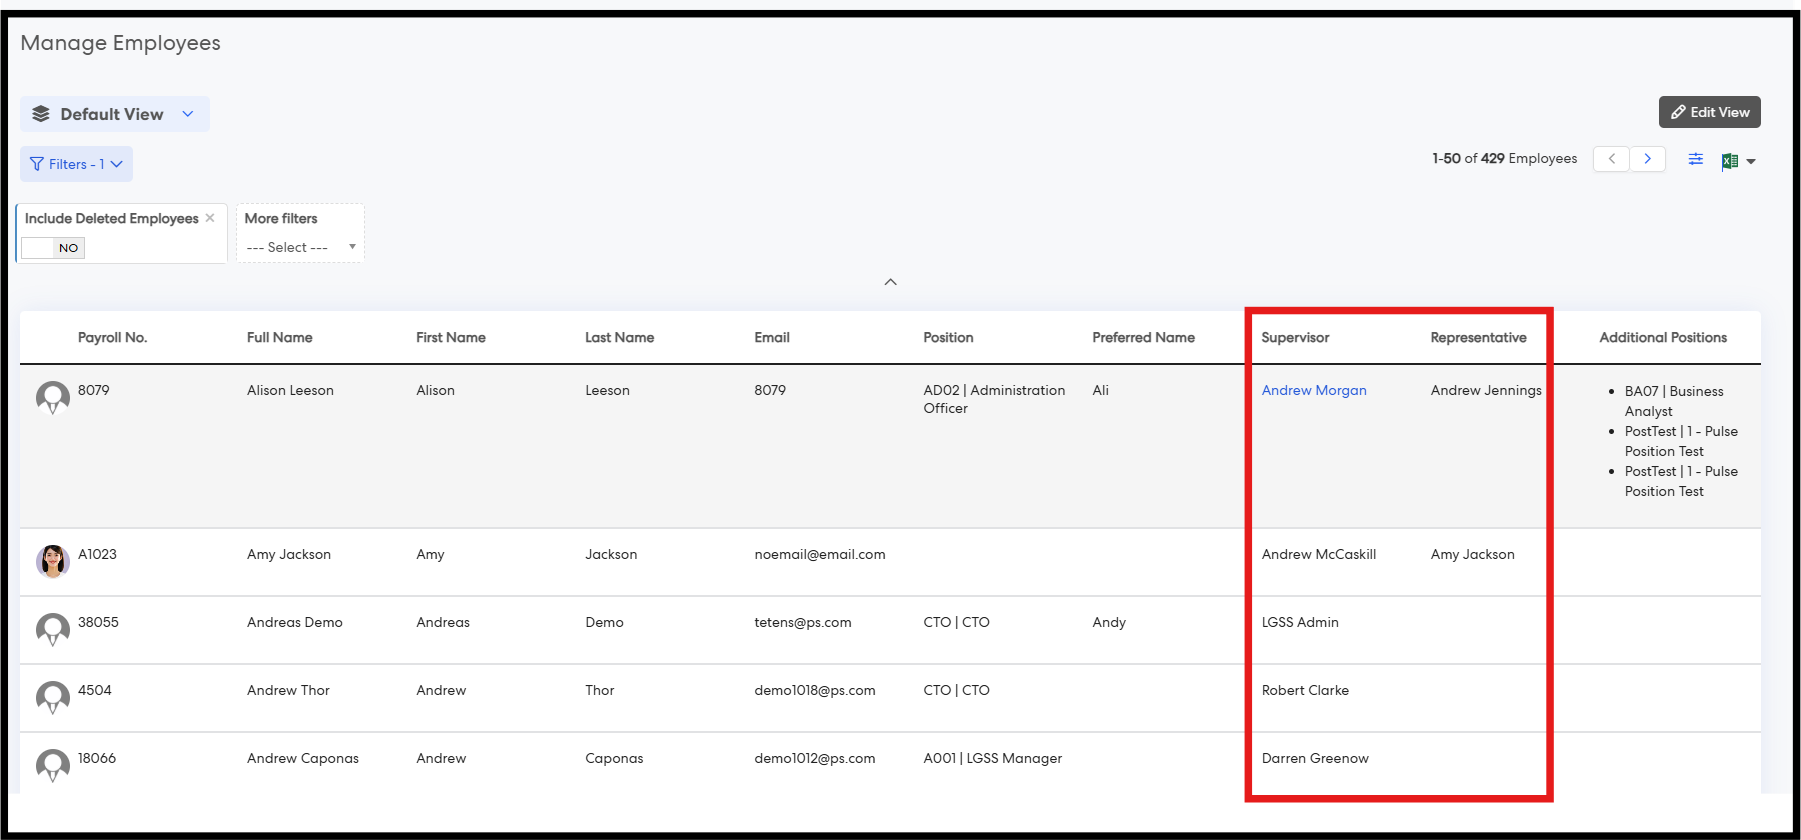
Step 4: Click on any name to open the respective employee’s profile in a popup.

Issues resolved
Corporate Planning & Reporting and Additional Hierarchies
- Fixed an issue where attachments were not saving against action progress updates.
Performance Reporting Framework
- Fixed an issue where select list indicators triggered robot errors when editing responsible or authorising officers.
- Fixed an issue where document generator filters were not working correctly.
Delegation & Policies Register
- Fixed an issue where modifying a delegation caused it to duplicate.
- Fixed an issue where users remained assigned to a removed additional delegation after their additional position was removed.
Project Management & Control
- Fixed an issue where pre-projects with multiple approval forms reset the approval of the first form.
Pulse Security
- Fixed an issue where My Pulse Summary did not display assigned or completed items.
eRecruitment
- Fixed an issue where uploading Offer/Contract Templates resulted in a “Payload Too Large” error and caused images to appear broken.
- Fixed an issue where candidates did not receive the “Notify applicant when the application is submitted” notification.
- Fixed an issue where the system became unresponsive when sending an Offer Package.
Learning
- Fixed an issue where attachments were not saving to accreditations when adding new, renewing, onboarding, or adding via training session accreditation.