Contents
1.Enterprise Risk Management
1.1 Risk Section ReorderingIn order to support and facilitate the differing, and often changing, Risk Management requirements and processes, Pulse have introduced the ability for Admins to configure the order and visibility of the different sections of the Risk Creation and Management process.
Configurable section labels: Admins can rename the section labels to align with their organisation's terminology and processes.
Reordering sections: The risk sections can be easily rearranged to fit the preferred risk management flow, ensuring a smooth and efficient process for users.
Enable/disable sections in pop-ups: Admins have an option to enable or disable specific risk sections with in pop-up, such as Risk Creation or other relevant pop-ups, guiding users through the process effectively.
Step 1: Login to Pulse and go to the Enterprise Risk Management Module.
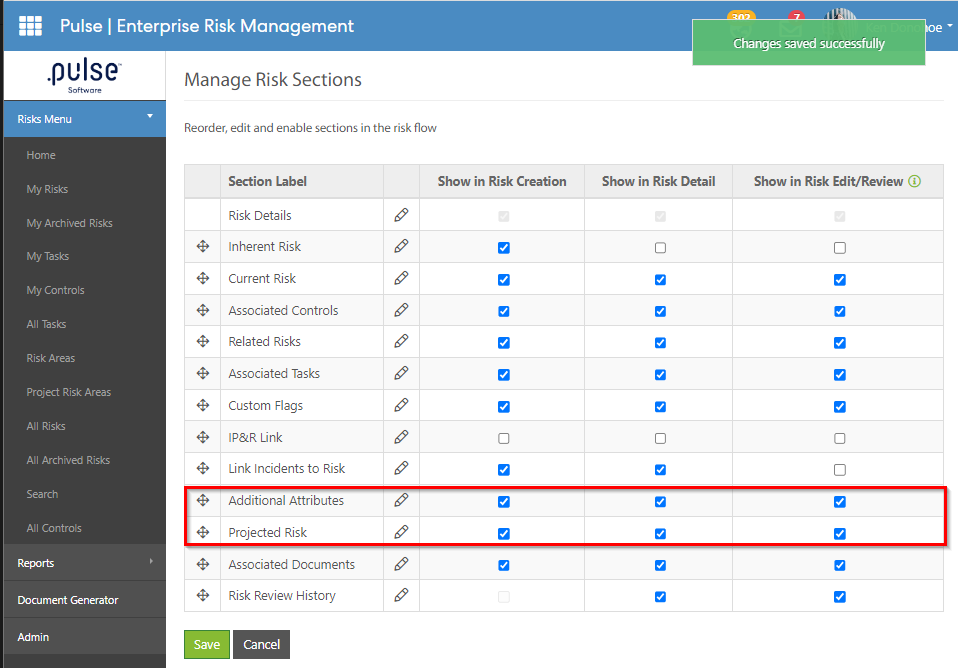
Step 2: Go to the Admin page > Click on the new "Manage Risk Sections".

Step 3: Admins can reorder, edit and enable/disable sections in the risk flow through this page.
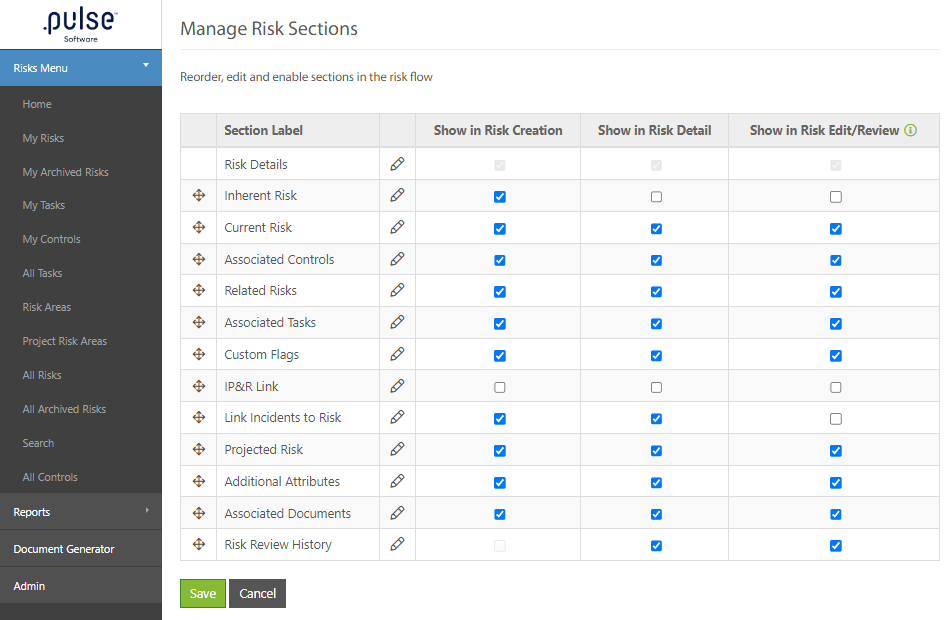
Step 4: Reorder, Edit, and Enable/disable Sections.
With "Manage Risk Sections" functionality, admins can now effortlessly reorder the sections within the risk flow, tailor them to specific needs, and enable or disable sections based on organisational requirements.
It's important to note that while this feature provides extensive flexibility, there are certain limitations to consider:
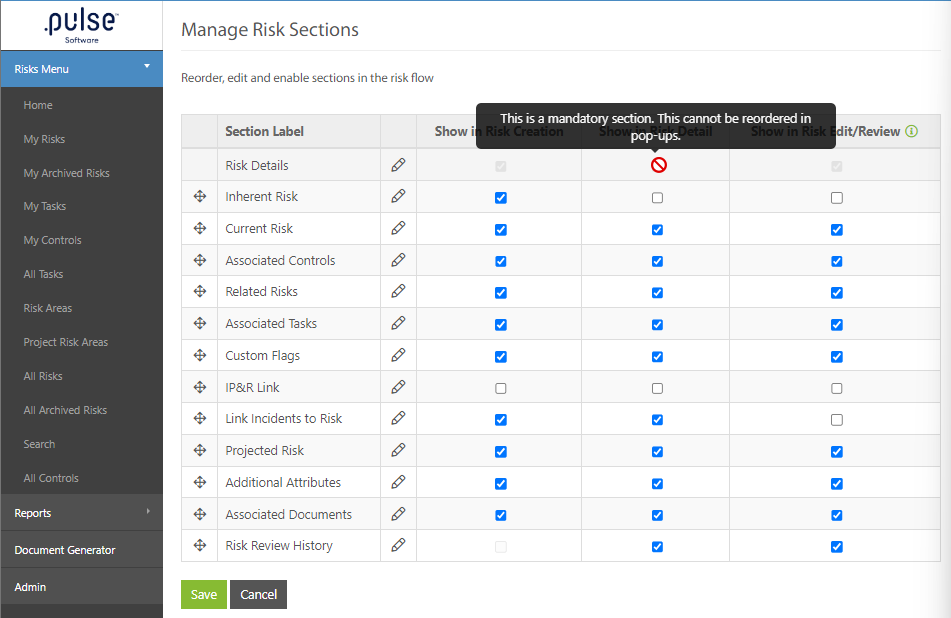
- The "Risk Details" section is fixed and cannot be reordered or hidden by admins. This is because the first section serves as a starting point for the risk management process and ensures consistency across the organisation. Its visibility is crucial to help users understand the context and initiate the risk management flow.
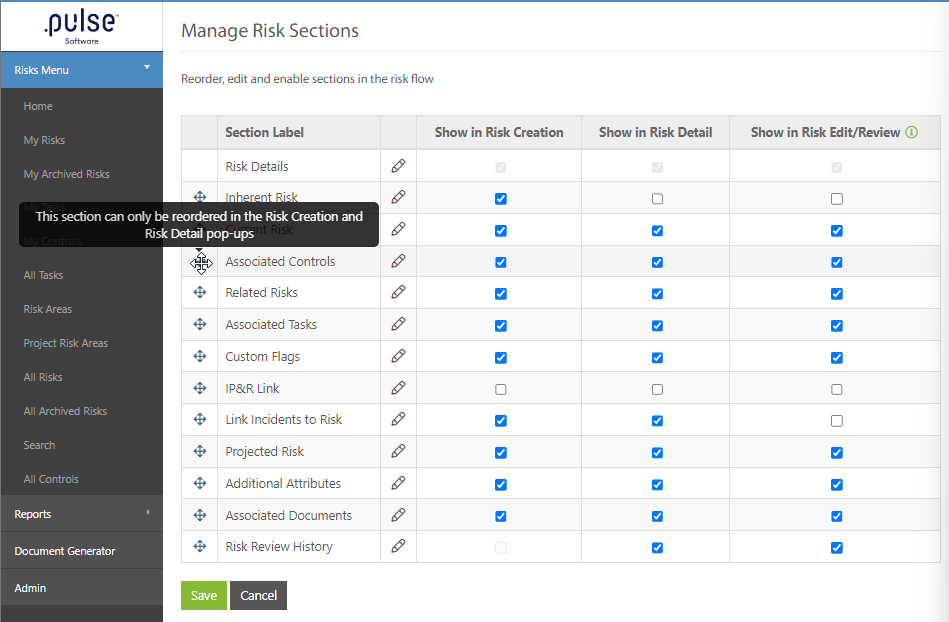
2. With the Associated Controls, Associated Tasks and Associated Documents, admins will not be able to reorder them in the Risk Creation and in the Risk Details pop-ups.
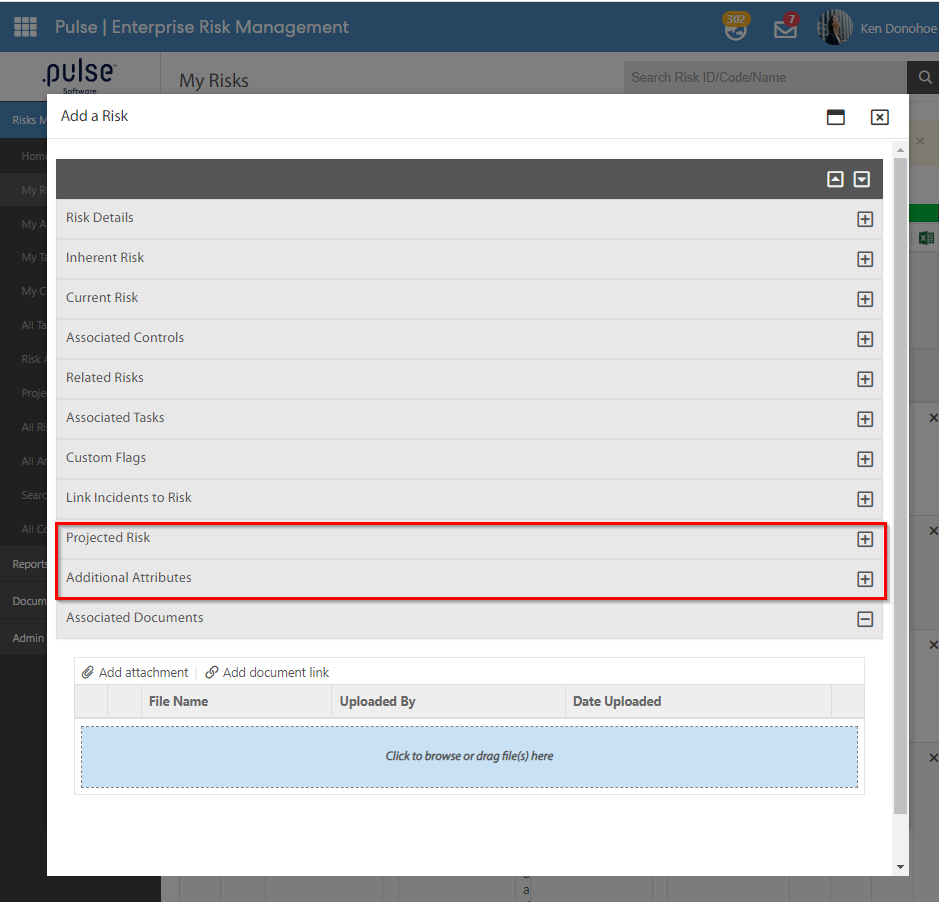
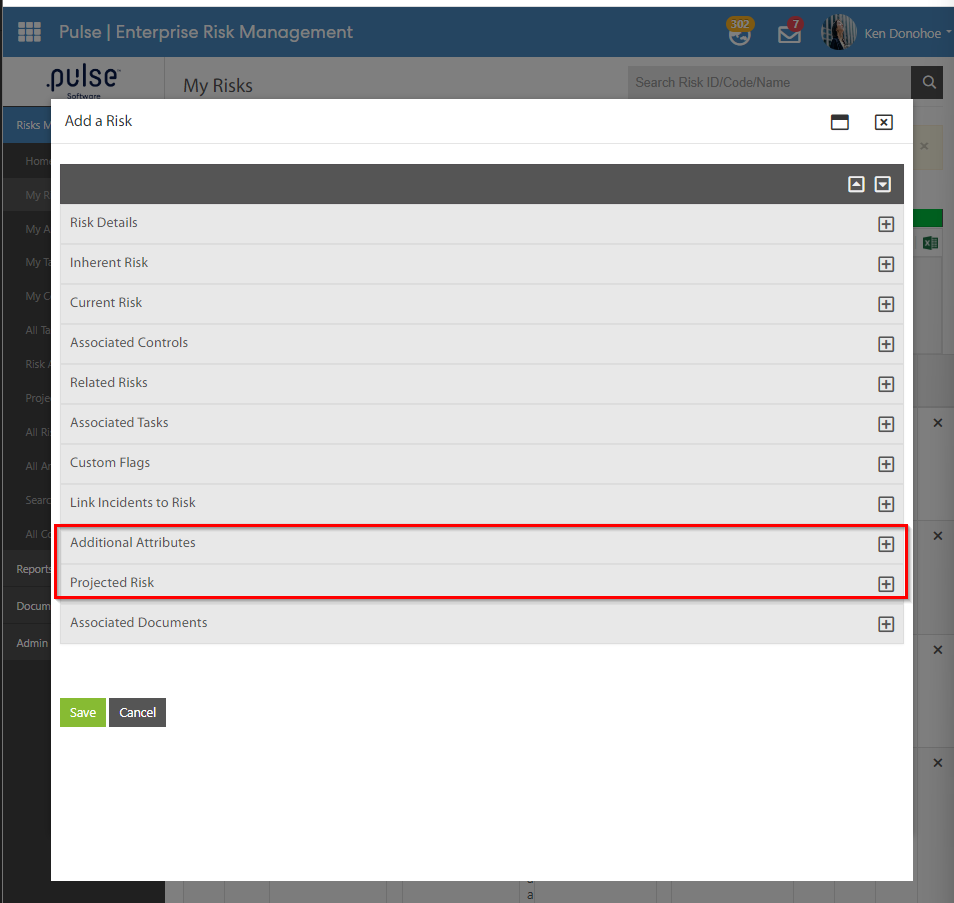
Step 5: Move a Section Label and enable it in Risk Creation, Risk Detail and Risk Edit/review. Click on the save button. (Reorder Projected Risk below Additional Attributes)
Before:
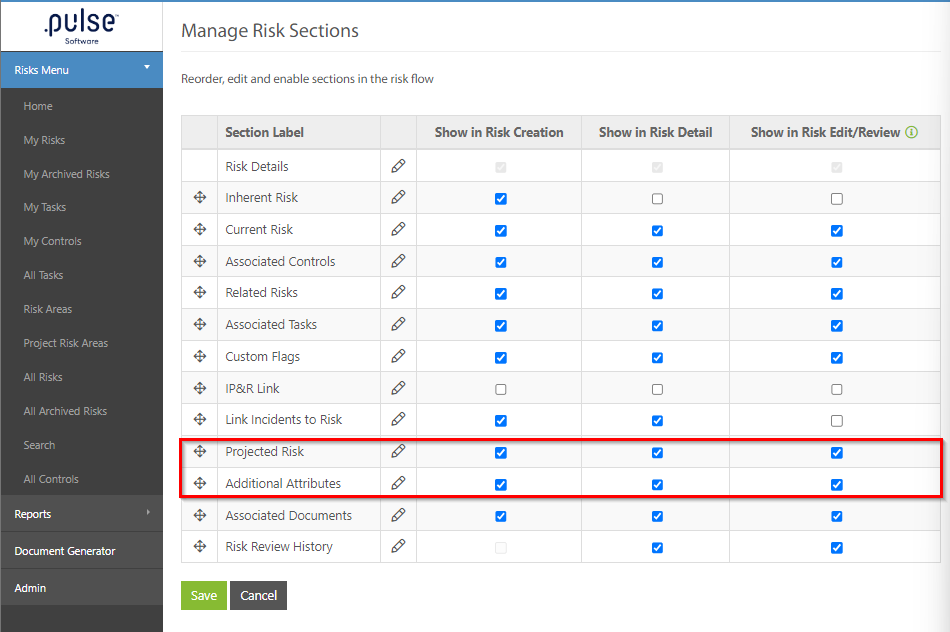
After:
Now admins will be able to see the changes in the Risk Creation, Risk Detail and Risk Edit/Review.
Note: All these changes will be implemented in PMC, CPR and CPR(AH)
1.2 All Tasks PageA new "All Tasks" page has been added to the Enterprise Risk Management Module, allowing admins to quickly and easily view the status of and manage all Tasks across the system.
Step 1: Login to Pulse and go to the "Enterprise Risk Management" Module.
Step 2: Expand the "Risk Menu" column and click on the new "All tasks" page.
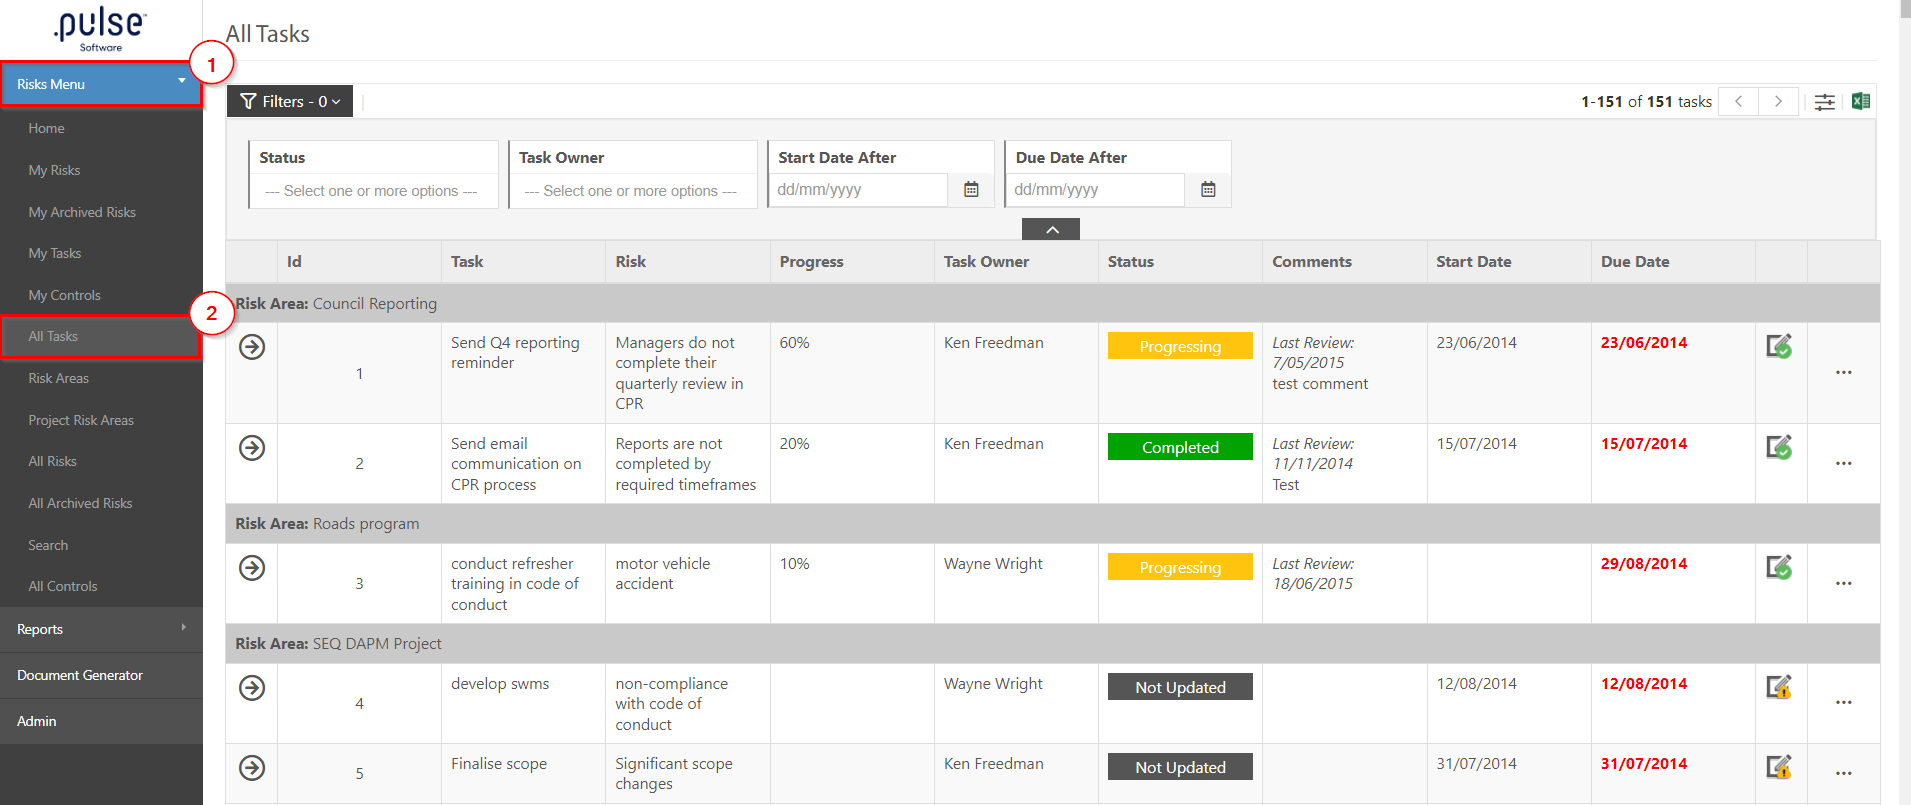
The new "All tasks" page will only be accessible to Admins.
The grid in the All tasks page displays Risk area grouping with Associated Tasks in each row. Admins can view, edit, update and Archive each task by clicking on the View, edit, update and Archive buttons.
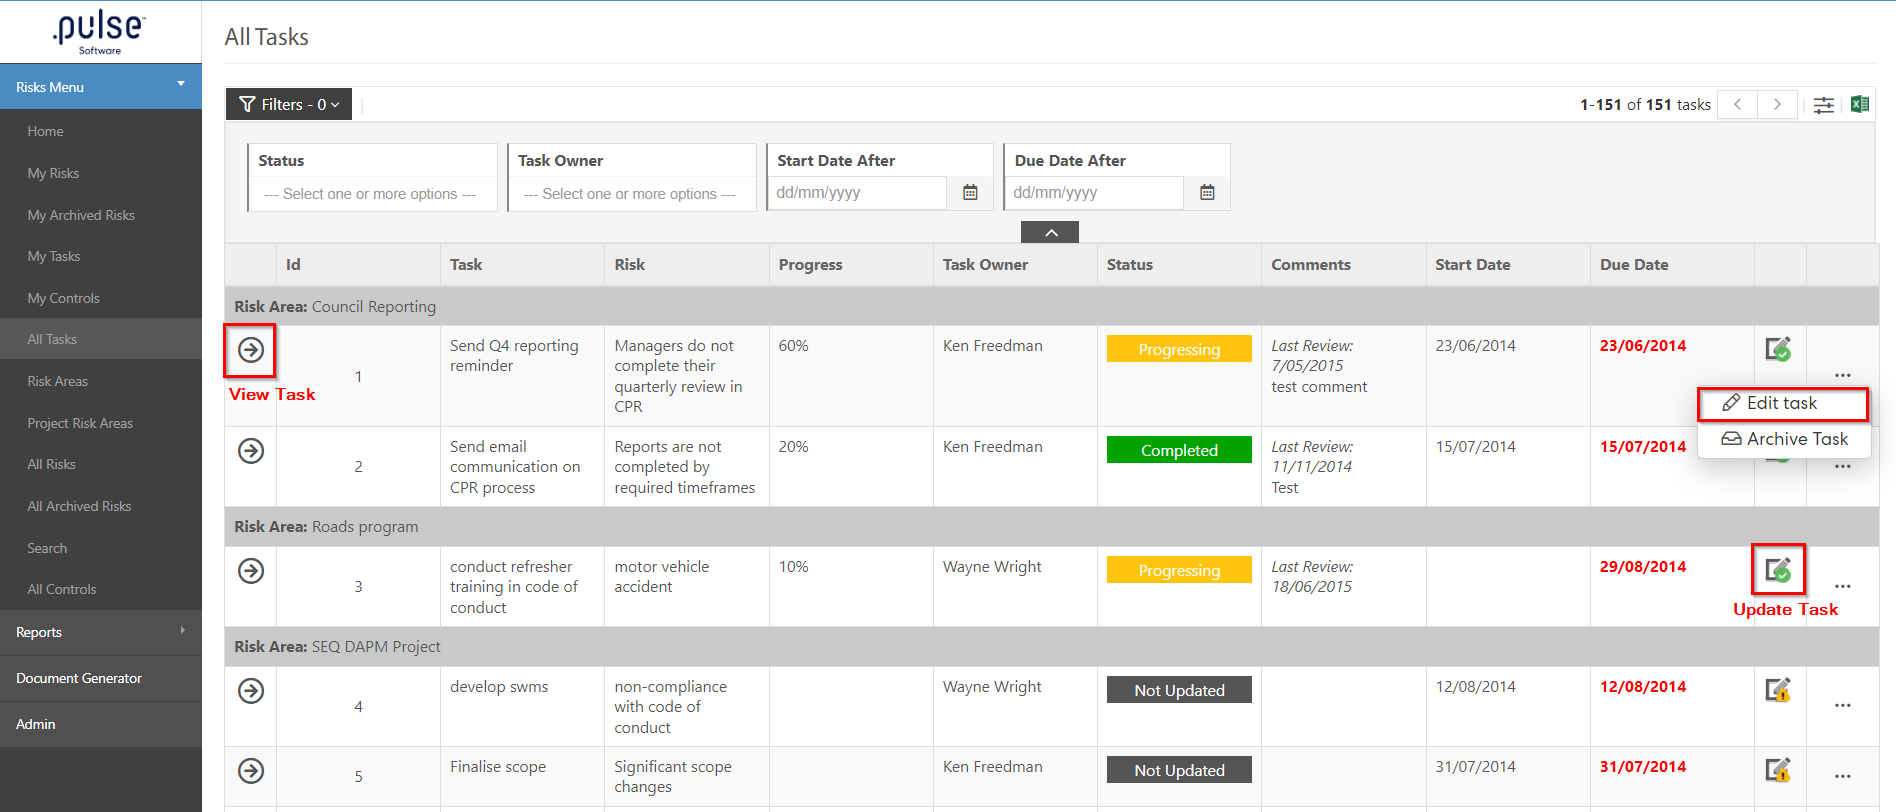
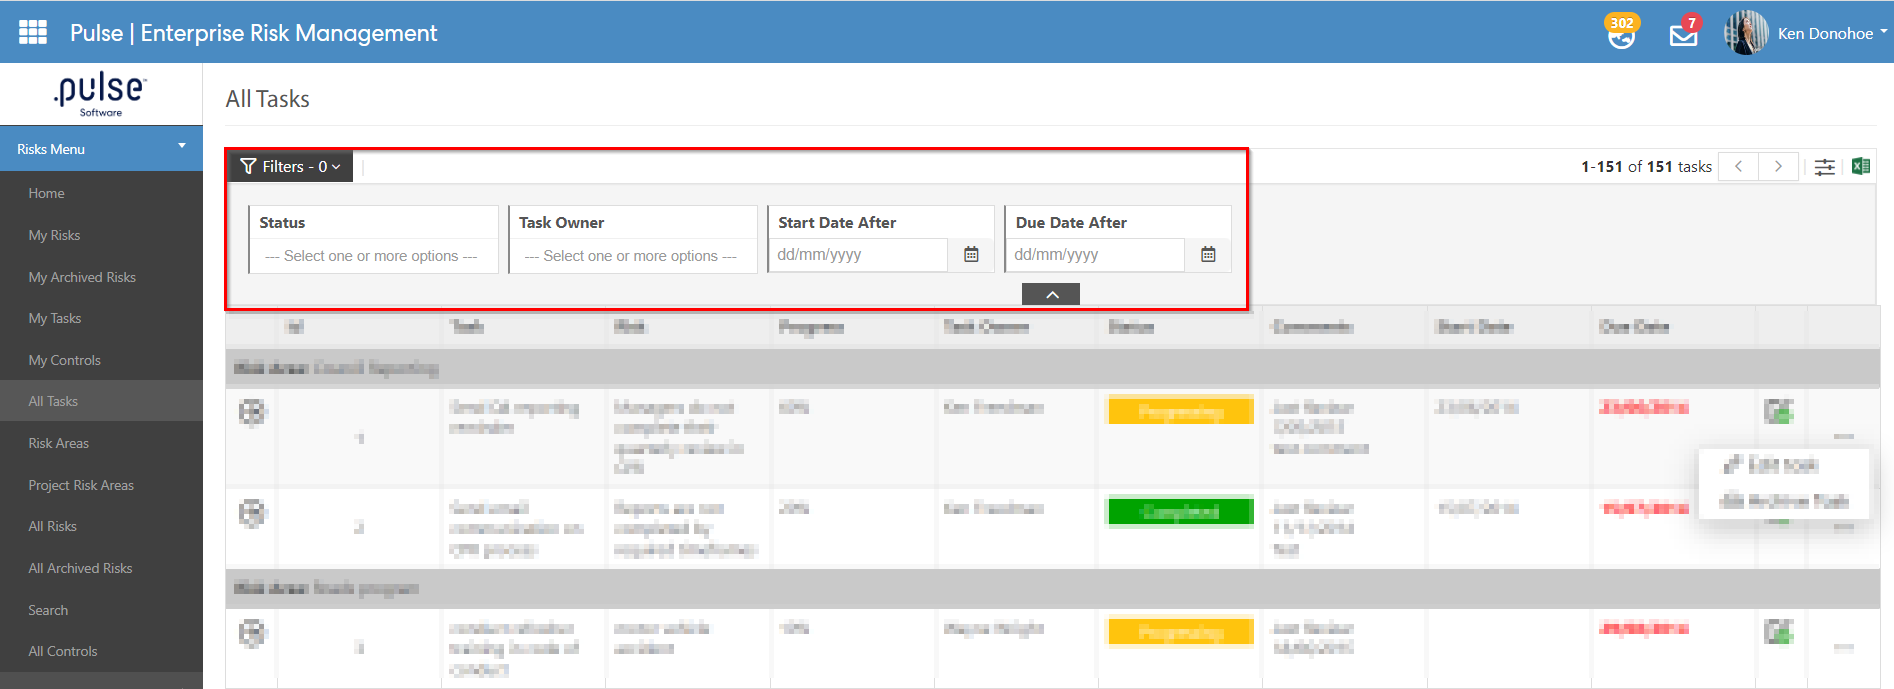
Admins can apply various filters to the task grid, refining the displayed results based on criteria such as task status, start date, due date, and task owner.
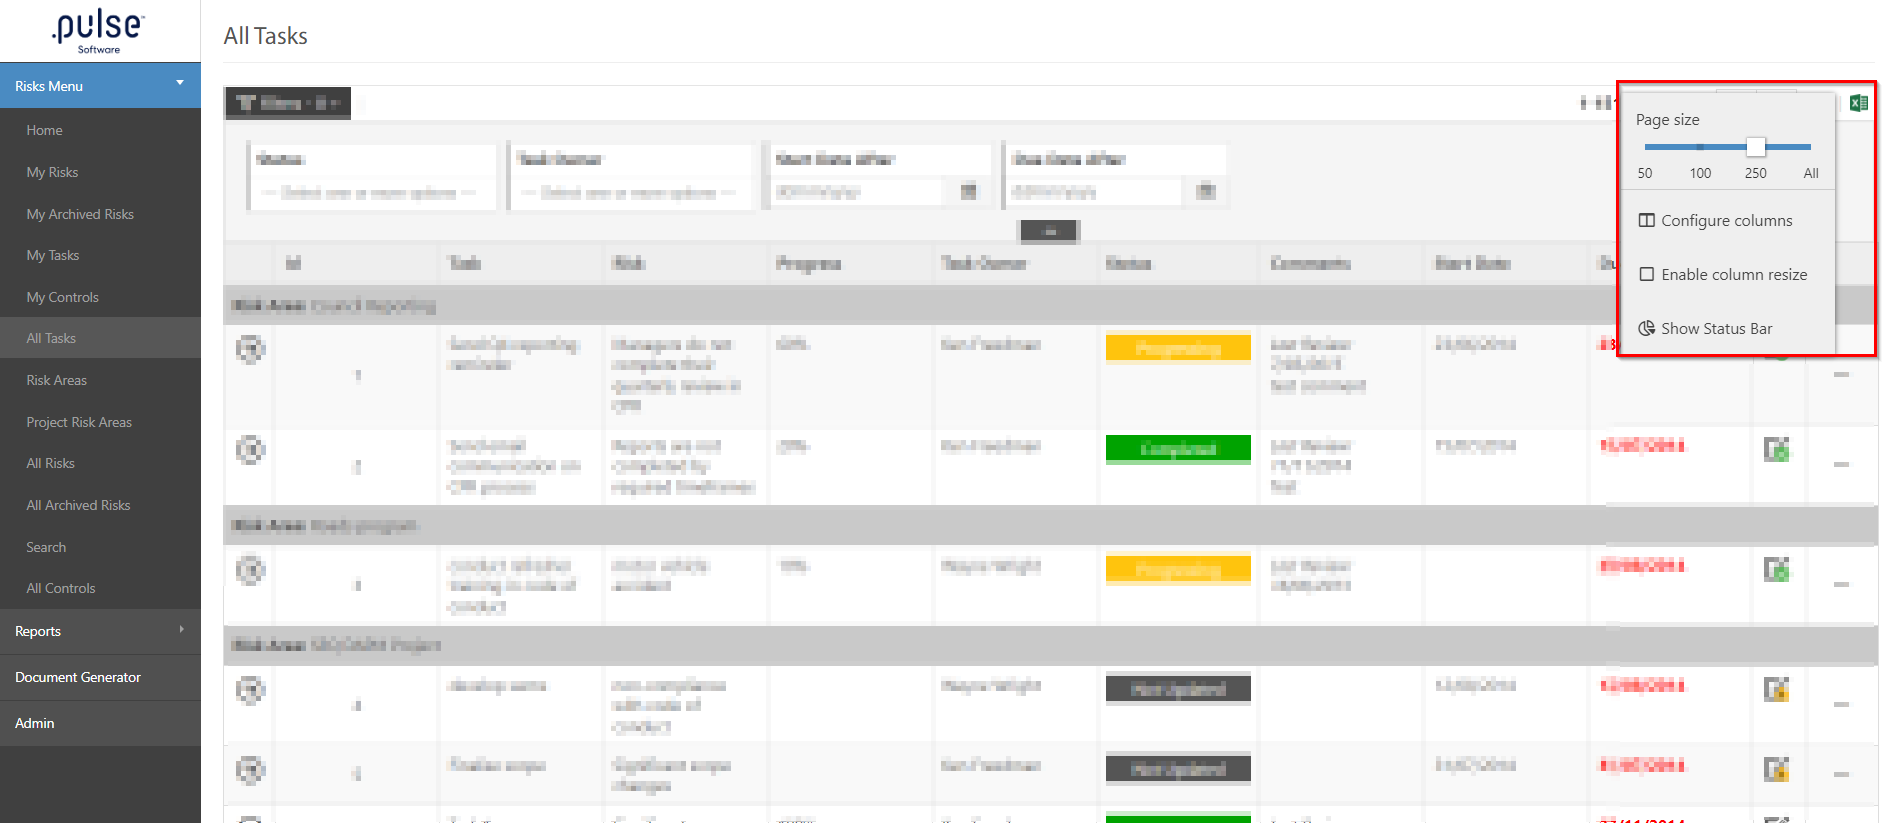
They also have the ability to use the Excel export, set the page size, configure columns, and show/hide the status bar.
The All tasks page is also mobile friendly, giving admins the ability to access the All tasks page from anywhere.
2. eRecruitment
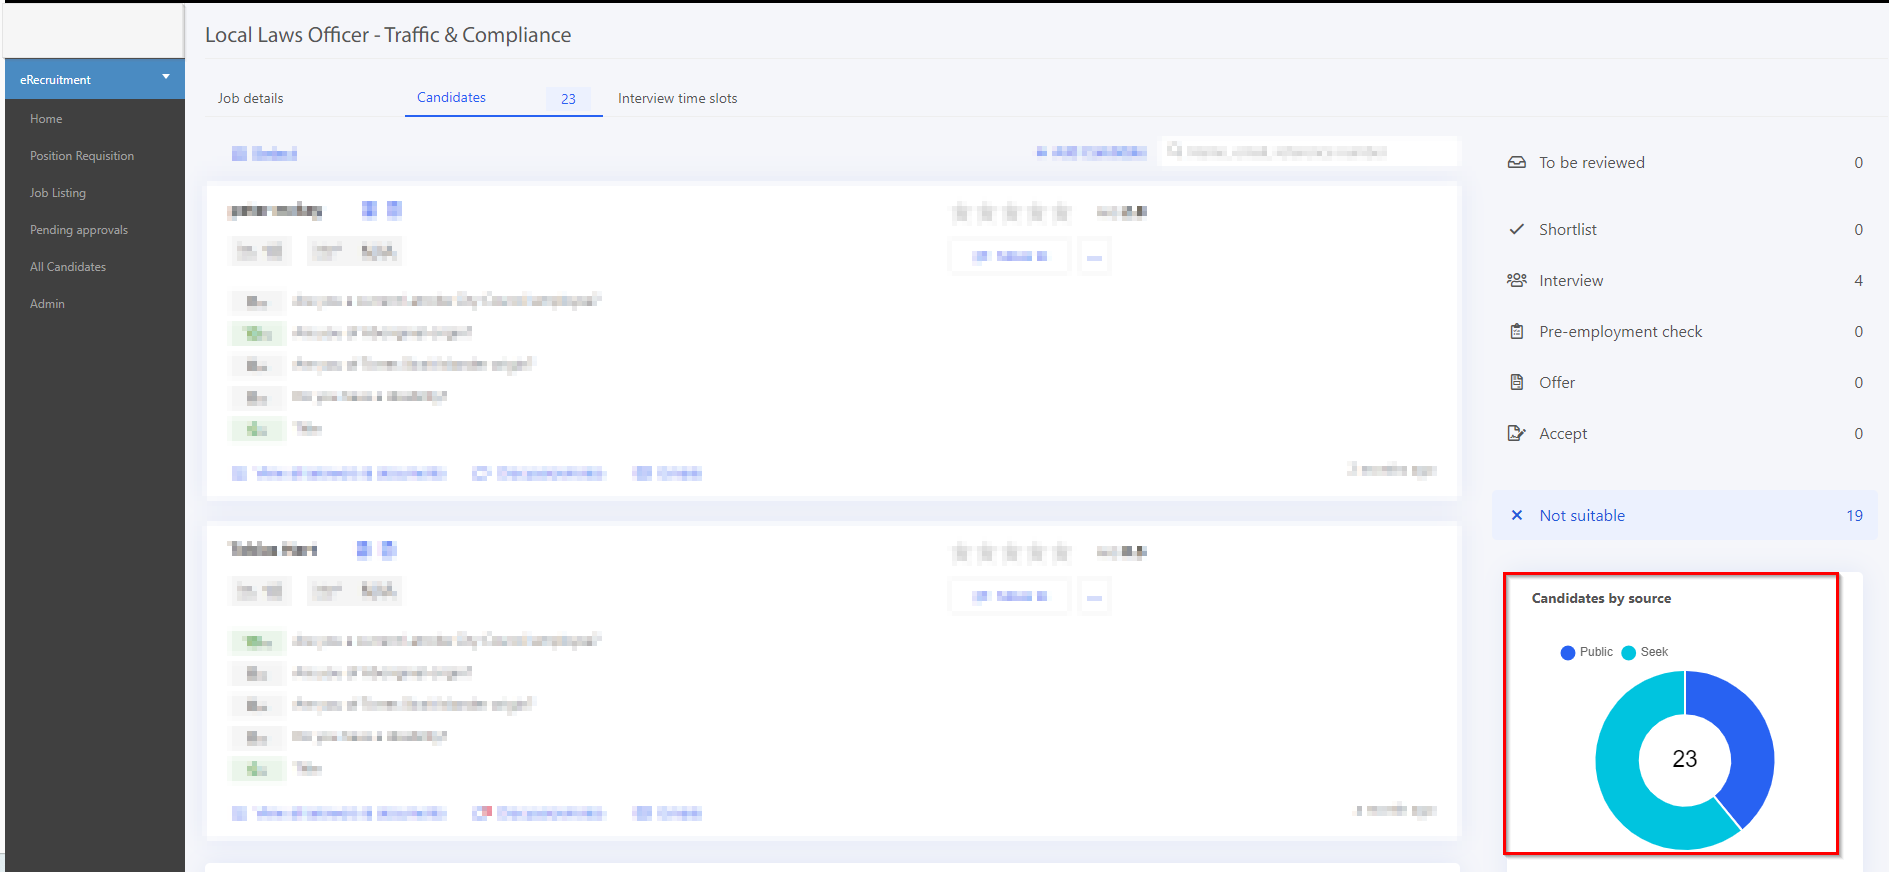
2.1 Candidate Source Breakdown Chart on Candidates TabA new "Candidate Source" chart has been added in the Candidate Tab. Admins will be able to view the chart when they view a Job Listing.
The new Candidate source chart will help the hiring team to see where the candidates are coming from so that they can begin to use the information to target specific job boards for different types of jobs, or to judge their efficacy.
Step 1: Login to Pulse and go to the eRecruitment Module.
Step 2: Go to the Job Listing page and select any job (Closed or open Job). Make sure to select a job which has candidates applied in it.
Step 3: Once selected, go to the Candidate's Tab and look for a graphical representation of chart where the candidates have been organised based on their source.
Issues resolved
- Fixed an issue where the progress status was not getting updated for the eLearning courses.
- Fixed an issue where users were getting notifications to complete an organisational task even when they were completed.
- Fixed an issue where admins were getting an error message when enrolling a new user to Pulse.