Contents
1. eRecruitment
Pulse has added job board integration with LinkedIn and Careers at Council. This will allow your recruitment team to post jobs directly to LinkedIn and Careers at Council and track which applicants have come through from each job board.
To enable integration with the LinkedIn and Careers at Council job board, please contact Pulse Support via email at support@pulsesoftware.com or phone on 1300 363 325
1.1 LinkedIn IntegrationStep 1: Login to Pulse --> eRecruitment Module. Go to the job listing page, search for an open job and go to the job details tab.
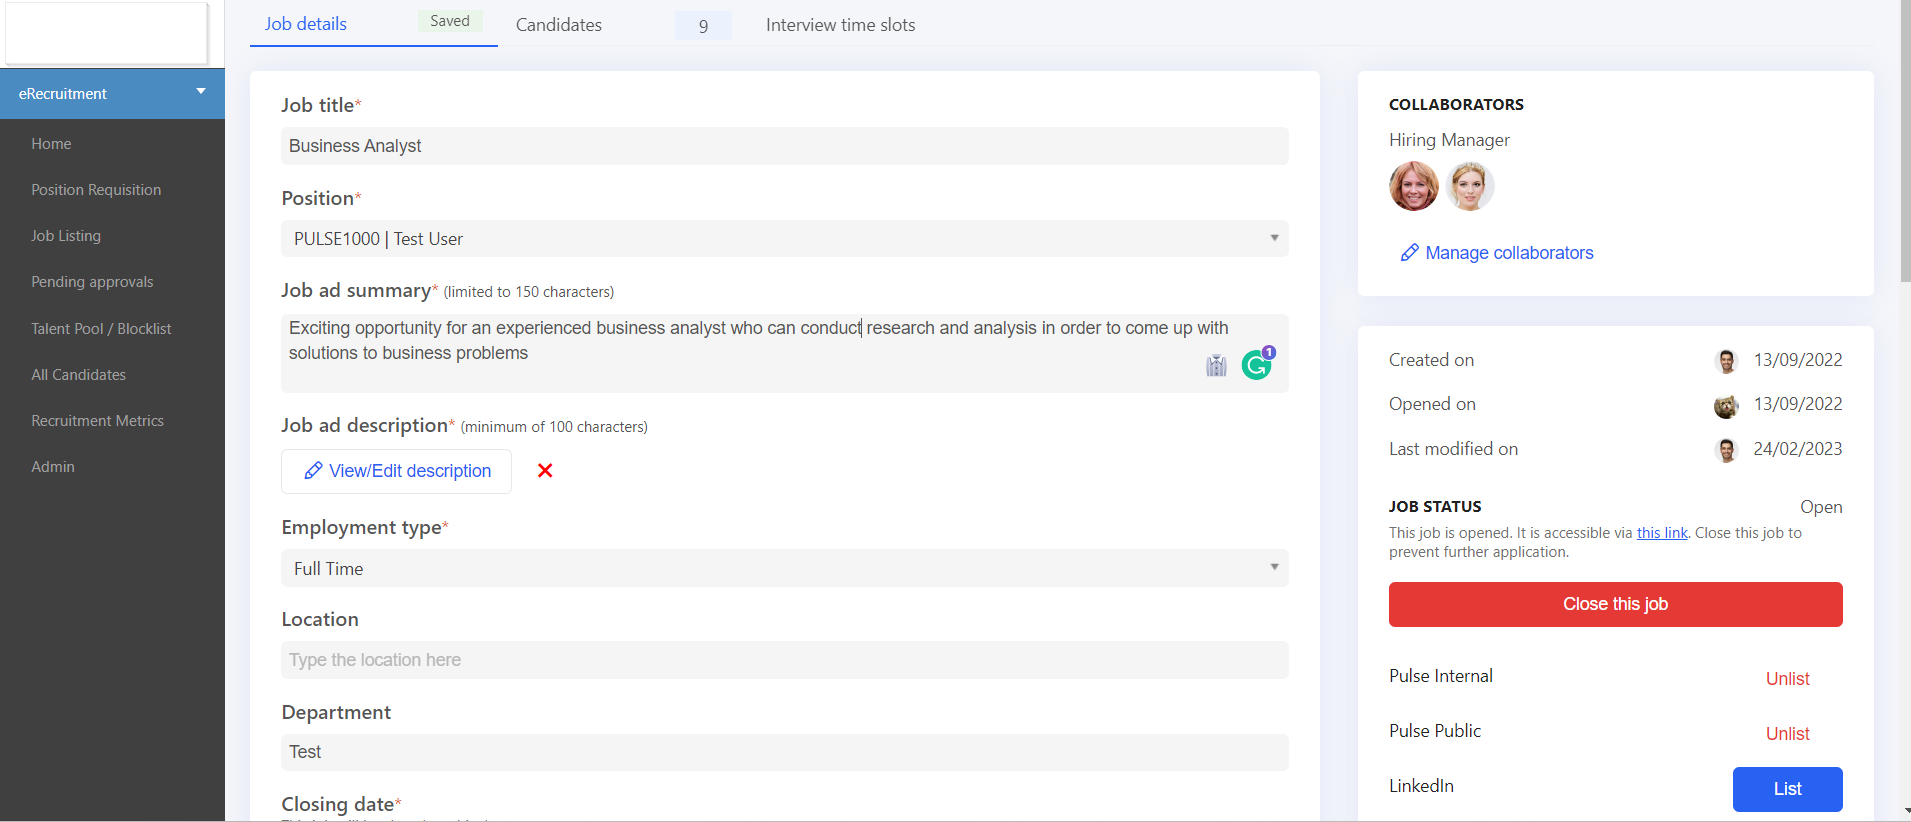
Step 2: Click on the "List" button beside "LinkedIn".
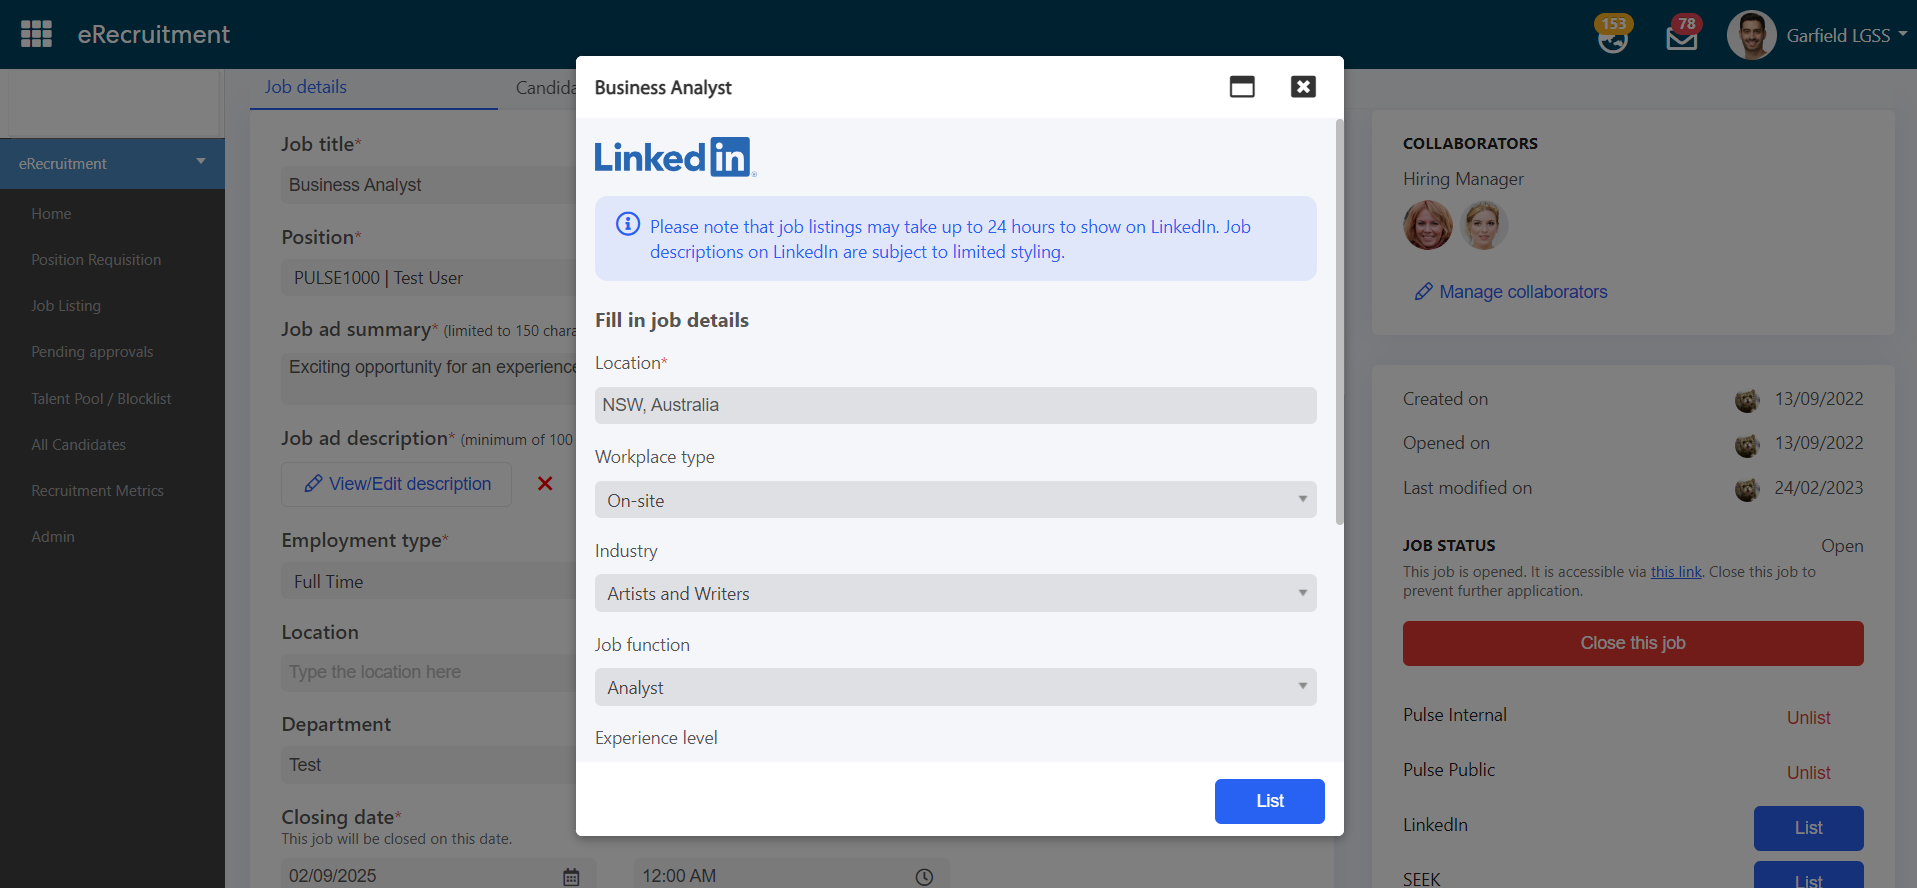
Step 3: Fill in the required information.
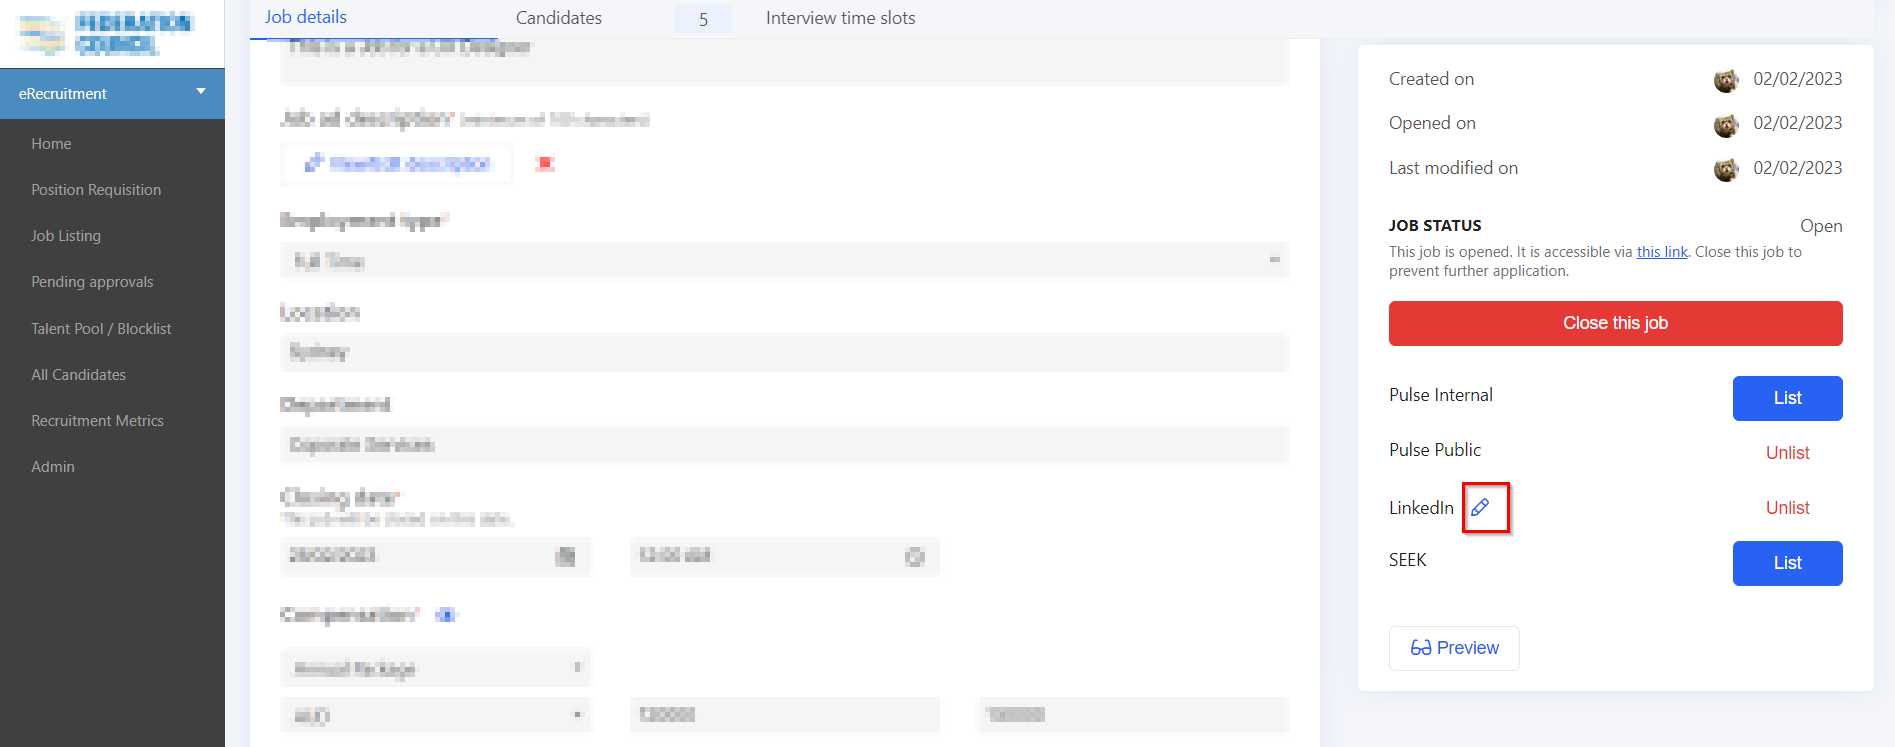
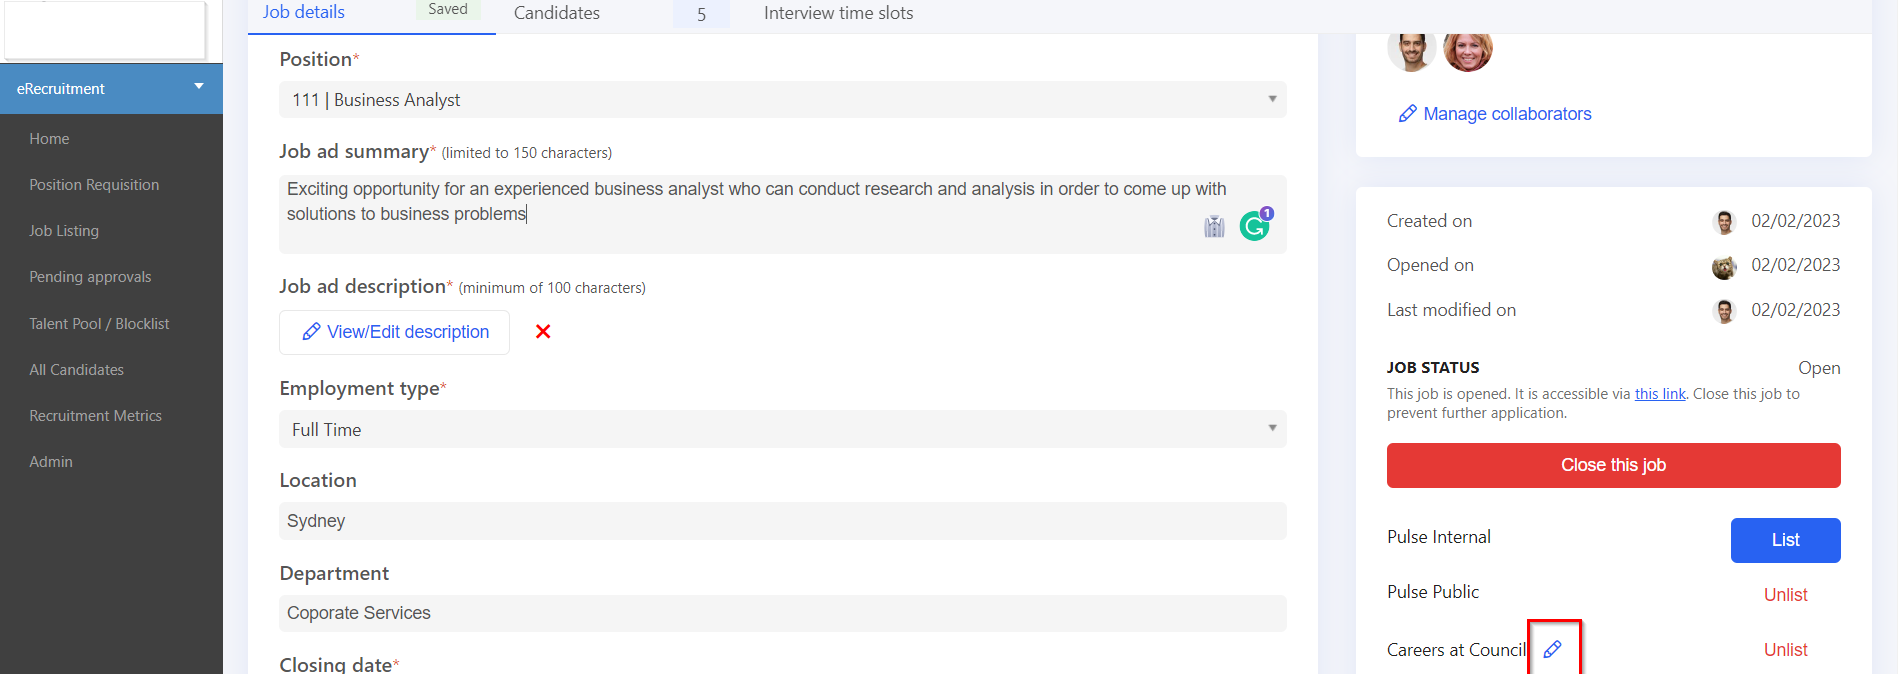
Note: Admins and Hiring Managers can make changes to job ads by clicking on the pencil item beside the job board name.
To view how this feature works, follow the steps below:
Step 1: Login to Pulse --> eRecruitment Module --> Job Listing Page --> Search for an open Job/Create a new job.

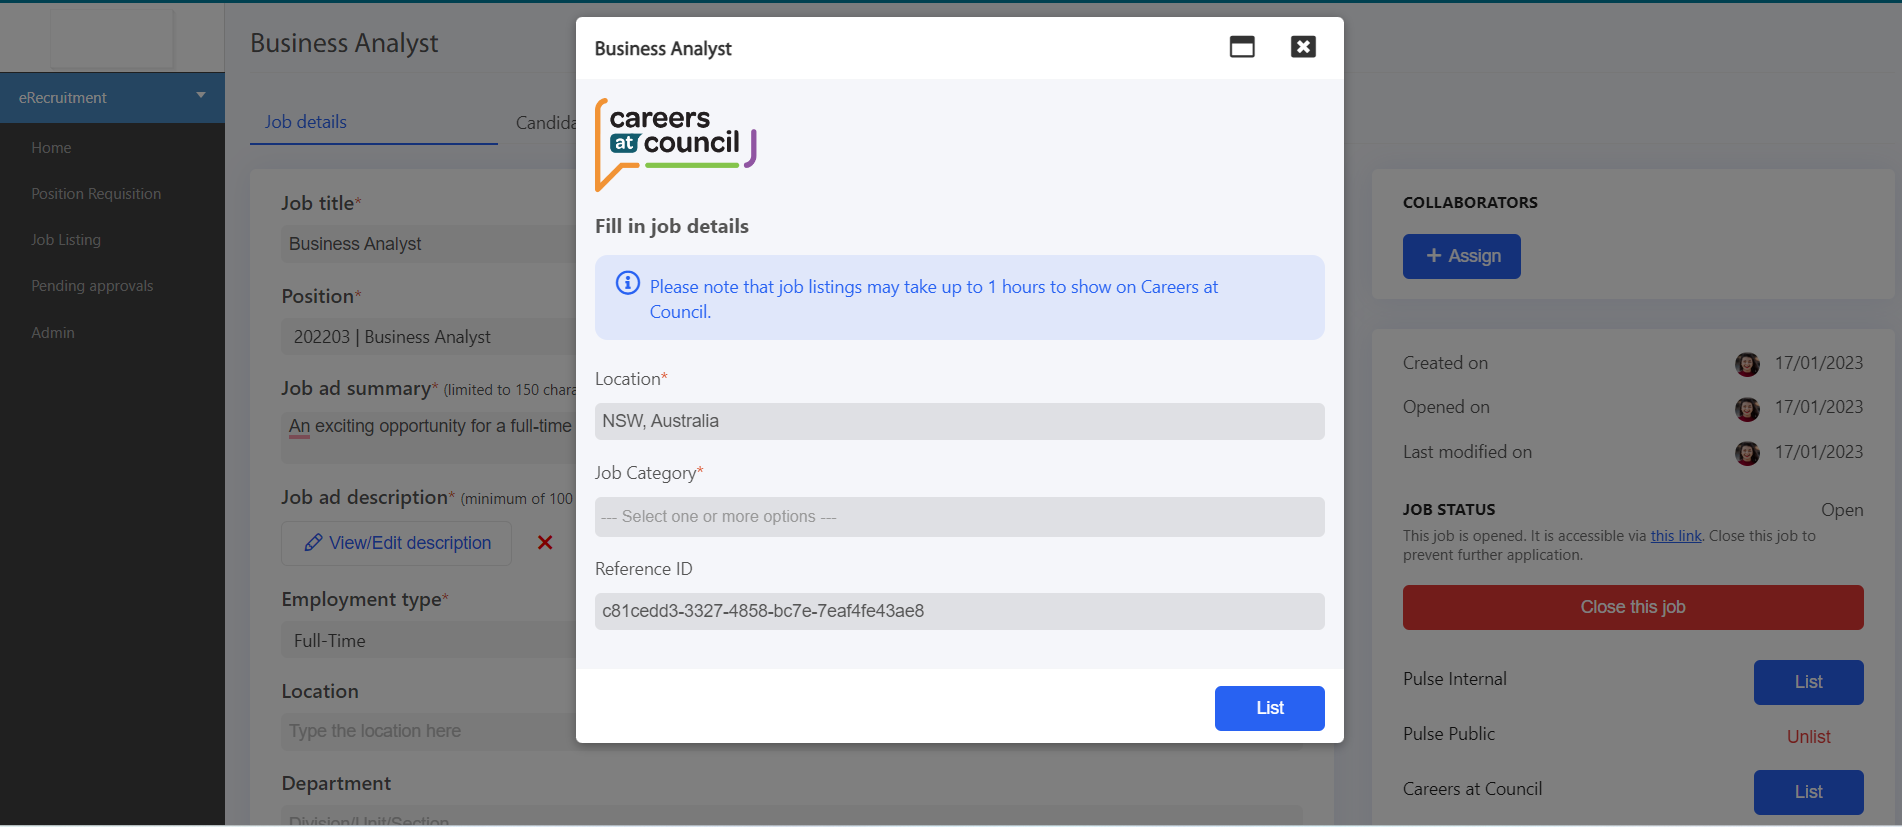
Step 2: Click on the Job details tab and then click on the "List" button beside the "Careers at Councils". When the admins or the hiring managers clicks on the List button, a pop-up will appear where all the details of the job will be filled automatically from the job details tab.
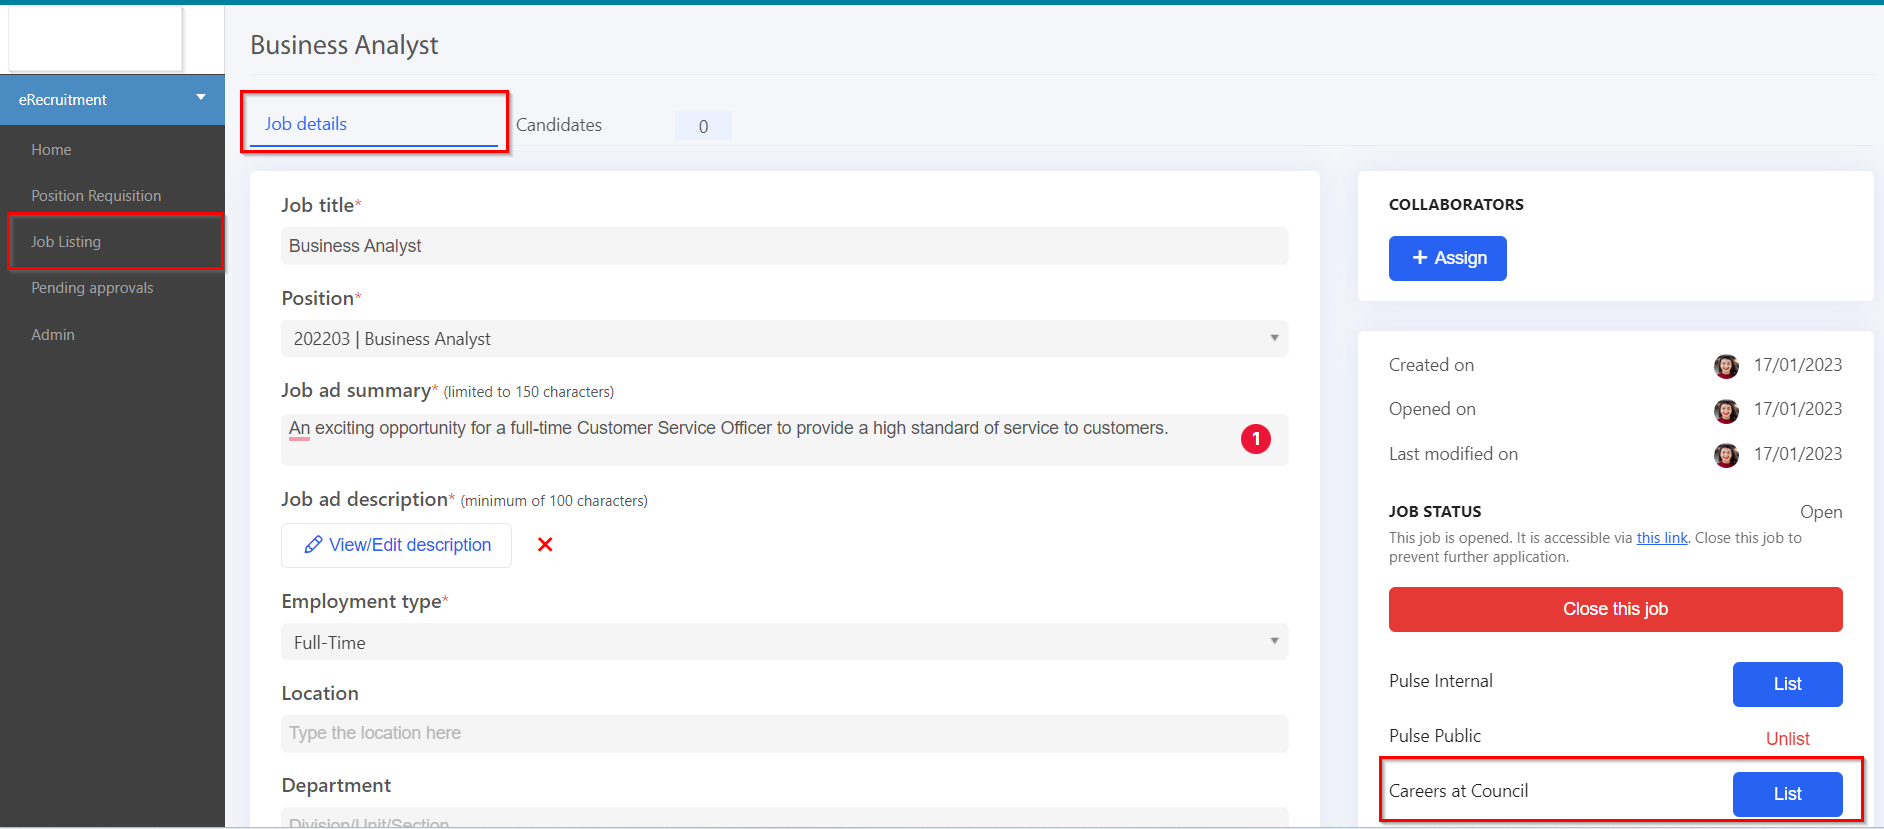
Note: Admins and Hiring Managers can make changes to job ads by clicking on the pencil item beside the job board name.
Admins and Hiring Managers can make changes to job ads through this pop-up.
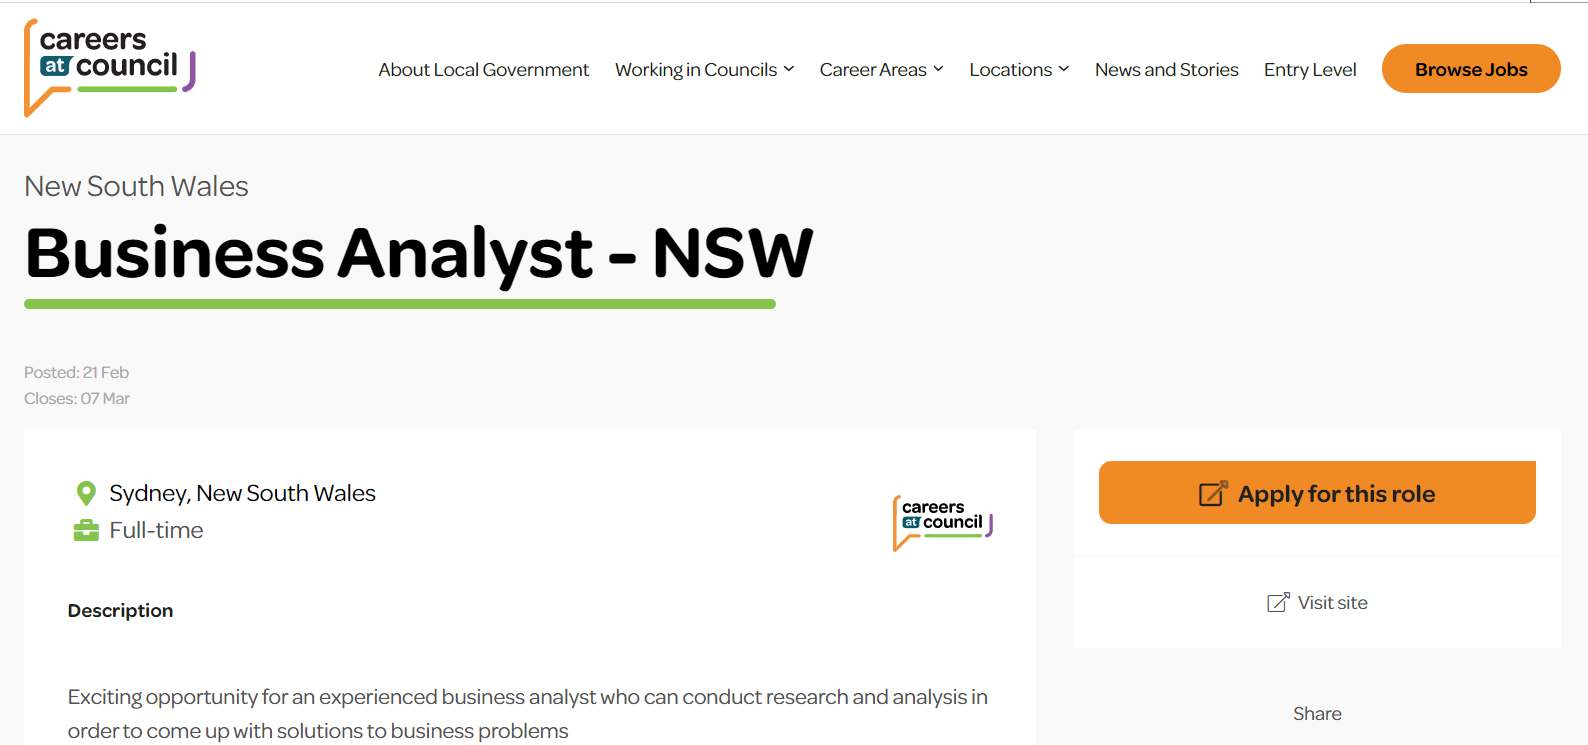
Step 3: Click on the list button and the job will be listed at the CAC portal.
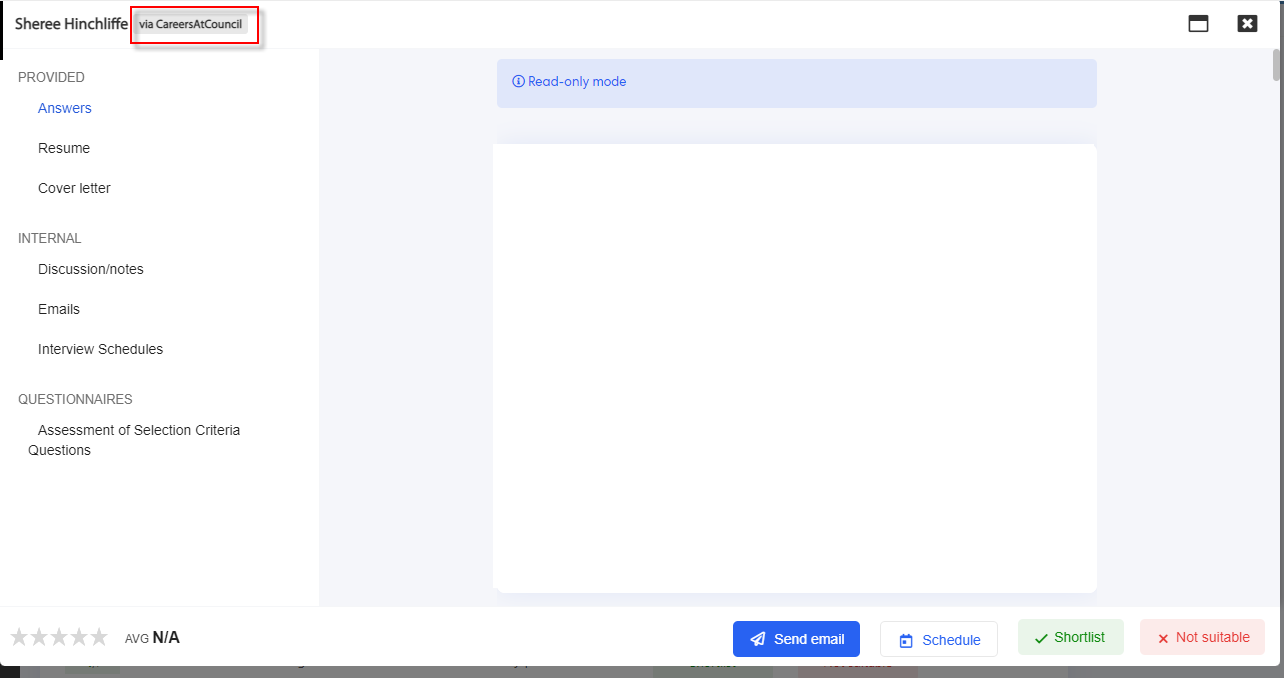
Pulse will track which Job Board each candidate has applied through as the Candidate Source. The Source will be visible as a tag against each Candidate's application (Job Listing > Any Job > Candidates Tab > View all answers & documents on any candidate).
Pulse has added management functions to the Checks feature, allowing Recruitment Admins to add, edit, and archive configured Checklists.
To view how this feature works, follow the steps below:
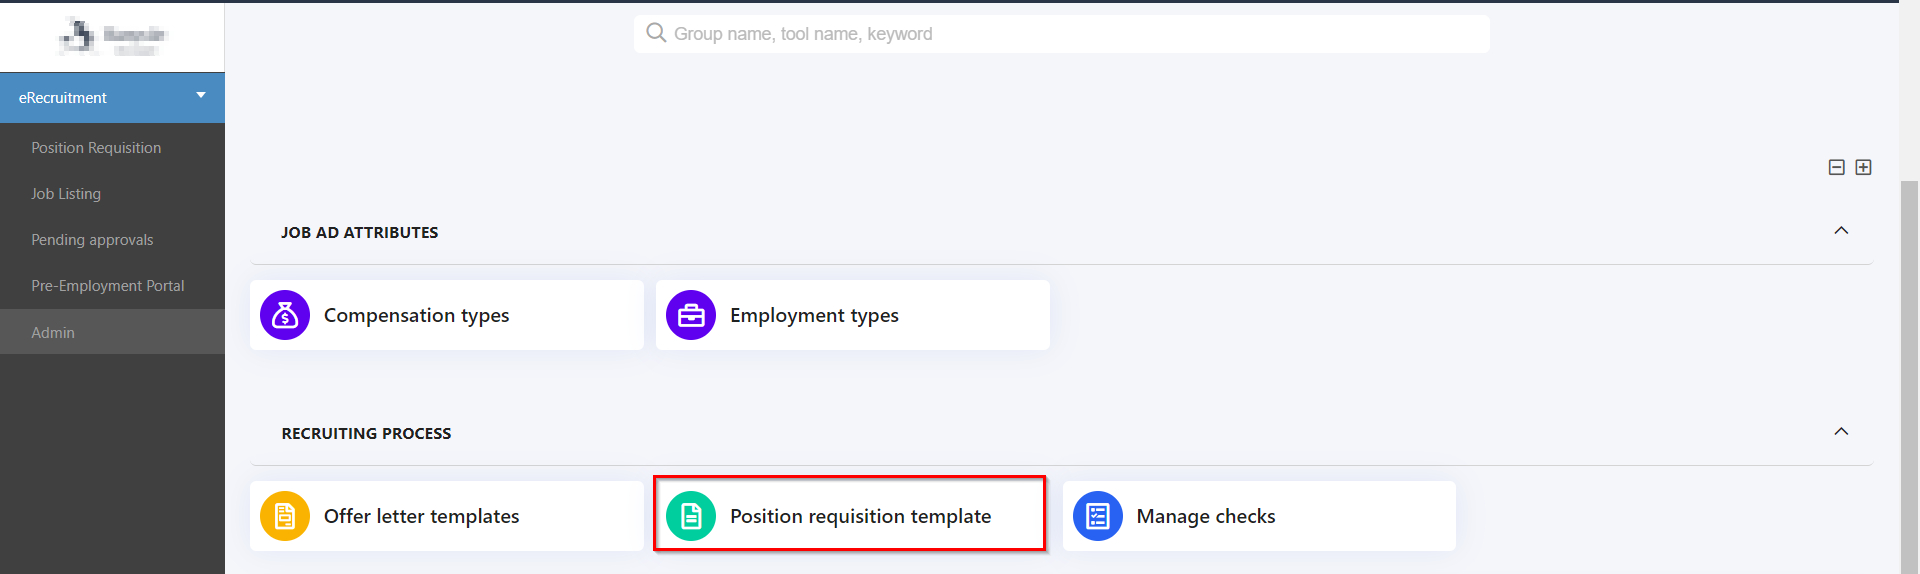
Step 1: In the eRecruitment Module, go to the Admin page --> Recruiting Process --> Manage Checks
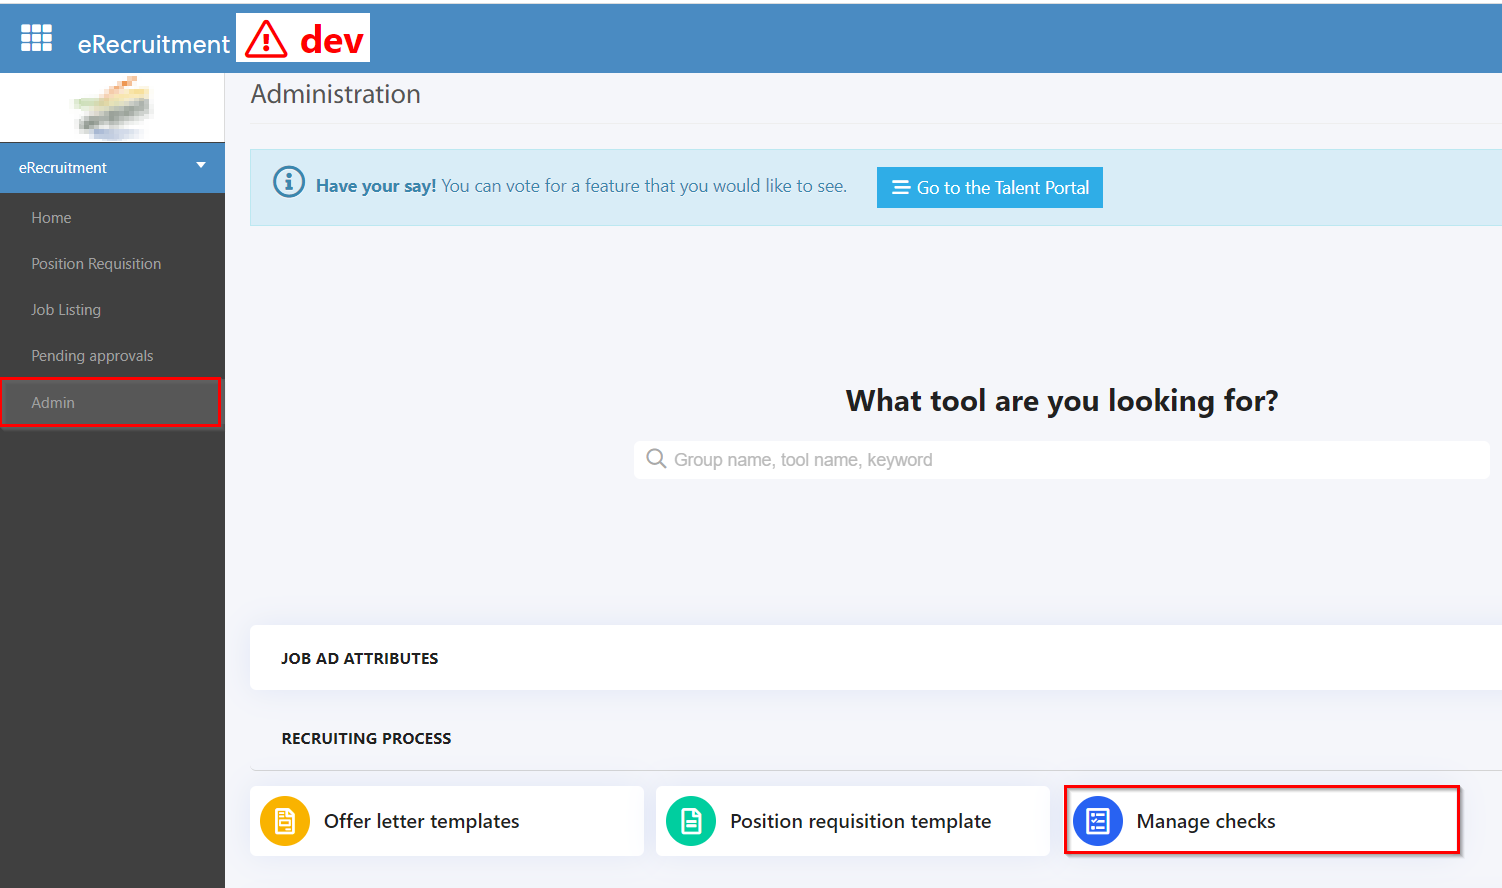
Step 2: On this page, the admins can either create a new check or use an existing check in the job listing page.
A) To create a new check, click on the "+Add Check" button and fill the required information and click on Next.
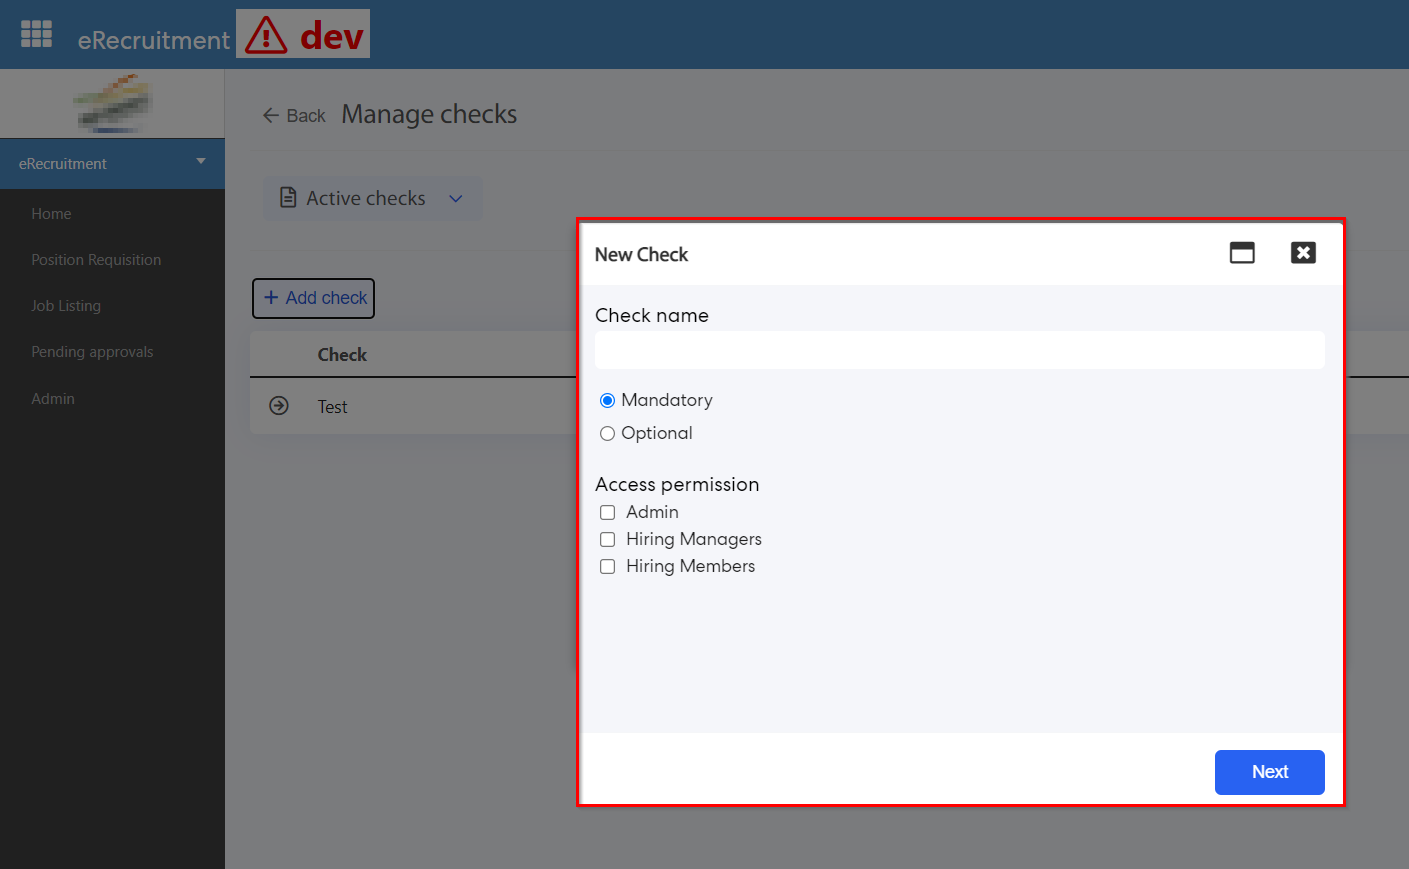
The admins can create a new check by using multiple system fields shown below:
Once created, click on save. This new check will now be visible in the Manage Check list and the admins will have the ability to manage, clone, edit or archive these checks.
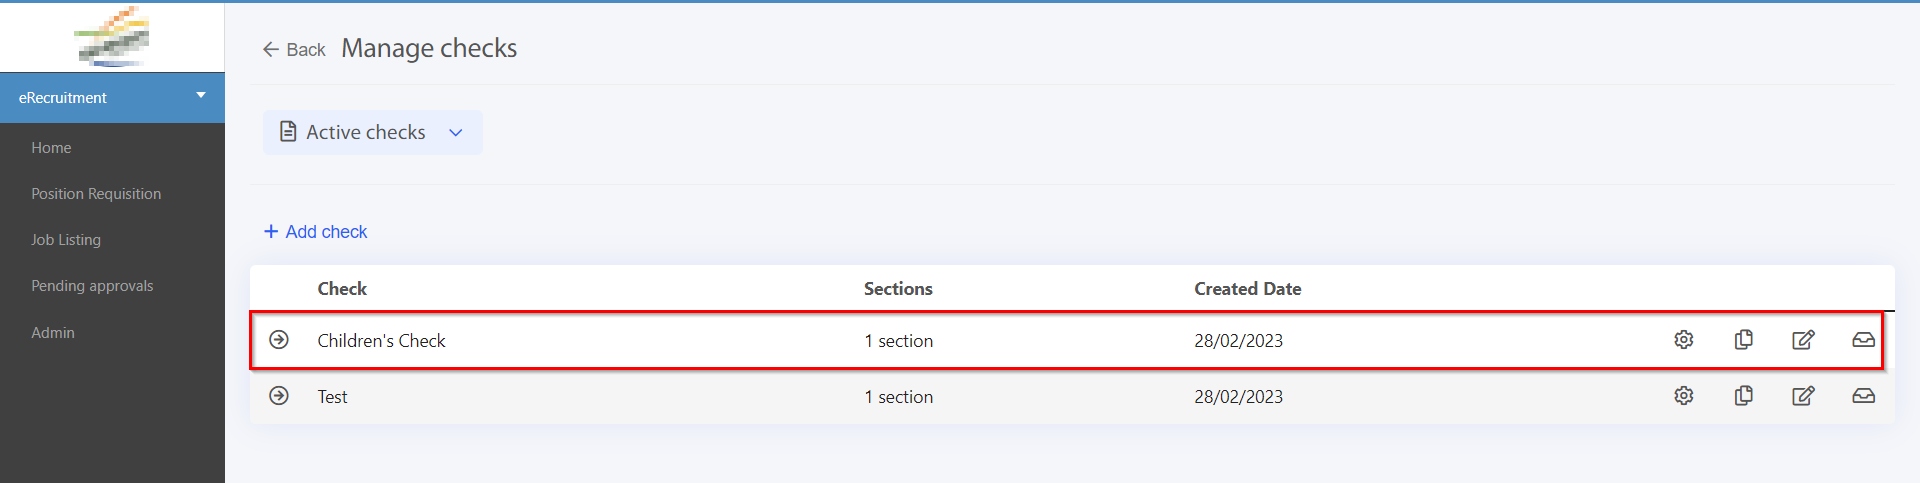
B) All the pre-existing checks will also be visible under the Manage Checks.
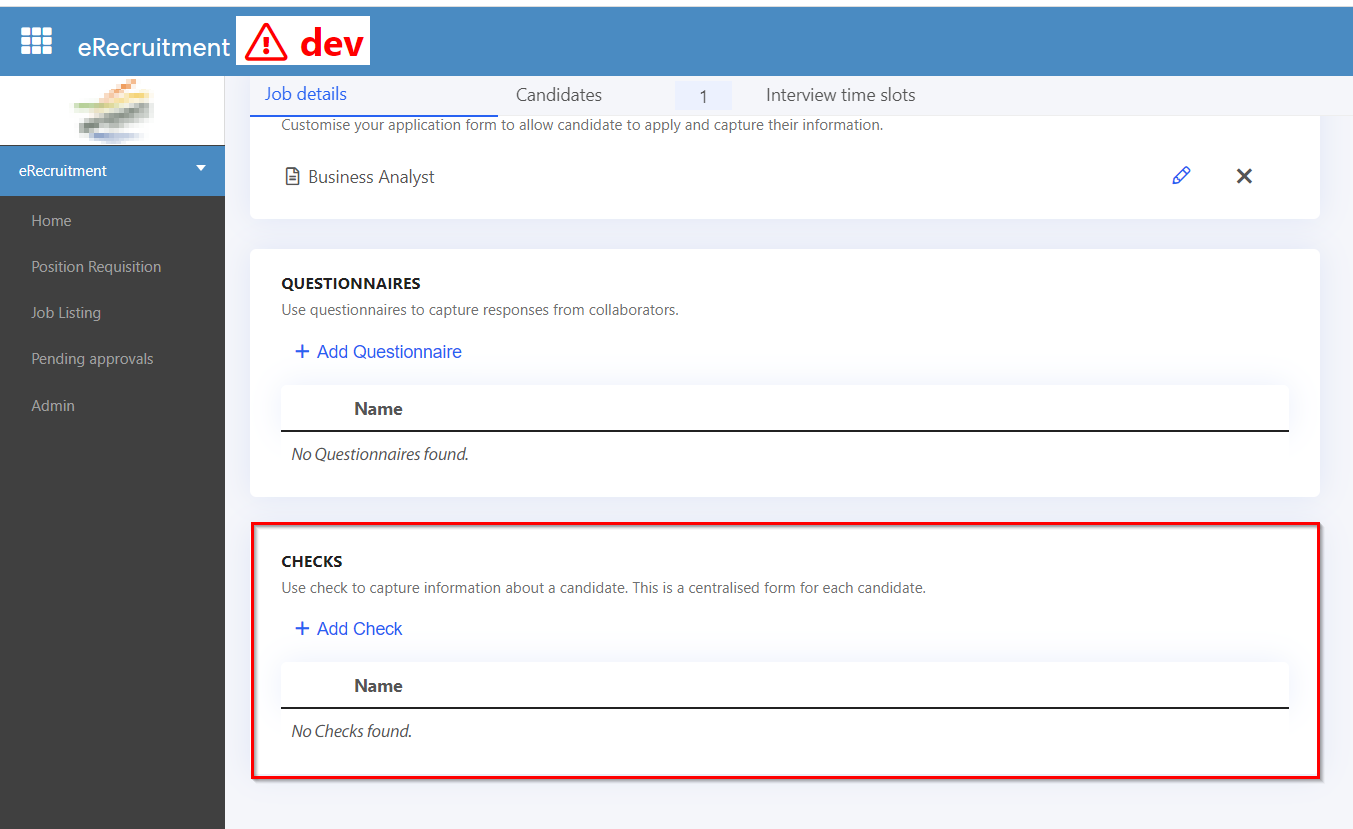
Step 3: To add a check to a job ad, go to the Job Listing Page --> View a job ad --> Job details tab --> Checks. Click on "+Add Check" button to create a new check or Add a check from the library(pre-existing checks)
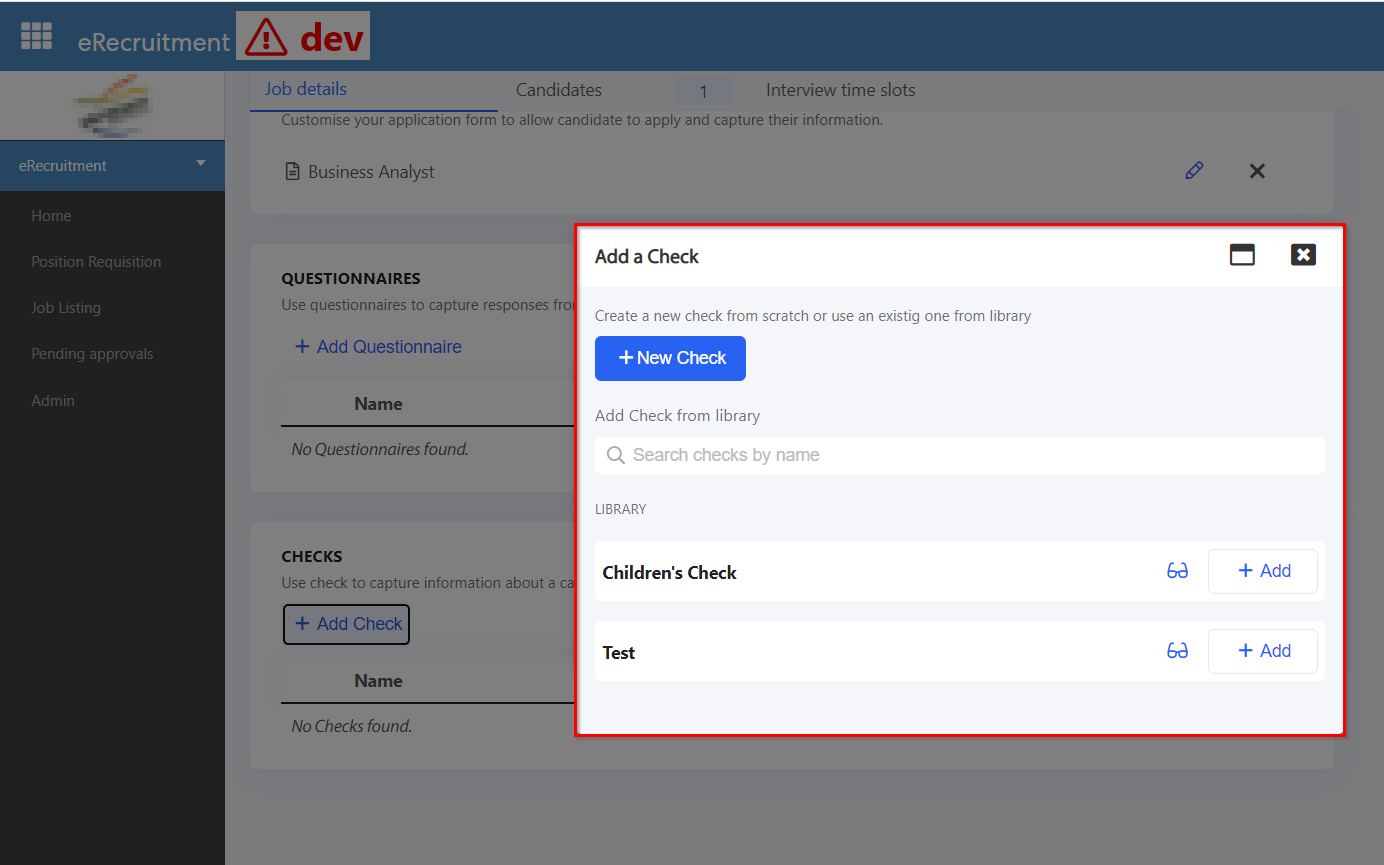
Note: Any new check created in the Job listing page, will also be visible in the Manage Checks page (Admin --> Recruiting process --> Manage Checks).
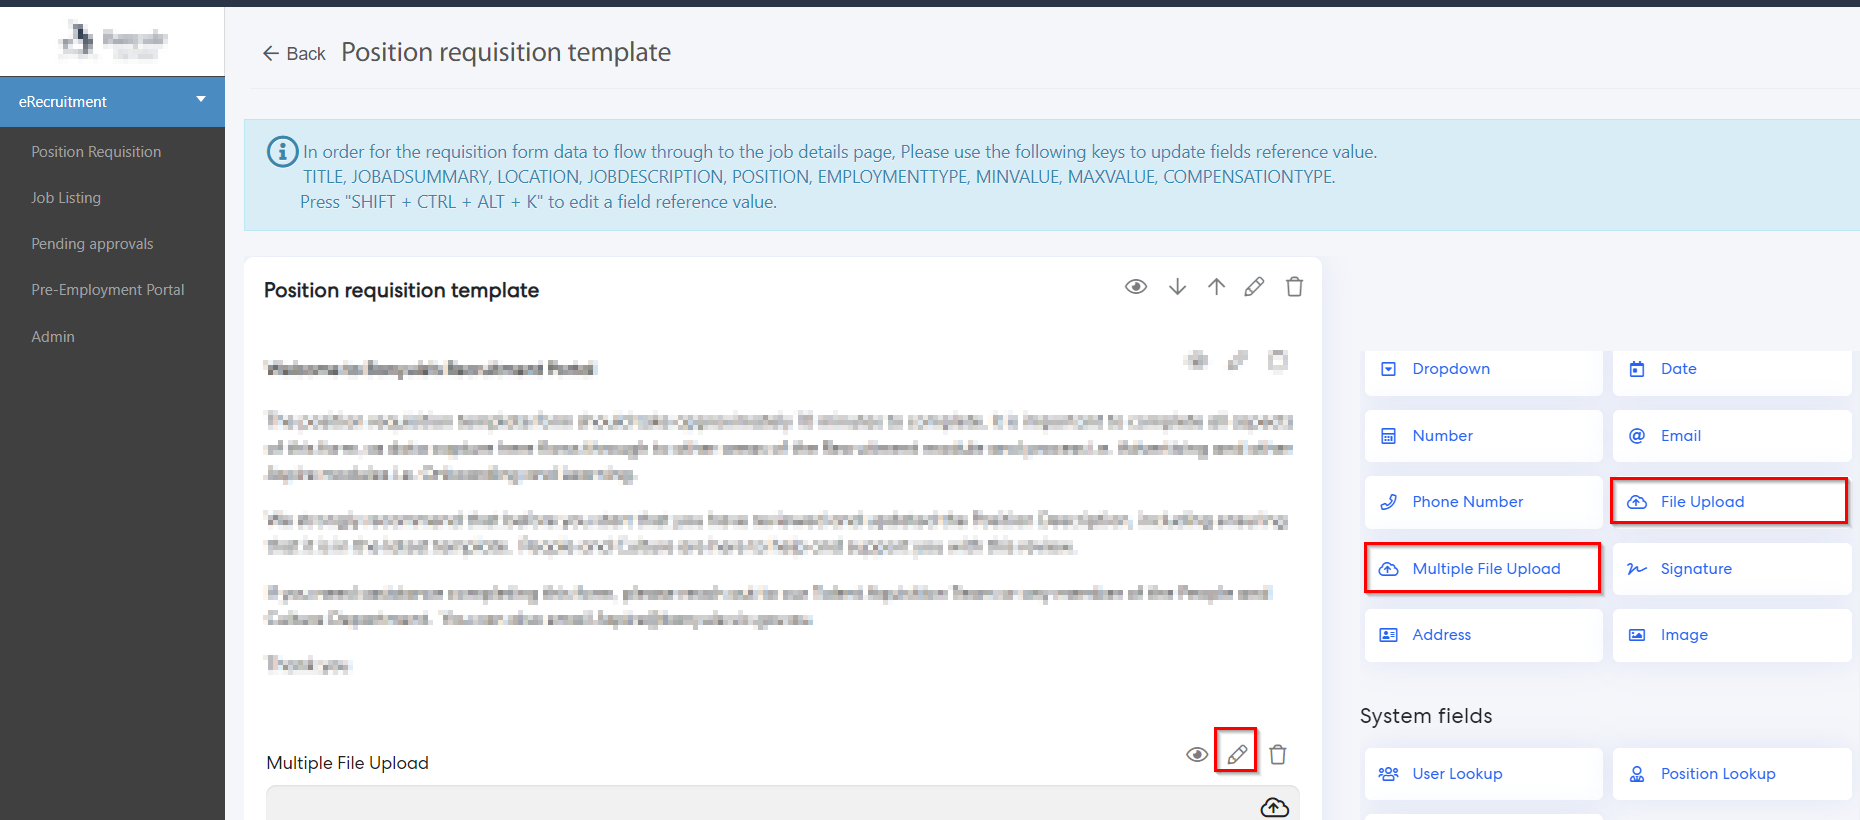
1.5 Mapping Documents from HR core to eRecruitment and Onboarding ModulePulse has added the ability to automatically store files uploaded through Forms in eRecruitment, Onboarding, and HR Core modules against document categories in a user's HR Core record.
Each upload field in these forms can be configured to store their uploaded documents against one of the configured HR Core Document Categories.
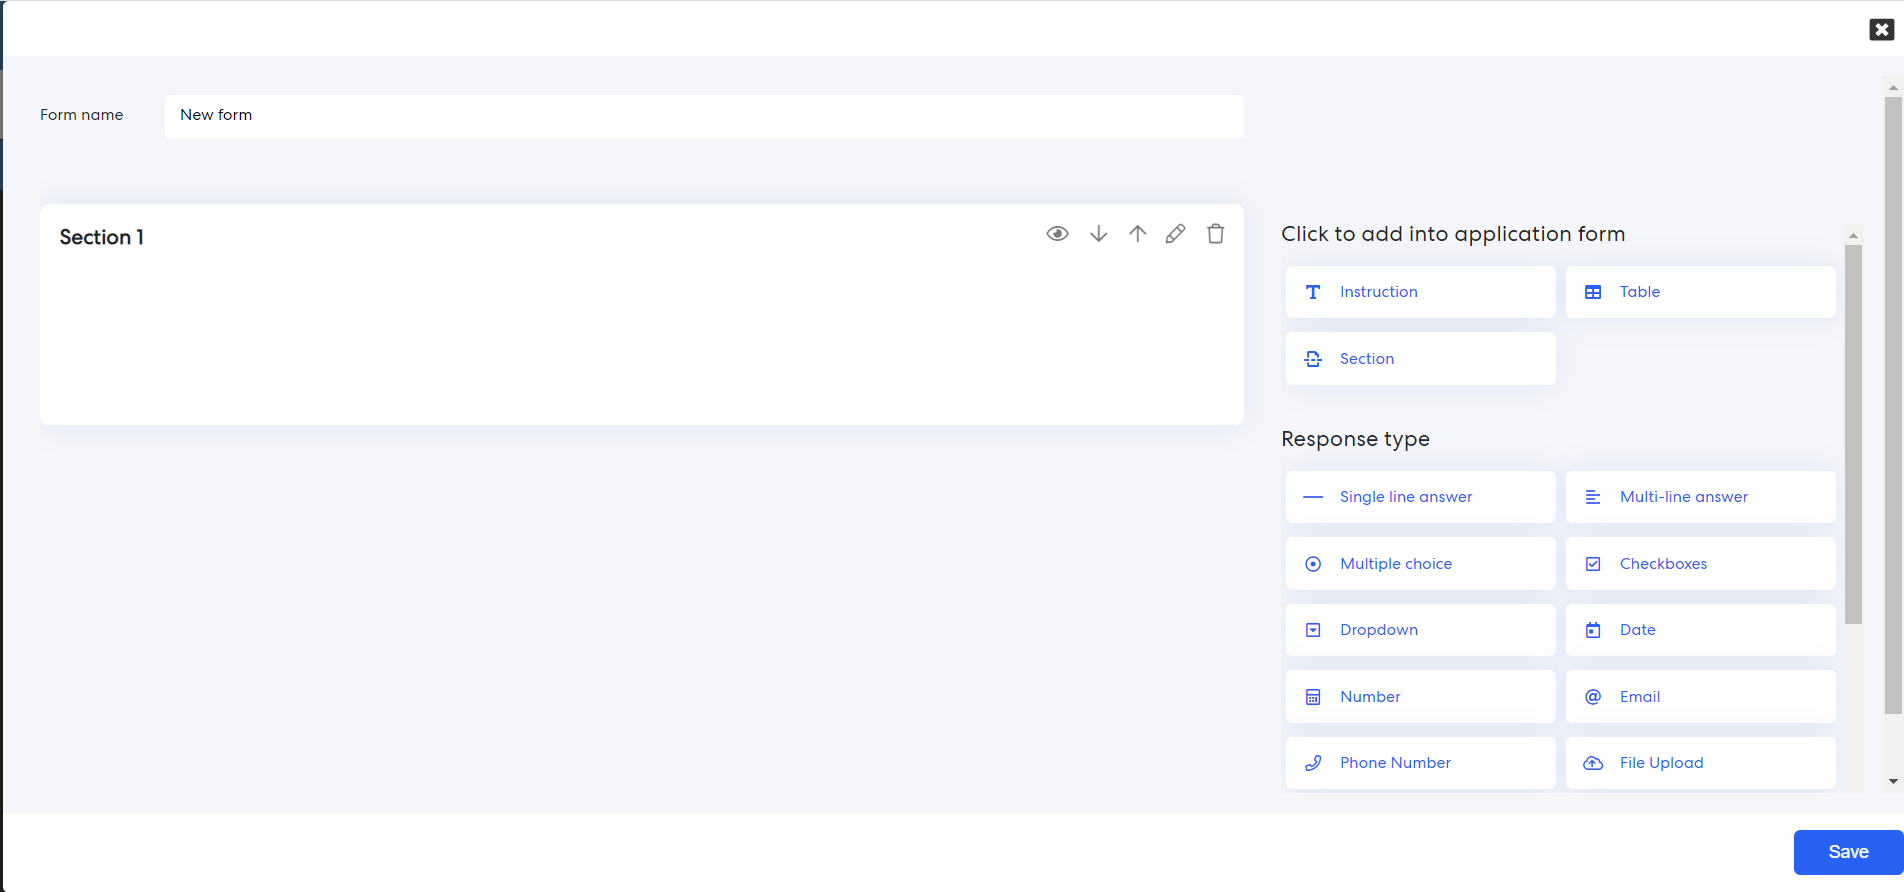
Step 1:In eRecruitment, Onboarding or the HR Core Module, Admins can navigate to a forms designer, such as the Position Requisition Template (Admin page --> Recruiting process --> Position Requisition Template).
Step 2: Select Single upload or multiple upload field.
Step 3: Edit the field to map the documents.
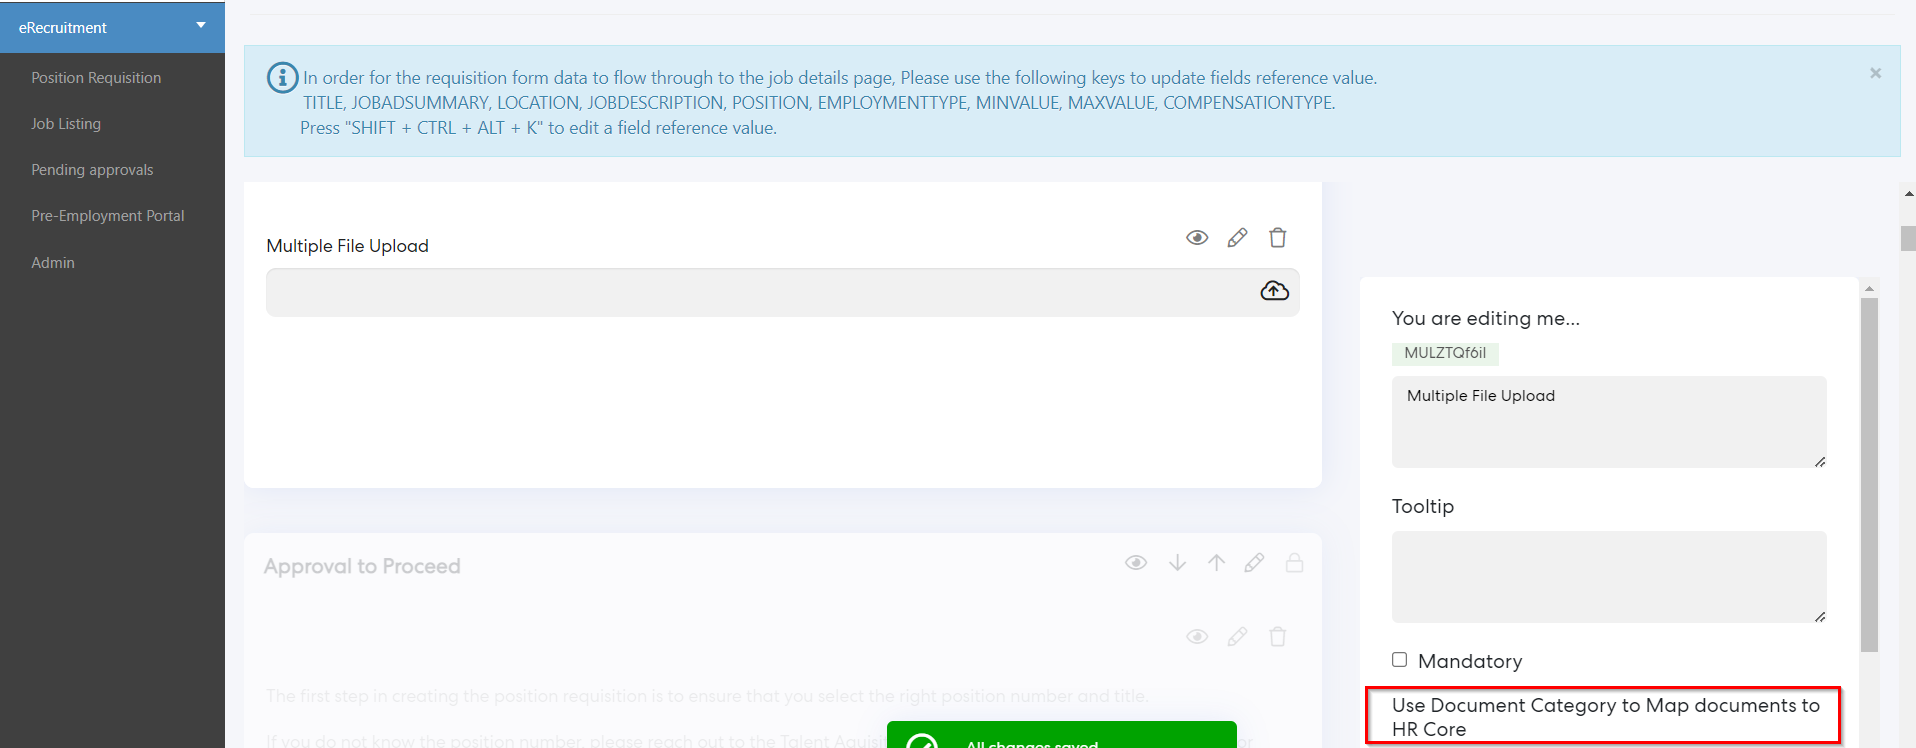
Step 4: Configure the document mapping by selecting a document category from 'Use document category to map documents to HR Core' attribute.
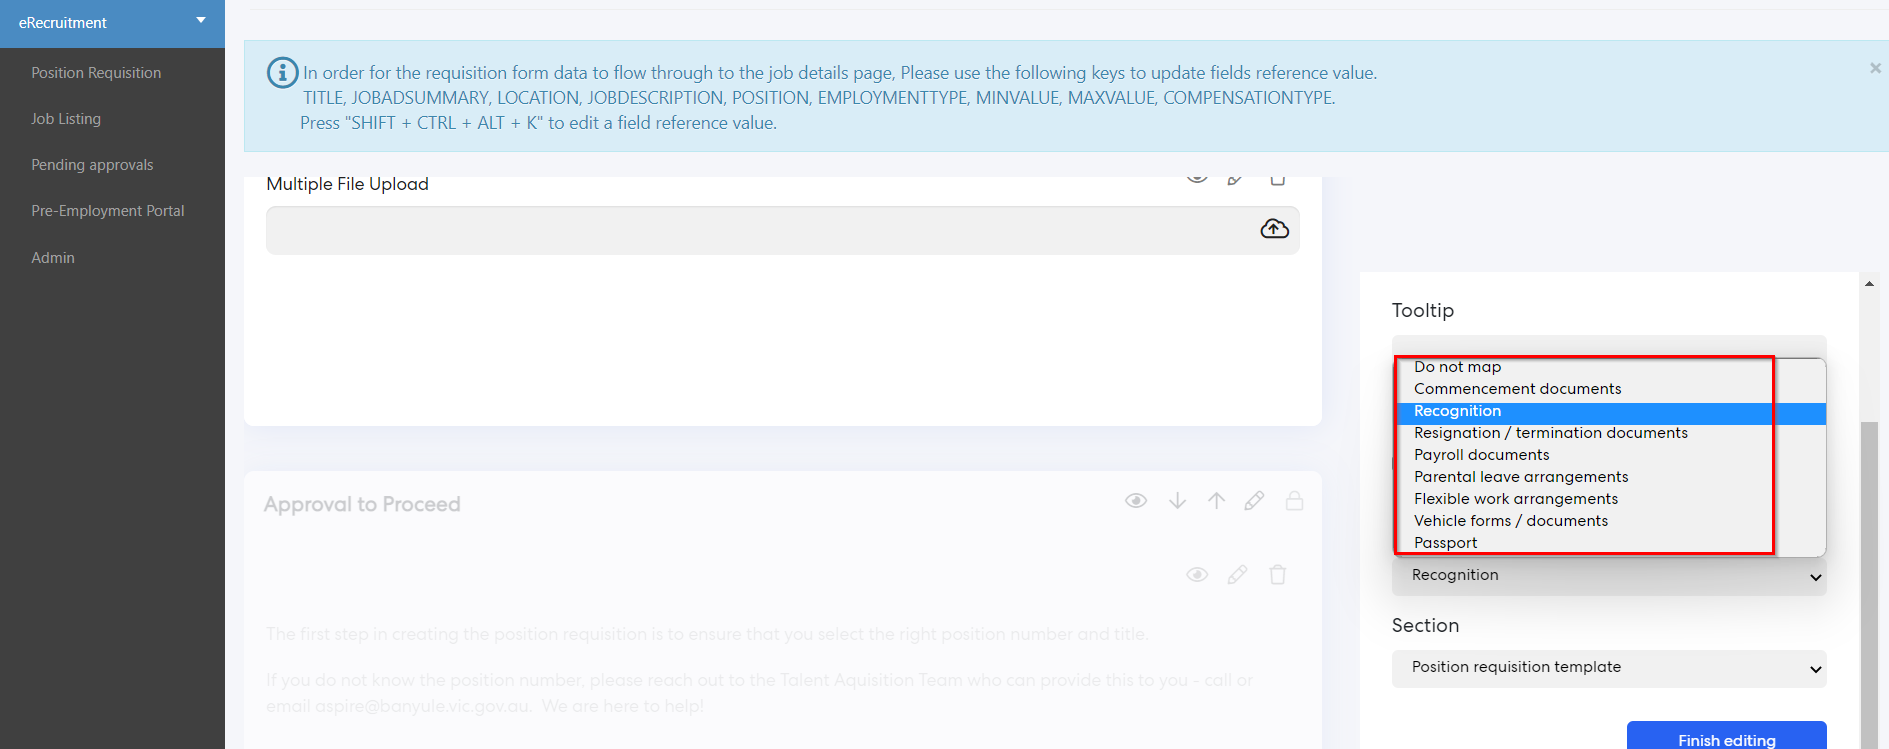
Step 5: Save the configuration.
Documents will be stored in their configured HR Core Document Categories once the forms have been submitted, after completing any configured workflows. In the case of eRecruitment forms, documents will be stored once the Candidate has been enrolled as a User or Employee.

HR Core Document Categories and their associated documents can be viewed in the HR Core > Documents page for any given user, based on the HR Document Category's configured permissions.

2. Incidents & Claim Management
2.1 Incident Management ReportPulse has introduced a new reporting feature in the Incident & Claim management module, where the admins will now be able to generate reports of the selected forms.
To view how this feature works, follow the steps below:
Step 1:In the Incident & Claim Management module, go to the Admin --> Manage Forms page. Here, Admins will be able to see all configured forms
Note: Reports can only be generated for form that have "Use form for reporting" enabled.
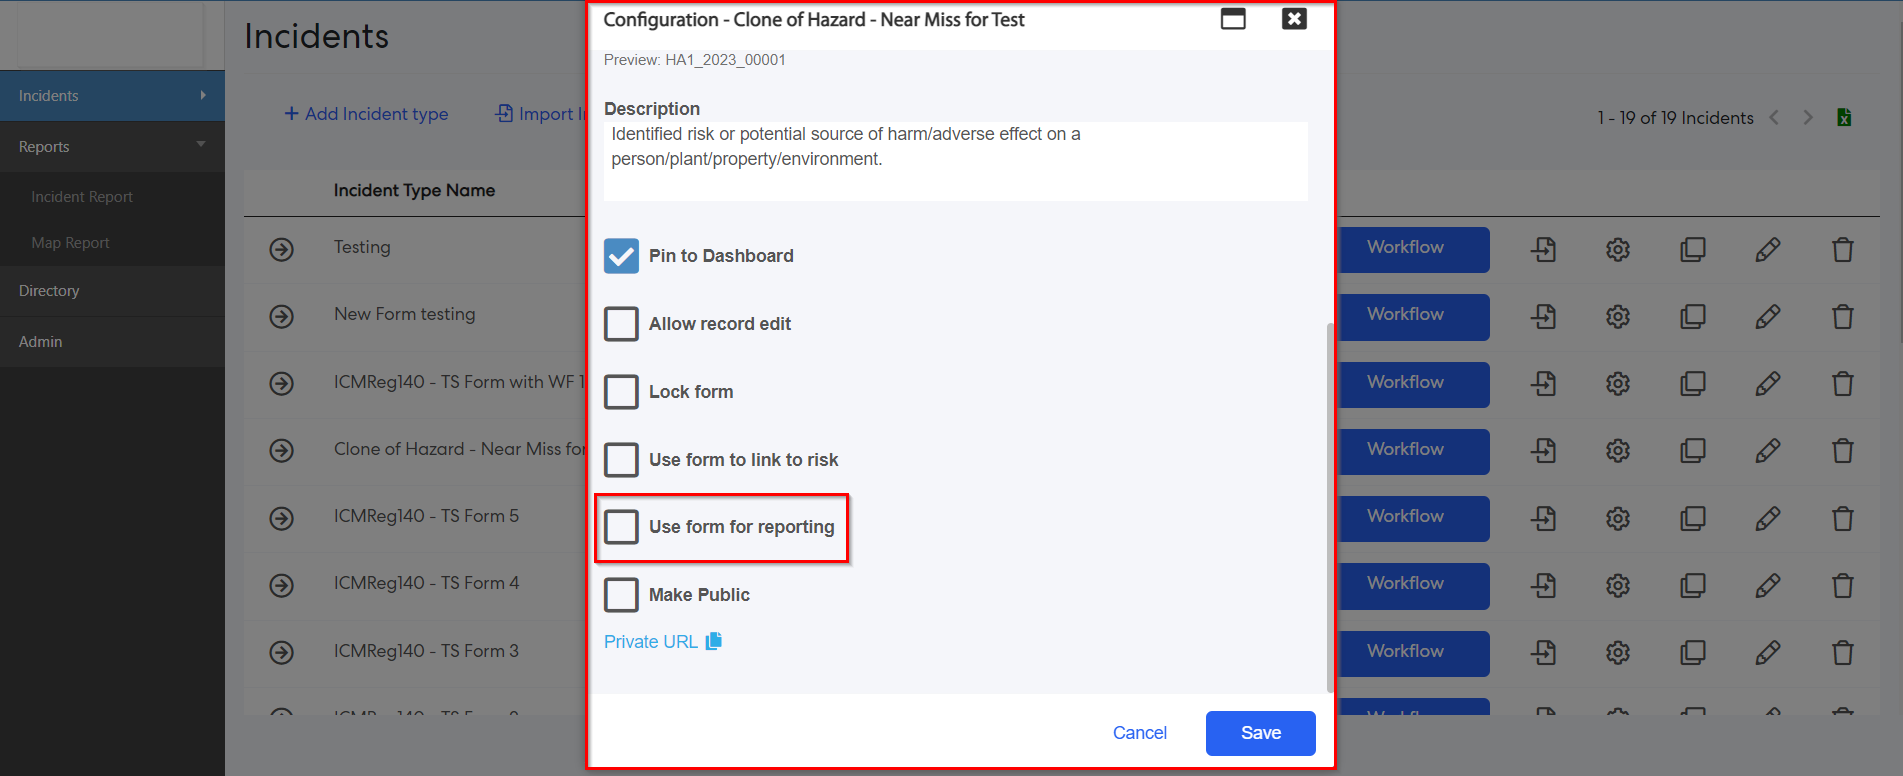
Step 2: Click on the Manage button, check the "Use form for reporting" checkbox, and click Save to save the configuration.
Step 3: Go to Reports --> Incident Reports. Select the forms, and fill in the required information to create reports.
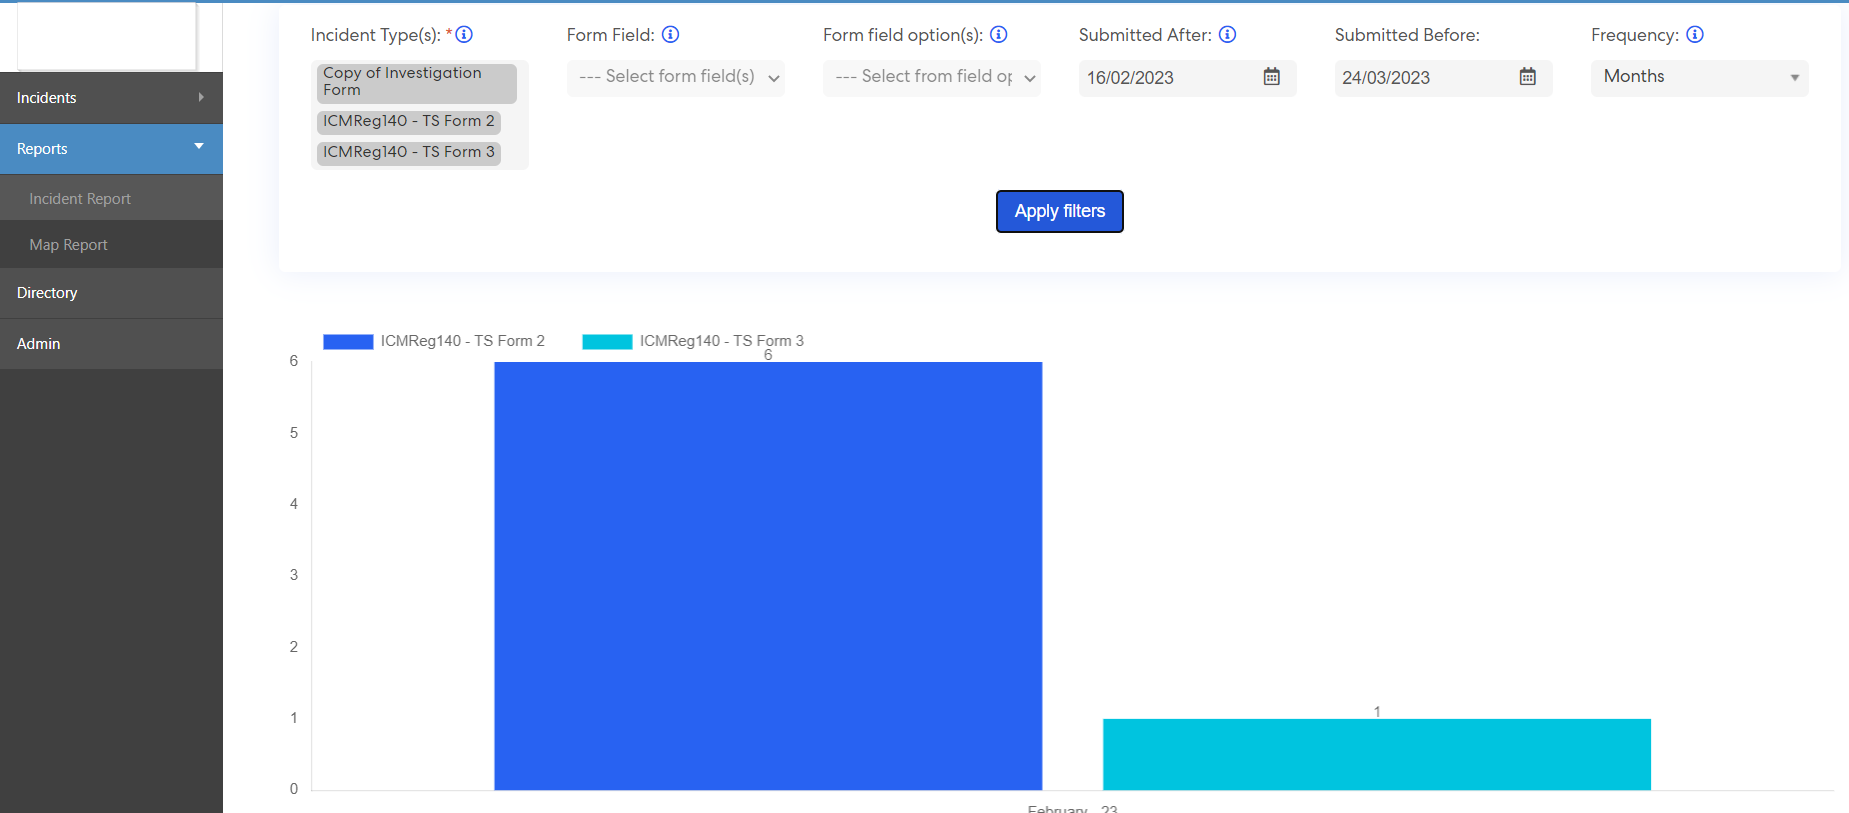
Example:
- In cases where incident types are specified in a field within a form, use the Form Field Options.
- In cases where Different Incident types each have their own form, use the Multiple Form option.
Issues resolved
Corporate Planning & Reporting
- Fixed an issue preventing an Action's Additional Attributes from being imported, via the Action Importer, if there was a space in the Additional Attribute's name field. The system will display an error message.
- Fixed an issue where the enrol user confirmation pop-up is not showing the Onboarding Portal name.