Contents
New Features and Enhancements
1. Human Capital Management
1.1 Add 'Approval Decision History' table to training request history detail and the ability to export training request as a PDF (Learning)LAM users and admins with permission to approve/reject/view LAM training requests will have the ability to see the approval history when viewing Training Requests in the 'My Tasks & Approvals' page (shown in image below).
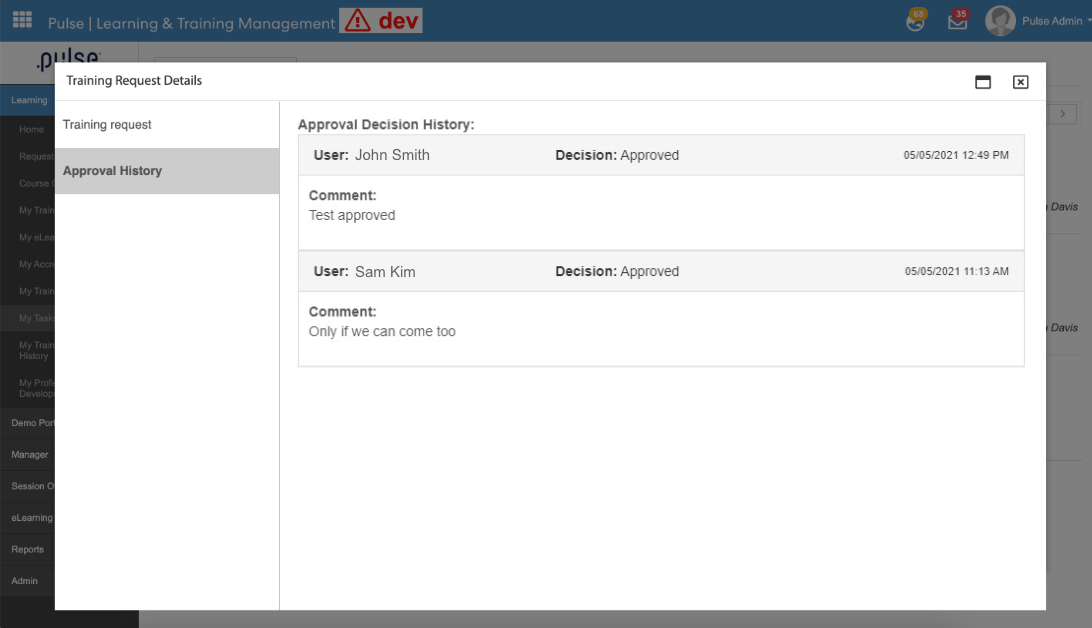
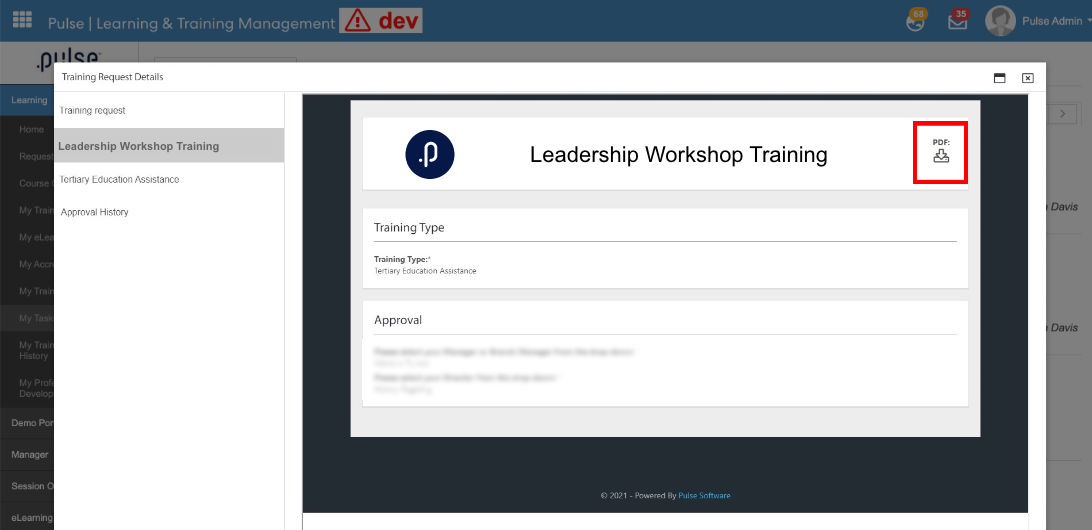
LAM users can also download Training Request Forms as a PDF.
The Manager Check-in Feature has been developed in the Performance module to assist Reviewers with managing and monitoring employee performance. Reviewers will have the ability to record their monitoring process of an employee's goals, actions or tasks.
The new Check-in feature allows reviewers to:
- Create a check-in entry against a snapshot of the employee's set goals, actions or tasks at a point in time
- Communicate with employees by posting to the discussion
- Assess an employee's performance against a set of goals, actions or tasks during the monitoring phase
- Review the history of an employee's check-in to assist in the appraisal process
To enable this feature, HCM Admins must go to the Admin Panel and General Settings to check the 'Enable check-in feature' box and click 'Save'.
Click here to access the Manager Check-in Feature User Guide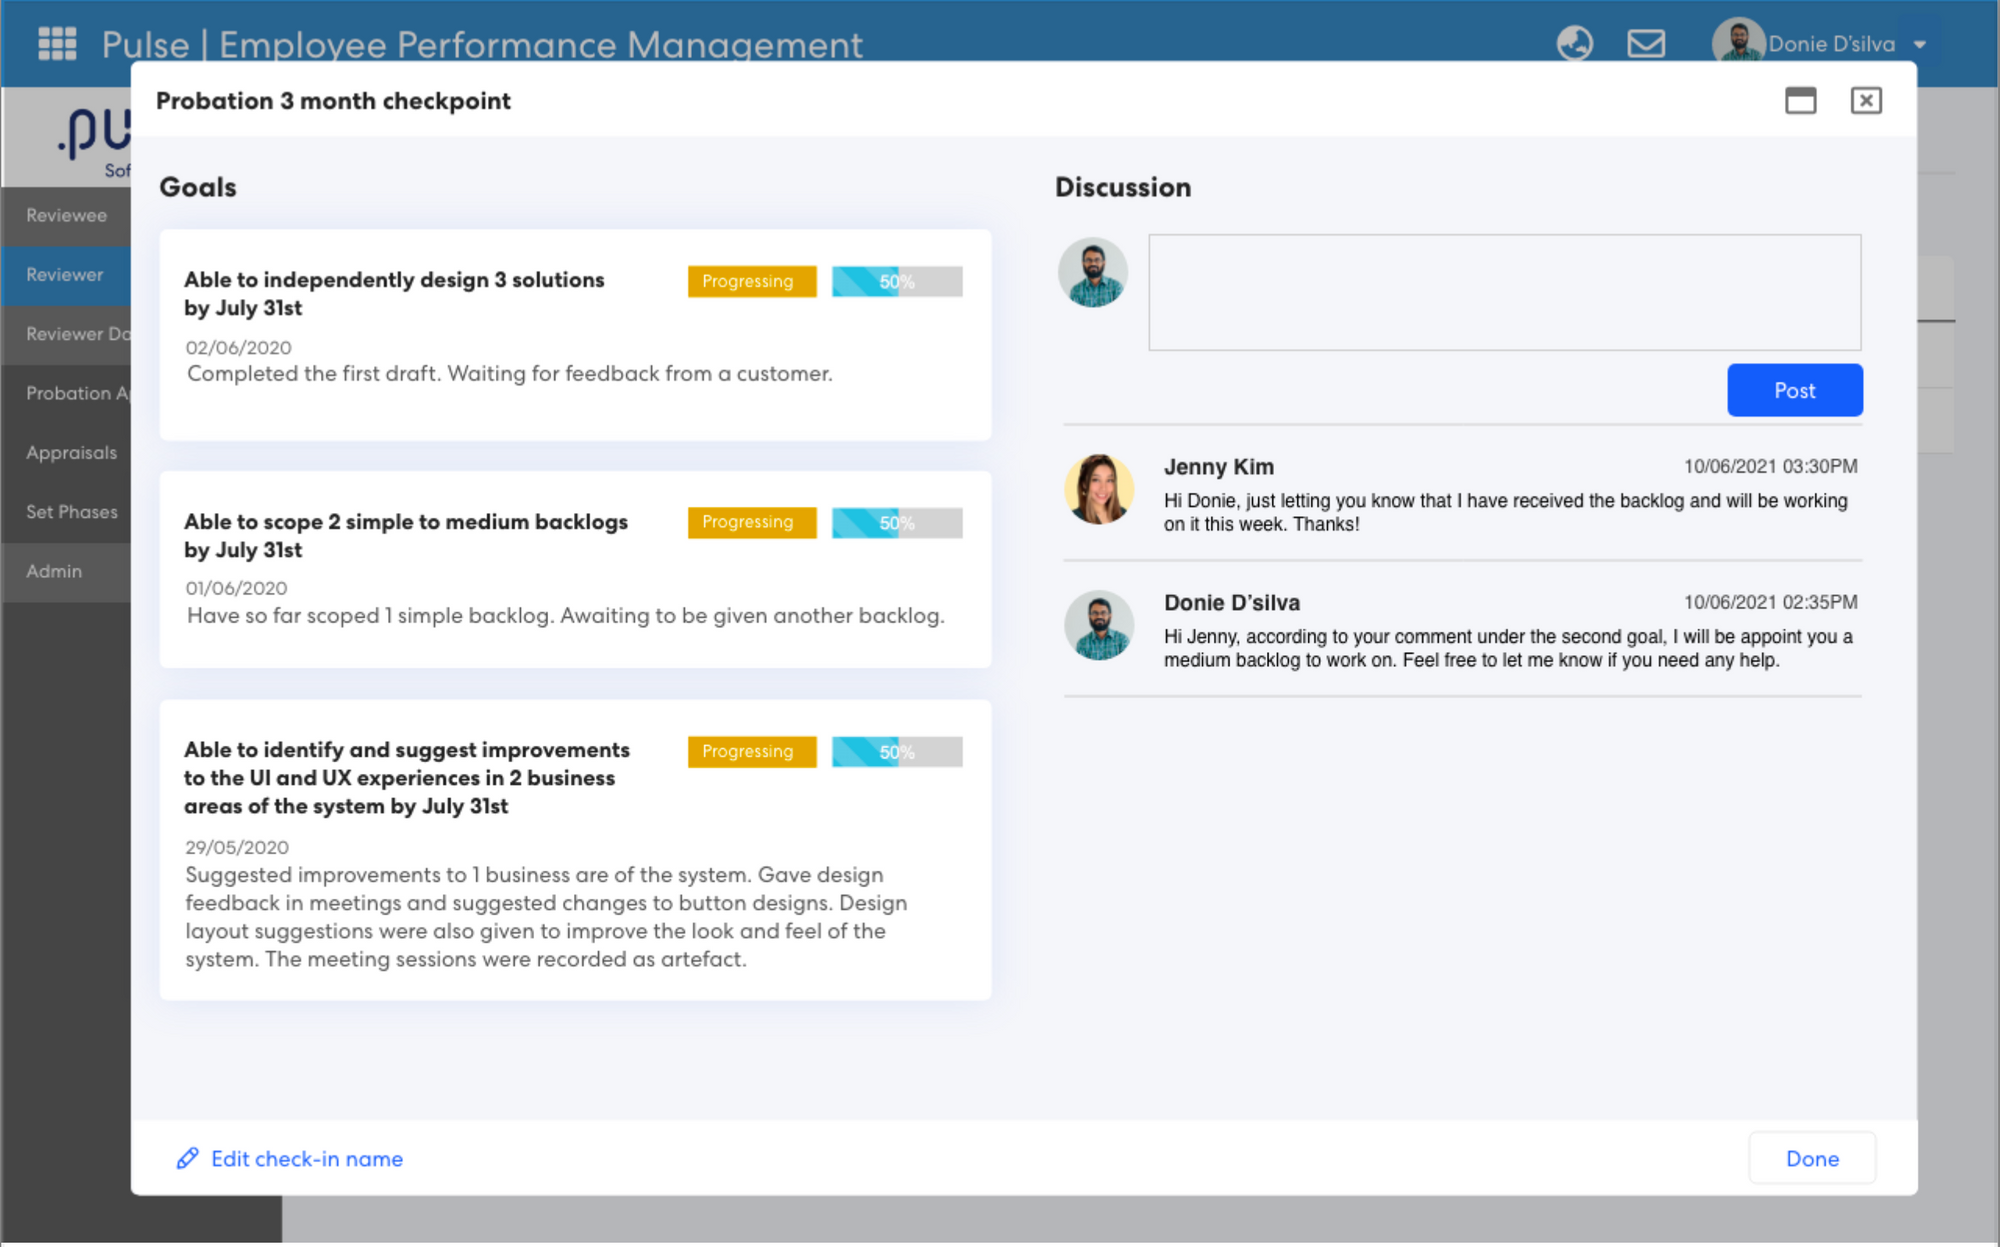
2. Project Management & Control
2.1 The ability to have an automatic flow on effect on sub tasks when updating a project task's dateProject officers will now have the option to bulk update task dates in a project by:
- Updating Project Start Date (please refer to scenario 1 below)
- Updating Parent & Child Task Dates (please refer to scenario 2 below)
- Updating Predecessor & Dependant Task Dates (please refer to scenario 3 below)
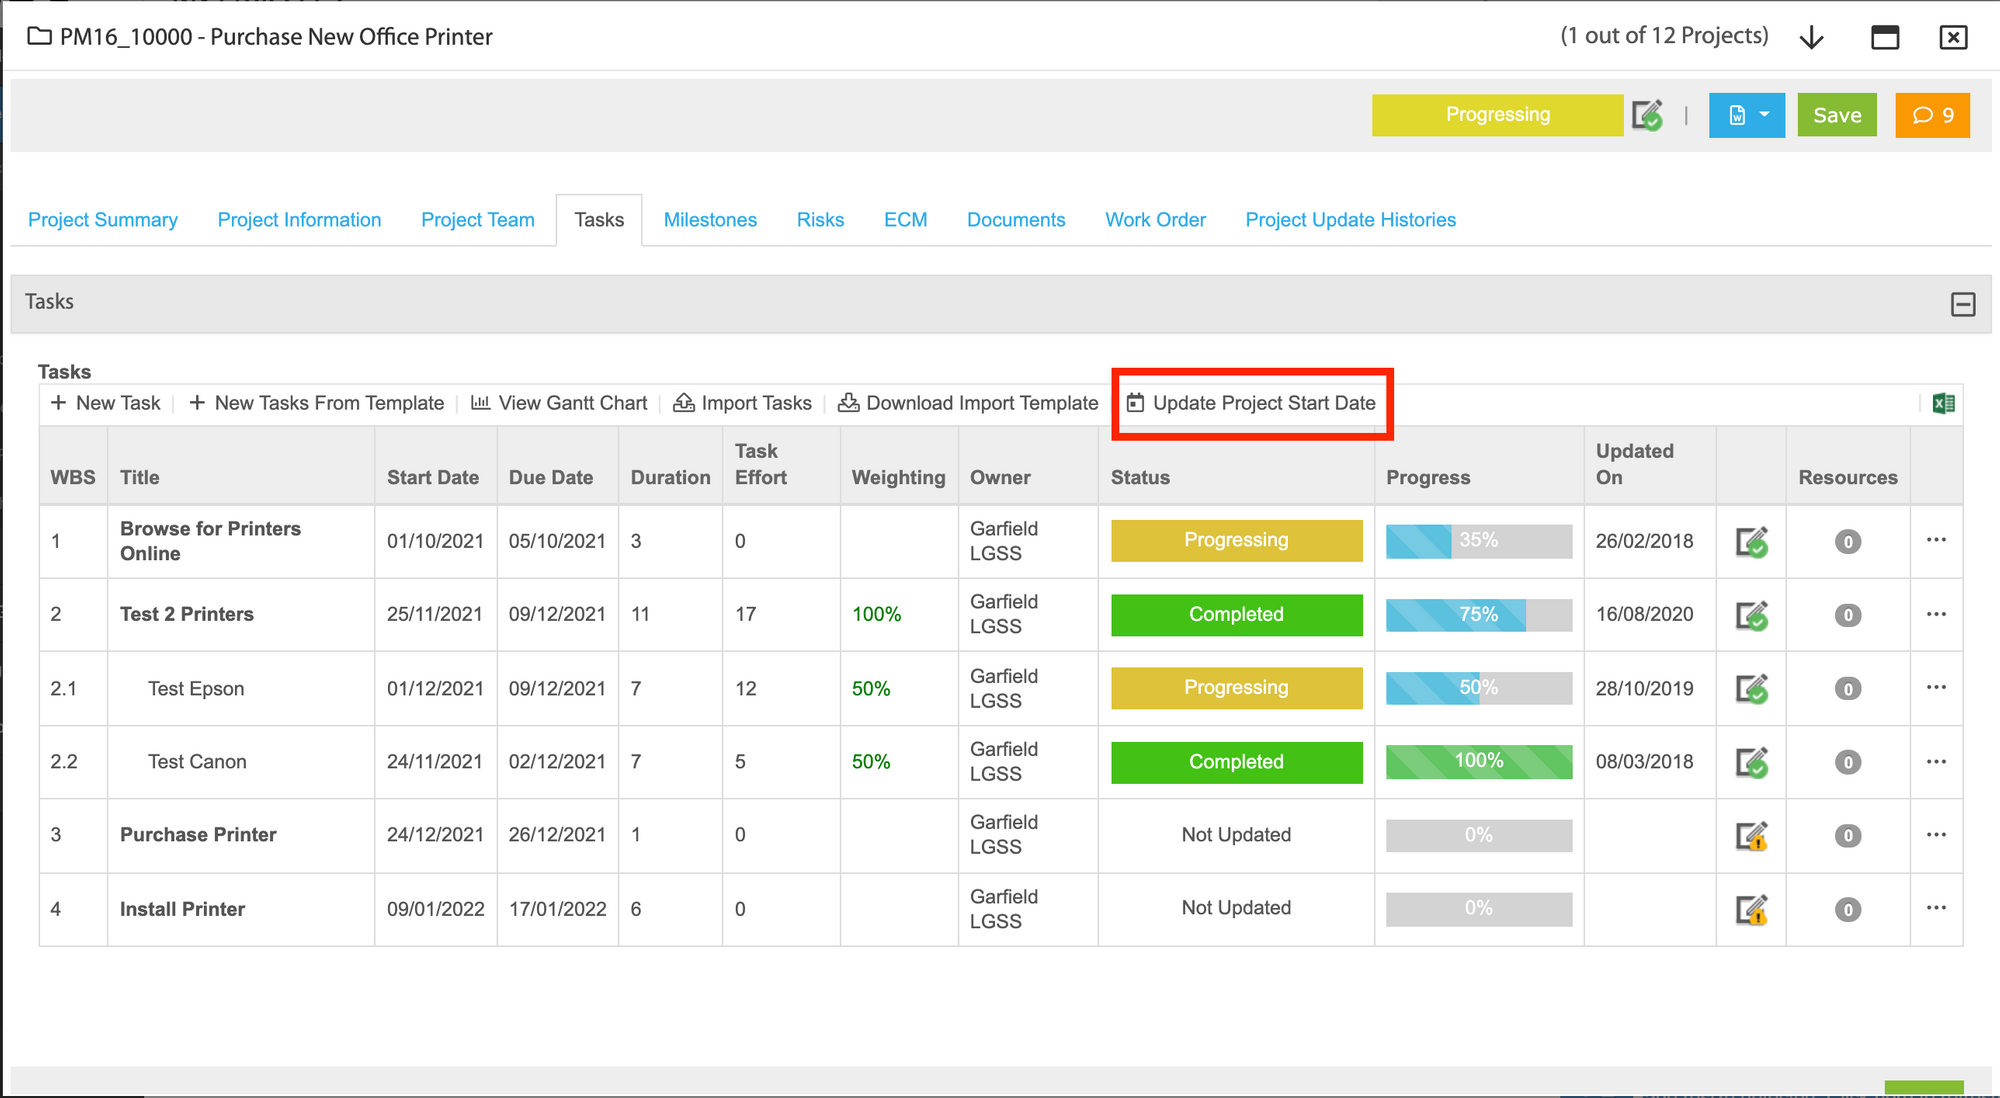
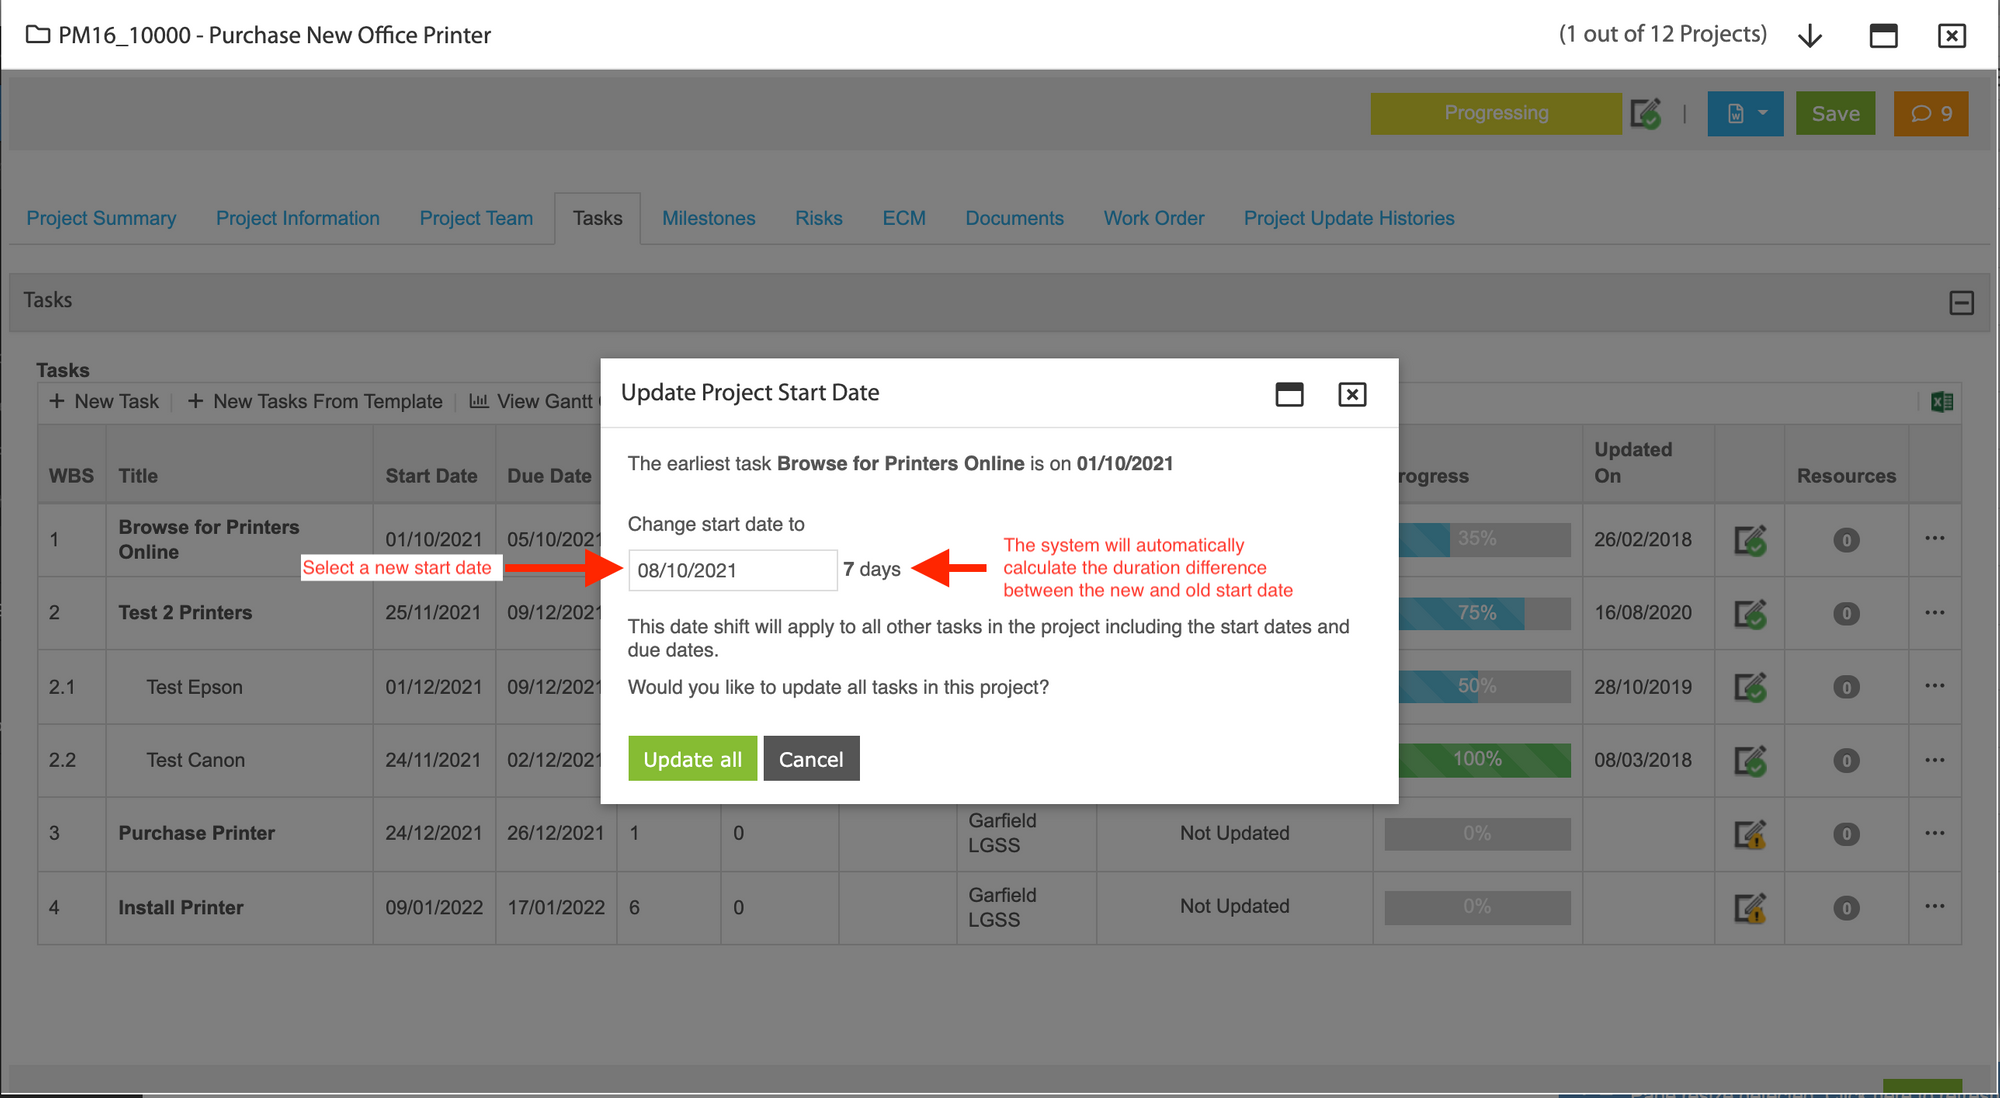
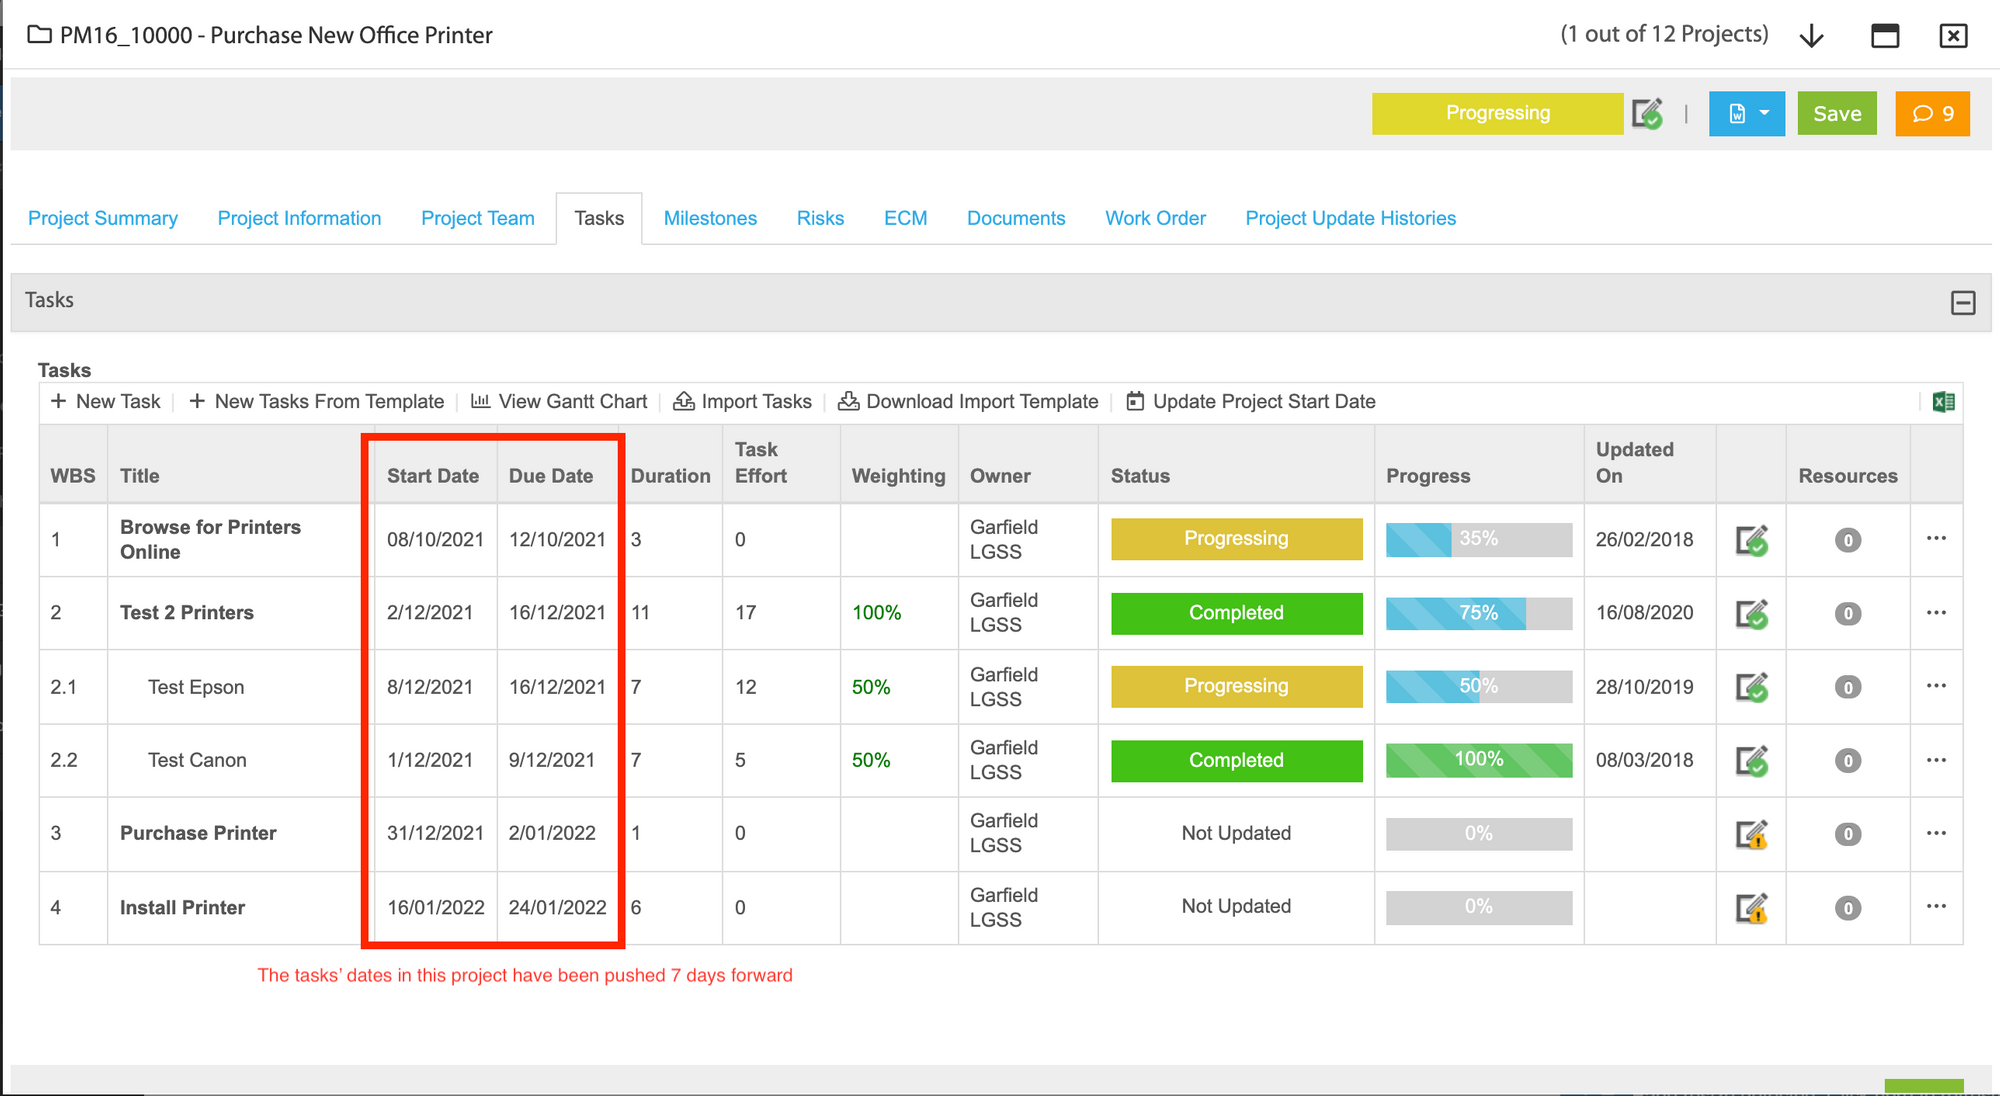
Scenario 1: Updating Project Start Date
If users wish to change the start date of a project, they are able to do so by clicking on the 'Update Project Start Date' button. This will change the start date of the earliest task in the project which will automatically change the dates of all tasks.
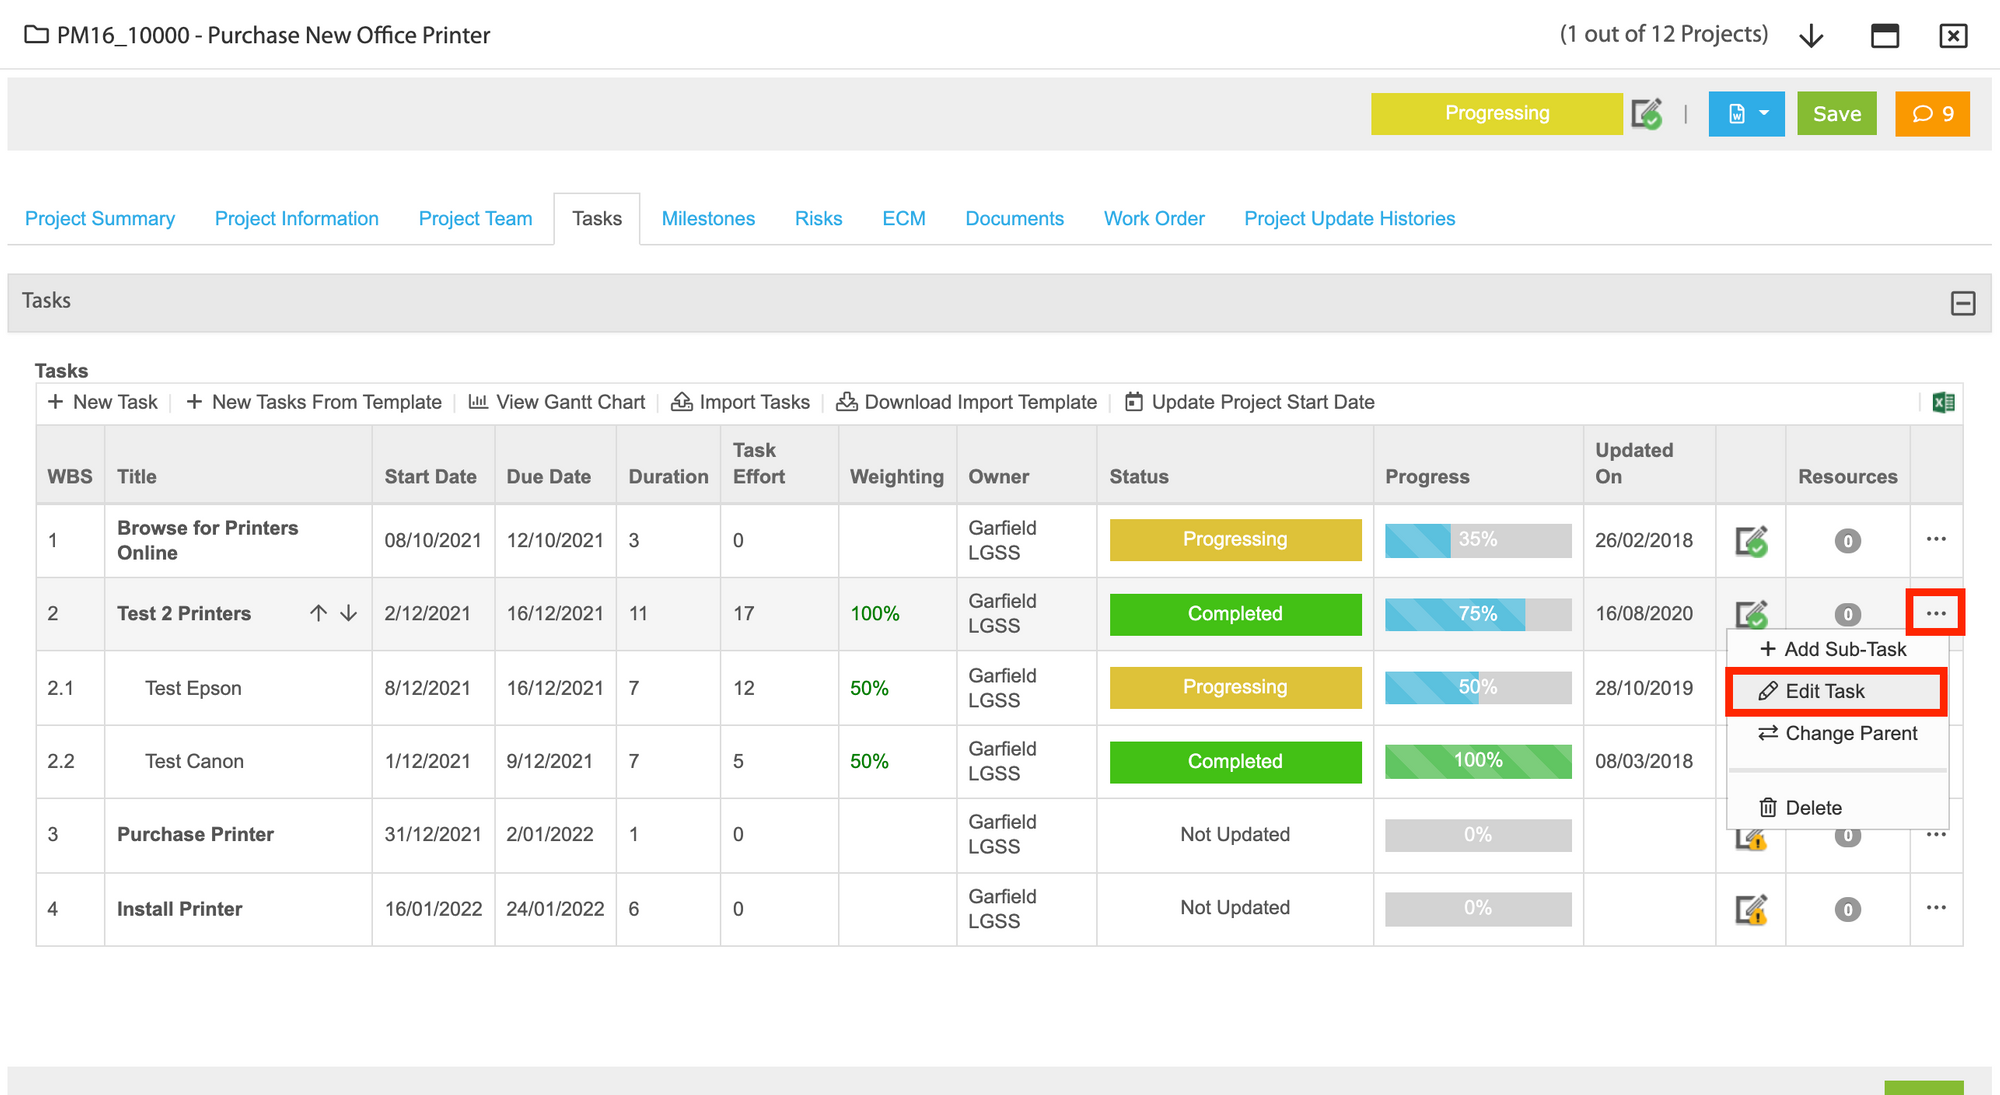
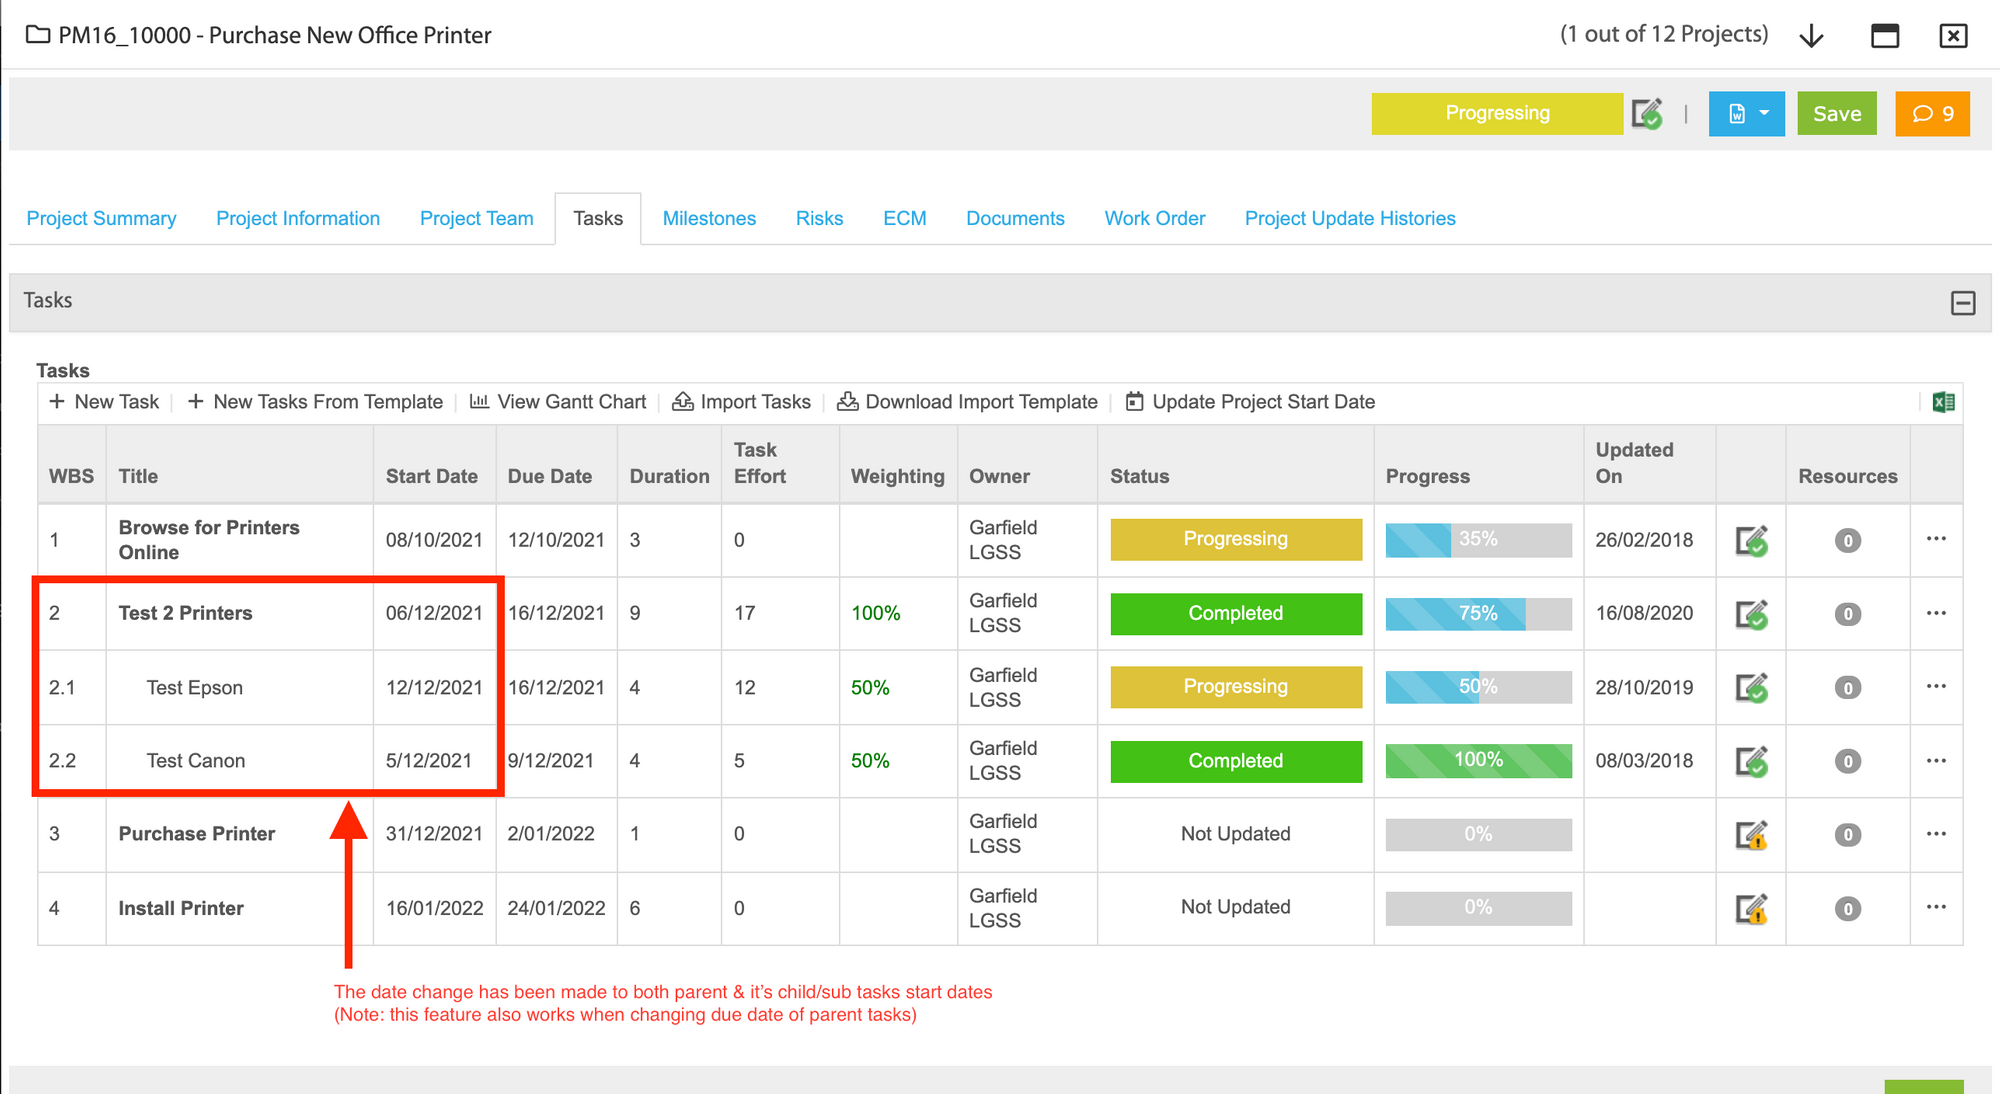
Scenario 2: Updating Parent & Child Task Dates
If users wish to change the dates of a task and have the change affect it's sub tasks (also known as child tasks). To only change the dates of parent & child tasks, users must:
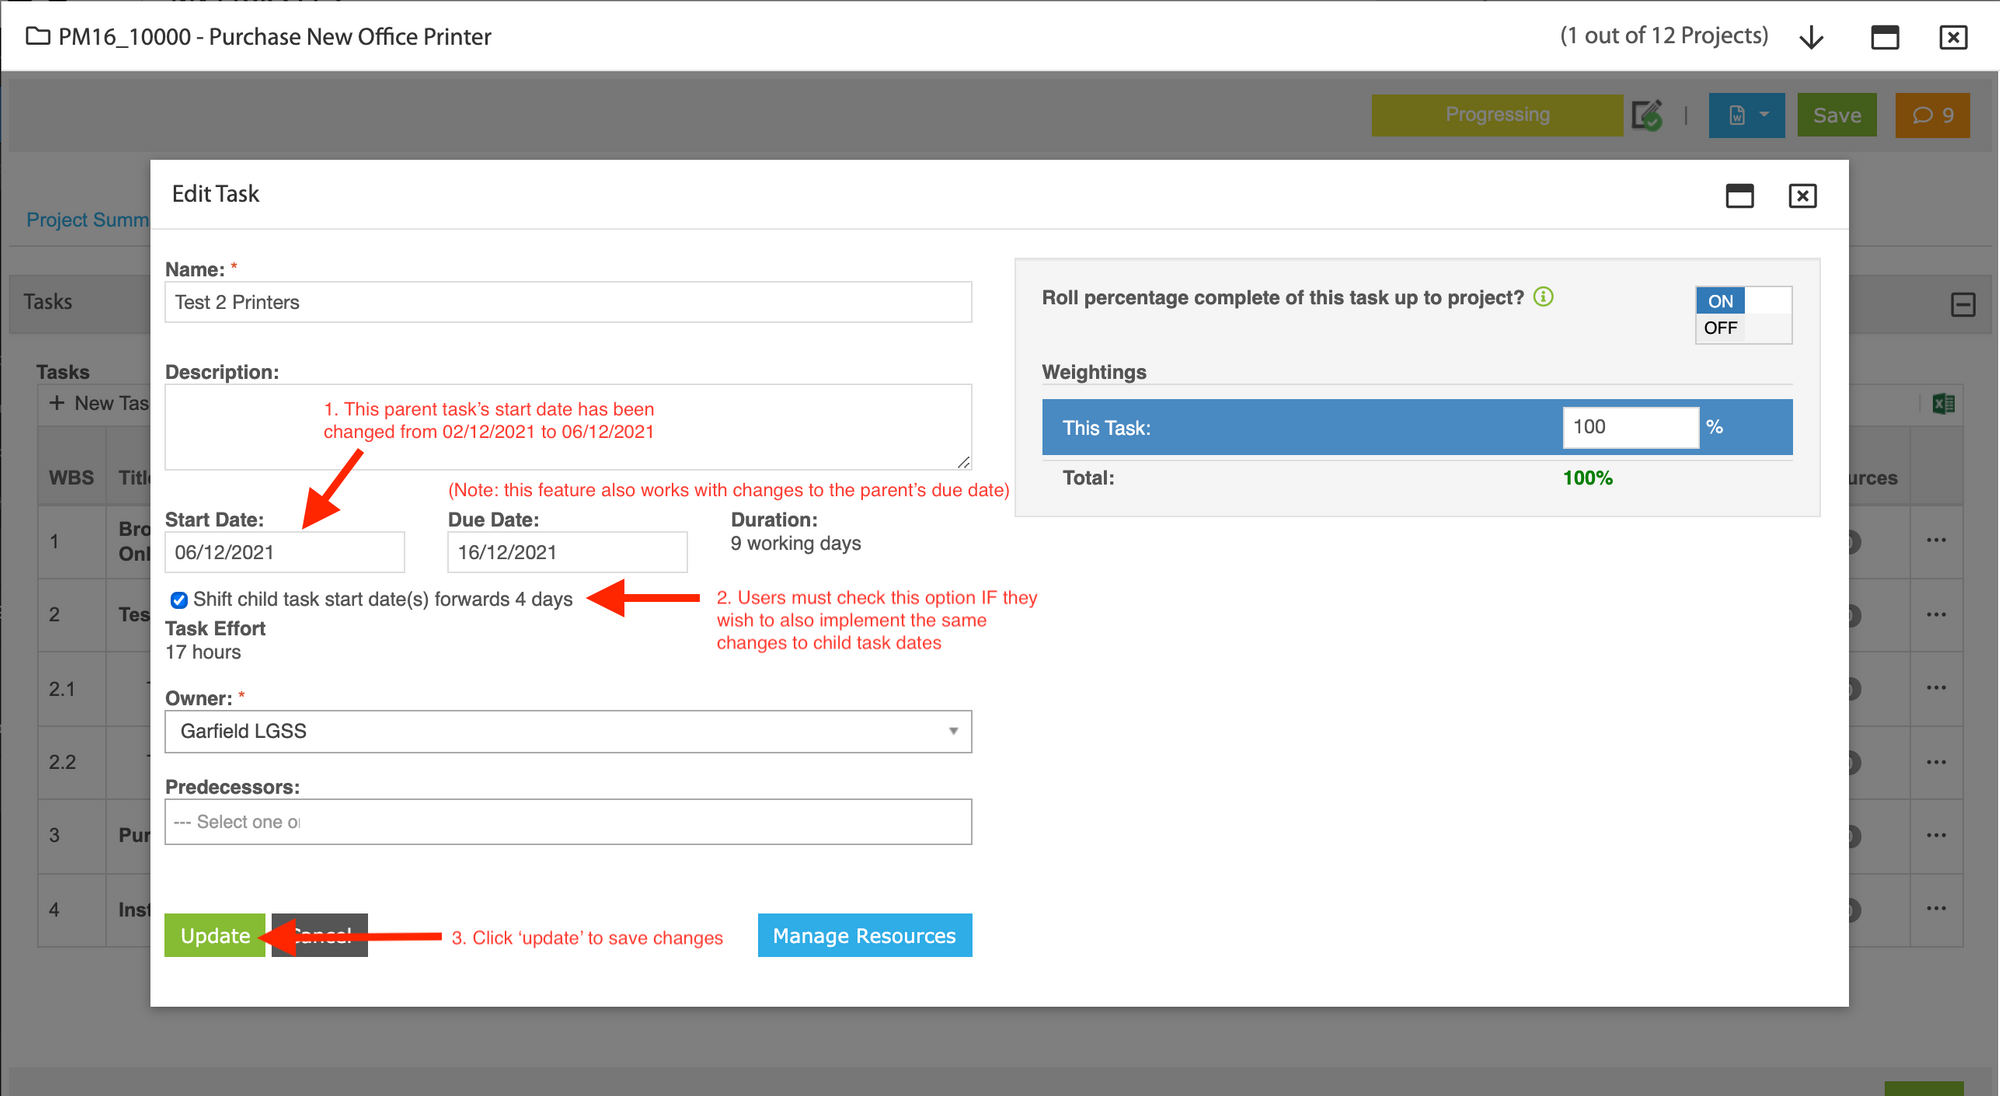
- Click on 'Edit Task' on a parent task and change the start/due date.
- Once a new date has been chosen, the user will have the options to shift the start/due dates of the child tasks.
- If an option has been checked, click 'Update' to apply the changes to the parent & child tasks dates.
(Note: Child tasks are sub tasks to parent tasks. For e.g. '2.1 Test Epson' and '2.2 Test Canon' are child tasks to '2. Test 2 printers' .)
Scenario 3: Updating Predecessor & Dependant Task Dates
If users wish to change the due date of a task and have the change affect it's dependant tasks. Similar to scenario 2, the predecessor date must be changed to shift the dependant task dates. Users must:
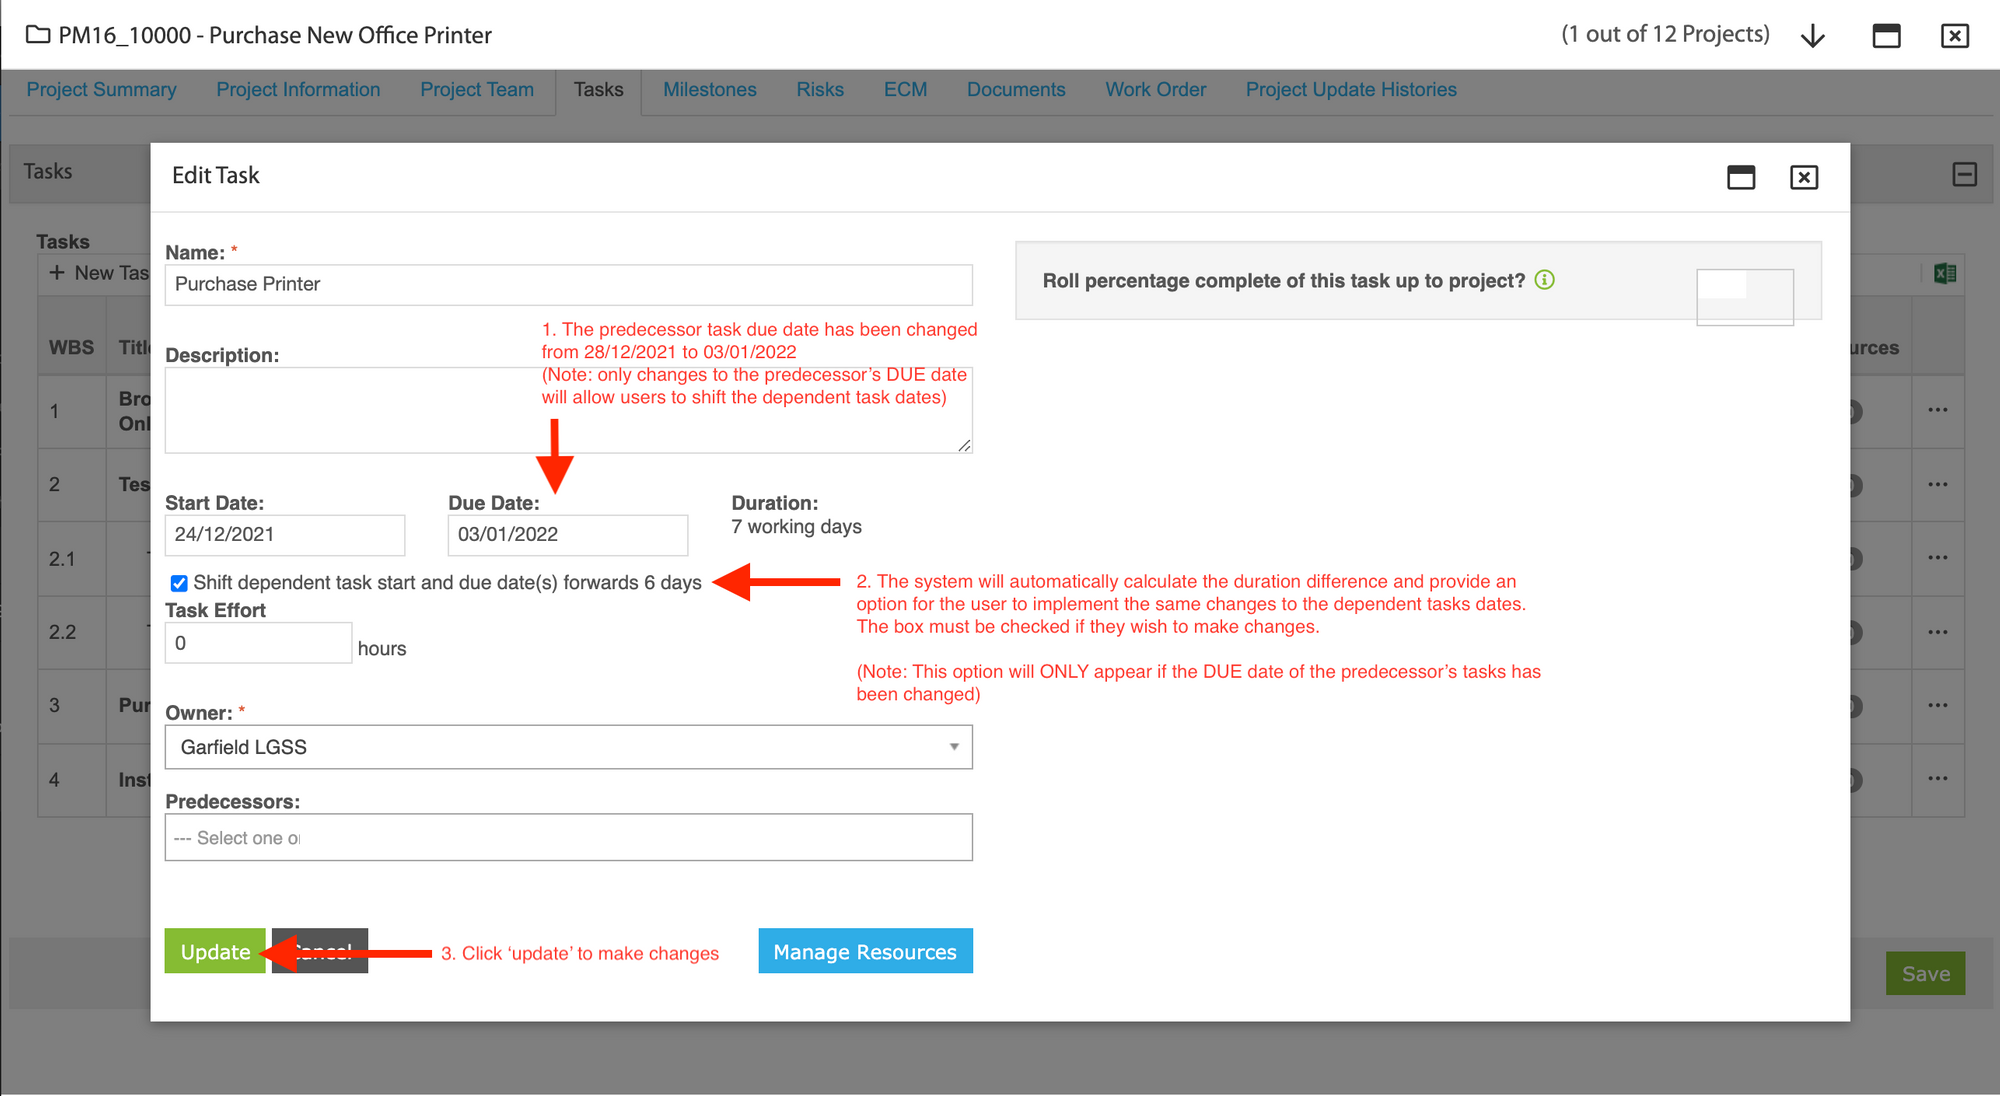
- Click on 'Edit Task' on a Predecessor task and change ONLY the due date.
- Once a new due date has been chosen, the user will have the option to shift the start date of its dependant tasks.
- If an option has been checked, click 'Update' to apply the changes to the predecessor & dependant tasks dates.
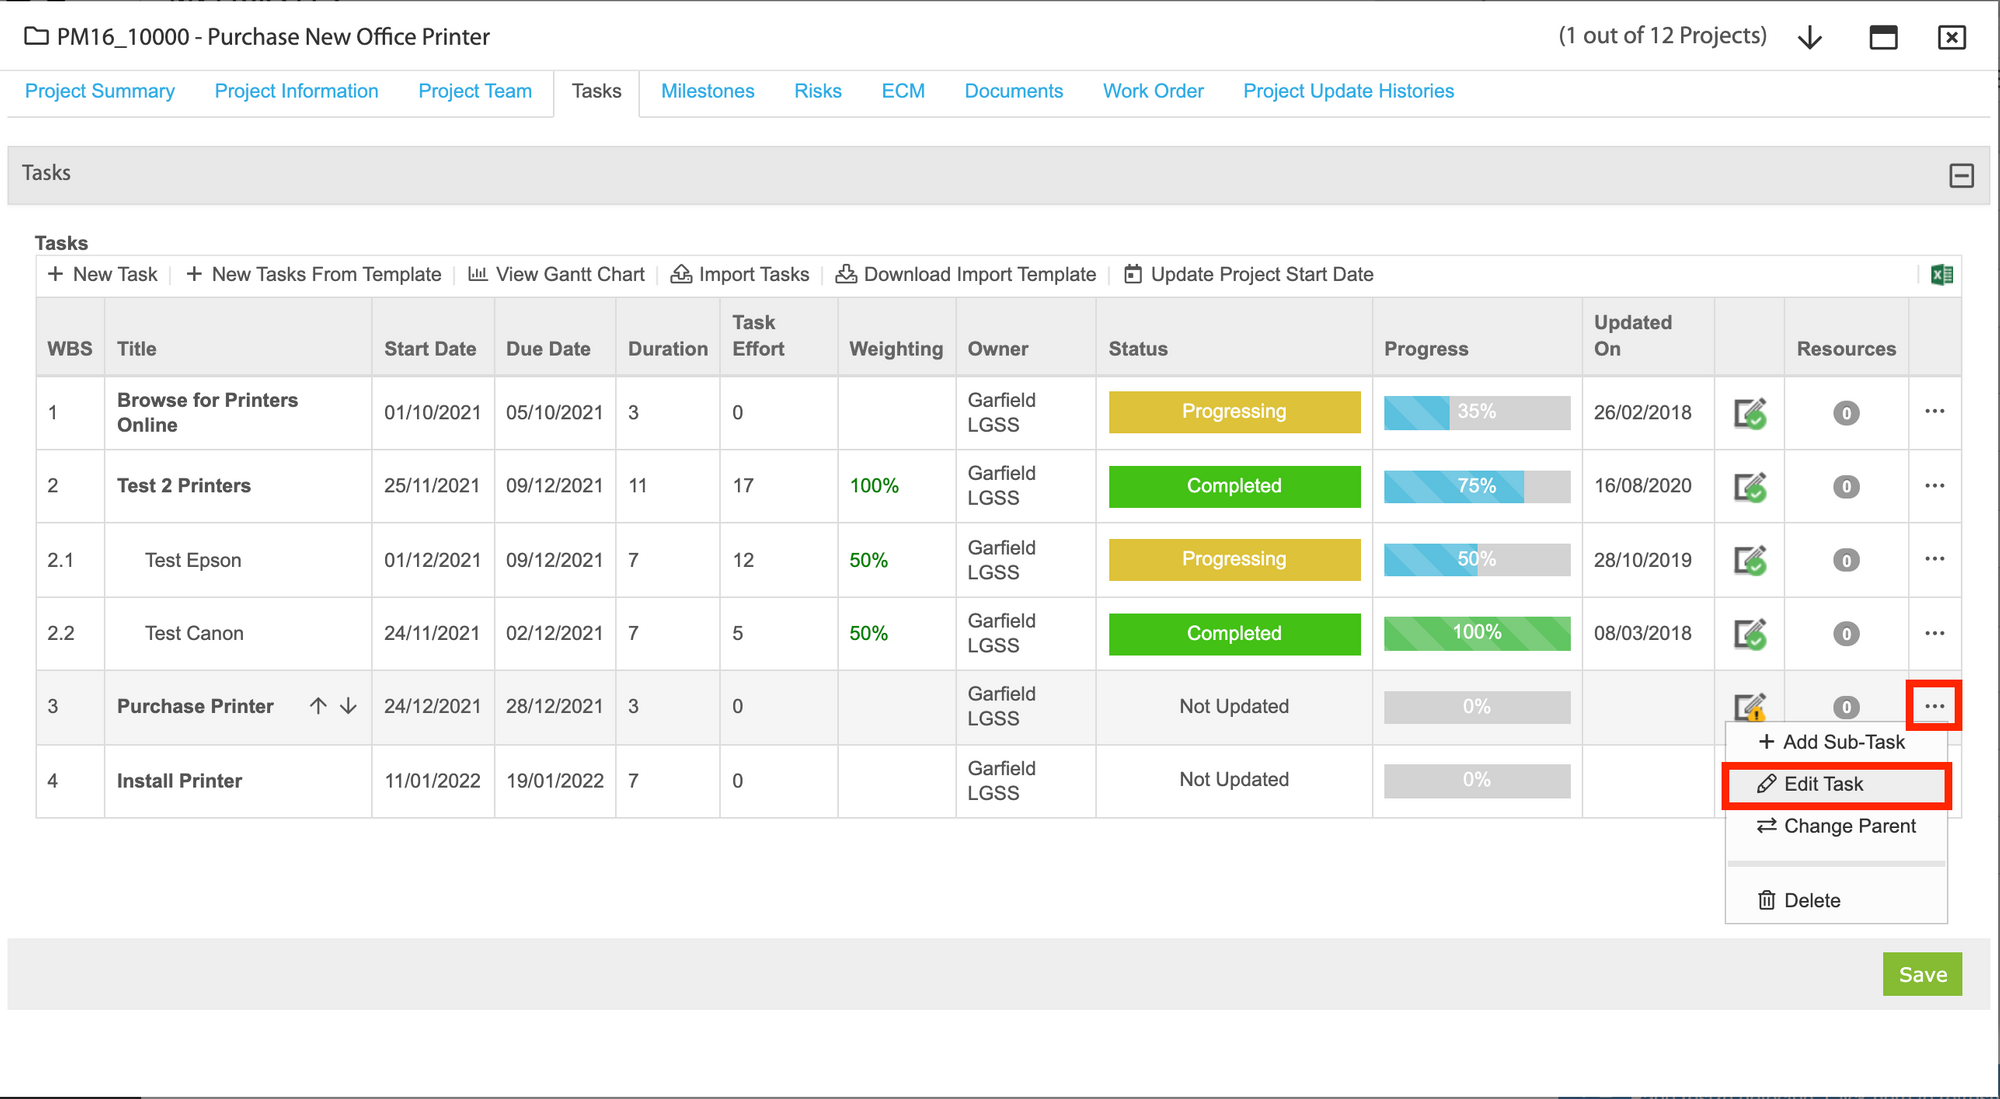

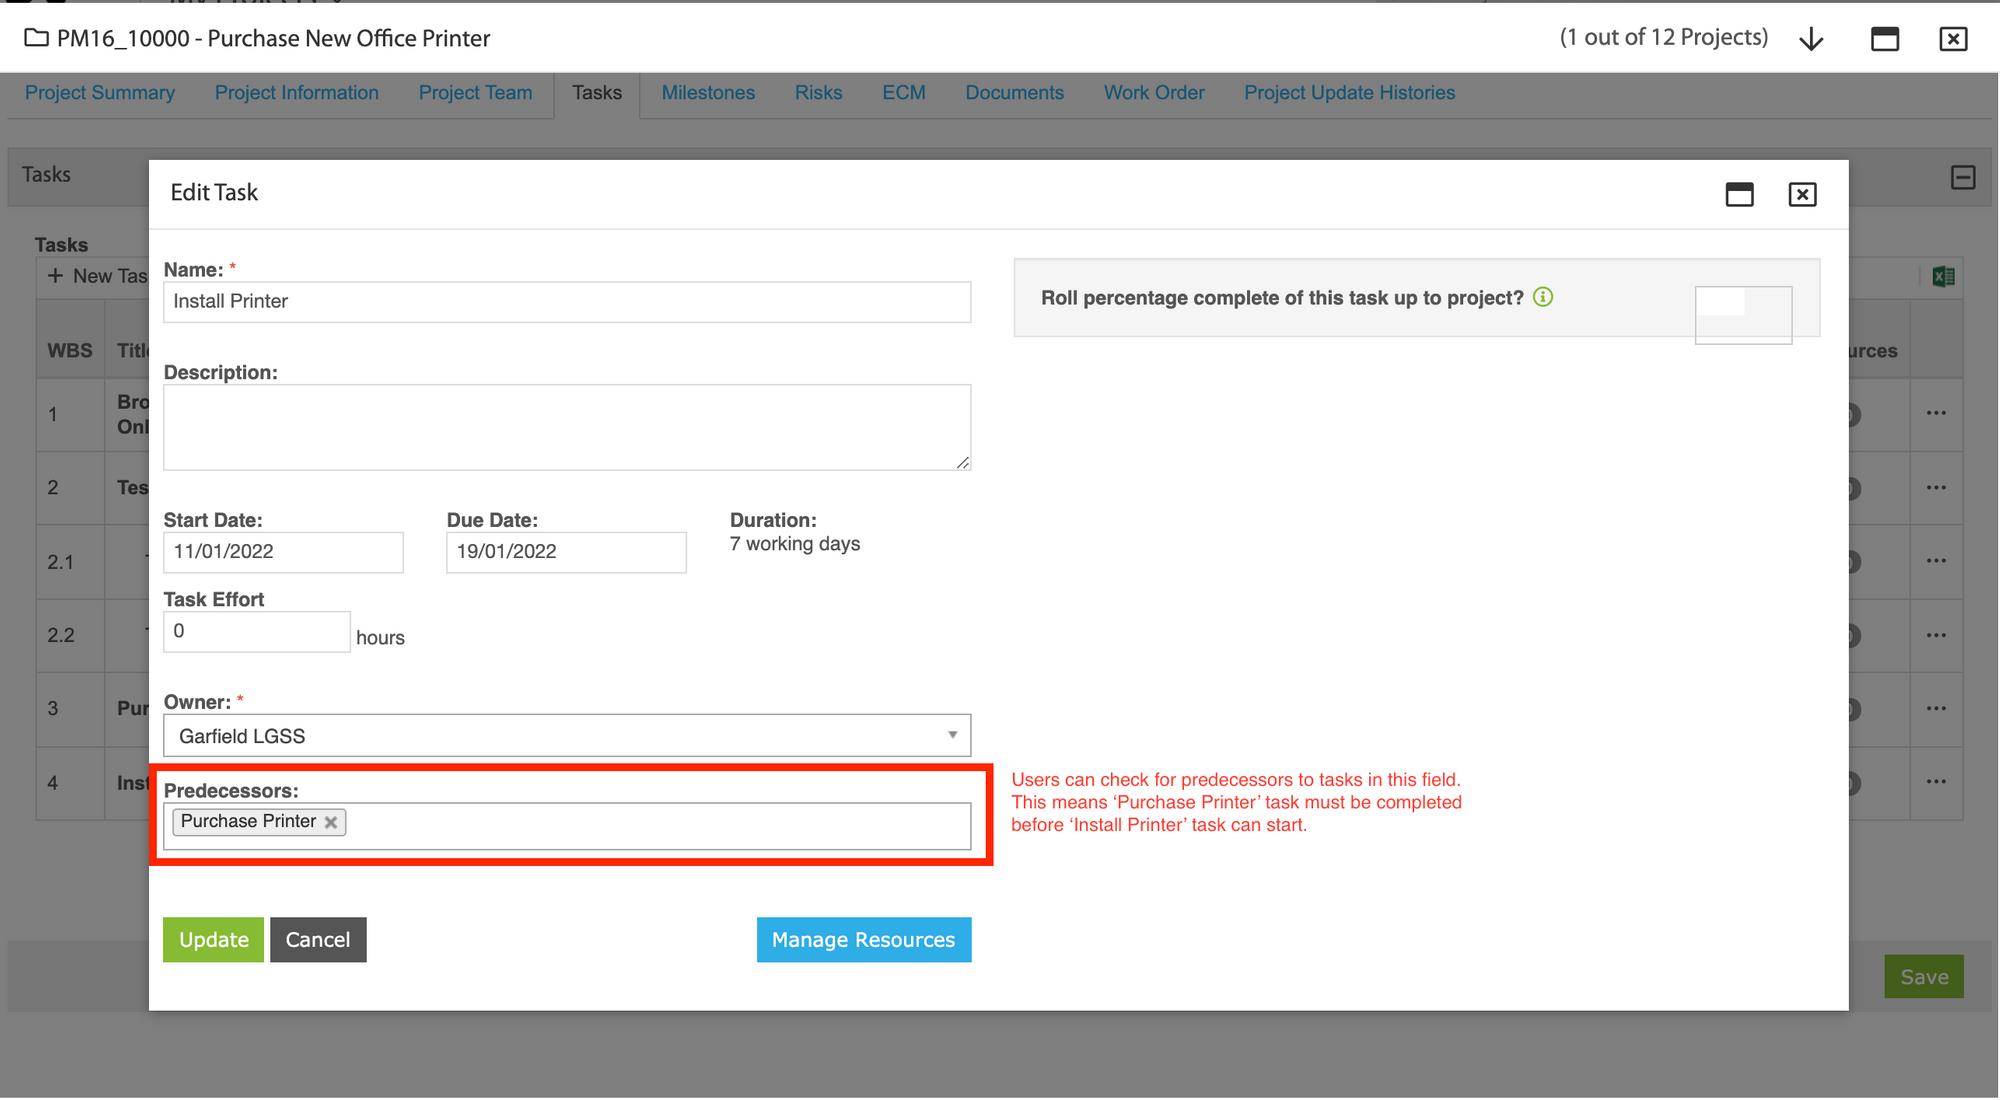
Note: Predecessor tasks are prerequisites to dependant tasks. For e.g. '3. Purchase Printer' is a predecessor task to '4. Install Printer' because the printer must be purchased first before it can be installed.
2.2 Add "effort" to the task
PMC Admins can now add an 'Effort' field to a project's task. To enable this feature, the Admin must do the following:
- Go to PMC Admin Settings and turn on a key called 'Enable "Effort" feature on the Task". The key is off by default.
- Provide a name for the Effort' field under "Effort display name".
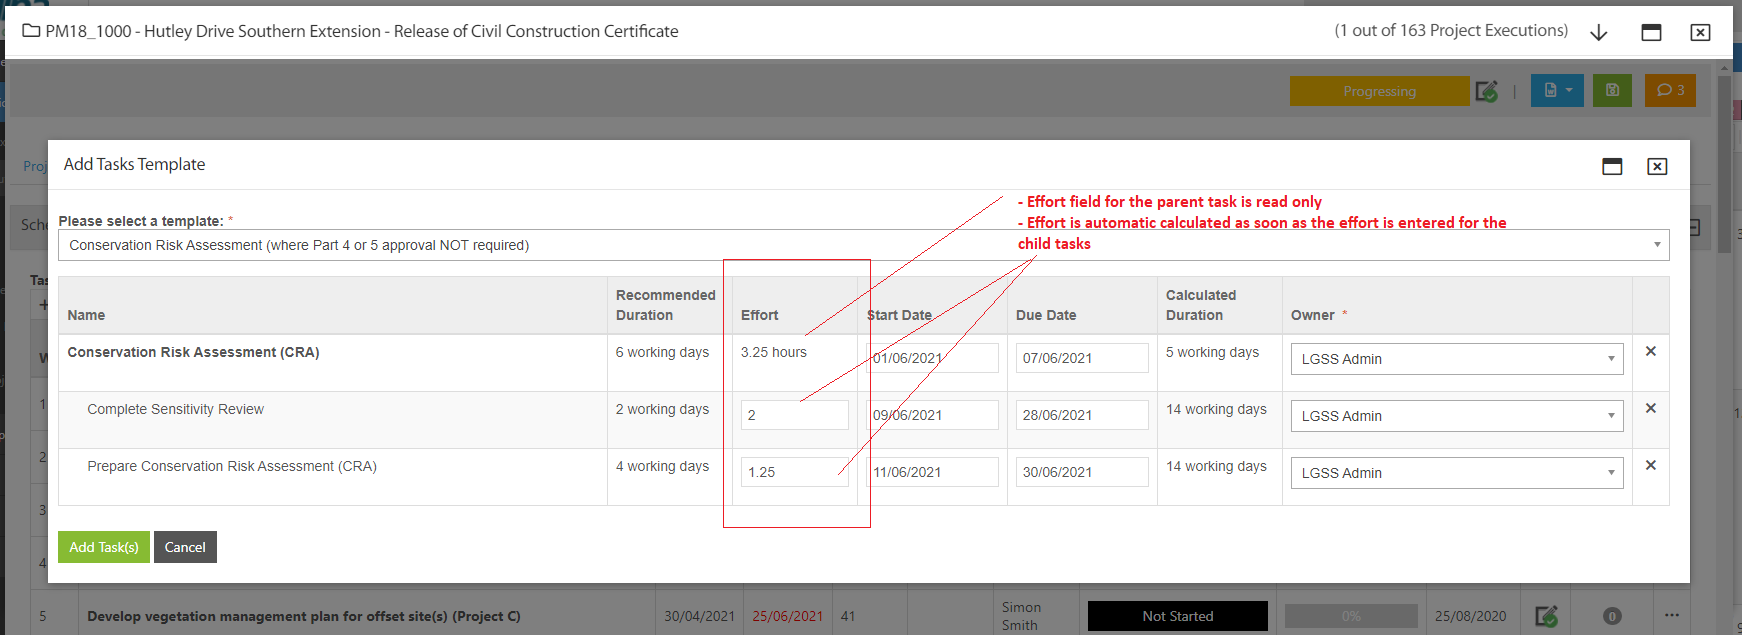
Once enabled, the 'Effort' field can be found in the project task's Add and Edit popup as shown below. Users can enter up to two decimal places (for e.g. 4.25 hours).

Users will be able to see the values entered in the 'Effort' field under the 'Effort' column in the project table as shown below.
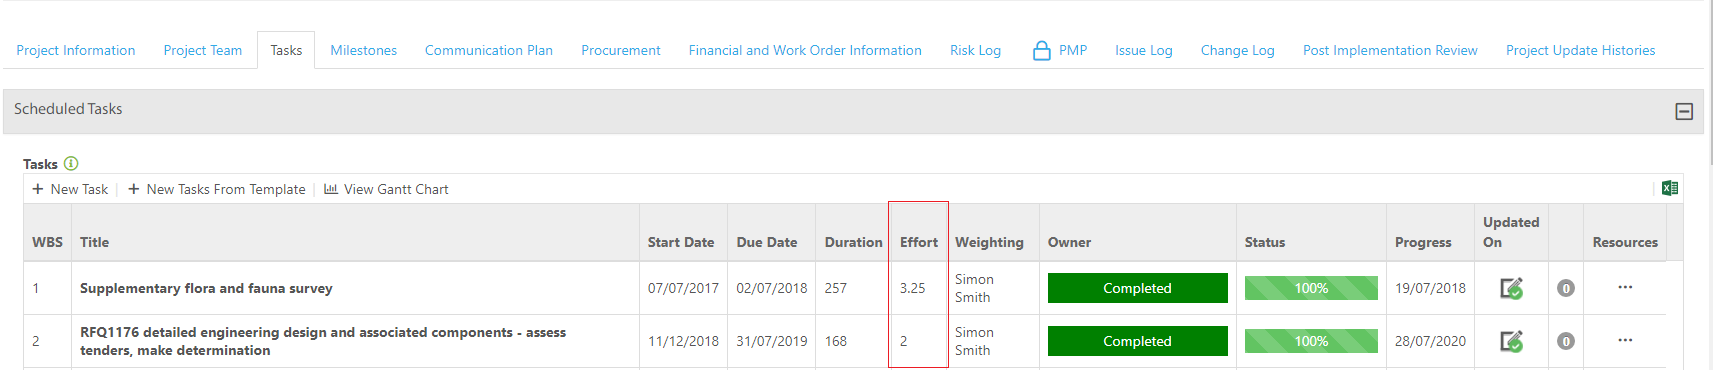
For parent tasks, the system will calculate the 'Effort' hours based on the sub tasks. Users can only enter data for the sub tasks 'Effort' fields as shown below.
3. Applicant Tracking & Recruitment
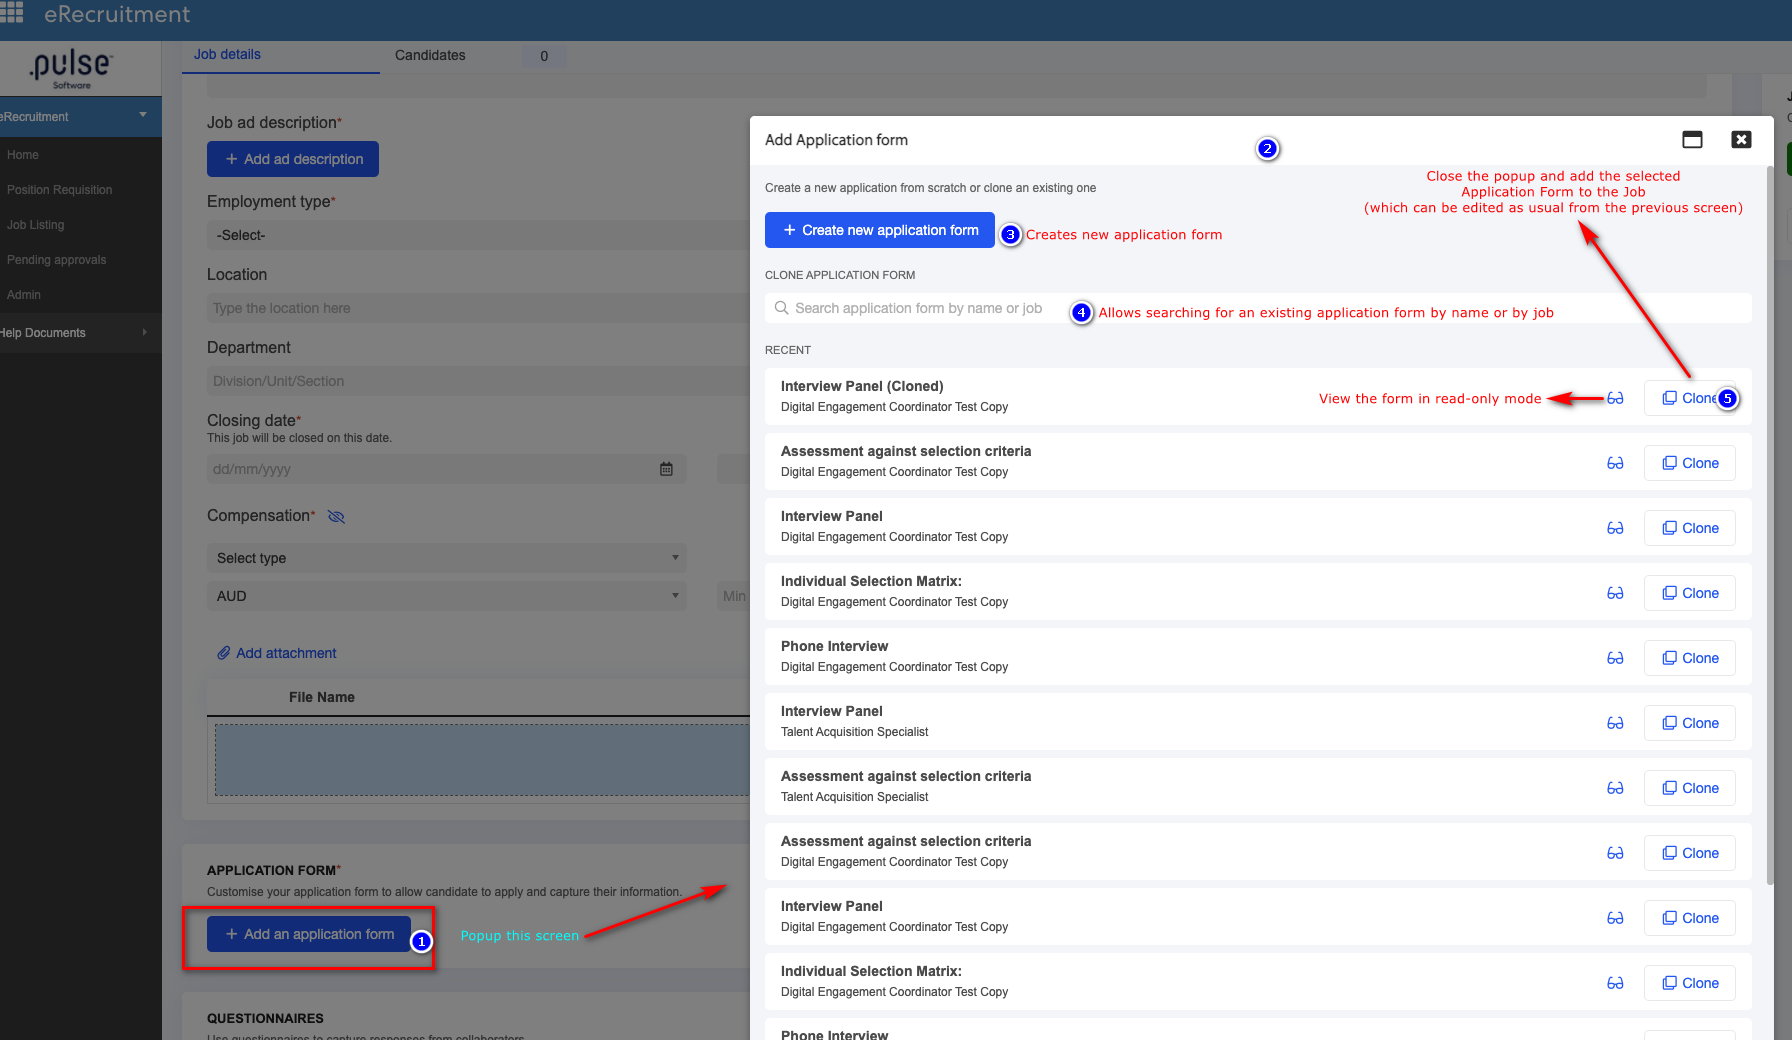
3.1 The option to copy from previous job applications when setting up an application formHiring managers now have the option to copy an existing application when creating a new job application form. To clone a job application, users must follow the instructions below:
- When setting up a new job application, simply click on '+ Add an application form'
- On the 'Add Application form' popup, users can either search an existing application form or choose one from the 'Recent' list to clone. If users wish to view a form, they must click on the glasses icon to open up a form in read-only mode.
- Once users have chosen an application form to clone, simply click 'Clone' and the system will automatically add the cloned application to the job details. The hiring manager can also edit the cloned application if they wish to do so.
4. Incidents & Claims Management
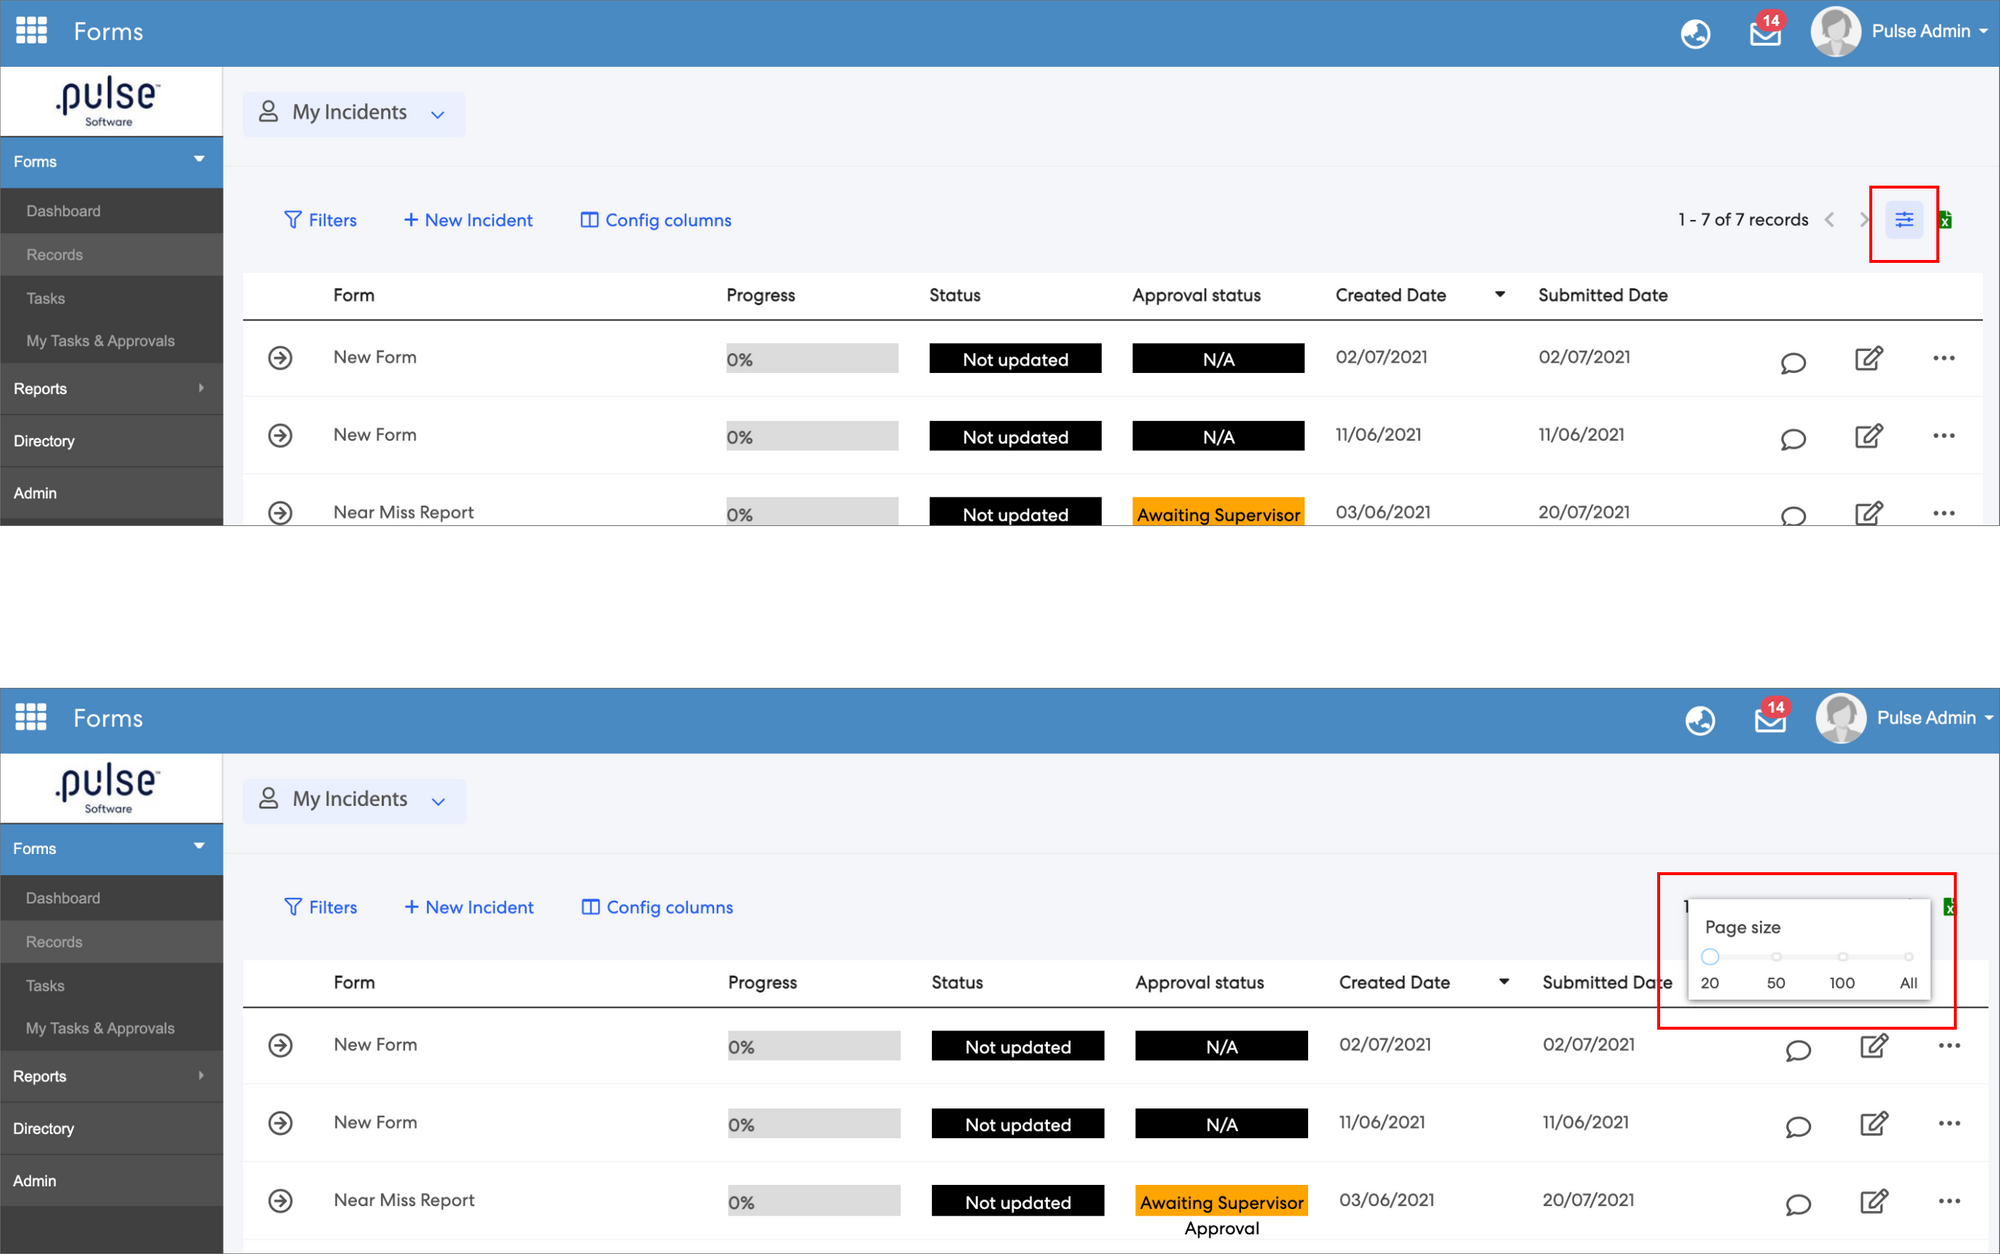
4.1 The ability to configure page size in 'My Incidents' and 'Submitted Incidents'In the 'My Incidents' and 'Submitted Incidents' pages, users can now configure the page size to change the amount of forms shown in the table.
Issues resolved
Document Generator
- Files no longer contains corrupted data
- Full Delegations Report files no longer generates duplicate positions
Human Capital Management (Onboarding)
- 'My Organisational Tasks' page now shows enrolled users and related organisational tasks
Pulse Summary
- The Pulse Summary pop-up now shows the correct number of outstanding items