Contents
1.Corporate Planning & Reporting Module
1.1 Ability for the linked actions to roll over in the next reporting periodIn the CPR, CPR (AH), Compliance, and Audit modules, when actions are rolled over, all actions created from the same or a different hierarchy that are linked to the rolled-over hierarchy can now be carried over from the previous reporting year to the newer reporting year.
To view how this feature works, follow the steps below:
Step 1: Log in to Pulse and go to the CPR and CPR(AH), Compliance and Audit modules
Step 2: Go to Admin > Rollover and check "Include actions in rollover".
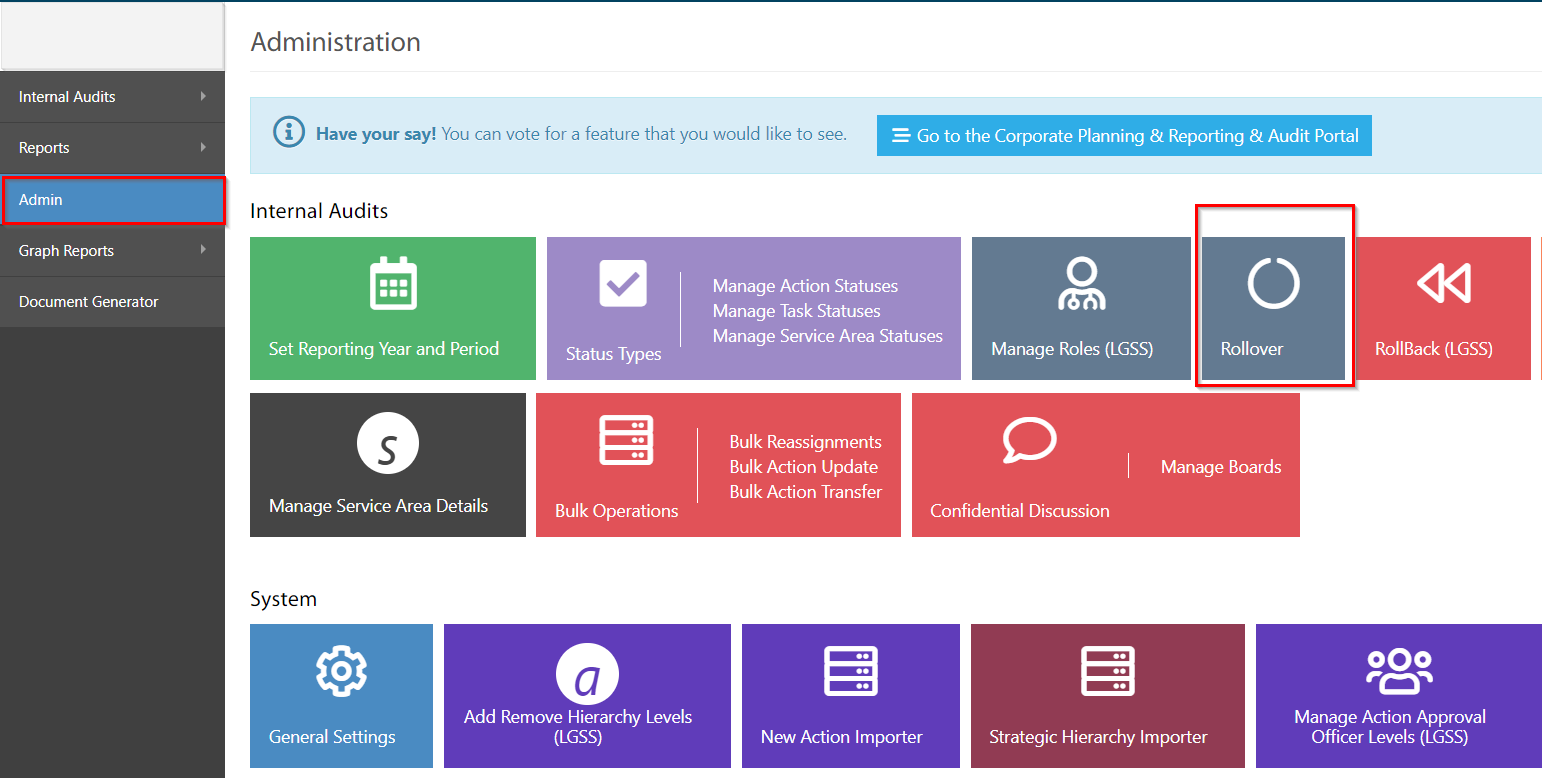
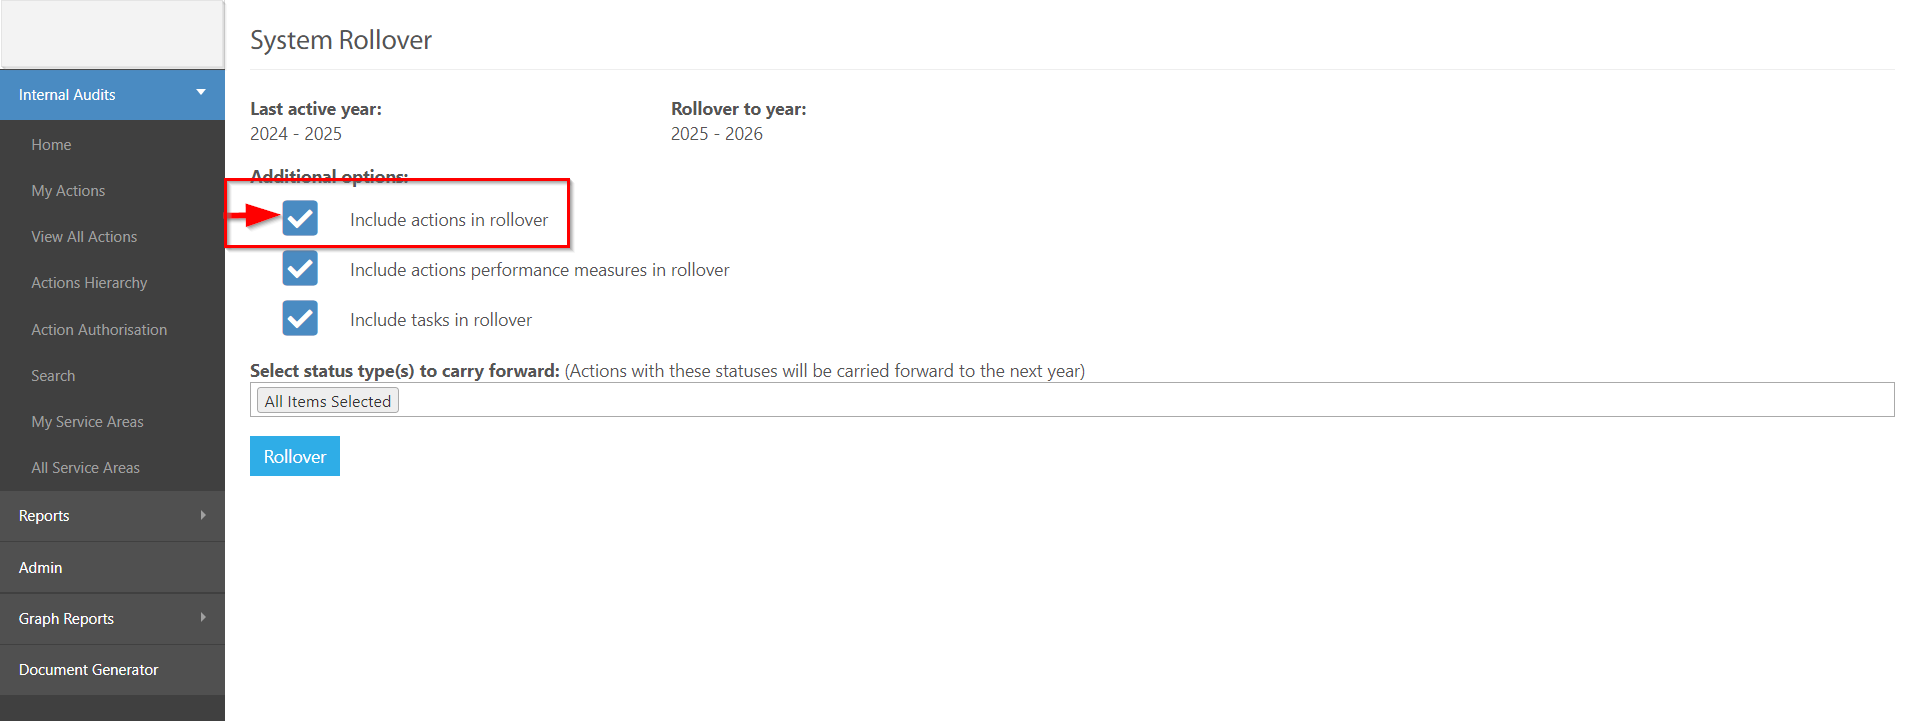
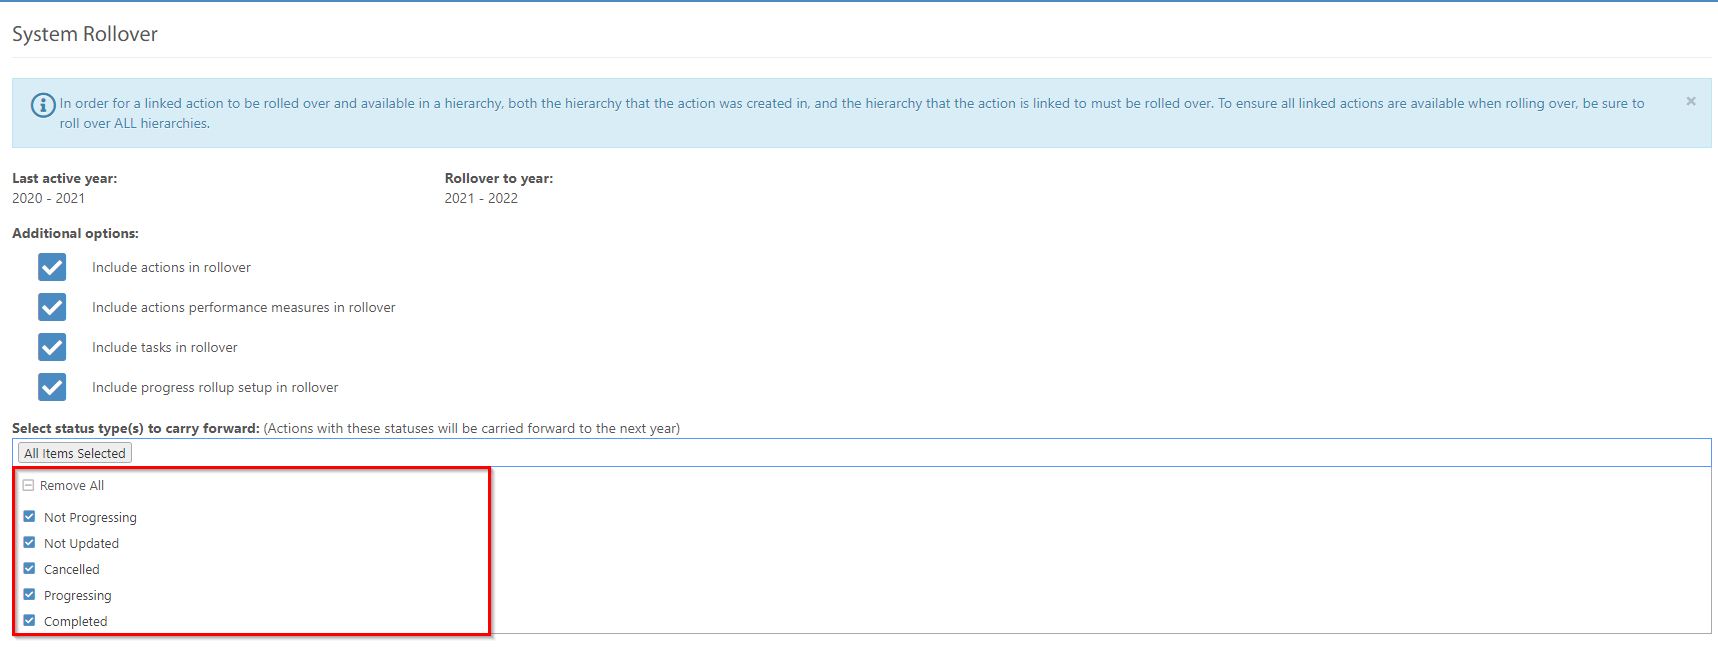
Admins also have the flexibility to rollover the Actions based on their statuses.
Step 3: Click on "Rollover" to rollover all the actions. This process may take some time.
Step 4:Once the rollover is complete, and the business is ready to start reporting on the new period, Admins can change the reporting year and period by navigating to: Admin > Set reporting year and period (i.e., keep the current year as 2023-2024 and the current period as Q1). All modules must be rolled over to ensure Actions are visible in the rolled over period.
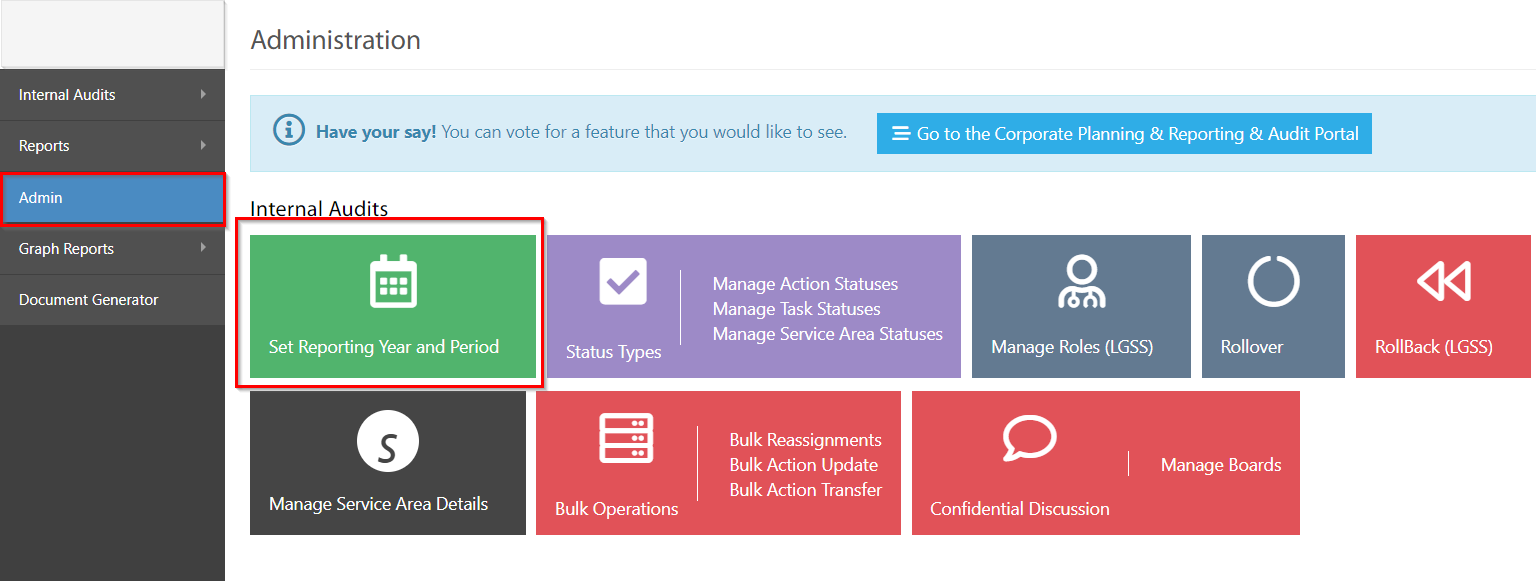
Click on "Change Current Period" to change the reporting period.
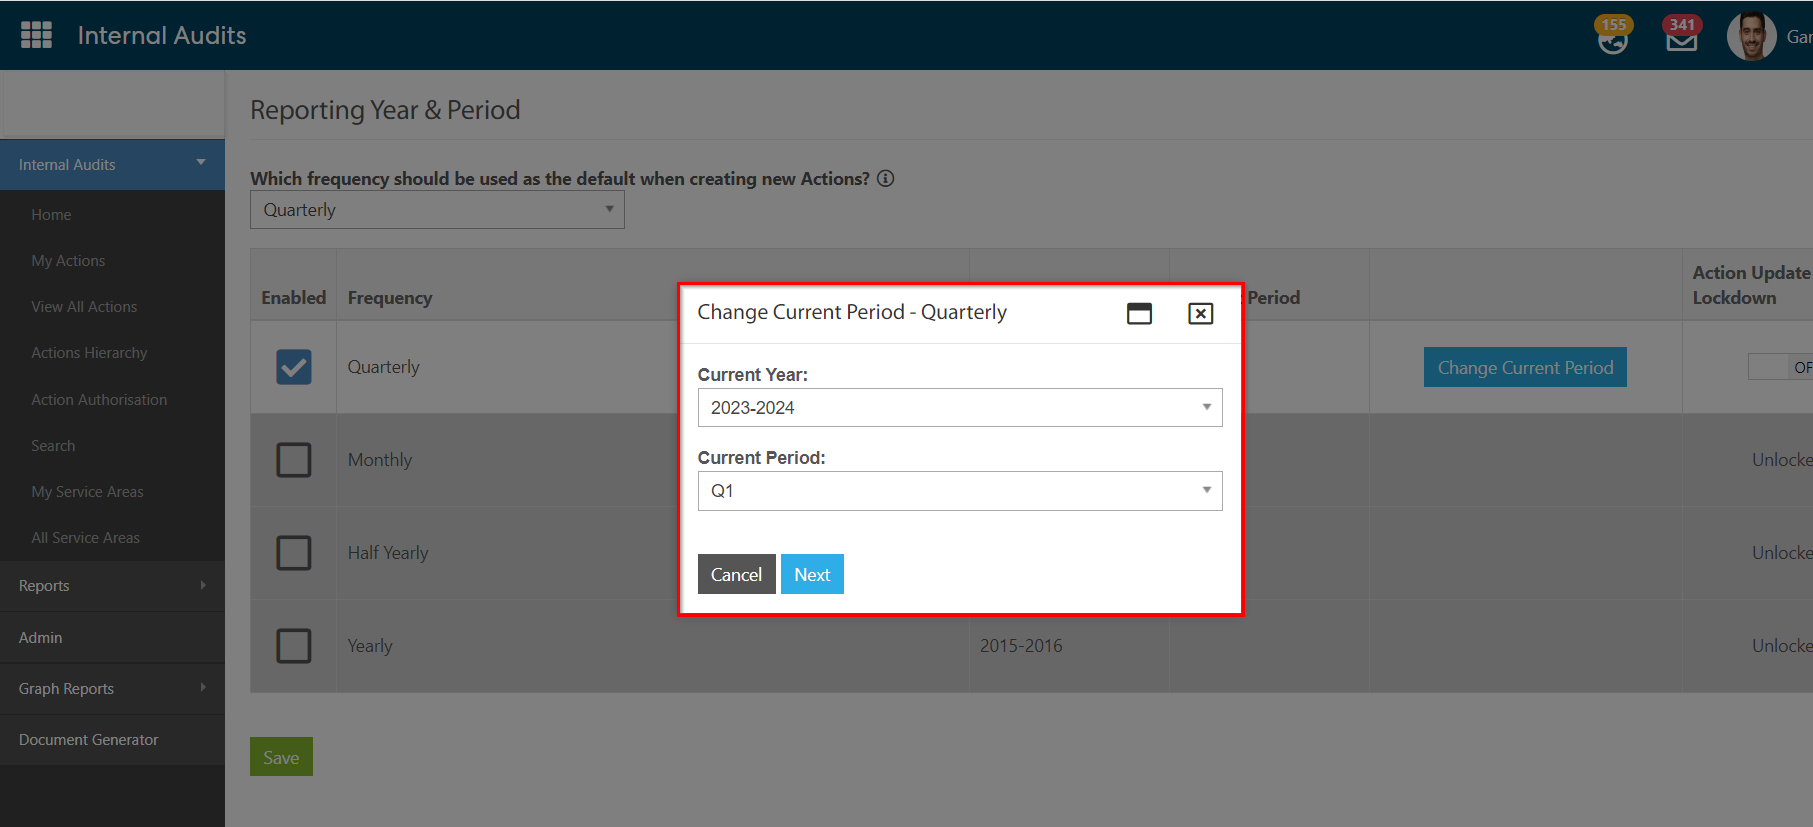
Click on "Next" to change the Reporting Year & Period.
2. eRecruitment
2.1 Interview Process EnhancementsPulse has redesigned the Interview process to be more intuitive and easy to use, allowing Recruiters to invite short listed candidates to one or more interview sessions.
The interface has been updated to provide better visibility and management of Interview sessions and their attendees.
Recruiters can create interview sessions and invite candidates using the below steps:
Step 1: Log in to Pulse and go to the eRecruitment Module.
Step 2: Go to the Job Listing page. Admins can either create a new job by clicking on the "Add Job" or search for an existing open job.

Step 3: Click on the view button and navigate to the Candidate page, and click on the "Send time slots" or "Book candidate in".
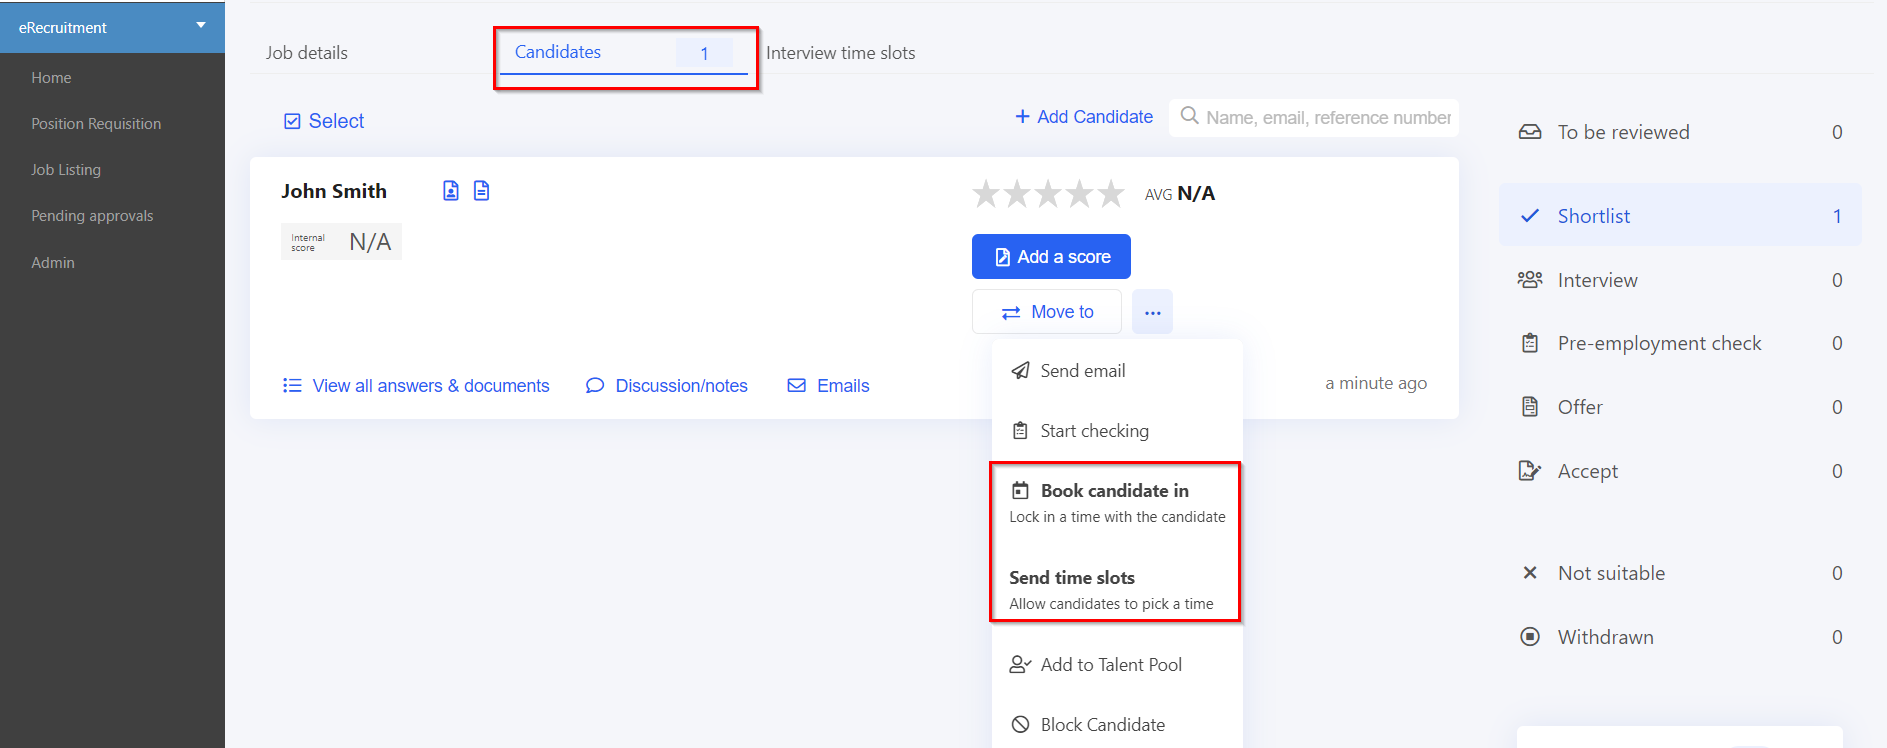
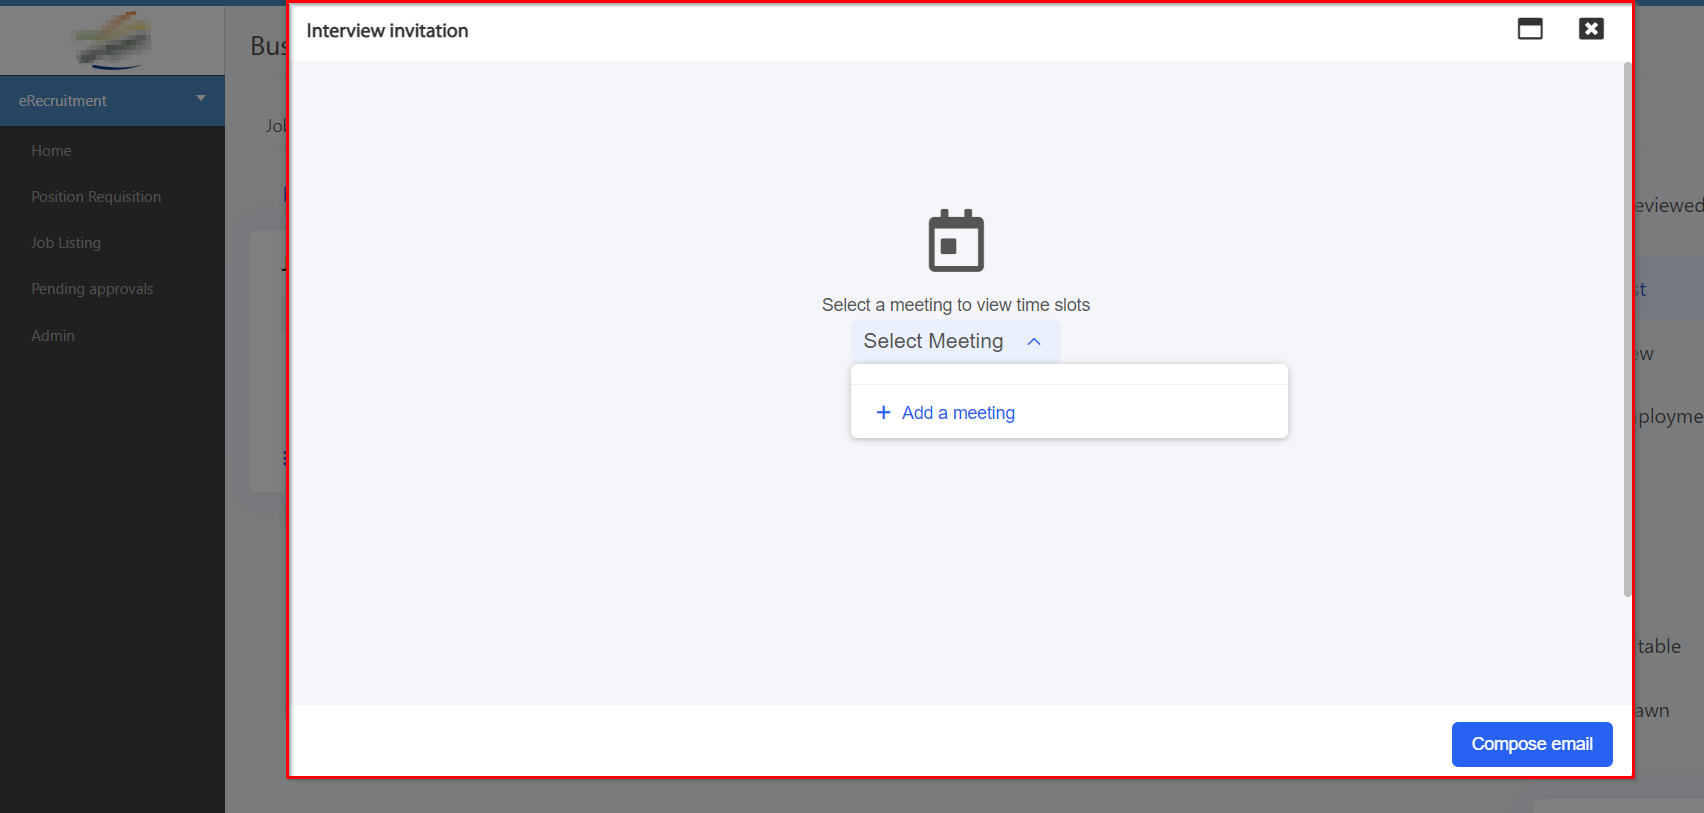
A pop-up will appear where admins and hiring managers will have the ability to create a meeting.
Step 4: Click on "Add a meeting", to create a new meeting invite. Once the meeting is created, click on the "Add time slot" button, admins and hiring managers can add multiple time slots for the interview.
Alternatively, admins and hiring managers can go to Interview time slots tab to create different time slots.

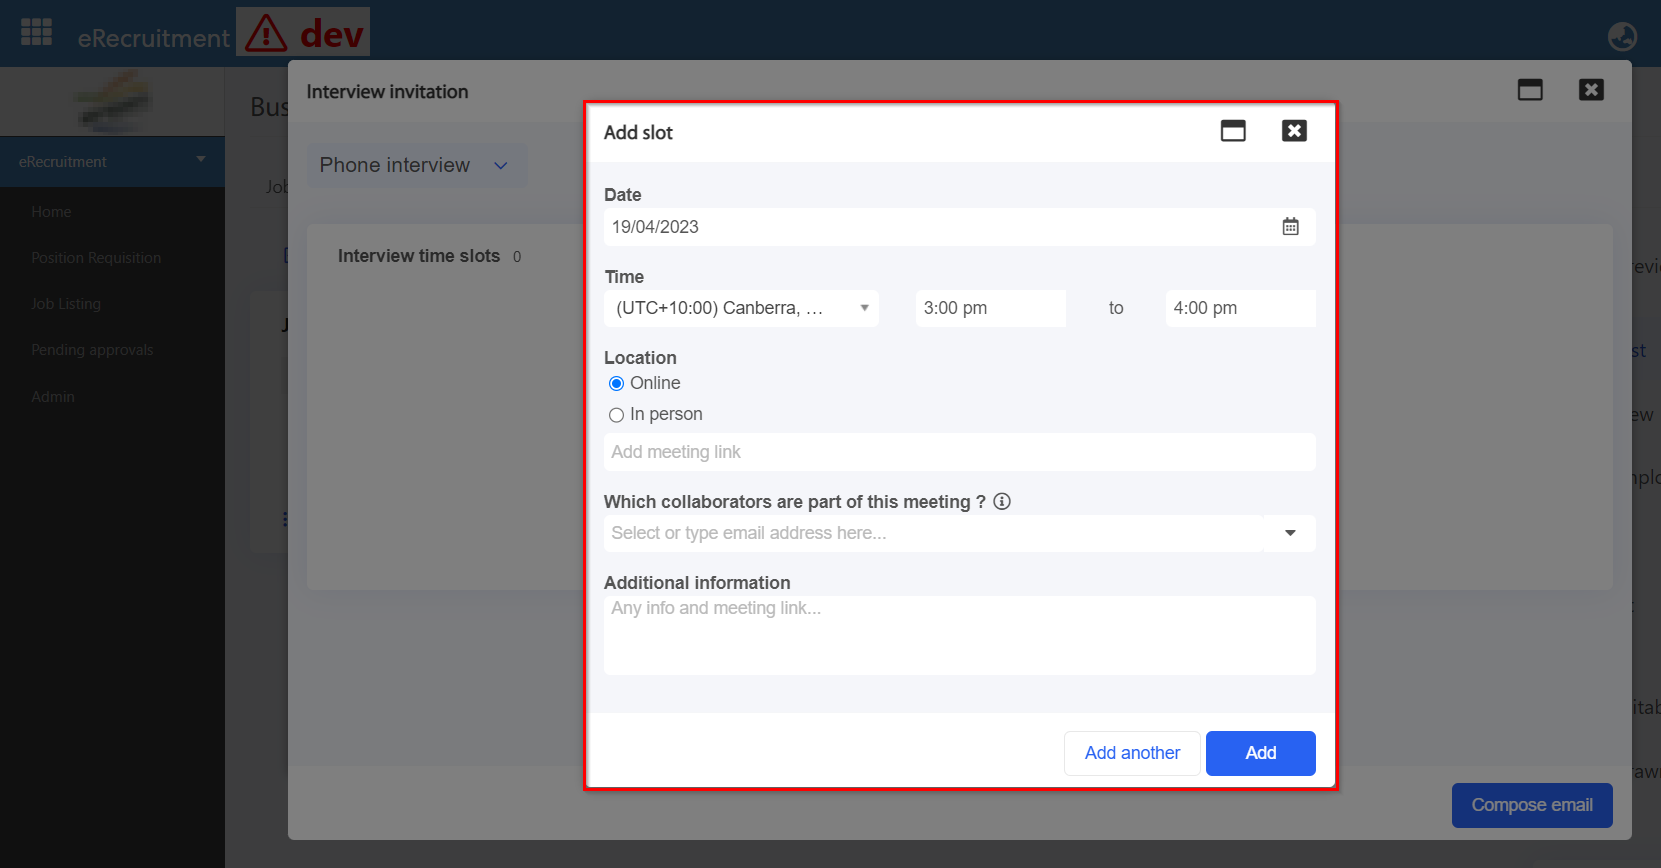
Admins and hiring managers can now add time slots based on the region as well and the system will automatically pick the time & date of the region selected.
Admins will also have the ability to select the location of the interview. They can select whether they want to conduct the interview Online or In person. Any online meetings link can be attached to the time slot and the candidate and collaborators will be able to join the meeting from that link. The In person location now supports address lookup, allowing accurate locations to be entered quickly.
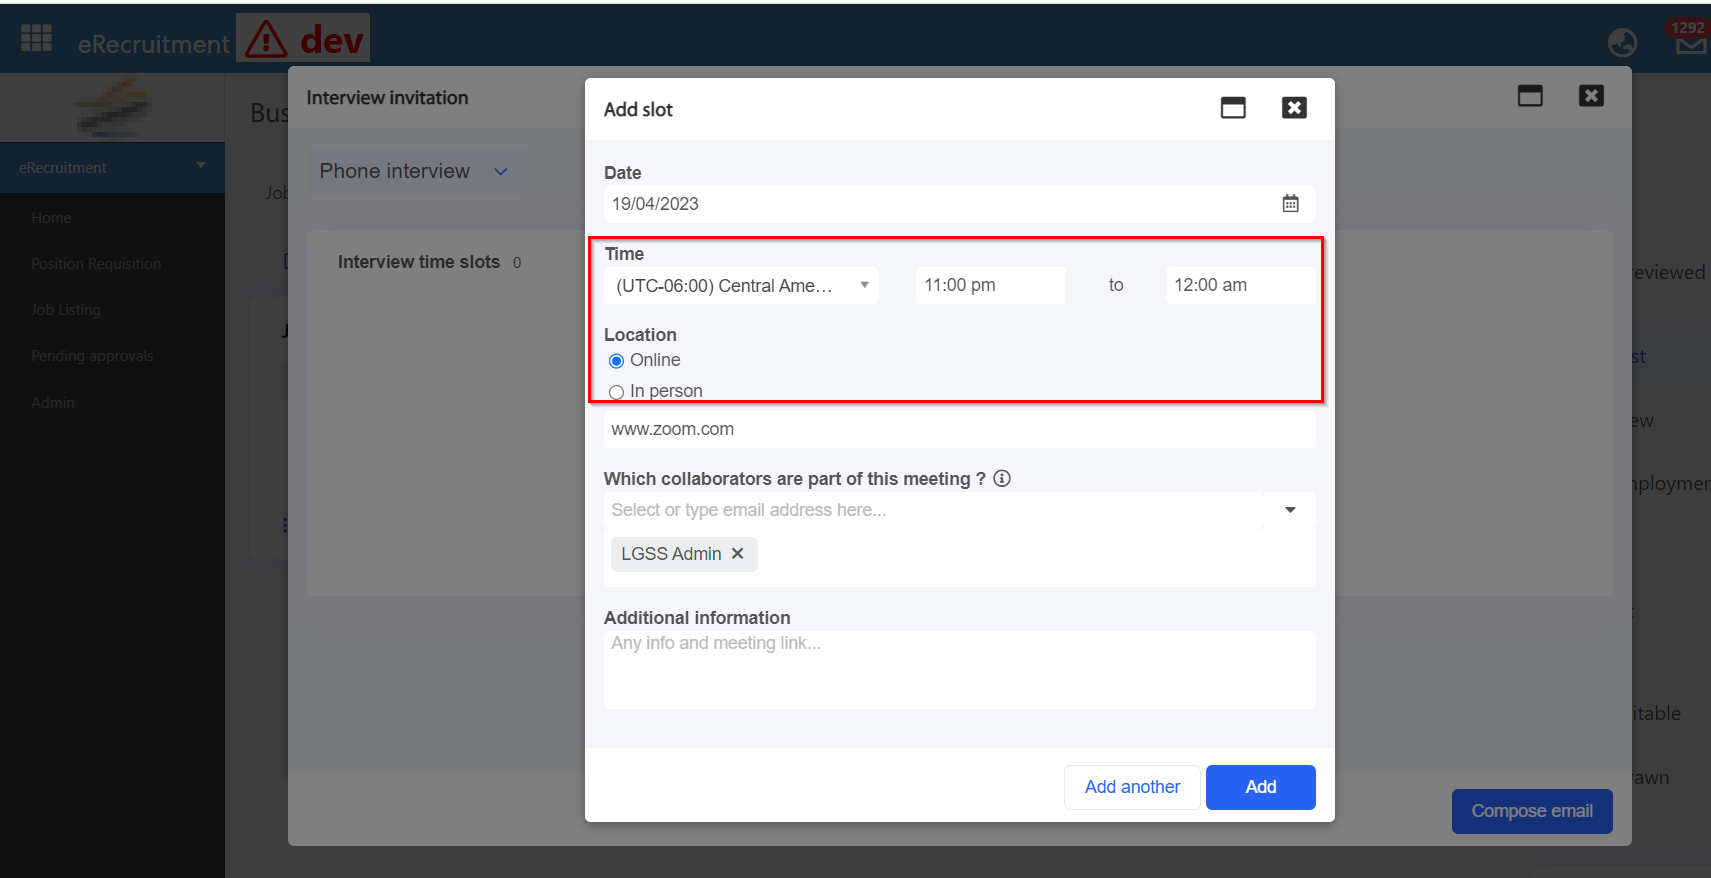
Click on "Add" to add this timeslot in the meeting.
Step 5: Go to the Interview time slot tab. Admins and hiring managers have the ability to view all the time slots and they can also create new interview time slots if needed.
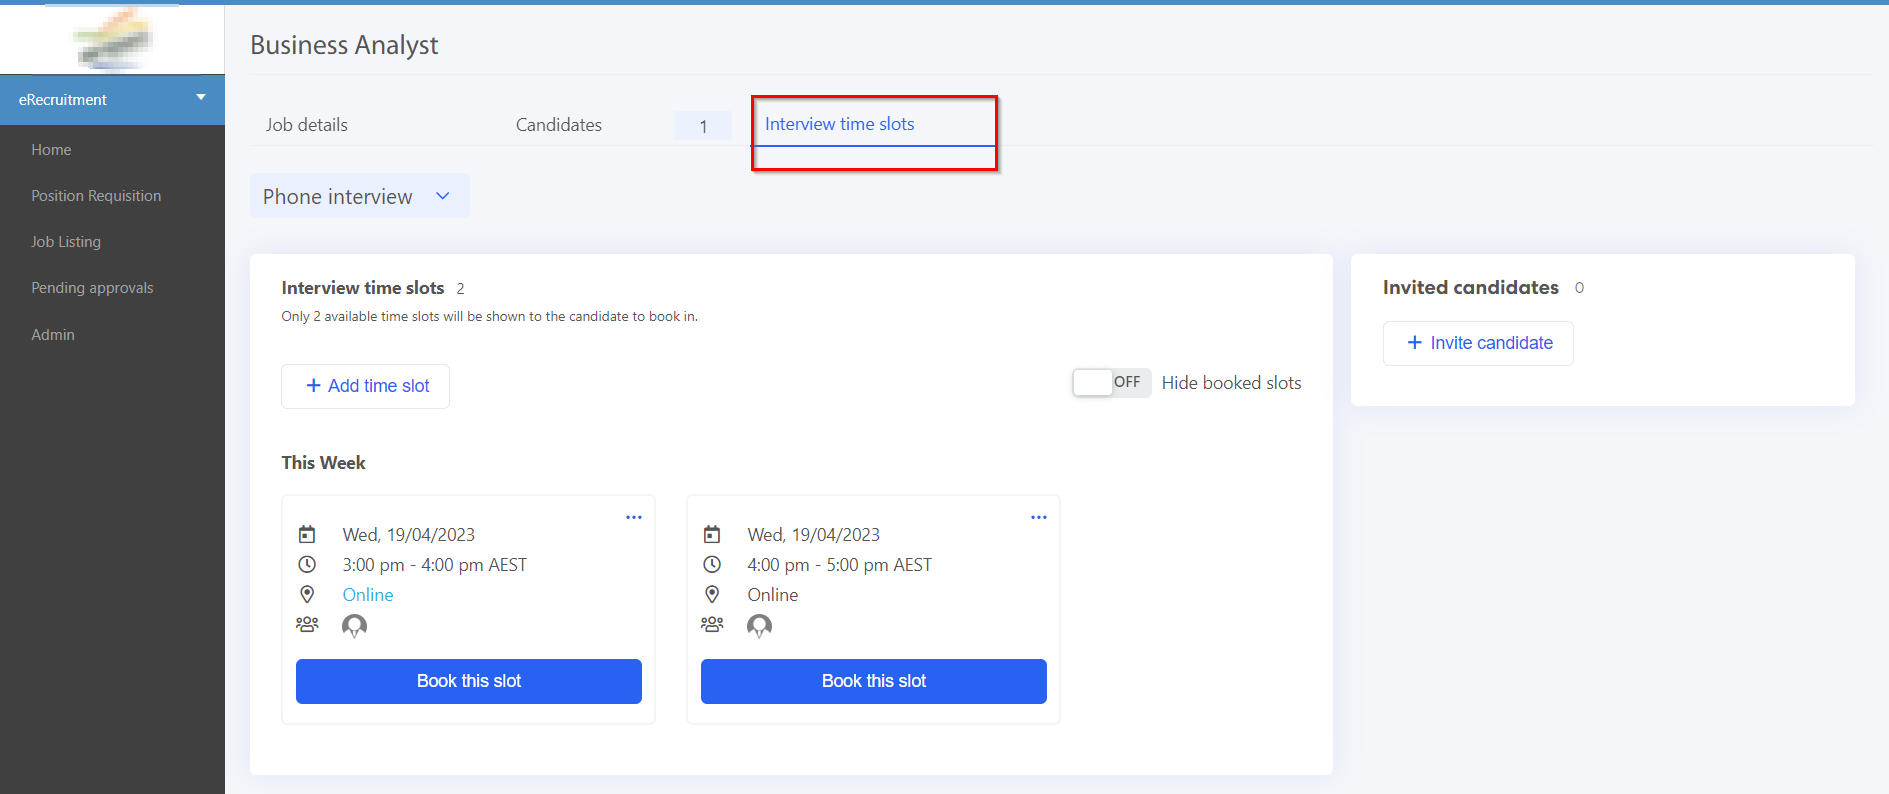
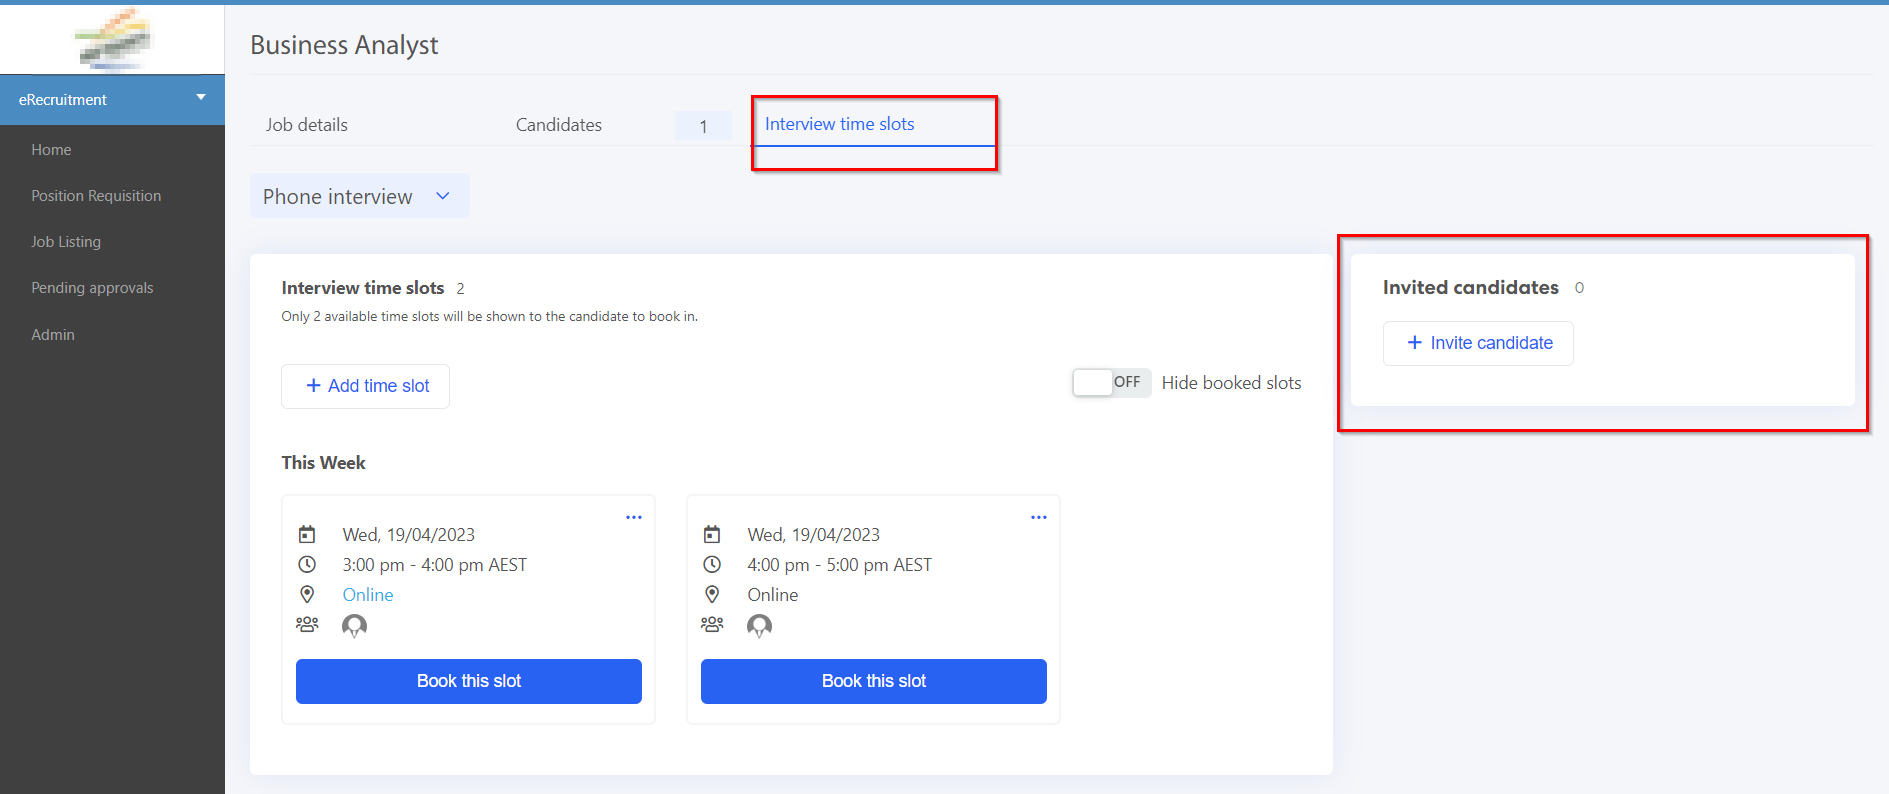
Admins can invite candidates to interviews in two ways:
(a) By clicking on the "Invite candidate" button.
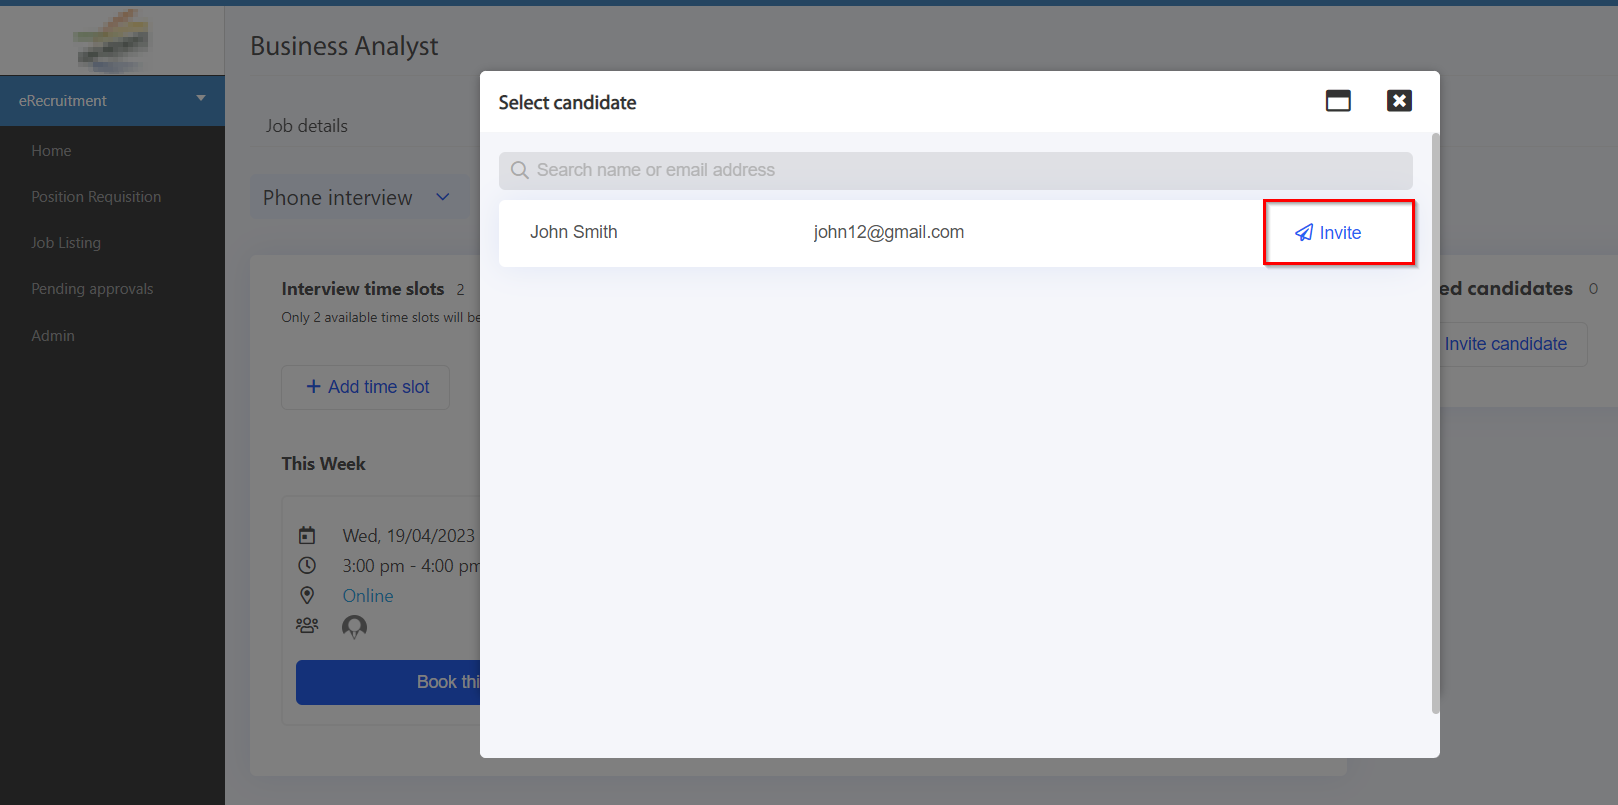
Click on the Invite button to invite the candidate for the job interview and an invite email will be sent to the candidate.
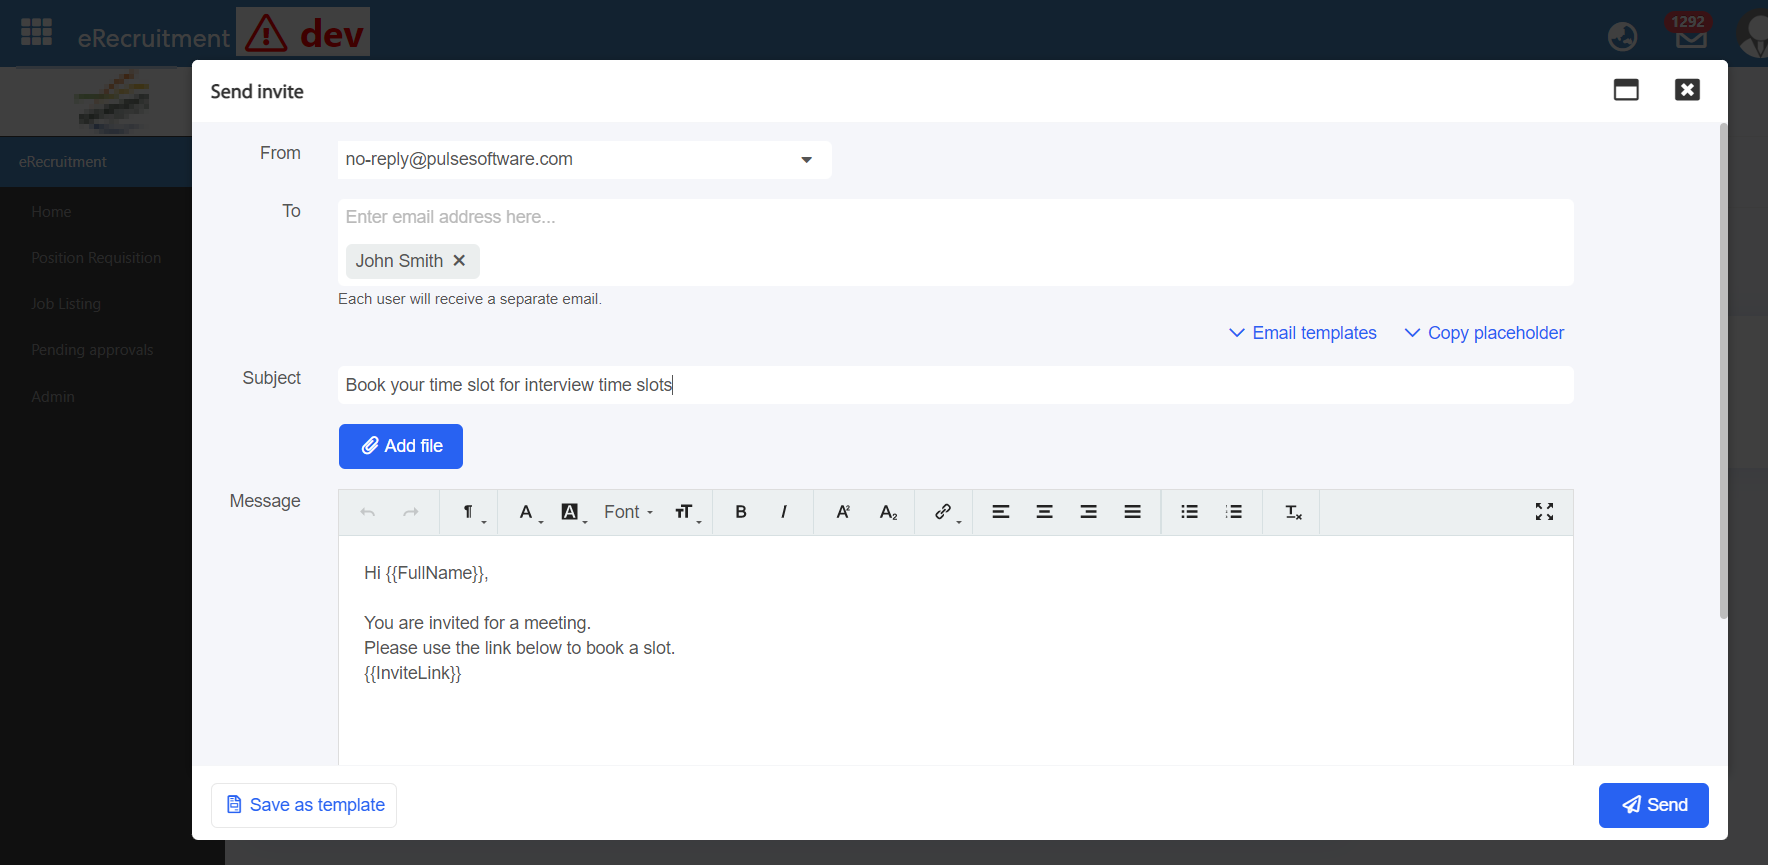
Once the mail is sent to the candidate, admins can view the list of the candidates who are invited for the meeting.
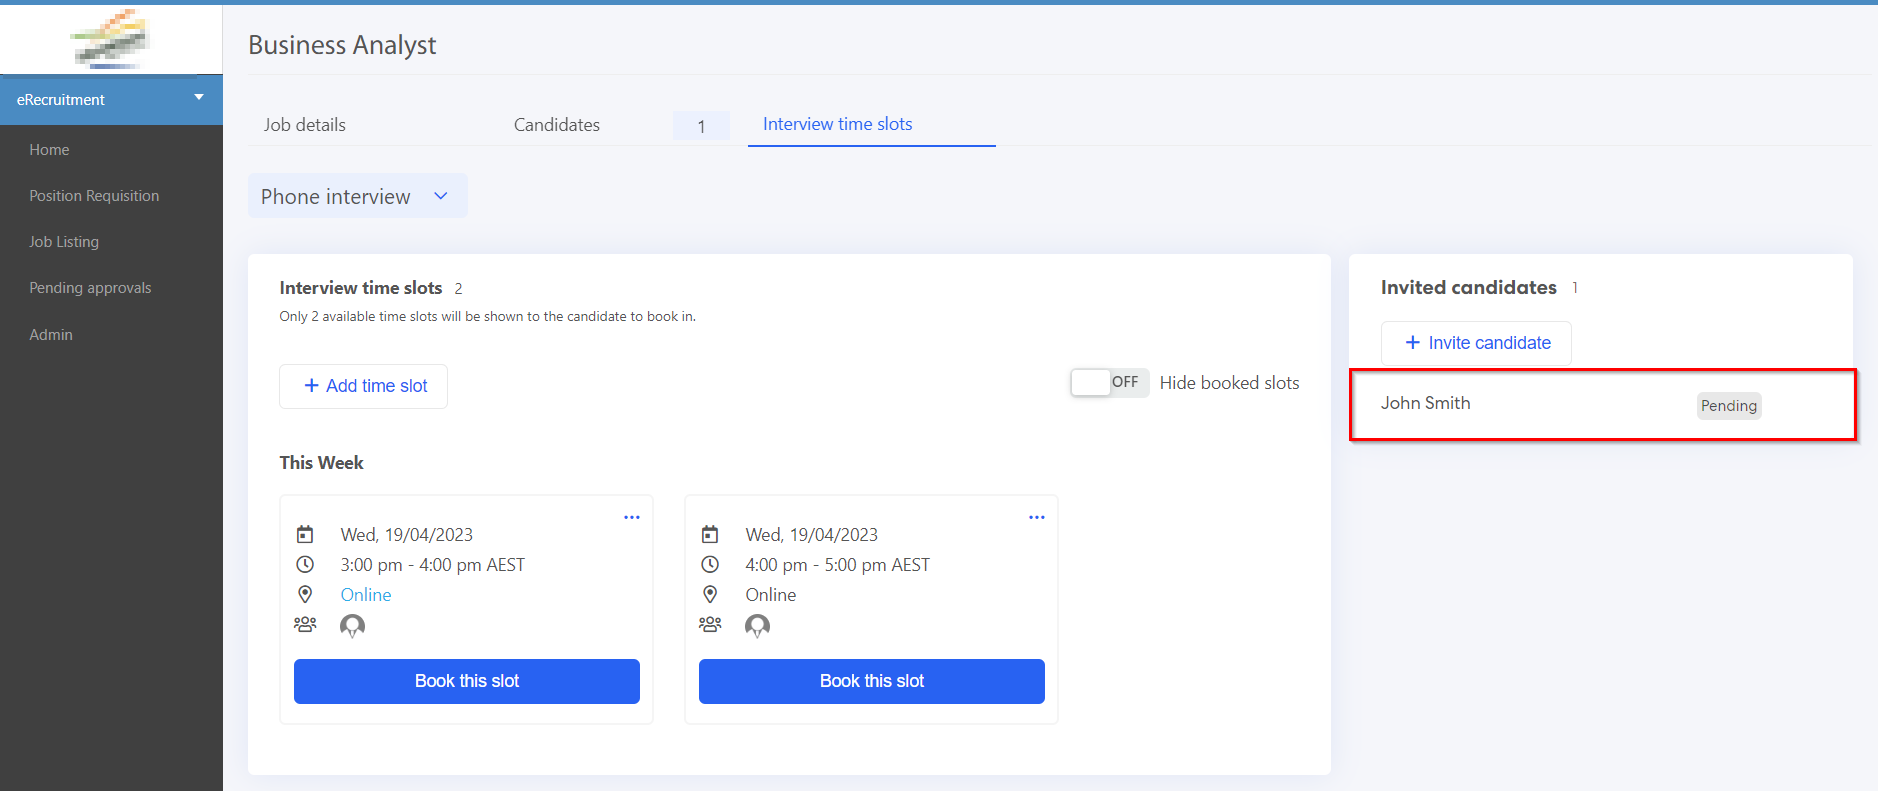
The status will show as "Pending" until the candidate confirms the interview time slot. Once the candidate confirms the Interview time slot, the status will be changed to "Booked" against the invited candidate.
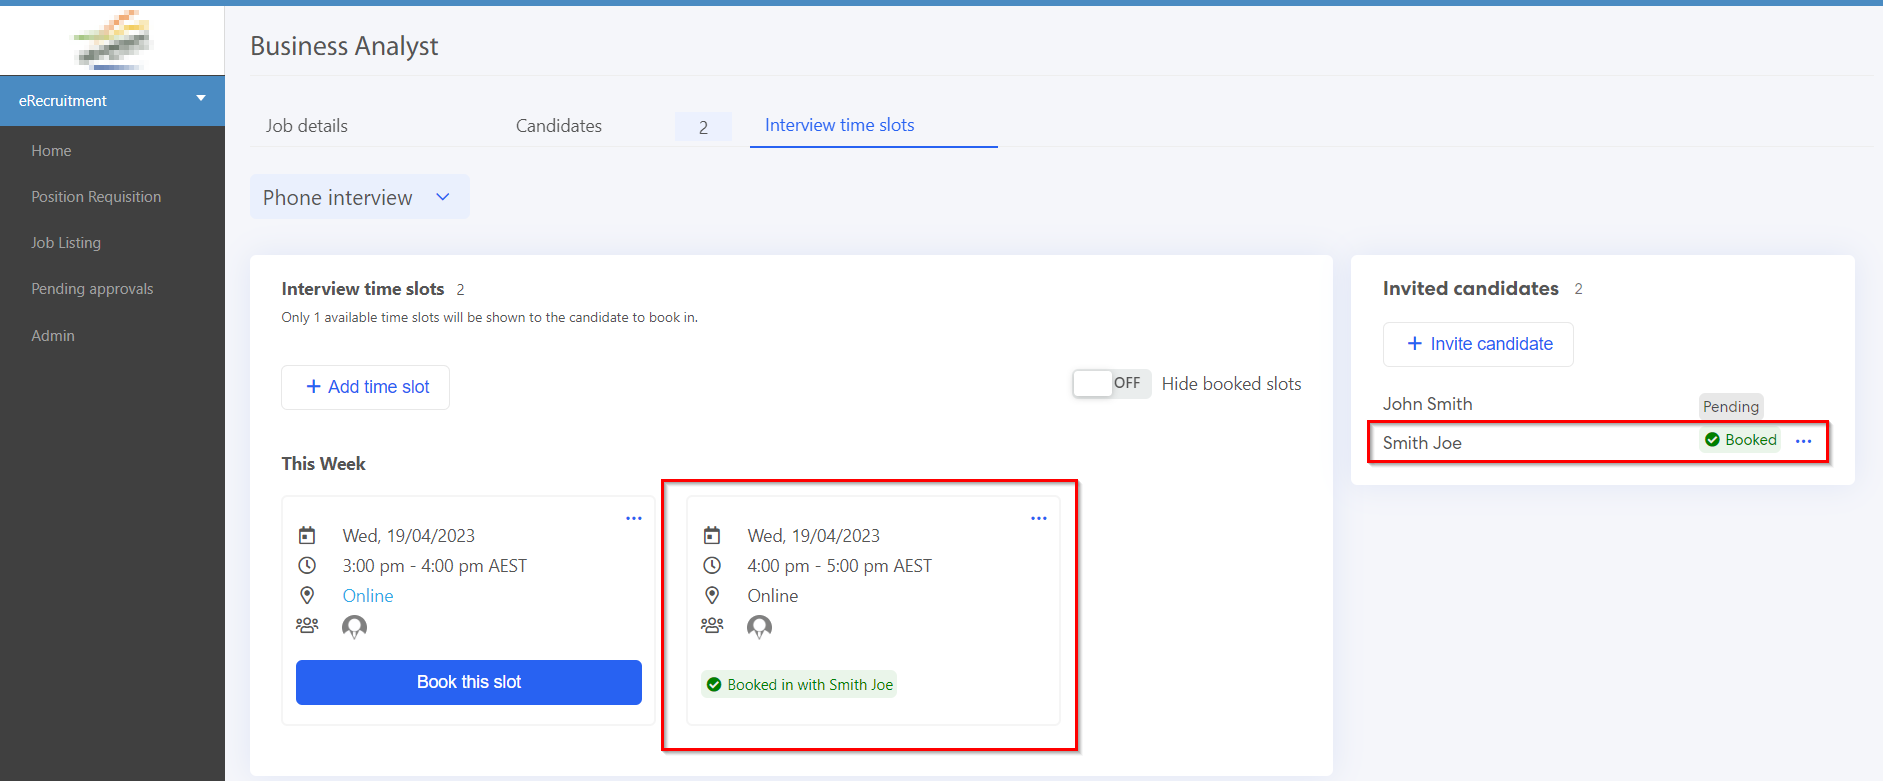
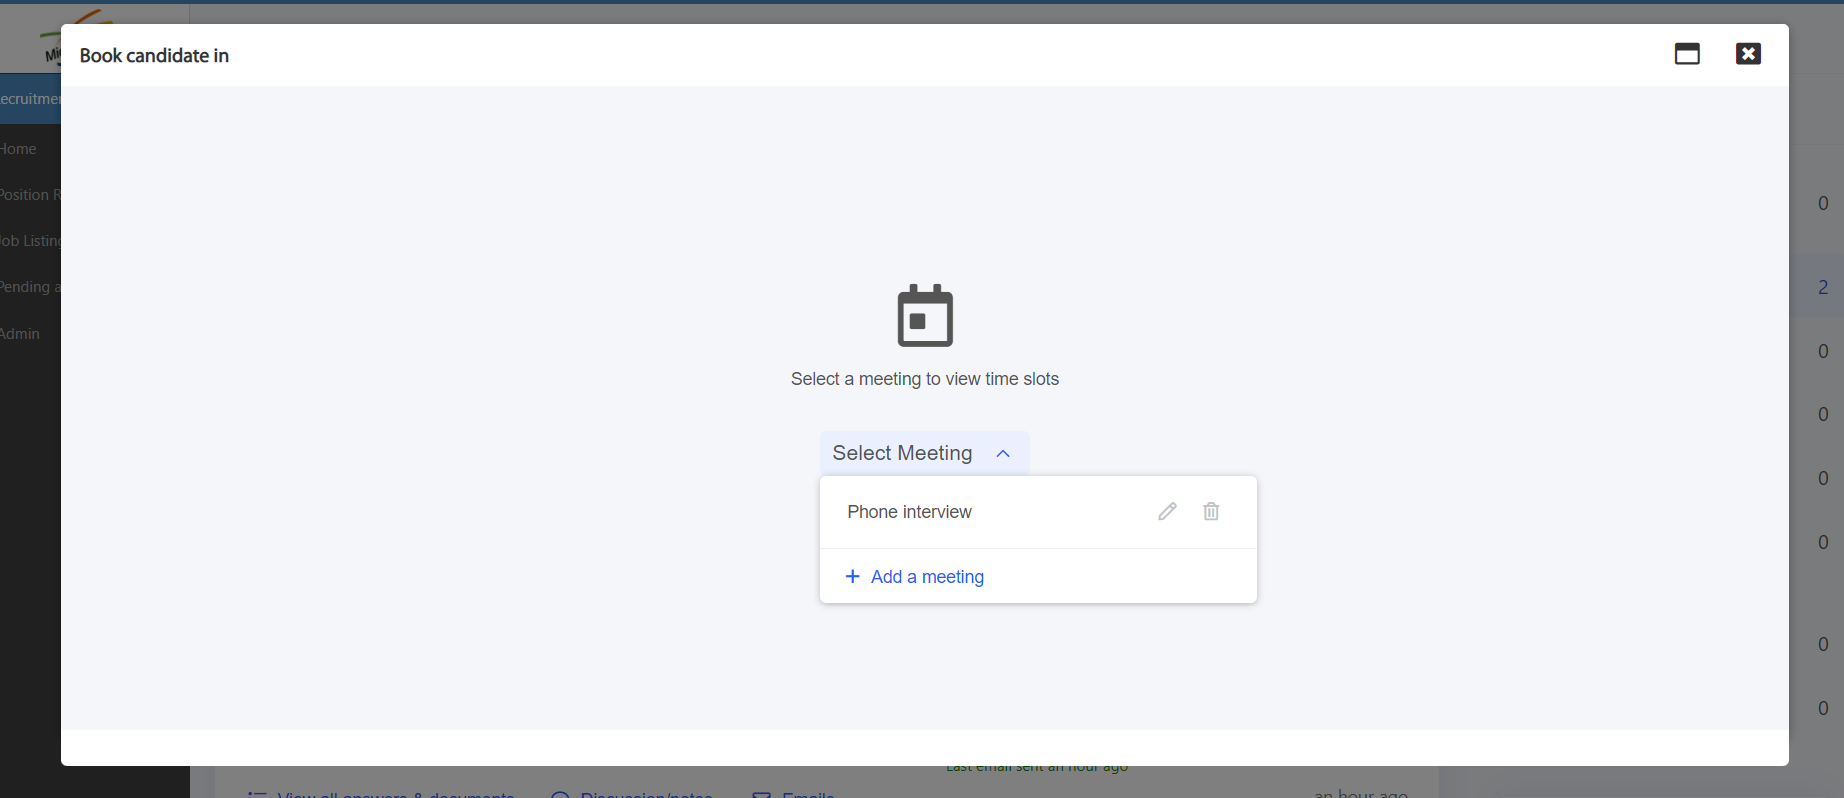
(b) Go to the Candidate Tab > click on the 3-dot button > Click on the "Book candidate in".
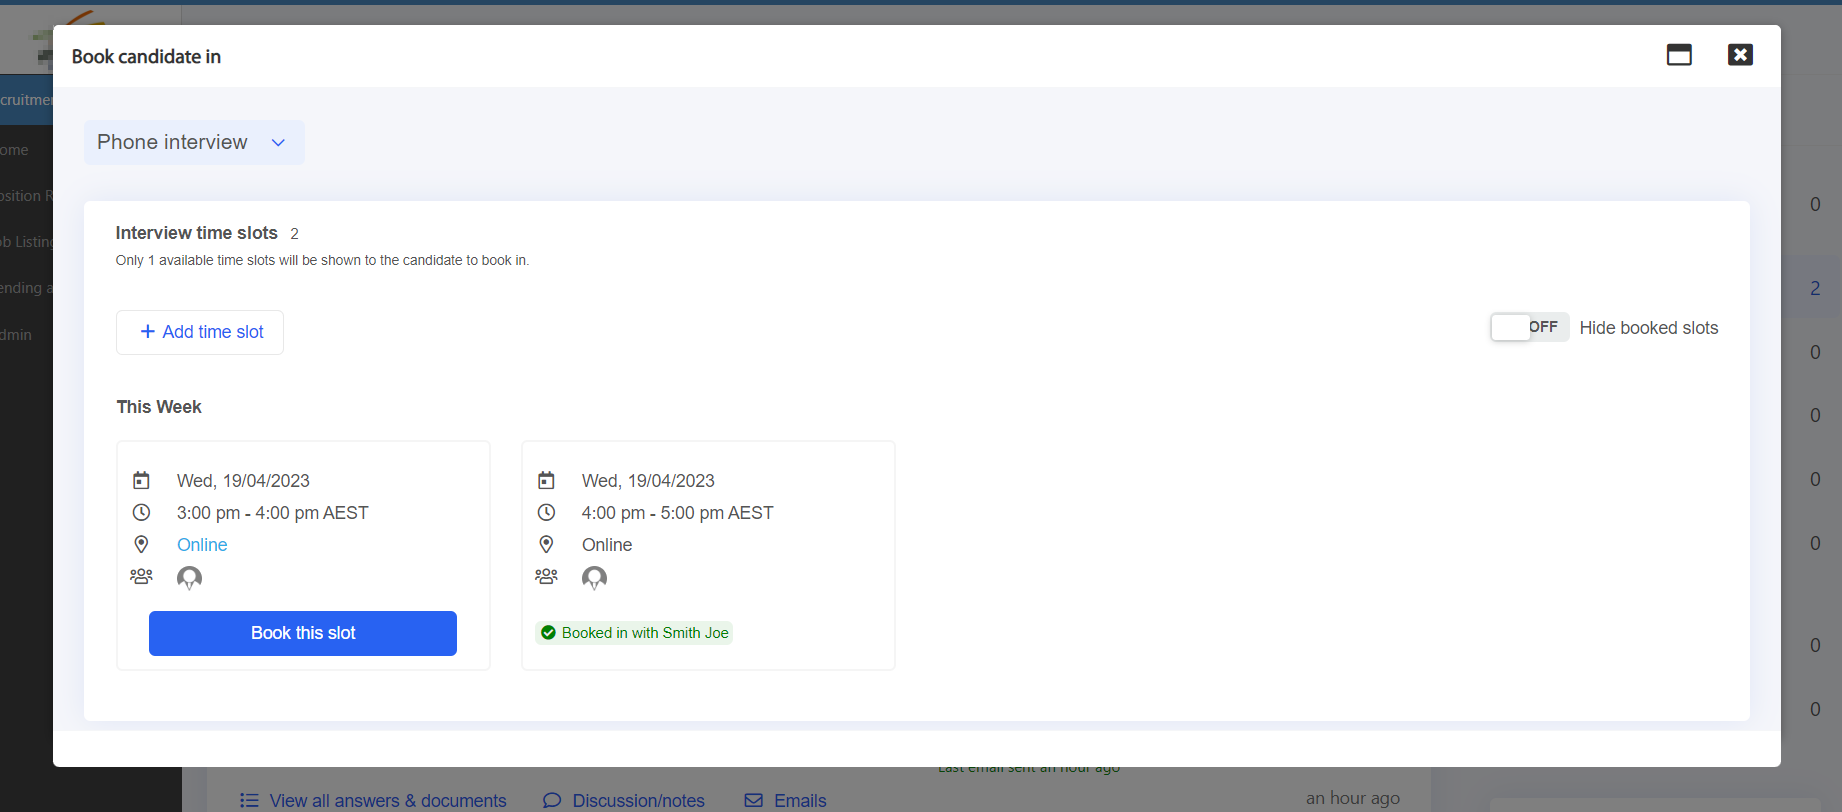
Select the meeting to lock in a time with the candidate (in this case, Phone interview meeting)
Click on the "Book this slot" to book in a meeting with the candidate.
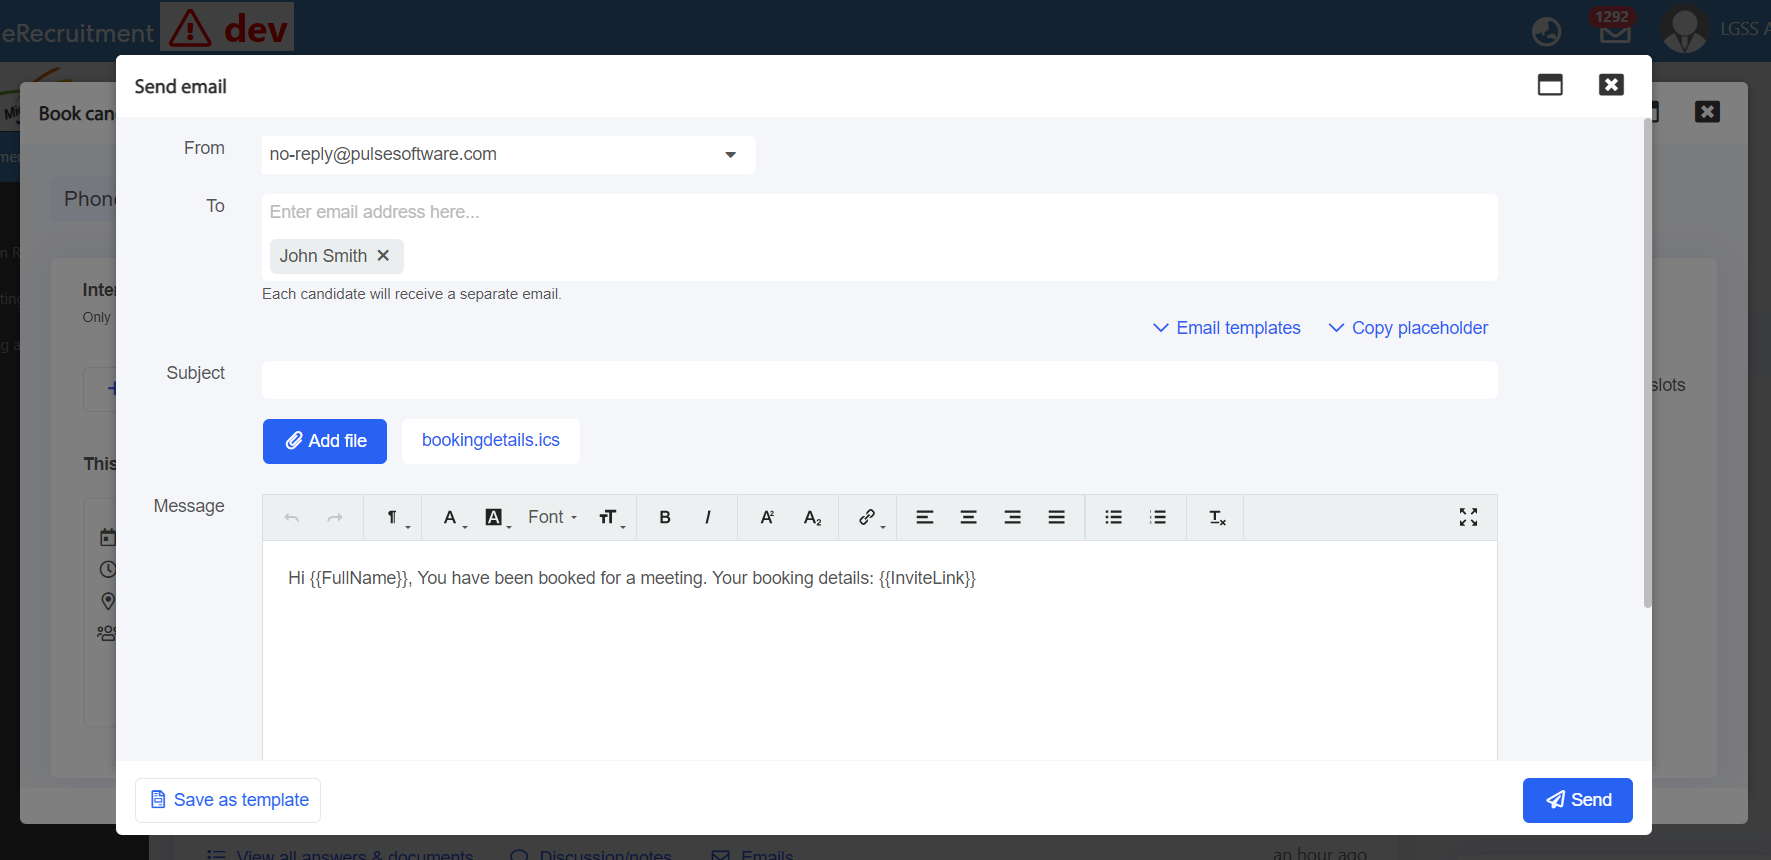
A notification pop-up will appear with the details of the candidate. Click on Send to send the notification.
Once the notification is sent to the candidate, navigate to the Interview Tab, and admins and hiring managers will be able to view the time slot booked in with the candidate.
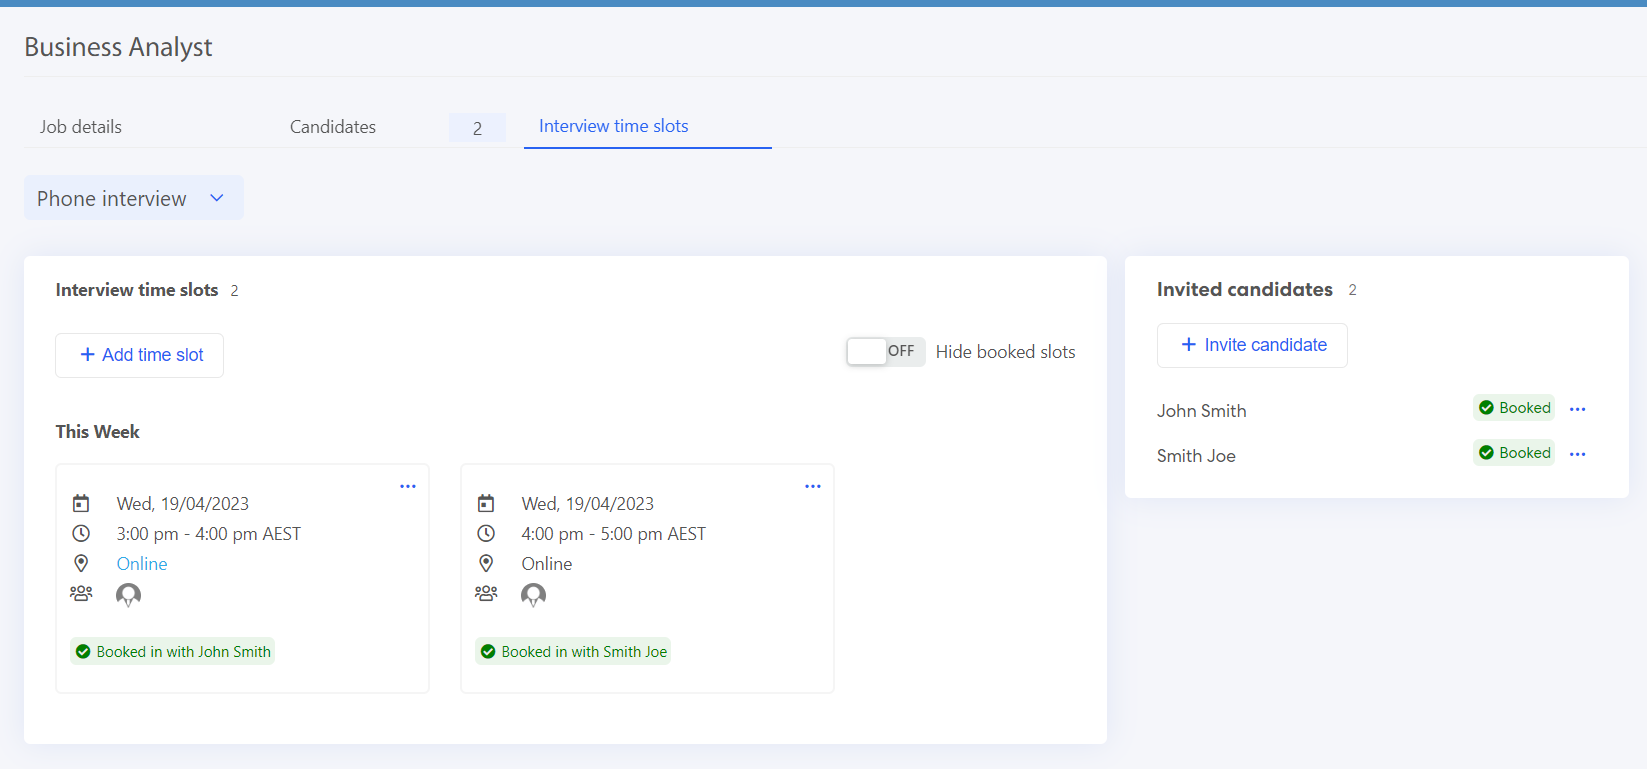
The status against the candidate's name will also be changed to "Booked".
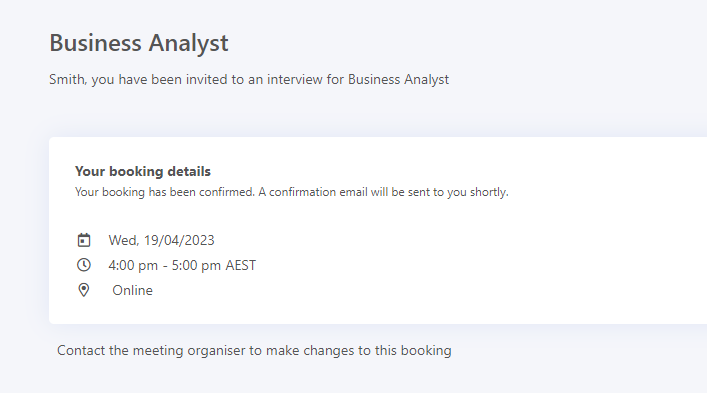
The candidates can now be able to look the interview time slot booked by admins or hiring managers as shown below:
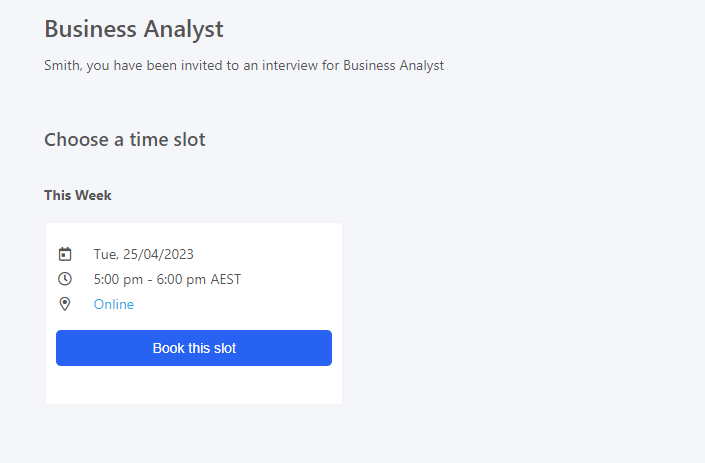
The candidates can now be able to look at the interview time slot and be able to book for a time slot from their portal, as shown below:
Issues resolved
Learning & Accreditation Management
- Fixed an issue where the name of users requesting training was not listed on the "My Tasks and Approvals" page.